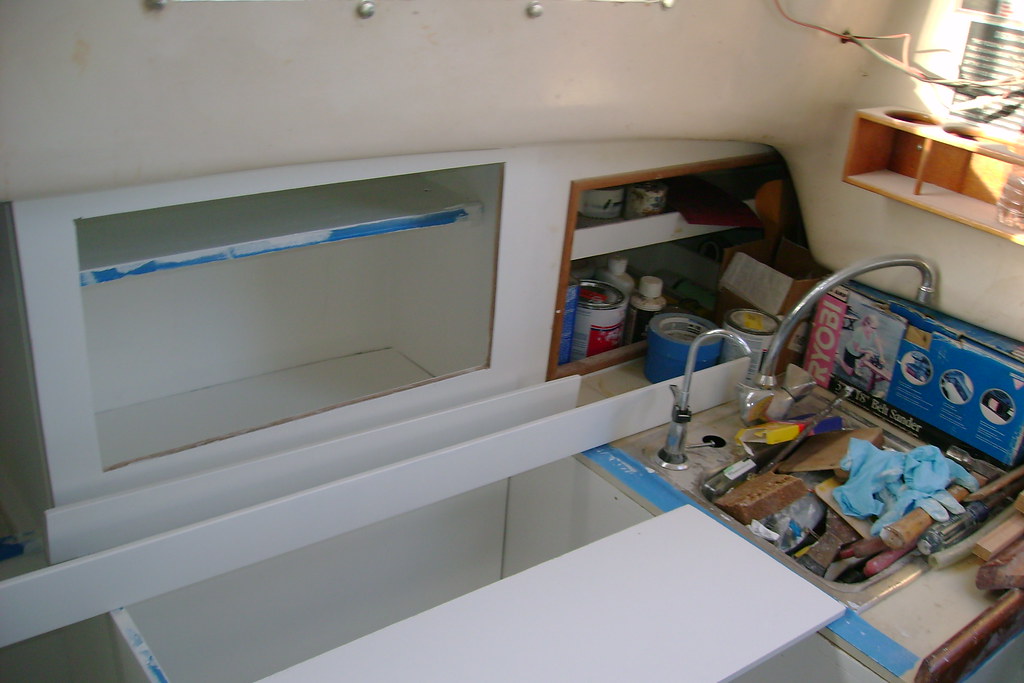
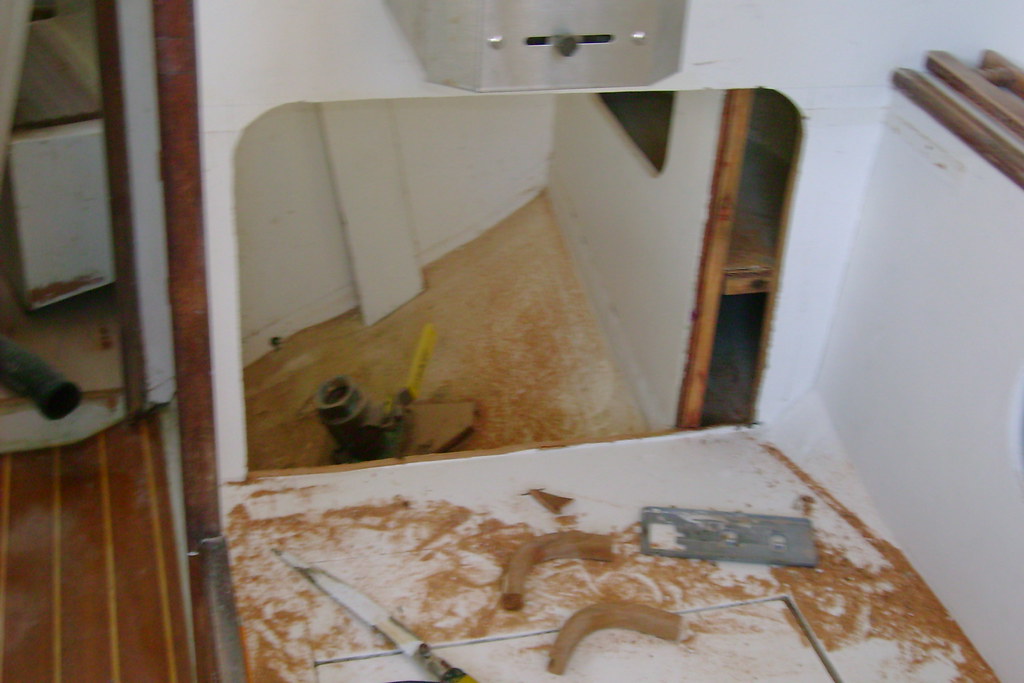
Stove Enclosure

Ask a question...get an answer (or two).
Post Reply
Triton106
Candidate for Boat-Obsession Medal
Posts: 392
Joined: Fri Apr 18, 2003 4:51 pm
Location: San Francisco Bay Area

Stove Enclosure

Post by Triton106 »

I am embarking on a new project to add a "real" stove to my Triton106 Blossom. The stove I have chosen is a second hand (but completely rebuilt) Force10 2 burner propane unit with oven. I am planning to put the stove right next to the galley sink (it is still at the original factory location which is on starboard side of the companion way ladder.) My question is that once I build up the plywood structure for the enclosure what is the best practice for lining the enclosure - stainless steel? Would formica lining be acceptable? If stainless steel is recommended is there a need for a layer of insulation between the plywood and the stainless steel shell? Thanks in advance for your advices and ideas.

Here is Kaholee with stainless steel lining -
Image

Here is Tim's Triton381 with formica lining -
Image
Ray D. Chang
Triton 106 in Berkeley, CA
User avatar
Tim
Shipwright Extraordinaire
Posts: 5708
Joined: Tue Apr 01, 2003 6:39 pm
Boat Name: Glissando
Boat Type: Pearson Triton
Location: Whitefield, ME
Contact:

Re: Stove Enclosure

Post by Tim »

The Formica I installed has not proved to be a problem, but I feel metal is a far better choice for lining the enclosure. I'd not use the Formica again. One grows and learns with time and experience.

Use metal; I think it looks better anyway. There's no need for insulation in terms of protecting the surround; the metal alone is sufficient to protect the surround from any heat damage. SS is a common choice, but you could get fancy and use nice copper sheeting too, if you feel like blowing the budget and polishing copper forever.

ABYC has nothing to say about this (other than some blathering about the acceptable "flame spread" of the adjacent material in A-3.5.9.3), but here is the applicable portion of the standard covering general requirements for galley stoves:

ABYC A-3.5: General Requirements (PDF File)

While we're at it, let's note the mistake I made with the stove enclosure on Glissando: I didn't build the enclosure tall and deep enough to allow full movement of the stove when gimballed. The back needed to be further back, and the bottom needed to be lower. As it is, it will only swing about 15° before it hits the bottom or back of the enclosure. This isn't a big problem for me as I have yet to use the stove underway and probably never will, but allowing for full swing room is an important consideration and takes a lot more space than you will initially imagine.
---------------------------------------------------
Forum Founder--No Longer Participating
Triton106
Candidate for Boat-Obsession Medal
Posts: 392
Joined: Fri Apr 18, 2003 4:51 pm
Location: San Francisco Bay Area

Re: Stove Enclosure

Post by Triton106 »

Thanks very much Tim for your prompt response. That's very helpful. Good point on swing room. I plan to follow the process you laid out for (Kaholee stove enclosure) which details very thoroughly step by step instructions and some of the pitfalls to avoid.

Copper sheet for lining? That will be very shippy but I am not prepared for the labor to keep it polished (and deep down I know I probably won't keep it polished to do it just - based on my track record of keeping other bronze and other metal parts well maintained). So, I think I am going with stainless steel.

Another great feature I plan to copy from Kaholee is the handle bar in front the stove. I imagine that will be very useful in a seaway when one is attempting to make a meal when it is heeled over at 30 degrees. Thanks again for making restoring my Triton almost a dream job!
Image
Ray D. Chang
Triton 106 in Berkeley, CA
User avatar
Rachel
Master of the Arcane
Posts: 3044
Joined: Tue Dec 07, 2004 7:59 pm

Re: Stove Enclosure

Post by Rachel »

Just to give you some base-line information (but not to recommend that you skip an enclosure):

Both of the boats I lived/cooked/baked on had gimbaled stove/oven units like that (one Shipmate; one 2-burner Force 10), and both were originally installed with no particular liner; just the teak staves or teak plywood that was part of the galley cabinet general construction, and the air space that results from the gimbal hardware (there might have been a little extra space due to the gimbal hardware being on blocks on boat #2) and the stove wing (considerable space). Neither of them got terribly hot, even with baking (I'm not an expert, but I don't think there was enough warmth to start the process -- carbonization? -- that makes wood's fire point get lower). One of the boats was also lived aboard previously for 7 years by an avid cook.

Again, I'm not saying I would set the boat up this way (I wouldn't), but more just letting you know that these stoves don't heat up the enclosure terribly, in my experience.

I would put in a stainless surround, if it were me. I like the idea of a metal surround. As much as I like copper, I wouldn't use it here, because.... well, for one thing it will be mostly hidden, but also because the stove is stainless.

Rachel

PS: Something additional I just thought of: You may already be planning this, but I would want to install a lock such that you can make the stove be non-gimballing. It can be a bit scary to have a gimbaling stove when you are not underway, as it does not take much pressure to make it tilt. So, for example, you could be stirring something, or getting something out of a pan with a spatula, and tip the whole works onto yourself. Also it's easy to just accidentally push on the stove when you don't have your "underway" brain on.

Even underway, I would oftentimes "lock" the stove in place when I was going to get something out of the oven. Both of the stoves I used had a barrel bolt at the lower front edge of the stove.

PPS: Okay, for my 47th edit, I note that Tim's stove on Glissando is much closer to the side cabinetry that either of mine were. In that case wood might be more dangerous. Mine looked more like Kaholee in terms of side gap - or maybe even a shade more.
Pinching
Bottom Paint Application Technician
Posts: 11
Joined: Sat May 08, 2010 7:11 am
Boat Name: several
Boat Type: 8 to 41 ft

Re: Stove Enclosure

Post by Pinching »

FWIW: On our 40 footer, we have used the cooktop (not oven) offshore in a chop for deliveries and Bermuda races. You will get some food spatter on the surround and on the side of the oven which would make cleaning desirable. On my old boat with a beautiful Taylor brass stove, the food spatter stained the brass more than the spray and was harder to polish out. Like Rachel, I have a big air gap and a stock varnished surround, but if I was thinking metal, I'd go stainless.

As to the protective bar, make at least one end removable in case you need to pull the stove.

For a swing limiter, we used 1/8" dacron line, a couple of tiny bullet cheek blocks and 2 aluminum clam cleats with a single piece of line. Simple and adjustable at angles of heel. Most barrel bolts only lock the stove at zero degrees. Sorry, no pic.

P
Quetzalsailor
Master of the Arcane
Posts: 1100
Joined: Fri Aug 26, 2005 9:53 am
Boat Name: Quetzal
Boat Type: LeComte North East 38
Location: Philadelphia, PA

Re: Stove Enclosure

Post by Quetzalsailor »

Quetzal's original installation's pressure alcohol stove and oven is gimballed, latched with a slide bolt in one position, equipped with a removable grab rail and stainless lined recess. The stove is wonderfully heavy, but even so, I've removed it without removing the grab rail. I think I removed the top with its fiddles (easy) and lifted the thing up and off the brackets, slid it out into the galley. Interestingly, nothing holds this stove down into its mounting brackets; for offshore, I would think that would be an unacceptable feature. Quetzal's pressurized alcohol rubber fuel hose is expected to take the amount of gimballing that the stove does; best to worry that detail, too.

There must be some reasonable limit to the amount one would need or want the stove to gimbal. There must be some degree of heel or roll that beyond which, cold food and drink would be just fine. Thus, the clearances might not have to be all that excessive.

It would be easy to make a template of the cross-sectional shape of the stove and rotate it on your drawing of the cross section of the casework.
User avatar
Rachel
Master of the Arcane
Posts: 3044
Joined: Tue Dec 07, 2004 7:59 pm

Re: Stove Enclosure

Post by Rachel »

Quetzalsailor wrote: There must be some reasonable limit to the amount one would need or want the stove to gimbal. There must be some degree of heel or roll that beyond which, cold food and drink would be just fine. Thus, the clearances might not have to be all that excessive.
Upside down, I guess. No, seriously, I can't see limiting the designed amount of gimballage, once you've committed the space to a gimballed stove. Even if you're not heeled way over, things can be rolly, and then it's nice to not have the stove come up short.

Rachel
Pinching
Bottom Paint Application Technician
Posts: 11
Joined: Sat May 08, 2010 7:11 am
Boat Name: several
Boat Type: 8 to 41 ft

Re: Stove Enclosure

Post by Pinching »

For offshore, we have installed simple retainers to keep the stove on its gimbals if rolled. Small diameter SS 7x19 wire with swaged loops in each end. One loop goes over the stove pin (Force 5) that sits in the gimbal plate. The other end is screwed down to the enclosure wall below the bottom of the stove. One such assembly on each end of the stove. Not tested, but would almost certainly do the job. Total cost, probably under 10 bucks.
Your mileage may vary. P
Triton106
Candidate for Boat-Obsession Medal
Posts: 392
Joined: Fri Apr 18, 2003 4:51 pm
Location: San Francisco Bay Area

Re: Stove Enclosure

Post by Triton106 »

I thought I will post an update on the project which is going at snail pace for two reasons: (1) every boat project will lead to five corollary projects, and (2) I only get to work on my boat one day (maybe two if I am lucky) a week.

As you can see the stove enclosure is roughed in. But I am now waiting for stainless steel lining to complete the project:

Image

As for corollary projects I am working on a couple of them: (1) I am redoing the shelves since I did not get them right the first time 10 years ago (I am probably not doing them right now but version 2.0 will be better than version 1.0); and (2) I am cutting out the bulkhead to add a trotter box so that we won't lose a full size berth.

Here is a picture of the galley shelf work in progress:

Image

Here is a picture of the trotter box work in progress (sorry about the fuzzy picture):

Image

Best,
Ray D. Chang
Triton 106 in Berkeley, CA
User avatar
Rachel
Master of the Arcane
Posts: 3044
Joined: Tue Dec 07, 2004 7:59 pm

Re: Stove Enclosure

Post by Rachel »

Nice update!

I bet you will enjoy having a gimballed stove and an oven, yet with the trotter box you don't really "lose" anything. Sweet! Plus I think you'll find the trotter box makes a great stowage spot for bedding, jackets, or what-have-you.

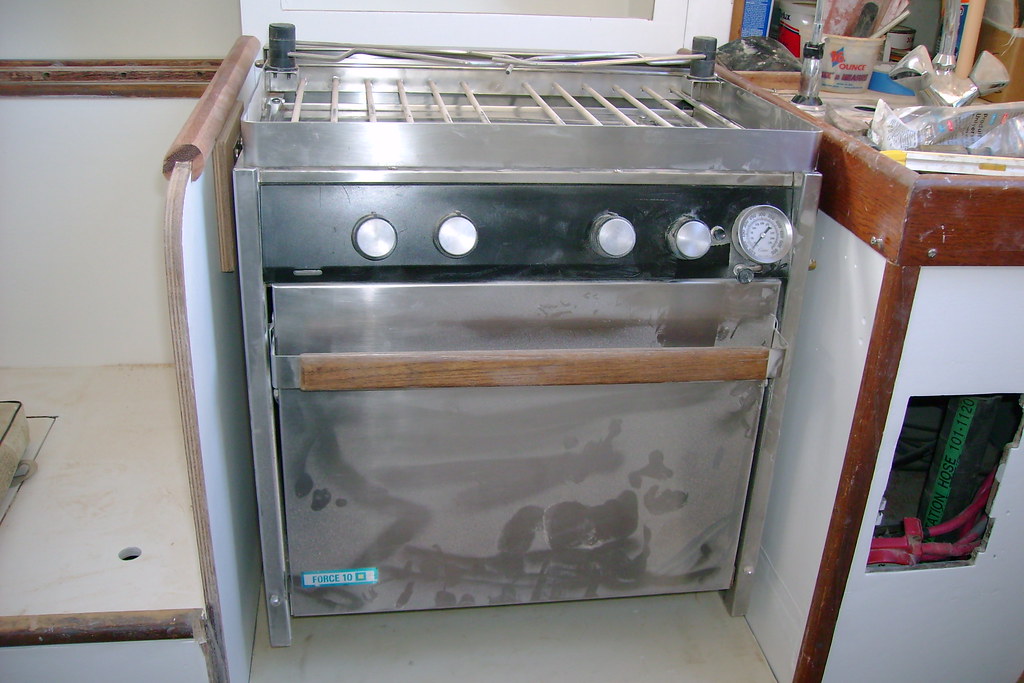
I spent a couple of years with that same exact Force 10 unit and I really liked it compared to others I've used. I think my favorite feature was the way the stove top is a series of rods that cover the whole stove - instead of four individual burner grates. This made for a great gimballed countertop section, where you can even set down eggs and other rolly things and have them stay put! I also used to top to hold glasses with drinks in them, etc.

The key to the latter was changing the pot holders. I started out with the same ones you have, and found them so-so for pans, and completely un-useful for a glass of water, cup of coffee, dome-shaped tea kettle, or etc. But, Force 10 makes another style of potholder that fits on the stove. It's a straight-sided thing that attaches to that outer rail with a thumbscrew. I had two. You can easily narrow them down for aforementioned beverages, etc. Or remove them altogether. I simply removed those original ones and stowed them away.

Edit: I found a couple of photos that show the potholders in action. Pardon the mess ;) but it was toward the end of a nasty passage. I think the potholders were shown (on the package) attached to the sides, but we did not have room, and they seemed to work fine on the front. Very easy to adjust and/or remove. Just the small metal "corner squares" were left over from removing the original ones.
DSCF0020_1.jpg
DSCF0021.jpg
Hmm, let's see if I can show the actual pieces a little better:
DSCF0020_2.jpg
The new ones will attach to either the sides or front of the stove. I found mine at Downwind Marine in San Diego, but they were a Force 10 product.

Thanks again for the photo update - it's great to see how your project is coming along!

Rachel
JohnD
Deck Grunge Scrubber
Posts: 26
Joined: Mon Dec 13, 2010 6:00 pm
Boat Name: undecided
Boat Type: Pearson Triton EC #234
Location: Chesapeake Bay, MD
Contact:

Re: Stove Enclosure

Post by JohnD »

Love the idea about the trotter box, thanks for the picture of it. I was thinking about doing the rough in for a stove while doing my Triton, but was worried about loosing sleeping room. Love this solution.

If you don't mind me asking, what are you changing on the shelving, and why?
Quetzalsailor
Master of the Arcane
Posts: 1100
Joined: Fri Aug 26, 2005 9:53 am
Boat Name: Quetzal
Boat Type: LeComte North East 38
Location: Philadelphia, PA

Re: Stove Enclosure

Post by Quetzalsailor »

OK, I bite; what's a trotter box? I even googled for it, so as to not appear so stupid. Perhaps a place to store a pigs' trotters?
User avatar
Rachel
Master of the Arcane
Posts: 3044
Joined: Tue Dec 07, 2004 7:59 pm

Re: Stove Enclosure

Post by Rachel »

As I know it, it's a niche for your feet on a berth, and then the part that isn't niche is used for something else in the other direction, if that makes sense. So in this case it's that little section that goes into the hanging locker, but is going to be where you put your feet when you are sleeping. And then on the other side, it's hanging locker.

Some boats have one going the other way, and then the "far side" is a galley flat or maybe a nav desk.

Unless I made it up some years ago (I hope not).
Triton106
Candidate for Boat-Obsession Medal
Posts: 392
Joined: Fri Apr 18, 2003 4:51 pm
Location: San Francisco Bay Area

Re: Stove Enclosure

Post by Triton106 »

Rachel, much appreciate your encouragement and idea on the potholder. I agree the existing ones on my stove is a bit whimppy. I will look into the type you showed in the pictures after I am done with the project.

JohnD, the changes I made to the shelves in the galley and the saloon can be divided into two categories: (1) a result of the cutout of the settee to accommodate the stove enclosure, and (2) general upgrade of the shelves in the saloon. The changes I made to the shelf behind the stove enclosure include: (a) extension of the original shelves out by a couple of inches so that the shelves align with the original galley cabinet and I added the cover to enclose the shelves (see second picture in my previous post), and (b) trimout the cover and add sliding doors (not in the picture). The changes I made to the saloon shelves are more of upgrade in nature like changing the shelf to a marine grade plywood and paint the shelve are with Interlux Yacht Enamel (white). I also glassed in the partial bulkheads to strengthen the shelves.

Glenn, you can see from earlier postings from this thread for discussion around enclosure lining. I don't think they are required but I like them because they make cleaning up any spills a lot easier and they look good. I ordered custom cut stainless sheets (#4 finish 24 gauge) from Onlinemetals.com and the whole thing only cost around $100. I thought about using formica but the cost is only 50% cheaper and it does not protect the enclosure from overheating as well as stainless steel.

I will post another update once the project is completed.
Ray D. Chang
Triton 106 in Berkeley, CA
mitiempo
Candidate for Boat-Obsession Medal
Posts: 319
Joined: Mon Oct 27, 2008 11:37 am
Boat Name: Mi Tiempo
Boat Type: Canadian Sailcraft CS27
Location: victoria bc canada

Re: Stove Enclosure

Post by mitiempo »

I have had a Force 10 stove for over 10 years. The model I have is 3 burner w/oven and grill. I use the oven regularly and the sides of the stove do not get past warm as the oven is double walled on the sides. The front and back do get hot. My surround is Formica and there are not any heat/discoloration issues. The air gap is a minimum of 1" between the stove and the Formica.

I was on a neighbor's Valiant 40 yesterday and his stove, also a Force 10, had a stainless plate on the right side and it was drilled with locking holes in an arc so the stove could be locked at many different angles.
Triton106
Candidate for Boat-Obsession Medal
Posts: 392
Joined: Fri Apr 18, 2003 4:51 pm
Location: San Francisco Bay Area

Re: Stove Enclosure

Post by Triton106 »

The stainless sheets have arrived last week. As is warned on the vendor website the sheets which are custom cut are within +1/8" and -0" tolerance. I guess the philosophy is that if it is too long the customer can always cut back. As it turned out every sheet is 1/8" too long and 1/8" too wide. If I had known I would have reduced my dimensions by 1/8". In any case, I will need to deal with the result as the vendor did what was within the stated tolerance level.

Does anyone have a tip on how to trim back 1/8" stainless steel sheets? They are 24 gauge sheets. Sabre saw? Cutoff wheel? How can I keep the sheets flat while cutting since they are pretty thin.
Ray D. Chang
Triton 106 in Berkeley, CA
mitiempo
Candidate for Boat-Obsession Medal
Posts: 319
Joined: Mon Oct 27, 2008 11:37 am
Boat Name: Mi Tiempo
Boat Type: Canadian Sailcraft CS27
Location: victoria bc canada

Re: Stove Enclosure

Post by mitiempo »

I'd find a machine shop with a shear large enough to trim them. Any solution you try will ripple the edge or otherwise mar the stainless I think. If it was aluminum I'd say trim them but not stainless.
One Way David
Skilled Systems Installer
Posts: 183
Joined: Sat Aug 02, 2008 8:46 pm
Boat Type: Pearson Ensign
Location: Kansas

Re: Stove Enclosure

Post by One Way David »

One could cut sheet using a brake and a hand chisle. Brakes can be made or purchased from Harbor freight cheaply. The waste side will suffer distortion but the good side will not. Many lumber yards have shears and brakes and will do this for you. Most Heating and cooling shops can cut sheet for you and of course, sheet metal companies can cut for you.

Dave.
Never finish all your projects or you'll be bored.
Zach
Boat Obsession Medal Finalist
Posts: 684
Joined: Wed Jan 25, 2006 6:28 pm
Location: Beaufort, North Carolina
Contact:

Re: Stove Enclosure

Post by Zach »

ou can draw file it with a fine mill file. Mark it, start in the middle and work out to each end. If you start on one end and file towards the center or other side it'll make a slope.

Try to clamp it as firmly as you can and as close to the edge as possible so you don't get chatter. You may want to break in the file on some other stainless so that the teeth aren't as sharp. 24 gauge is pretty thin.

Draw filing just means to hold the file perpendicular the length of the sheet metal you want to file and draw the file towards you and push it away. Almost no pressure.... Makes for a pretty smooth slick surface. The last few passes you can do long way with the file held flat (take off the handle if it helps...)

Also may want to wear some gloves, the stuff is sharp.

If you somehow scuff up the sides of the sheet, you can get it back to a brushed finish by using red scotch brite in straight lines in one direction only. Slightly coarser more brushed look can be obtained with 120 or 220 grit or a rubber block in straight lines..

If it is polished you can use a random orbital or buffer and sand it through the grits to 320, then use red rouge on a 4.5 inch mini grinder and spiral stitch buffing wheel to polish it up. Acetone wipe, and come back with a finer polish either by hand or with a new spiral stitched buff...)

You can polish with a normal buffing head on a power buffer, but it is slower and takes more compound. 3,000rpm vs 10,000rpm, just have to move steadily with the mini grinder. (Small projects anyway, wouldn't want to polish an industrial kitchen with a mini grinder...)

Cheers,

Zach
1961 Pearson Triton
http://pylasteki.blogspot.com/
1942 Coast Guard Cutter - Rebuild
http://83footernoel.blogspot.com/
Hirilondë
Master of the Arcane
Posts: 1317
Joined: Thu Dec 28, 2006 8:50 am
Boat Name: Hirilondë
Boat Type: 1967 Pearson Renegade
Location: Charlestown, RI

Re: Stove Enclosure

Post by Hirilondë »

Triton106 wrote: Does anyone have a tip on how to trim back 1/8" stainless steel sheets?
Belt sander
Dave Finnegan
builder of Spindrift 9N #521 'Wingë'
--------------------------------------------------------------------------------------------------------------------------------------------------------------------
Gresham’s Law of information: Bad information drives out good. No matter how long ago a correction for a particular error may have appeared in print or online, it never seems to catch up with the ever-widening distribution of the error.
mitiempo
Candidate for Boat-Obsession Medal
Posts: 319
Joined: Mon Oct 27, 2008 11:37 am
Boat Name: Mi Tiempo
Boat Type: Canadian Sailcraft CS27
Location: victoria bc canada

Re: Stove Enclosure

Post by mitiempo »

If you have absolutely no access to a good sheet metal shop there are methods that will work as has been posted. But I would take it to a sheet metal shop and get it done right.
Triton106
Candidate for Boat-Obsession Medal
Posts: 392
Joined: Fri Apr 18, 2003 4:51 pm
Location: San Francisco Bay Area

Re: Stove Enclosure

Post by Triton106 »

Thanks everyone for the tips on trimming SS sheets. I actually did not see the postings until today and in the urge to move the project forward last weekend I went ahead and trimmed the SS sheets.

First, I tried to grind it using my 4" grinder. I clamped the SS sheet between a piece of plywood and a piece of 1x2 oak cleat. This method was slow and the edge was not straight. To finish off the job I filed off to make the edge as straight as possible.

Second, I tried cutoff wheel on the grinder. It went a little faster but the edge were burred and I had to file it off. The edge is a little more straigher but not perfect.

Lastly, I tried the sabre saw with steel cutting blade. I clamped the SS sheet to a plywood back and a oak piece as the cutting guide. I cut the plywood and the SS sheet at the same time to prevent the sheet from flexing too much. This method was both fast and straight. I was very pleased with it. Too bad I did not try it first.
Ray D. Chang
Triton 106 in Berkeley, CA
Hulukupu
Skilled Systems Installer
Posts: 165
Joined: Tue Oct 23, 2007 9:54 pm
Boat Name: Mahana
Location: Bristol, Maine

Re: Stove Enclosure

Post by Hulukupu »

Ray, I was caught off-guard by the reference to "trotter box". The PO of my Triton installed the same in the hanging locker (sorry 6K miles from a photo). This is off subject, so I'll post under questions and answers...
Post Reply