Page 7 of 8
Re: Coronado 15 project.
Posted: Sun Nov 24, 2013 8:28 pm
by TampaBay
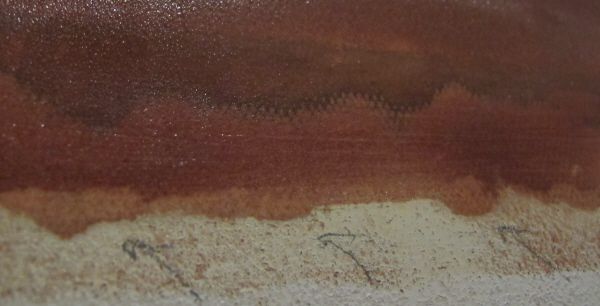
After a couple hours of patient sanding, the seam was very close to perfect. This image shows the lows spots that were so obvious when under the paint (the darkest reds have the thickest filler (the deepest dents.))
 I marked all the low spots with big arrows (visible along bottom of picture.)
 This is the second coat of fairing epoxy. I'll work it with 60 grit paper tomorrow and then reassess (it might need a third application.)
Re: Coronado 15 project.
Posted: Wed Nov 27, 2013 6:07 pm
by TampaBay
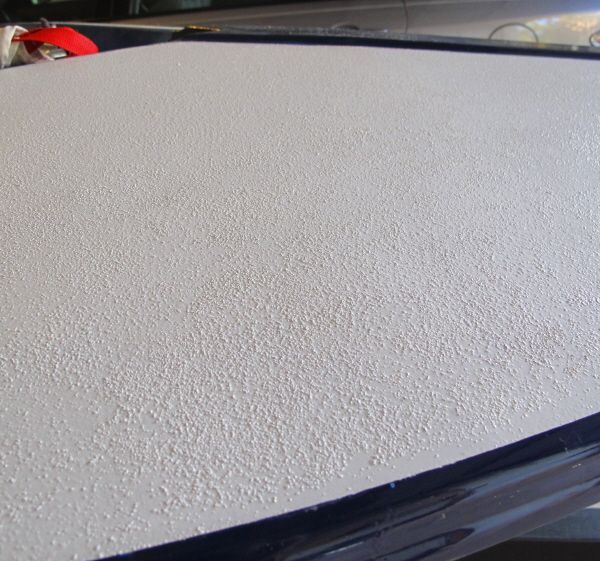
The paint and non-skid is down and all I can say is wow. The repair is invisible, and I didn't think that was possible. Earlier today I had a loaded paint brush in hand, and for two seconds, I didn't know where to start painting. That's when I knew the repair was good.
It's a Thanksgiving miracle! The boat went from this:
 To this:
 Happy Bird-day people!
Re: Coronado 15 project.
Posted: Fri Nov 29, 2013 9:07 am
by TampaBay
Happy Thanksgiving.
Re: Coronado 15 project.
Posted: Fri Dec 06, 2013 7:06 pm
by TampaBay
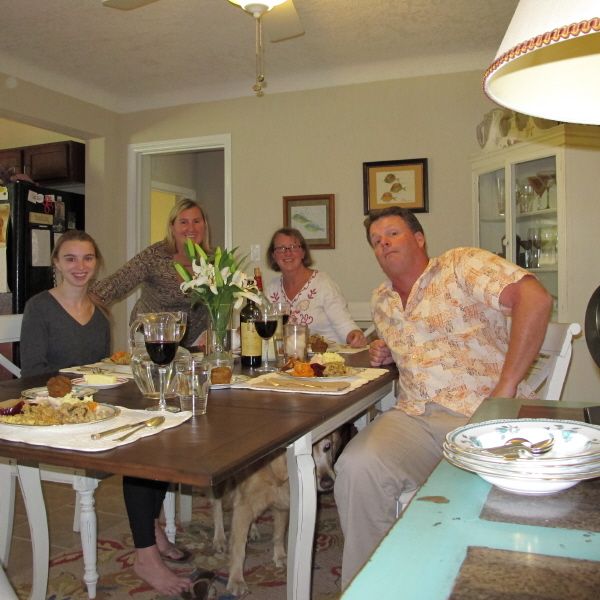
OK, one more Thanksgiving photo.
Re: Coronado 15 project.
Posted: Thu Dec 19, 2013 10:47 am
by TampaBay
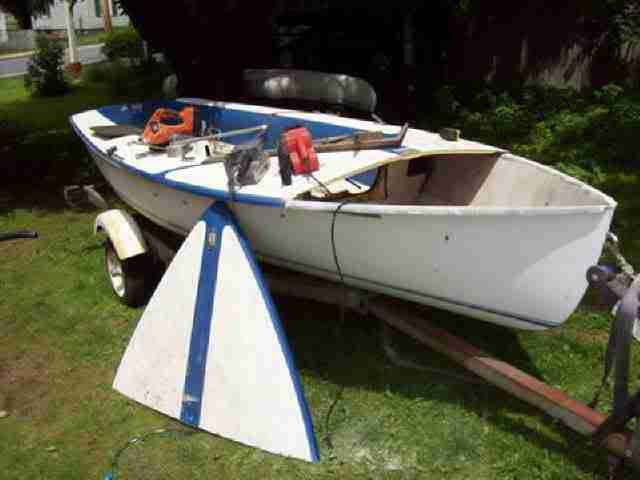
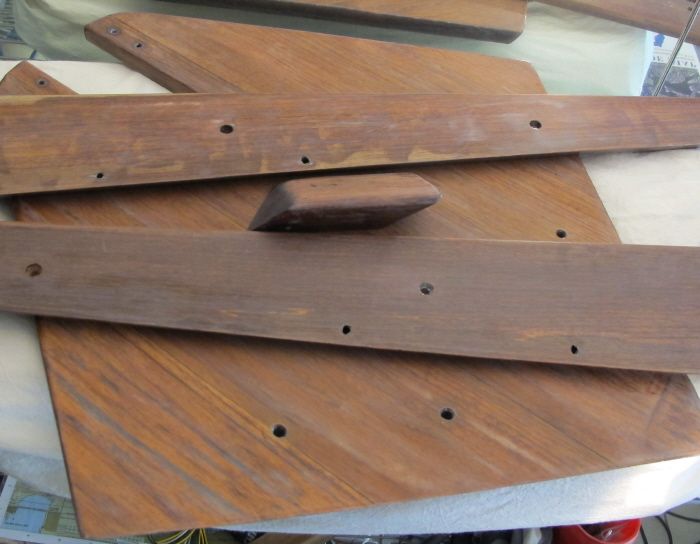
The teak has been off the boat for a long time. This is a test fit to figure out how it all goes back together.
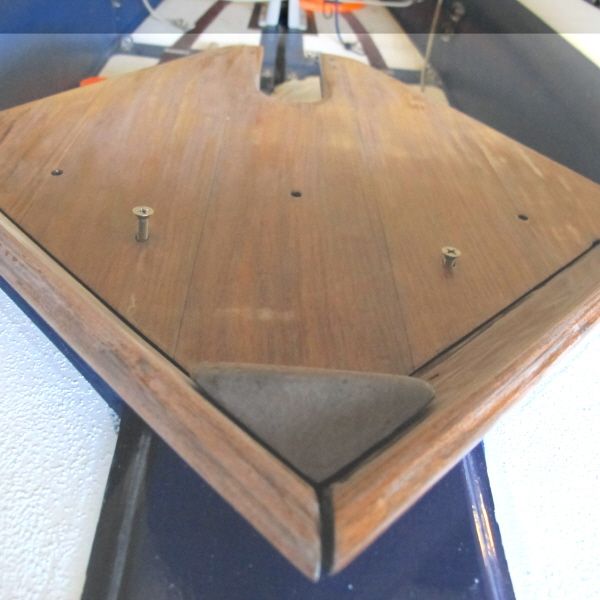 I'll disassemble, apply new varnish, then reinstall. Anyone know a good bedding compound? (nothing that's impossible to remove.)

Re: Coronado 15 project.
Posted: Fri Dec 20, 2013 3:46 pm
by TampaBay
This guy had a busy day at the beach.

Re: Coronado 15 project.
Posted: Thu Jan 02, 2014 7:57 pm
by TampaBay
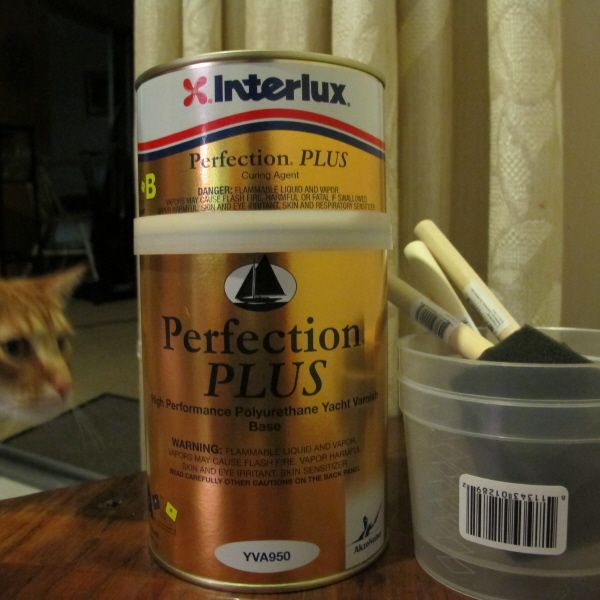
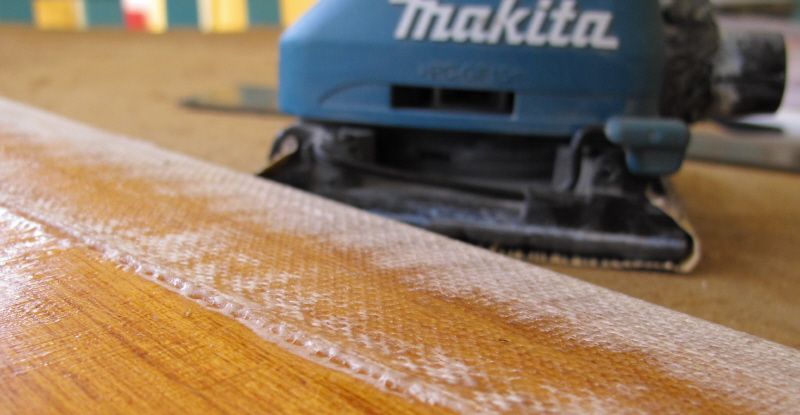
I bought this 2 part polyurethane. It's more expensive than traditional varnish, but it has better adhesion, better UV protection, and multiple coats can be applied in a day.
Re: Coronado 15 project.
Posted: Sun Jan 05, 2014 10:47 am
by TampaBay
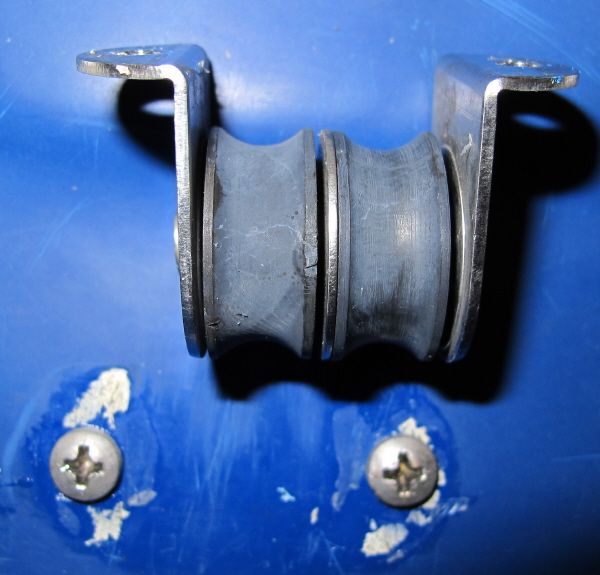
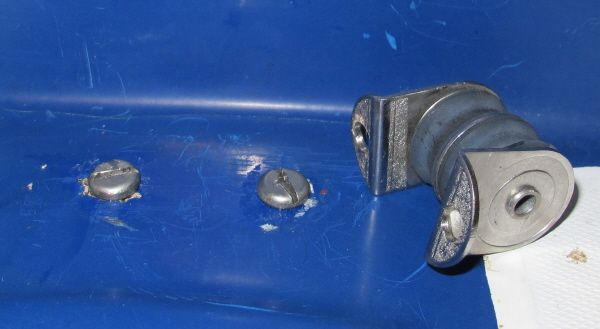
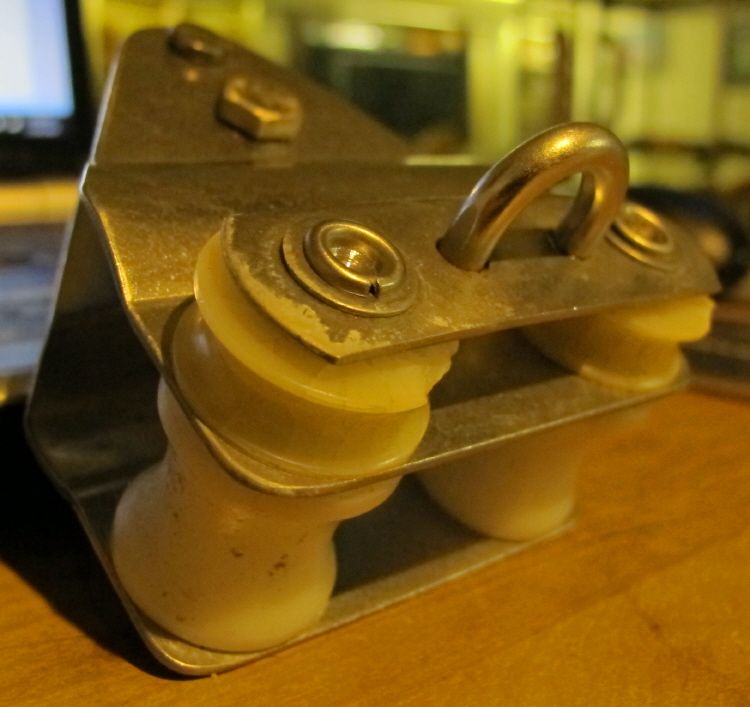
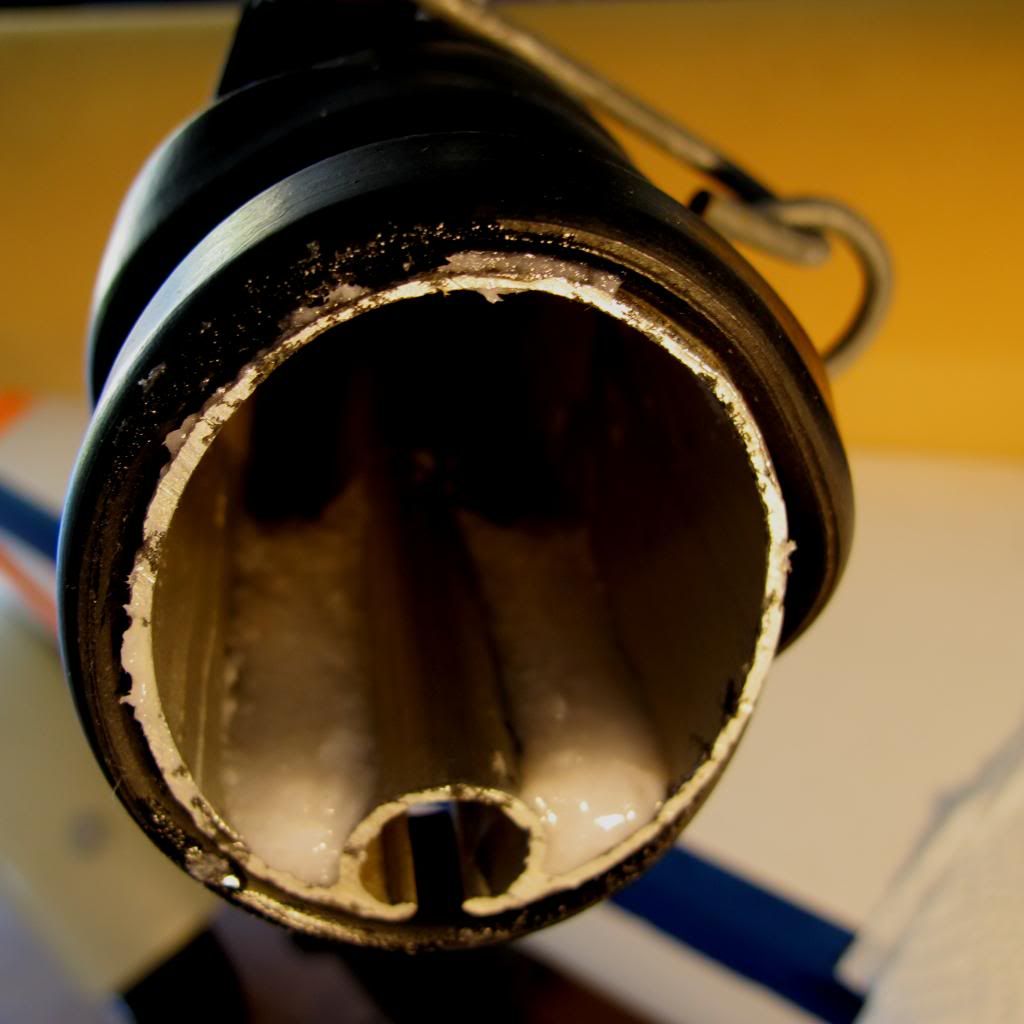
Yesterday, the tailgate on the tow vehicle was finished.That black trim panel was a big project; beneath the surface are 6 rubber edge strips, 4 new brackets and 8 new clips.

Re: Coronado 15 project.
Posted: Thu Jan 16, 2014 1:43 pm
by TampaBay
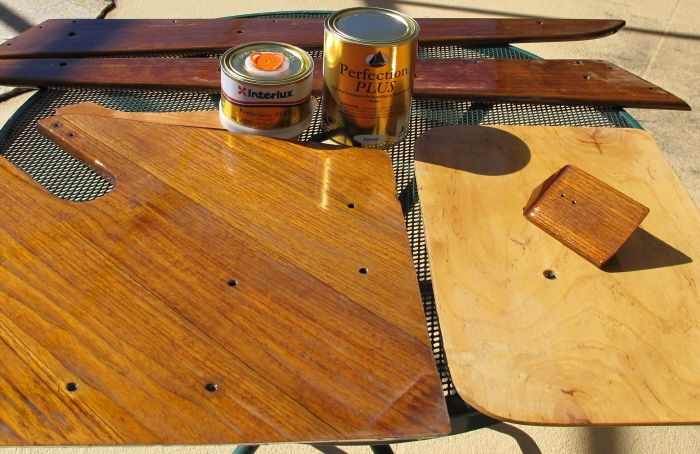
The boards were degreased and scuffed, all set for polyurethane. Temps last night and today are in the mid 50's so i'll wait till Friday when we should see the high 60's.
Re: Coronado 15 project.
Posted: Sat Jan 18, 2014 1:42 pm
by TampaBay
Morning: I moved the first coat of polyurethane into the sun for extra drying. The sanding blocks are ready to go, I'll scuff the new surfaces and apply coat number two.
I learned this, Interlux Perfection Plus "goes a long way." I prepared a small batch that turned out to be 4 times more than needed (when applied to an epoxy surface.) Use on bare wood is a completely different story.
Re: Coronado 15 project.
Posted: Sat Jan 18, 2014 2:15 pm
by TampaBay
Update: I started sanding the polyurethane with 320 grit. The dust was tacky and it "balled up." It's sunny, but the temperature is just 58 (conclusion: not fully cured.)
This sheet of black plastic is tucked in around the edges of the project. It will increase the temperature (and curing) quickly.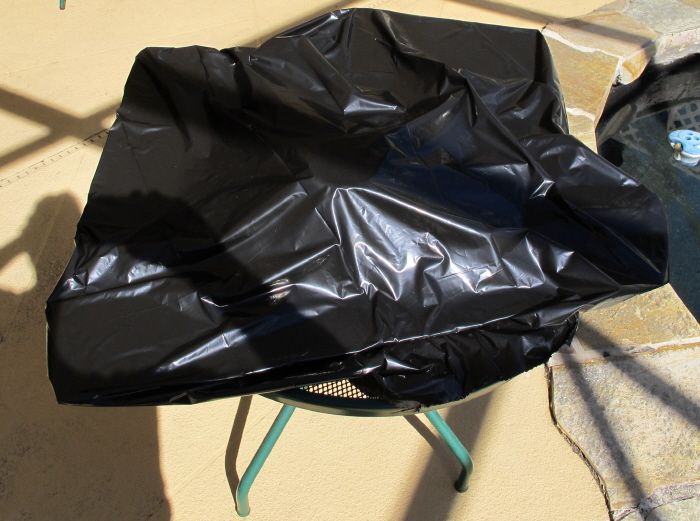
Re: Coronado 15 project.
Posted: Wed Jan 29, 2014 3:58 pm
by TampaBay
Third coat report:
It's in the mid 50's today with no sunshine; I brought the woodwork inside (with a patio table) and set the heat-lamp underneath.
Whats more exciting to watch as it's drying, paint or polyurethane? (I say polyurethane.)
Re: Coronado 15 project.
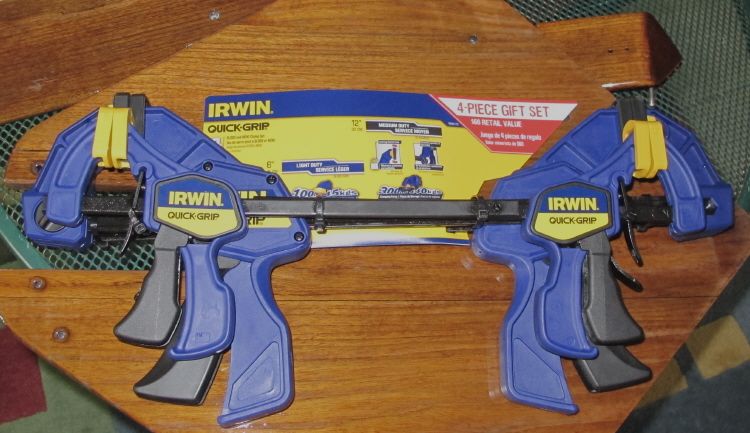
Posted: Fri Jan 31, 2014 1:24 pm
by TampaBay
Found some panel clamps at Home Depot. Four clamps for 35 bucks.
Re: Coronado 15 project.
Posted: Wed Feb 05, 2014 9:24 pm
by TampaBay
The teak: Refinished and installed.
Re: Coronado 15 project.
Posted: Wed Feb 12, 2014 10:44 am
by TampaBay
Until the boat sells, maintenance continues. This boom end cap needs to be removed, cleaned and reinstalled.

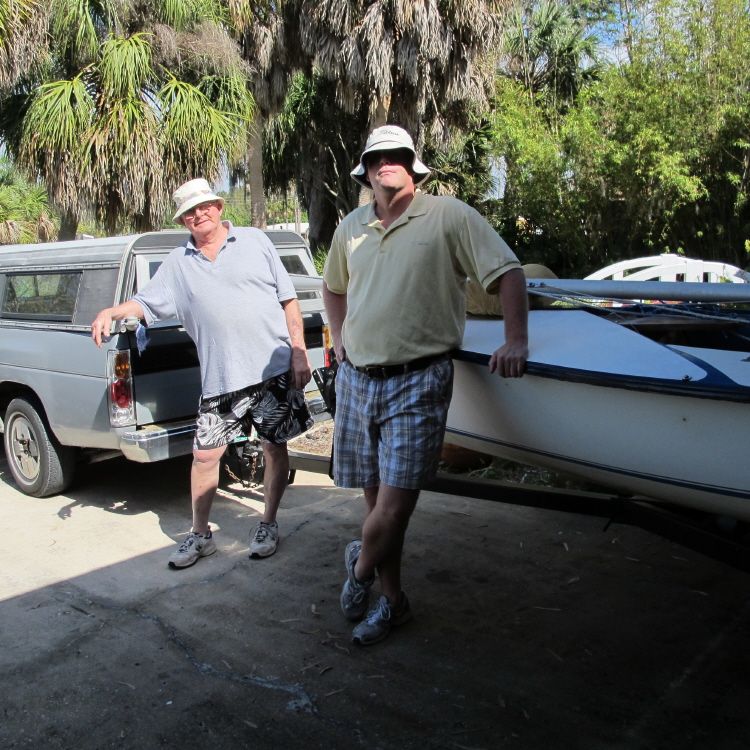
Re: Coronado 15 project.
Posted: Thu Feb 13, 2014 10:35 am
by TampaBay
The weather here was perfect. My father and I trailered to Sarasota Bay for a great day of sailing.

Re: Coronado 15 project.
Posted: Sat Feb 15, 2014 4:48 pm
by TampaBay
At the boat launch, testing the new emergency brake.

Re: Coronado 15 project.
Posted: Fri Feb 21, 2014 1:50 pm
by TampaBay
Ready for a visit to the beach.

Re: Coronado 15 project.
Posted: Fri Feb 21, 2014 7:14 pm
by TampaBay
I removed, cleaned, and reinstalled 4 of these blocks. Their used to raise and lower the centerboard. I over drilled and then filled the screw holes with epoxy for extra strength.
Re: Coronado 15 project.
Posted: Mon Feb 24, 2014 8:51 pm
by TampaBay
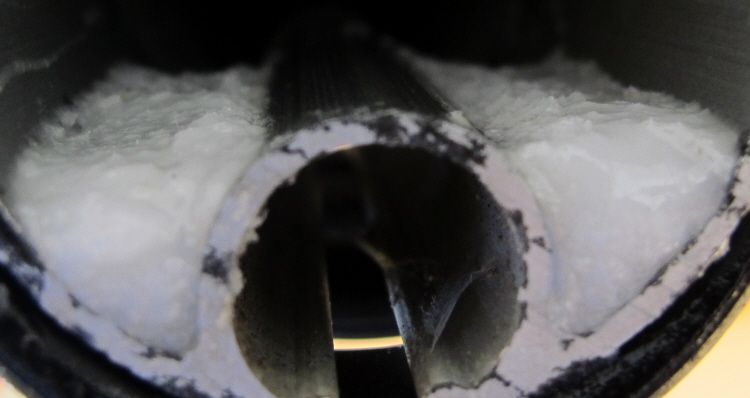
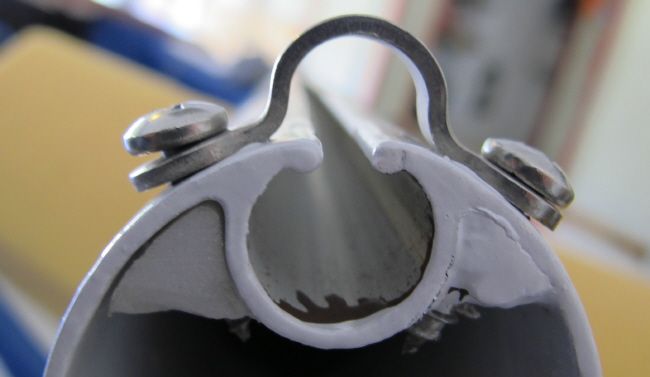
I bought new line for the traveler, and then noticed that the sheaves need to be replaced. This looks like a SS rivet but I'm not sure. The rivet end is peened over in an unusual way.
Re: Coronado 15 project.
Posted: Wed Feb 26, 2014 1:14 pm
by TampaBay
I ordered new control line sheaves from Ronstan. http://www.ronstan.com/marine/range.asp?RnID=032
Re: Coronado 15 project.
Posted: Sun Mar 02, 2014 2:01 pm
by TampaBay
Still waiting on my sheave delivery: I mixed 18mls of epoxy and tackled a couple small projects.
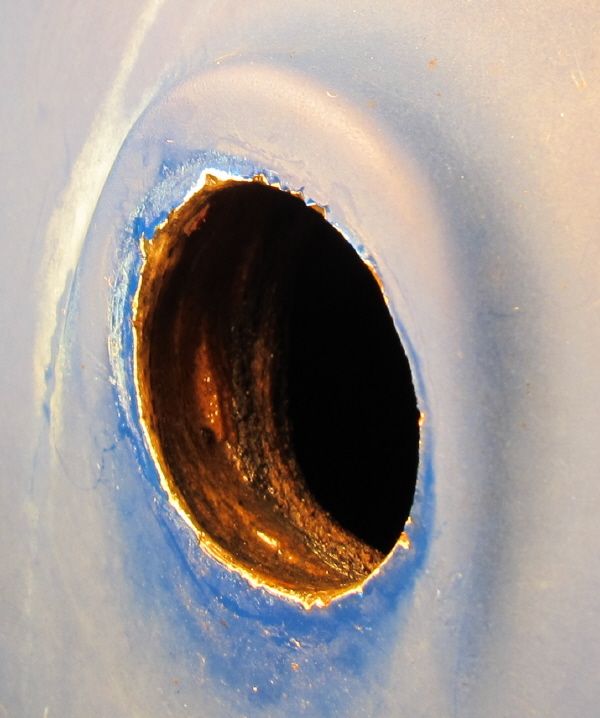
The boom end cap is a heavy aluminum casting that currently serves no purpose. If the main had boom end sheeting, then it could be replaced to support the new block. With mid-boom sheeting, all that happens end-boom is the out haul.
The rubber strap bungee kept epoxy from running out of the holes. Epoxy thickened with 403 microfiber is used to form a backing plate for the out haul fasteners. Previously there was no backing, the strength came from one thread of a self tapping screw that was grabbing onto the thin aluminum wall.
 The idea for the thickened epoxy was taken from a 505 class site. This is how they are reinforcing the high load areas of carbon fiber booms. The epoxy won't adhere to the aluminum but it will act as a tough backing plate. It's a big improvement over the previously non-reinforced design (and it's lighter.)
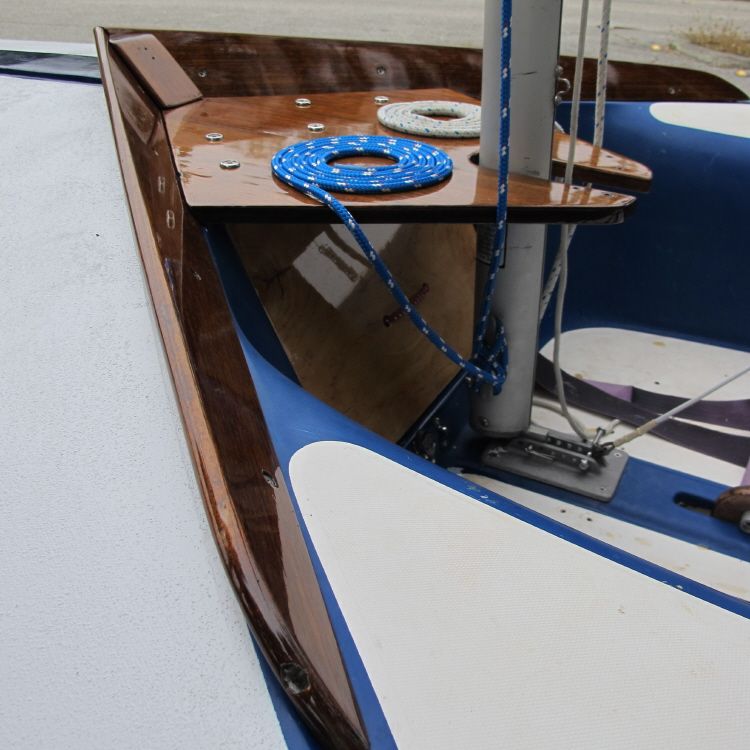
 This is a mounting point for the traveler bar (it's a very heavy stainless steel pipe.) The wood coring was unsealed, so I coated the works with neat epoxy after a little light sanding.
Re: Coronado 15 project.
Posted: Thu Mar 06, 2014 10:30 am
by TampaBay
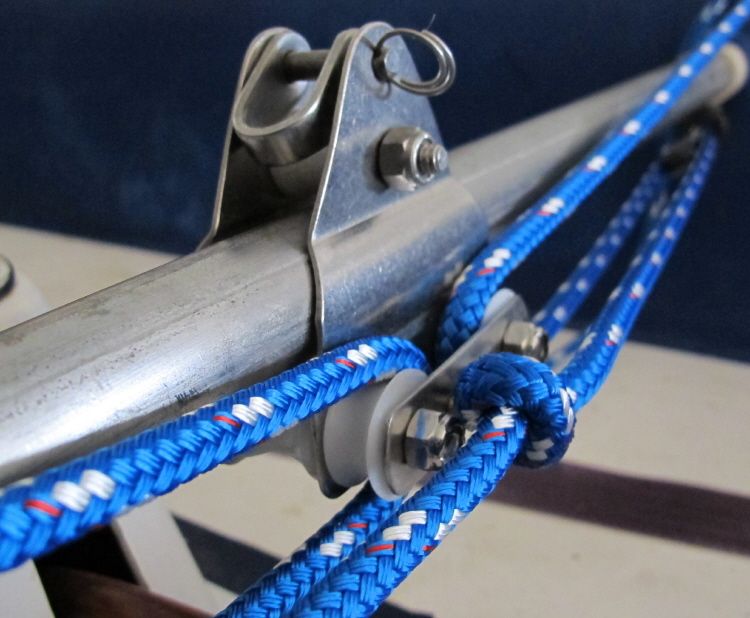
The new sheaves are installed, along with a new control line.
Re: Coronado 15 project.
Posted: Mon Mar 10, 2014 2:17 pm
by TampaBay
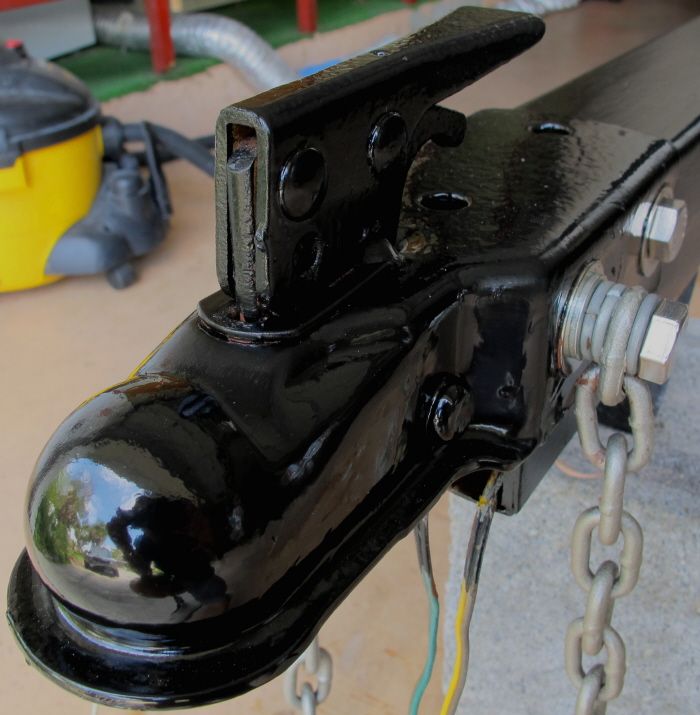
This coupler was rebuilt over the weekend. It was cleaned with a wire wheel, then primed and painted. All the rusty hardware was replaced with stainless steel.
Re: Coronado 15 project.
Posted: Wed Mar 12, 2014 8:09 pm
by Crazer
Were the sheaves riveted in place? How did you end up replacing them? I have the same problem, some of the sheaves on my traveller (Fico model) are completely shot and I need to replace them. I could just order new blocks, but they run $39 a piece! I'd rather replace the sheaves if possible.
Re: Coronado 15 project.
Posted: Thu Mar 13, 2014 12:17 pm
by TampaBay
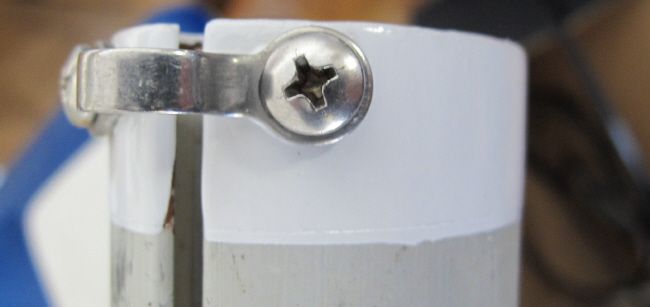
The rivets were easy to drill out. One rivet needed a small amount of filing before it released. The new sheaves were not a perfect fit, and so they were sanded on a flat surface until the width was right (also the height was reduced about one mm.) I replaced the rivets with stainless bolts of the same diameter. I lightly sanded the bolt threads so that the "peaks" wouldn't bite into the bushings. Scroll back a couple images, and you can see the Nylock nuts that were used in the same place where the rivets were mushroomed over (the secondary head.)
Re: Coronado 15 project.
Posted: Wed Mar 19, 2014 11:52 am
by TampaBay
The outhaul rebuild is progressing. New fasteners with epoxy backing (I reinstalled that left side and fixed the poor fit.). I also applied some primer and paint.
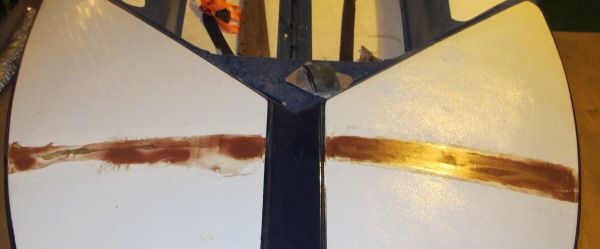
 The white stripe (it looks cooler in real life.)
Re: Coronado 15 project.
Posted: Thu Mar 27, 2014 1:48 pm
by TampaBay
Re: Coronado 15 project.
Posted: Fri Mar 28, 2014 12:53 pm
by TampaBay
Re: Coronado 15 project.
Posted: Wed Apr 09, 2014 7:03 pm
by TampaBay
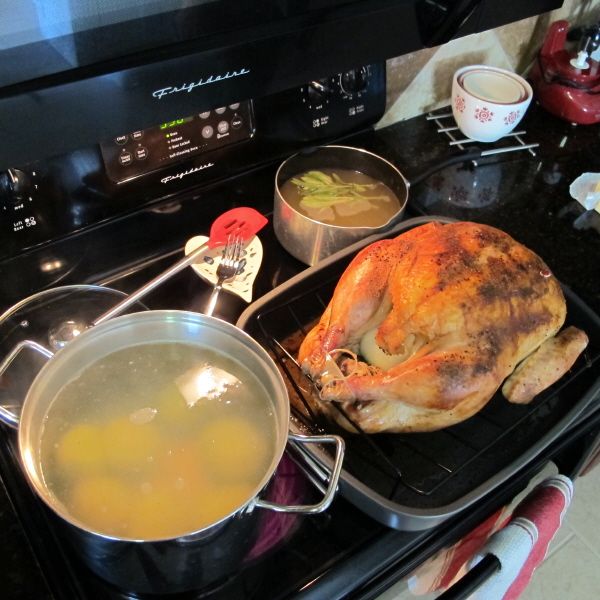
Check out this low carb. soup diet. I dropped 30lbs since Thanksgiving; ate this stuff every night for dinner (it's fantastic) and cut the other carbohydrates. All this stuff is off the diet: Bread, pasta, chips, breakfast cereals, potatoes, beans, candy and sugar. You won't miss it.
30lbs is about 10% of the hulls weight, so this diet is making my boat faster.
Empty pot, lets get rolling.
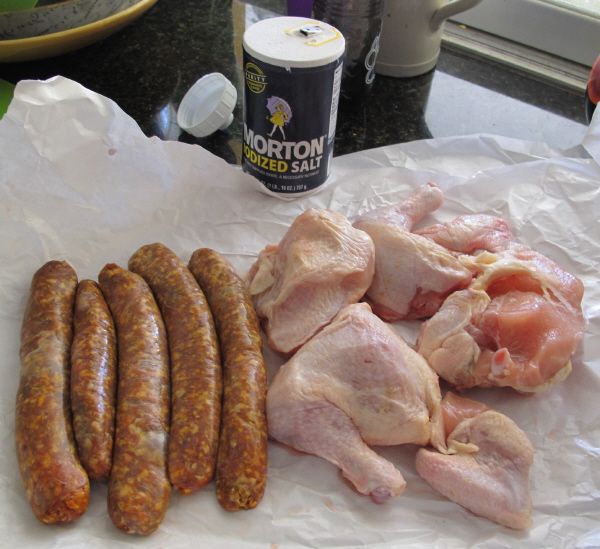
 Hot Italian sausage and 2 small chickens (one bird pictured here.)
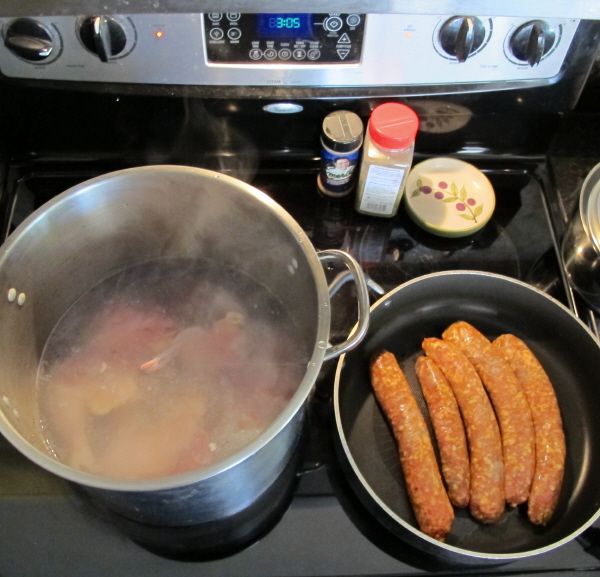
 Fry those links and boil that chicken (this becomes the soup stock.)
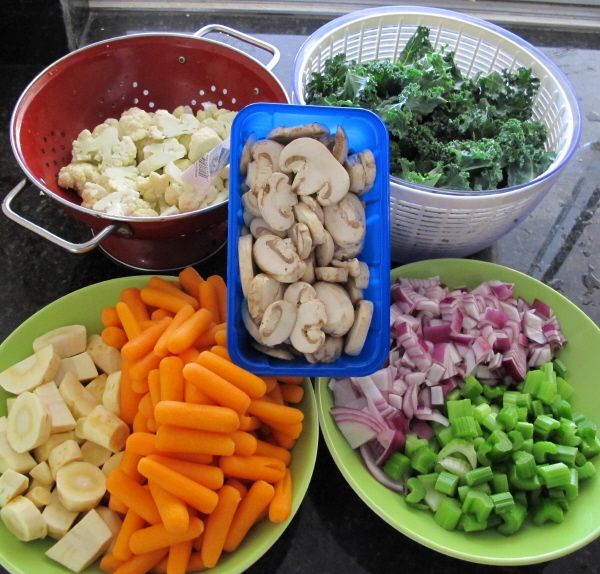
 Cook these veggies any way you please (your soup your rules.) Pictured from left to right and top to bottom are cauliflower, kale, mushrooms, parsnips, carrots, red onion and celery.
 Remove all bones and cut up the meat, then add to pot (also pork ribs here.)
 Keep adding water, and we just made a big pot of soup. This should last about 5 or 6 meals for 2 people.

Re: Coronado 15 project.
Posted: Fri Apr 11, 2014 7:07 pm
by Paulus
Keep some on the side - I'll be right over... :-)
Re: Coronado 15 project.
Posted: Sat Apr 12, 2014 1:35 pm
by TampaBay
Paulus, If your in Sarasota let me know.
Re: Coronado 15 project.
Posted: Tue Apr 15, 2014 10:35 am
by TampaBay
The owners of this Merit22 took me out for a sail. It's a very interesting boat.

Re: Coronado 15 project.
Posted: Mon May 12, 2014 10:58 am
by TampaBay
Hello!
Is anyone in the pharmaceutical or health care business? I'm putting together a LinkedIn profile and I'd like to include my friends here as contacts.
Re: Coronado 15 project.
Posted: Sun Jun 15, 2014 9:48 am
by TampaBay
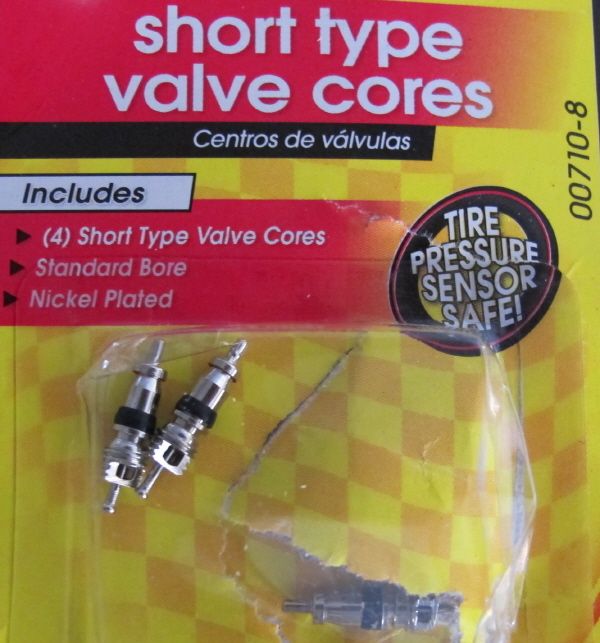
This wheel has a bad valve core (notice the tire is flat.) I have never done this type of repair, but I'm sure it involves a trip to the auto parts store.

Re: Coronado 15 project.
Posted: Sun Jun 15, 2014 1:08 pm
by Paulus
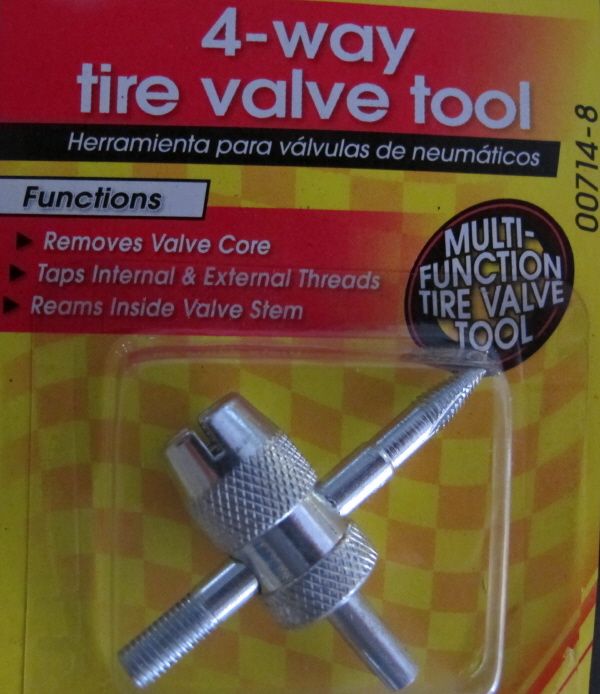
New core + core replacement tool = fix.
Re: Coronado 15 project.
Posted: Mon Jun 16, 2014 4:23 pm
by TampaBay
Easy project.
Re: Coronado 15 project.
Posted: Fri Jul 11, 2014 12:34 pm
by TampaBay
And now the other tire goes flat. It's strange when that happens; separate systems fail at almost the exact same time.

Re: Coronado 15 project.
Posted: Fri Jul 11, 2014 2:29 pm
by TampaBay
The tires read "max pressure 65 pounds," and that's what I added. If it's to much someone let me know.
Re: Coronado 15 project.
Posted: Thu Jul 17, 2014 7:37 pm
by Paulus
Sounds very high - 35psi is more of a norm for SUV's - some go lower to improve ride comfort (less "trucky") Ford Explorer got in trouble over recommending 25psi, resulting in tire blow-outs, for which Firestone got the blame....
Anyway, on the inside panel of one of the doors should be a sticker with the MFG recommended tires and pressure - too much pressure will wear the tires out prematurely (in the center of the treads)...
Re: Coronado 15 project.
Posted: Thu Jul 17, 2014 10:04 pm
by TampaBay
Hello Paulus. The tires in my last two posts are on a trailer (you must be thinking that they are truck tires.)
Re: Coronado 15 project.
Posted: Mon Jul 21, 2014 4:43 pm
by TampaBay
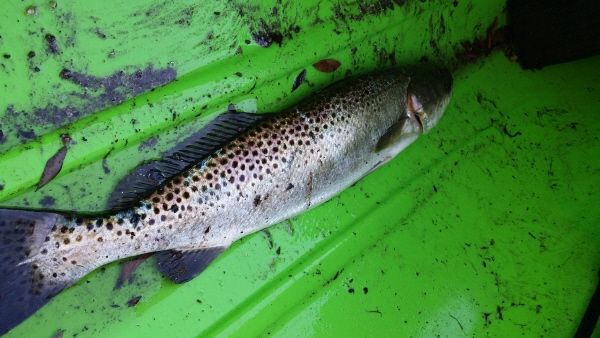
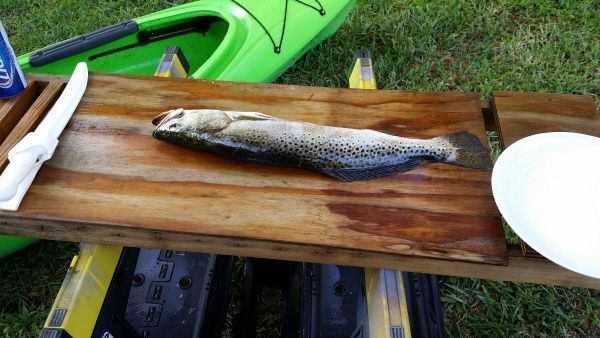
Gone Fishing.
 Caught a 22" spotted sea trout.
Re: Coronado 15 project.
Posted: Fri Aug 22, 2014 5:59 pm
by TampaBay
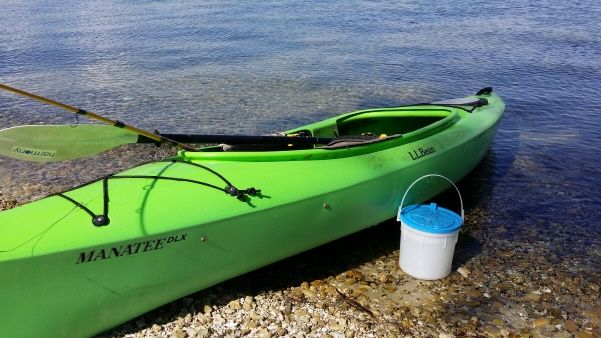
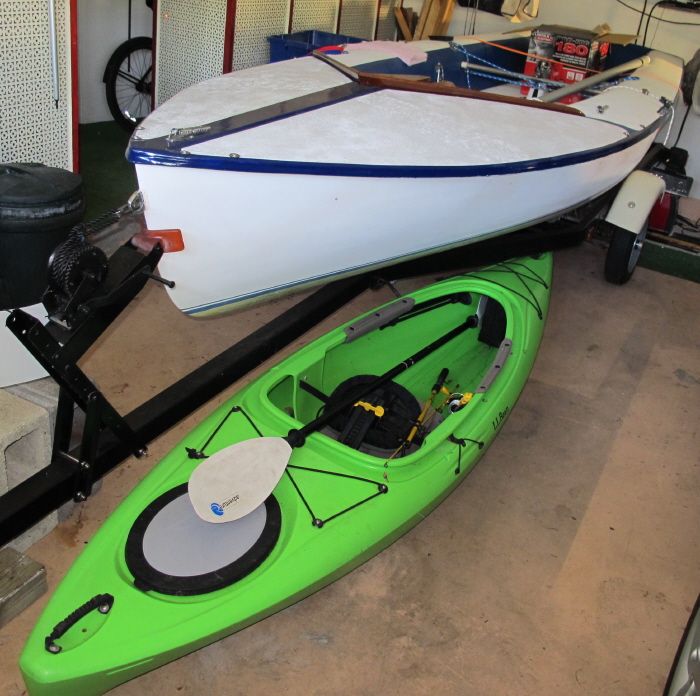
I added a boat to the garage (the kayak.) Always room for one more.
Re: Coronado 15 project.
Posted: Fri Nov 14, 2014 6:52 pm
by TampaBay
Today, I put a little magic back into the TeeNee Magic Tilt. The rusty nut was ground off and the original bolt was pounded out. I put a jack under the boat to separate the joint, and covered everything with oil. It was reassembled with the new hardware (shown.)
Re: Coronado 15 project.
Posted: Thu Nov 20, 2014 3:50 pm
by TampaBay
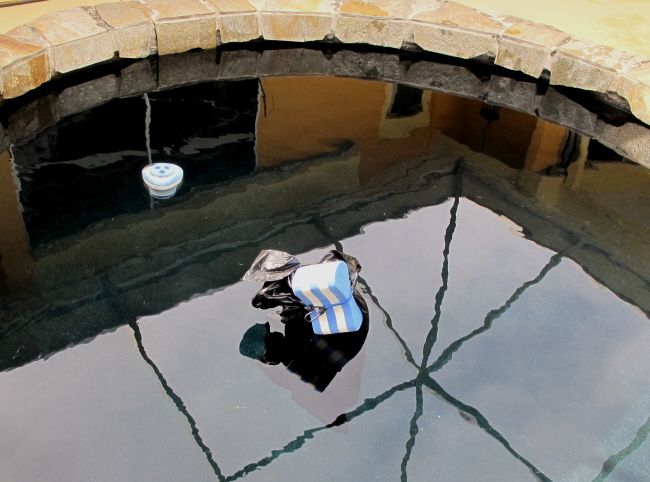
I had this idea: Busy working on my foils here; building up the thickness into a better NACA shape. The fiber-glassing has been easy enough, but I wanted a vacuum bag system. Then it struck me, I can submerge the uncured work in the pool, and the water pressure will create the same effect as a vacuum bag.
A yard waste plastic bag with some rocks for trim ballast (the bag and rudder float to high.) I gathered the top together with a float and let her sail. The plastic presses in against the work exactly like a vacuum bad does. The leading edge of the rudder got one strip of 4" 6oz. tape, folded down the middle. When it's cured I'll post a result picture.
Re: Coronado 15 project.
Posted: Thu Nov 20, 2014 7:35 pm
by TampaBay
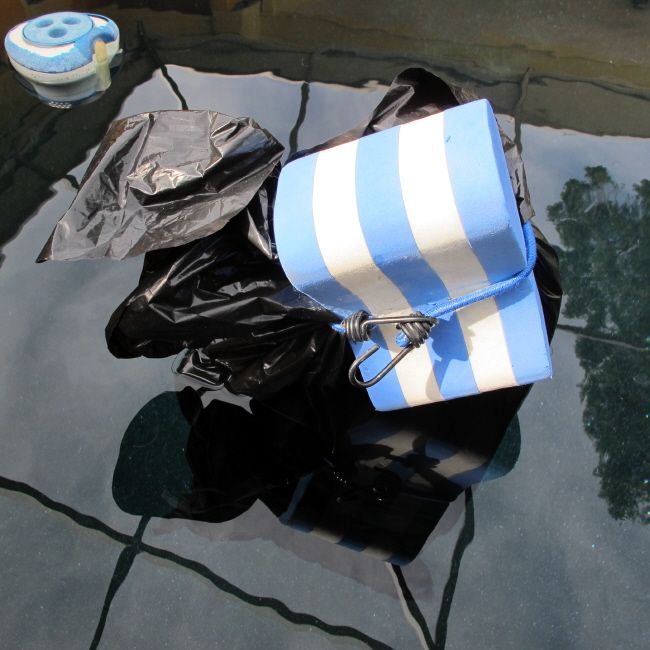
Meh! Big disaster. Water leaked in and tape looks white.
Re: Coronado 15 project.
Posted: Fri Nov 21, 2014 7:50 am
by pjesus
It was a crazy idea but it could have worked :D
Me, I wouldn't have tried it because from my (little) vaccum fiber experience I know there is always some air leak.
So... if air gets out, water will surely get in...
Re: Coronado 15 project.
Posted: Fri Nov 21, 2014 3:47 pm
by TampaBay
It was a cool idea that I couldn't resist trying. I knew the odds of water intrusion were fairly high. With a little perfecting, It becomes an interesting alternative to vacuum.
The epoxy is cured, but it doesn't look ideal. That's fresh 40 grit paper in the sander; you know what time it is (time to sand off glass.)
Re: Coronado 15 project.
Posted: Sat Nov 22, 2014 11:10 am
by Paulus
A good vacuum represents about 30ft of water column - even if the pool experiment didn't push water in the bag, you would have had to have a fairly deep pool to make it effective. But kudos for the thought!


