Page 3 of 8
Re: Coronado 15 project.
Posted: Sat Jul 21, 2012 12:18 pm
by TampaBay
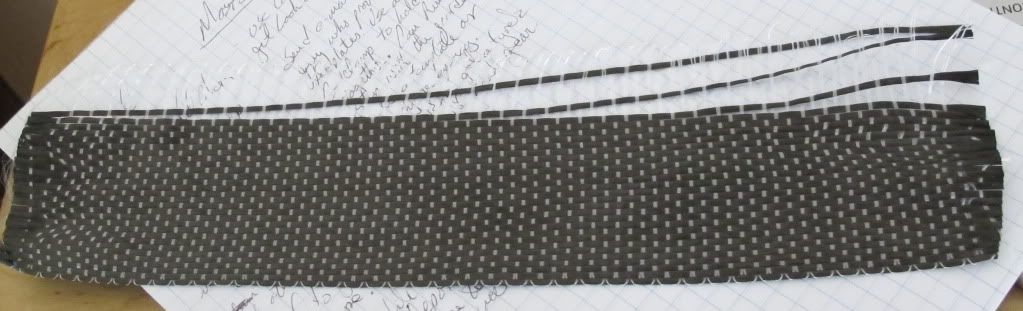
Separate the carbon fibers.
Re: Coronado 15 project.
Posted: Sun Jul 22, 2012 11:22 am
by TampaBay
Steps 3 and 4 (or maybe 5): Fibers are set into the kerfs with epoxy. After the cure, thickened epoxy was troweled into all remaining depressions.
 Clamped, and on horses.
 This layer of thickened epoxy is heavier than I wanted, but, "this too shall sand."
Re: Coronado 15 project.
Posted: Fri Jul 27, 2012 11:55 am
by TampaBay
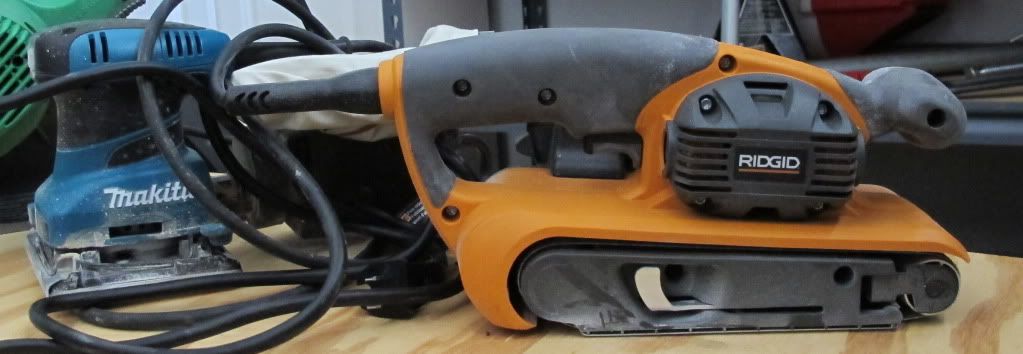
Picked up a belt sander (right side,) at Home Depot. With 50 grit, it bogged down quickly. Is that to be expected?
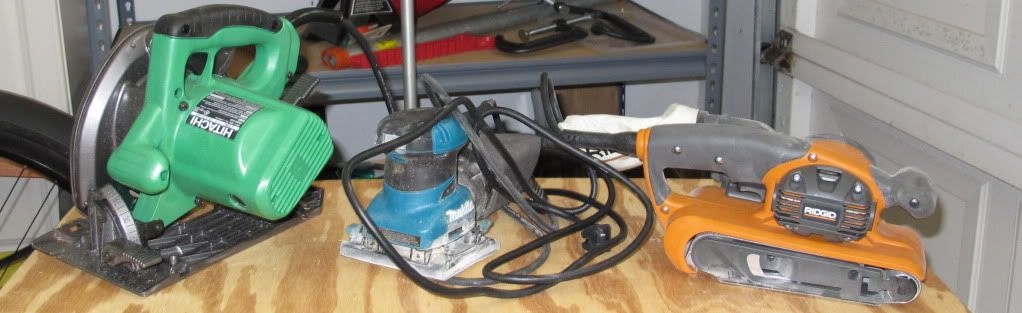
 Here is the "line up." I organized (to many tools on the floor.)
Re: Coronado 15 project.
Posted: Sat Jul 28, 2012 2:15 pm
by TampaBay
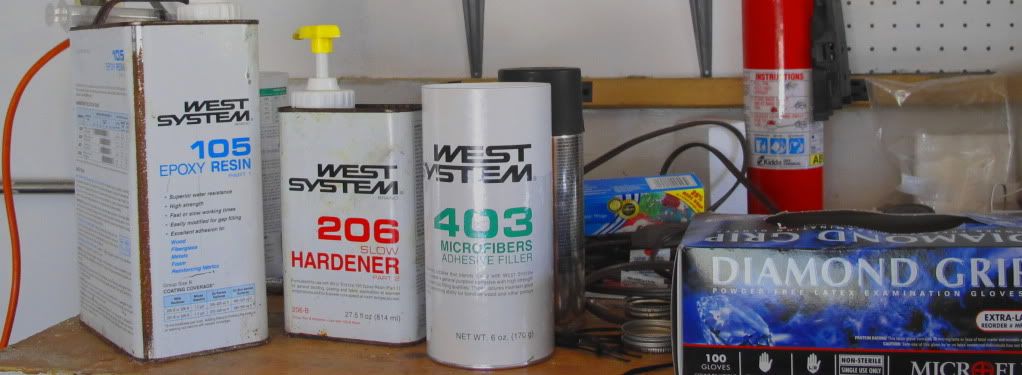
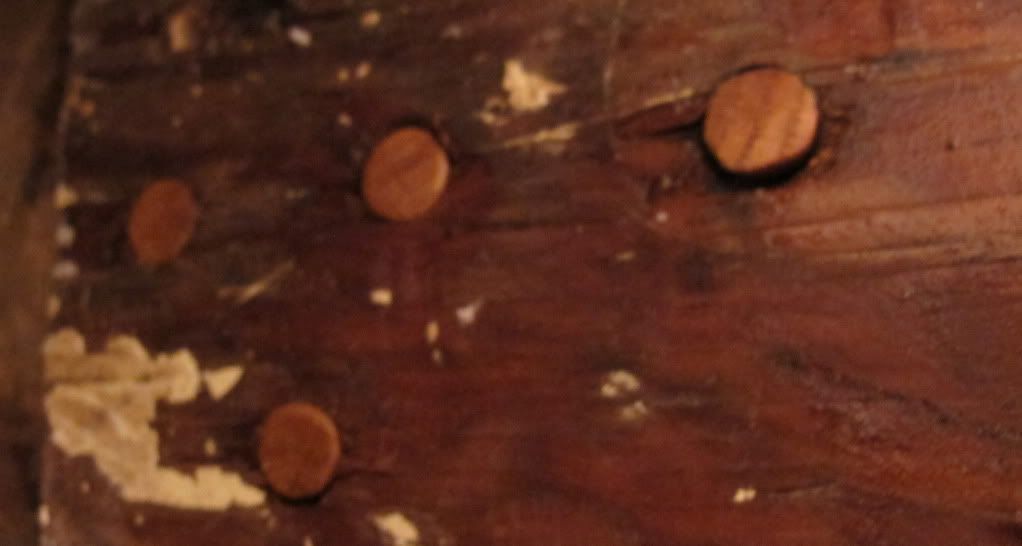
Build a proper NACA0008 foil: A pattern was epoxied onto a small sheet of plywood. With a scroll saw, the foil's profile was removed.
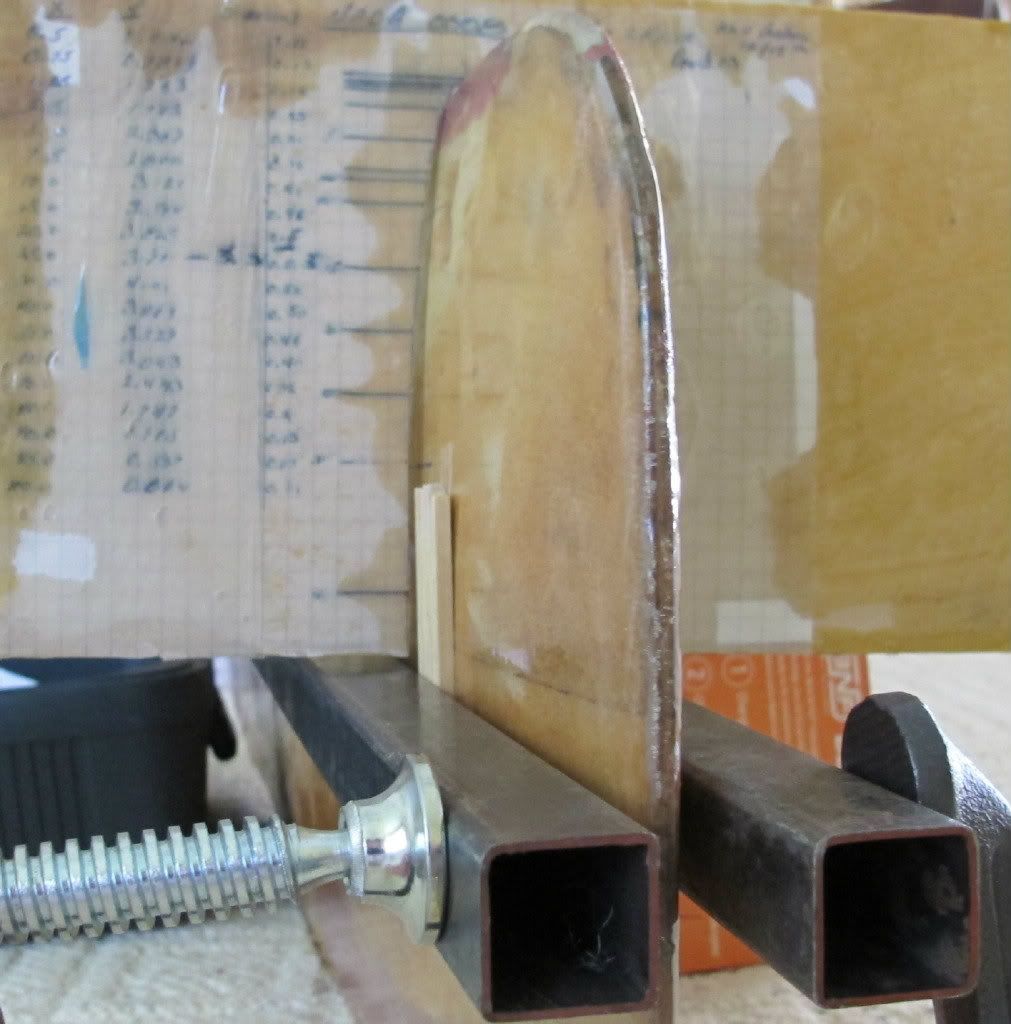 Here is the gap. There is clearance enough, on both sides, to lay down carbon fiber tape.
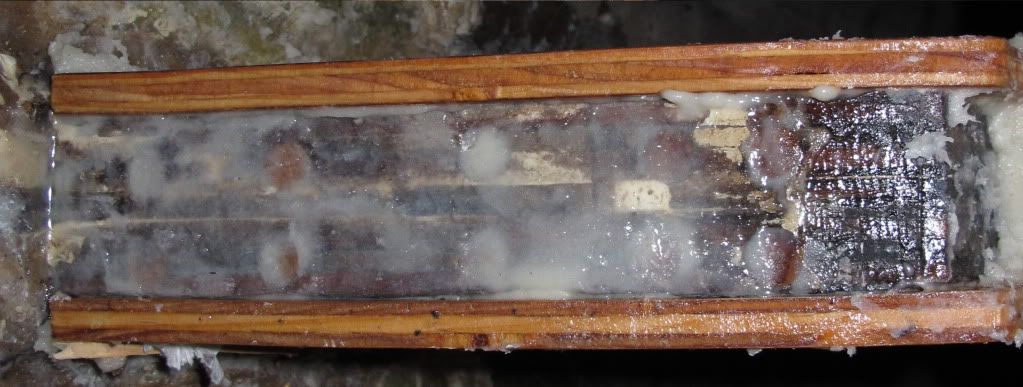
 Butter-it-up, with thickened epoxy (maybe the new West System Six10,) then draw the mold along the steel rails.
Re: Coronado 15 project.
Posted: Tue Jul 31, 2012 6:52 am
by galleywench
Looks good, but Six10 wouldn't be my choice for your next step. It's expensive, hard to sand, and is primarily used as a structural adhesive or gap filler. I'd go with a standard epoxy mix thickened with Cabosil (for strength) and microballoons (for sandability).
Re: Coronado 15 project.
Posted: Tue Jul 31, 2012 8:40 am
by Zach
For your belt sander gumming up you need a gum rubber abrasive cleaner.
http://www.amazon.com/Big-Horn-19547-12 ... lt+cleaner
For your epoxy screed, 610 doesn't pull very well. You'd be well off to use 407 or even 410 since it is just a female mold. In the future, most folks that are making a one off mold use Medium density fiber board, dry wall mud, polyester resin to coat the mud... Then they catalyze some polyester resin and bondo, mix both together to get a brushable putty and float on an 1/8th inch or so to sand out to smooth. A few coats of evercoat slick sand, wax it, spray PVA... and then you lay up your epoxy part.
If it has to be perfect:
I spray 20 mils of Duratec sandable primer on the part, wet sand with 800 grit and buff out with aqua buff 2000 on a power buffer.
It keeps the costs down, and the job goes faster, because each step is 20 minute wait instead of the next day.
Add a guide rail to your template piece so that it cannot rack sideways while you pull the putty. Basically just a "foot" so that you could stand it upright on a counter and not have it fall over. Anywhere the template turns, or moves side to side is a low spot on one or both sides. The guys that used to make plaster mouldings for houses two centurys ago had some novel guide rods for their curved work, you can learn a lot about shaping mud reading about that.
Wrap your metal guides in mylar packing tape, like what you'd use to tape up a cardboard box to ship it. No reinforcements needed. Not much sticks to mylar, and it will keep your epoxy from gluing the guide rails down. The same goes for any surface on the blade you don't want epoxy to stick to, if the shape is already right you can put a piece of packing tape over the areas that are correct and peel off the epoxy when it starts getting tacky.
When you pop the guide rails off after things have gotten gummy, most folks will pull the entire surface before it is fully kicked so that when they sand it all down they will have less to fill. Epoxy shrinks, so when you come back the next day your template will be loose, and you are about to sand it down. Apply with a squeedgee to the whole surface. This second filling takes up most of the inconsistency of the first pull. I would use a thin wooden batten 1/4x1/4 stretched from top to bottom and pull off any excess of the second filling, which averages all the high spots and fills the low spots to them. The high spots will shrink down, and so will the low spots... but the next day you'll be about where you want to be instead of a 1/8th shy.
I'd sand it from there on out with 80 grit... By hand.
When you sand it out, use a piece of sticky sandpaper on some dow blue or pink styrofoam, so it can conform to the curve. Sand up and down while crossing from one corner to the other with each pass and you won't have any lumps or bumps. When you reach the bottom corner left corner, go back to the top right corner and cross the opposite way so you have X marks scratched in the part at 45 degrees to each other. Any shiny spots, circle with a pencil, finger sand, lightly thicken some 5 minute epoxy and paint inside the pencil lines with an acid brush once or twice. Wait for it to kick, and sand it out until the lines cross the low spots. Then mix up some neat epoxy and roll a coat or two on. You can use a heat gun to get it to lay out (wear a respirator) and once it is smooth, leave it for 3-4 hours, but not more than 5 hours, and roll another coat on with the same method. If you are within 5 hours, the amine blush has not yet formed and the chemical reaction hasn't stopped in the epoxy so you can apply the next coat right over it with out sanding. It helps to have the part hot, and carry it in to a/c or shade so that any air in the wood is cooling instead of expanding out bubbling through the epoxy.
When you sand this coat out, if it laid out smooth you'll be able to sand with 180 real lightly. Just go until there is a haze on the surface and any lumps are gone. From here you can either wax it and pull your part, or switch over to a good primer and paint, or an epoxy tooling gelcoat/paint, and get a buffable A finish on the part.
Laying up epoxy parts, I like to make a brushable epoxy gelcoat with enough cabosil to make it start to lump up and some white dye to tint the color a bit more. Wax a piece of glass and play around with the ratios of epoxy to cabosil so you can brush on a coat and have the air work out leaving a perfect surface. To much cabosil, and it stays lumpy. To little, and it gets runny and fills the low corners of the mold. When that tacks up I put the mat side to the "gel coat" and start building out to finished thickness.
Zach
Re: Coronado 15 project.
Posted: Tue Jul 31, 2012 8:44 am
by Zach
Also for the gap between your steel rails, you may want to find some kids modeling clay and pack it in the gap to contain any drool.
If you have to leave the wooden spacers in place, wrap them in mylar packing tape and chip them out when you are done. Sand out the leftover tape, and pull epoxy in the low spots they leave.
Make sure the guide rails are low enough that the template is riding at least 1/3rd on surface that is already right, otherwise you'll have a hump where the template stops which will either change the shape of the foil or require some feathering out.
Re: Coronado 15 project.
Posted: Thu Aug 02, 2012 10:09 am
by TampaBay
Thanks for the info Zack, and galleywench. There is still a fair amount of head-scratching to be done on that centerboard project. I will add some pictures, as the events unfold. :)
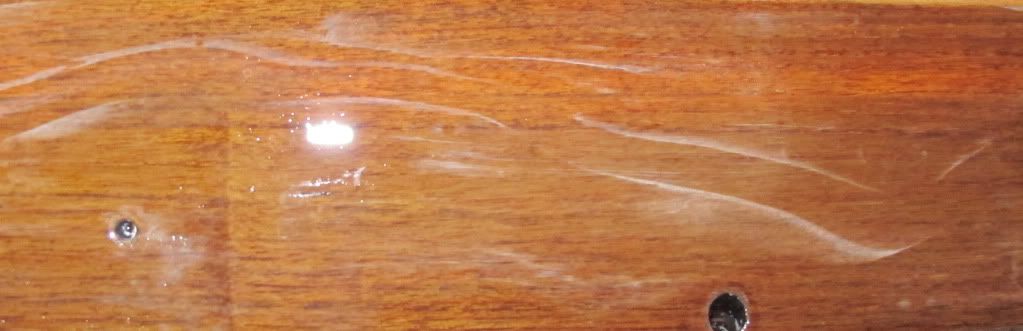
Yesterday I made some progress on the teak, and the tiller. These parts were ready for some work. The teak took up epoxy, like a sponge. Not the tiller however, it is harder than a baseball bat.
Re: Coronado 15 project.
Posted: Fri Aug 03, 2012 12:54 pm
by TampaBay
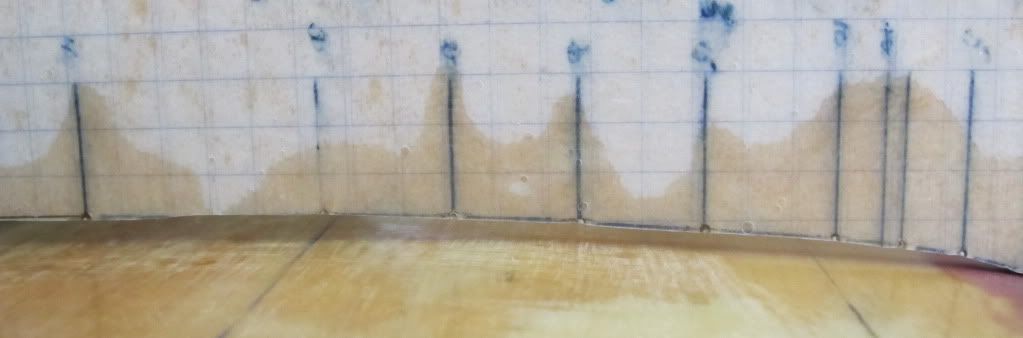
It's a first coat for the coamings, but not for the mast partner. This morning everything got a light sanding, and now, are ready for another coat of epoxy. The low spots (darker areas) get smaller and fewer, after each layer (maybe 2 more times and good.)

Re: Coronado 15 project.
Posted: Mon Aug 06, 2012 9:14 pm
by TampaBay
This is encouraging; something was assembled (for a change.) Holes for the tiller hardware were filled with epoxy, and then re-drilled. Screws were driven home, into wet epoxy (also, the feet are set into small puddles.)
Re: Coronado 15 project.
Posted: Tue Aug 07, 2012 10:41 pm
by TampaBay
The kitchen is a great spot for wet sanding.
 Coat with epoxy, sand it back,,,, and repeat.

Re: Coronado 15 project.
Posted: Thu Aug 09, 2012 12:19 pm
by TampaBay
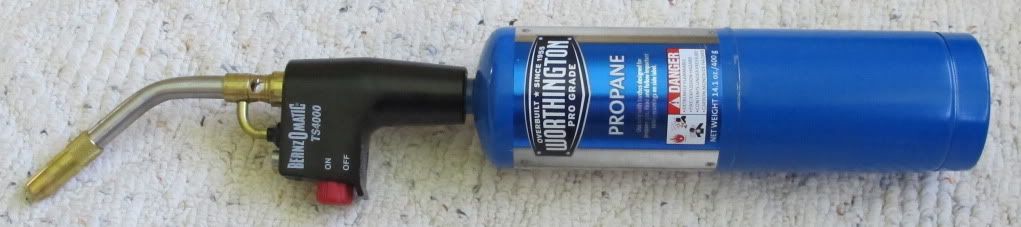
I picked up this torch; thinking it would be useful to remove small bubbles from the epoxy. It was not helpful, in fact, it made a big mess.
Re: Coronado 15 project.
Posted: Sat Aug 11, 2012 2:17 pm
by TampaBay
This is an example of the damage cause by the torch. The white pattern, is burnt epoxy. Why did I think a torch was a good idea? The Olympics,,,, maybe.
Re: Coronado 15 project.
Posted: Sat Aug 11, 2012 6:02 pm
by Tallystick
A rasp might knock off those bubbles without digging into the epoxy if you use light pressure.
Re: Coronado 15 project.
Posted: Sat Aug 11, 2012 6:34 pm
by TampaBay
That damage is scorched epoxy (no visible bubbles.) I used 80 grit Wet or Dry, under running water. It took a fair amount of muscle.
Re: Coronado 15 project.
Posted: Sat Aug 11, 2012 7:56 pm
by Tallystick
Heh, yeah I meant before the torch. I often use a rasp to knock off any dried epoxy runs before sanding. Ought to work for bubbles as well. Don't see many bubbles with the SC100 epoxy I'm using though. Good stuff and cheap at $50/gallon.
Re: Coronado 15 project.
Posted: Sun Aug 12, 2012 1:46 pm
by TampaBay
I used a file, the other day. It took down the drips, but it was tricky to control. Now, I am applying thinner coats of epoxy to prevent drips. In about a half-hour, the last coat goes on (thin,) then it will be varnish time (or polyurethane.)
Re: Coronado 15 project.
Posted: Sun Aug 12, 2012 1:57 pm
by TampaBay
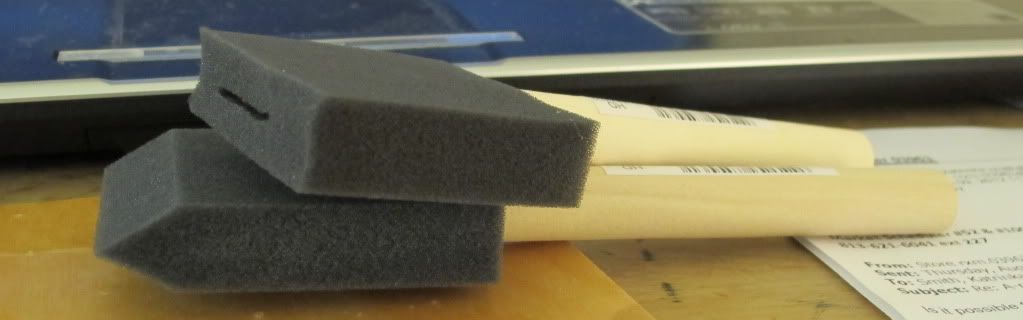
I sheered off the triangular end of this sponge brush.
Re: Coronado 15 project.
Posted: Tue Aug 14, 2012 9:50 am
by Zach
Don't give up on the torch yet.
The torch does work, but hold it 8-10 inches up and keep the flame level to the surface, not pointed at it. Use it to heat up the epoxy so it is more viscous. Its not instant, you are just trying to get enough heat that the surface tension breaks and lays out flat.
It makes about the same difference as between winter temps and summer temps, and in the summertime it can lay out like it was sprayed on.
It looks like the flame was close enough that the pressure of the propane actually made waves in the epoxy!
Also rather than a rasp or sandpaper for runs, get a card/cabinet scraper or a piece of glass with a sharp corner edge.
They take a bit of thinking to establish what you are doing when you are sharpening it. You need a piece of 600-800 grit sandpaper glued to a piece of glass or a diamond hone, a small vice, and a burnishing rod. In a pinch a long aircraft drill bit works. The glass or diamond hone makes the flat side perfectly flat and square with sharp corners. The burnishing rod you roll a 10-15 degree hook shaped burr on the side of the scraper. I real lightly file the corners off so they can't dig in and put a score mark in the piece.
http://www.finewoodworking.com/pages/w00007.asp
Glass is cheap if you have a glass shop near by, the 3-4 inch wide straight factory cut edges are what you are after. Wrap them up in masking tape and use them till they dull.
Looking good,
Zach
Re: Coronado 15 project.
Posted: Tue Aug 14, 2012 10:22 am
by TampaBay
Zack,
Thanks for the link; I bookmarked that page. The torch was pointed into the epoxy. I wonder if extra heat cures the epoxy faster, increasing viscosity, having an opposite of the desired, effect. However, I've seen it done on youtube, so, "what one man can do, another can do." (This is a quote from The Edge, with Anthony Hopkins.)
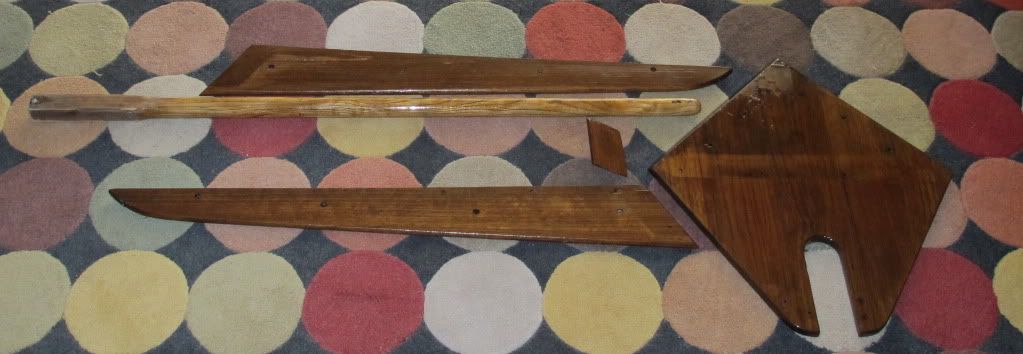
Here are the boards, set up with a correct orientation.
 Also, some cool stuff from the local Ace Hardware.
Re: Coronado 15 project.
Posted: Thu Aug 23, 2012 12:36 pm
by TampaBay
I put the work on hold for a few days. I have tools laying about, everywhere. It's time to deal with the clutter.
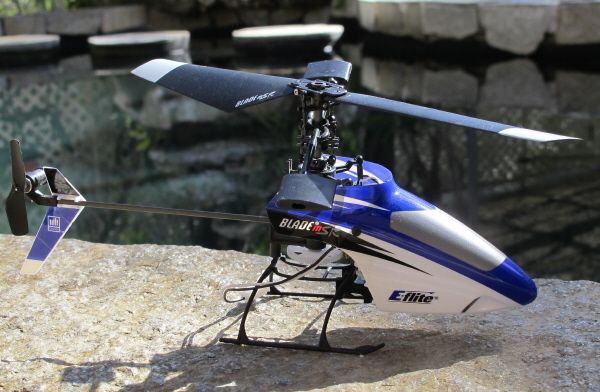
Spent a little time flying this: I found some lighter, and more powerful batteries.
Re: Coronado 15 project.
Posted: Sat Aug 25, 2012 10:58 am
by TampaBay
The quality of this photo is low, but you can get a general idea.
South Florida is getting rain from a system just North West of the hurricane.

Re: Coronado 15 project.
Posted: Sun Sep 02, 2012 10:30 pm
by TampaBay
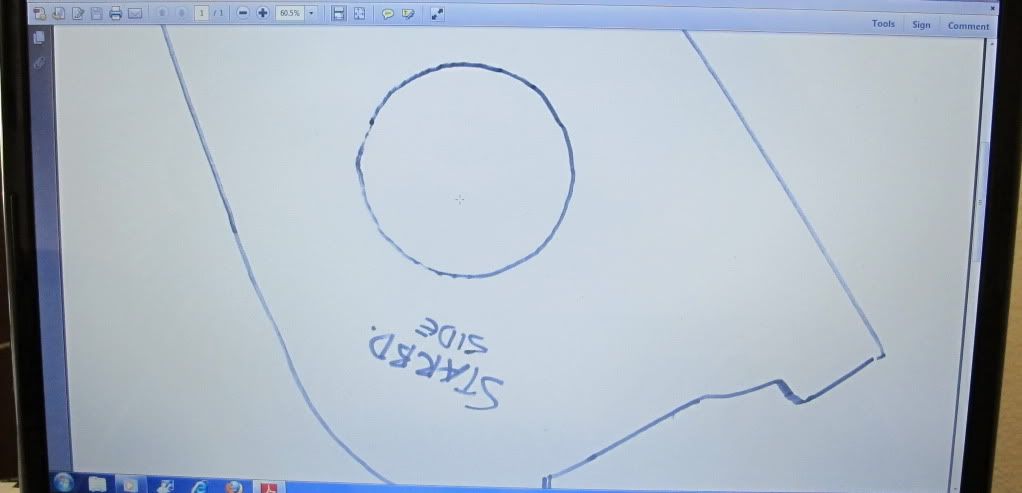
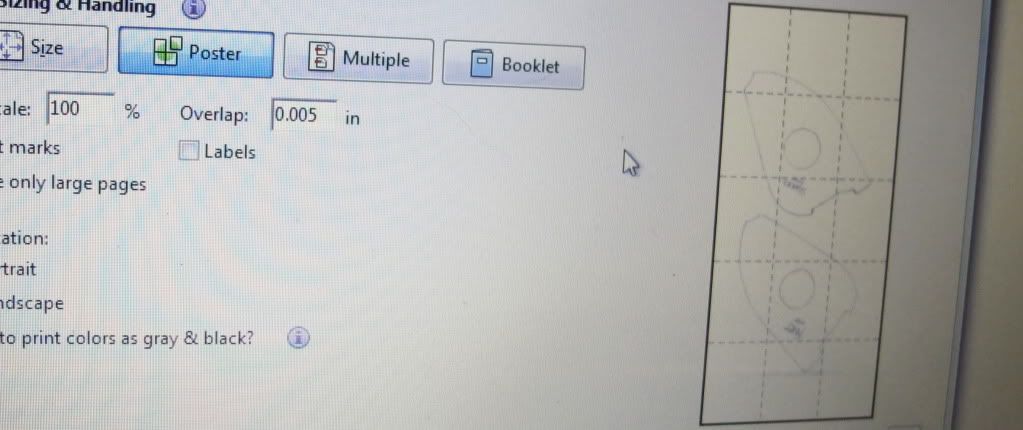
An image of a template, for the replacement bulkheads. This file won't print correctly, on regular sized paper.
 The Print window: See the highlighted "Poster" button, and the grid of 15 sections? Now, I have a pile of paper, and a sort of "bulkhead jigsaw puzzle" to solve.
Re: Coronado 15 project.
Posted: Sun Sep 02, 2012 11:04 pm
by TampaBay
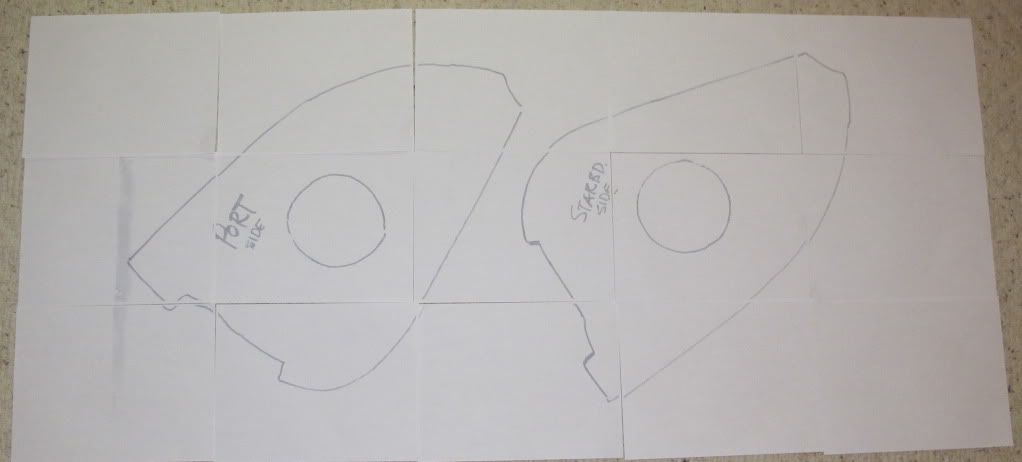
Here it is; fifteen sheets of 8.5" by 11" paper.
It's now time, for Scotch Tape.
Re: Coronado 15 project.
Posted: Fri Sep 07, 2012 9:18 pm
by TampaBay
Templates taped up, and cut out.
Why are two templates needed, if they are identical?

Re: Coronado 15 project.
Posted: Sun Sep 16, 2012 7:02 pm
by TampaBay
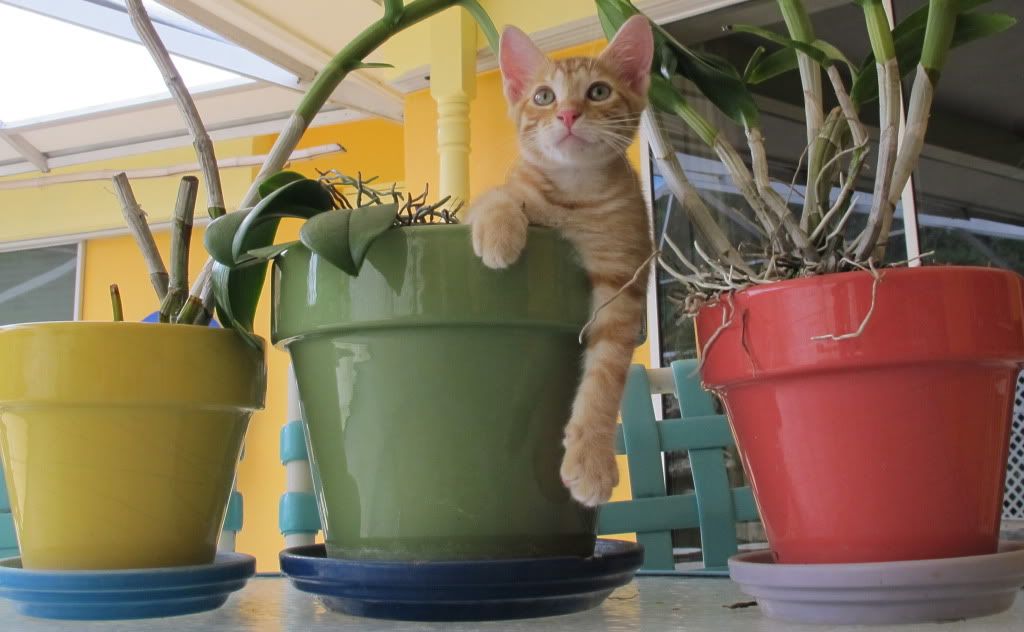
We have a new helper around here.

Re: Coronado 15 project.
Posted: Thu Sep 20, 2012 5:12 pm
by TampaBay
Today work resumes: Time to get new bulkheads (chain plates,) installed. This hull has been under a tarp, while I was working on the teak; so, I rolled it out, and used compressed air to blast away the pine needles. I'm not sure, if I want it on the ground, or on the trailer.
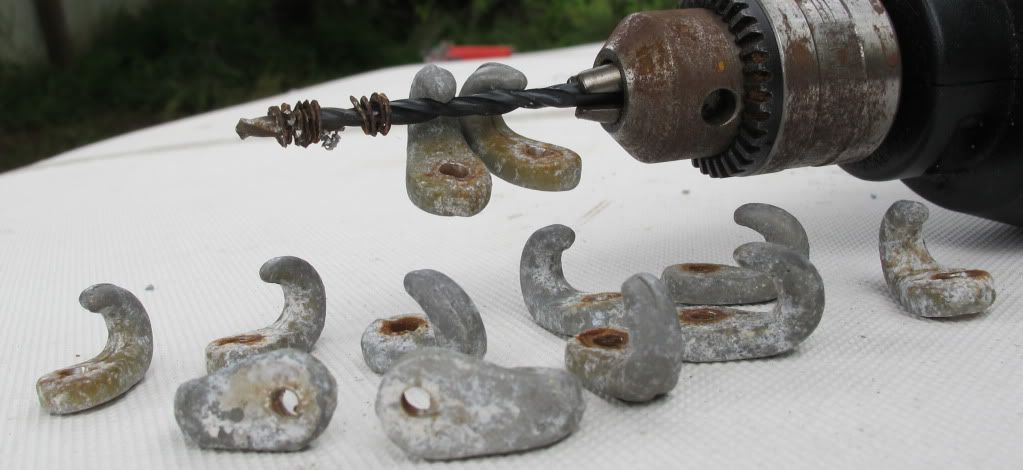
 Side tracked: This is, as good a time as any, to get rid of the canvas hooks (visible in image above.) Fourteen in all, riveted through the hull.
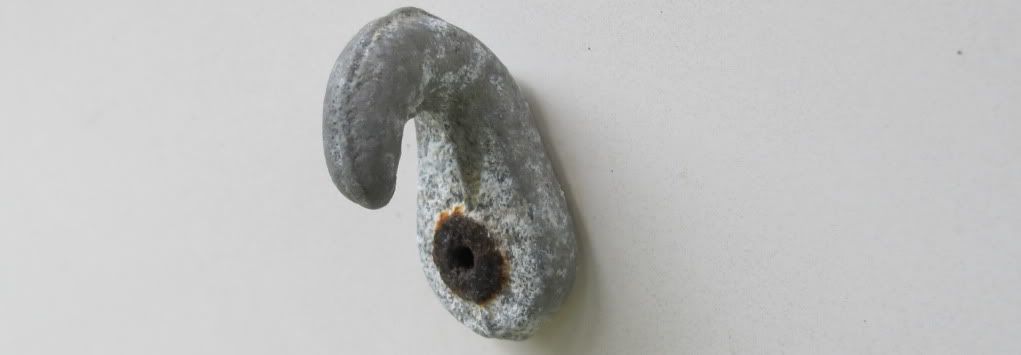 Should have done this years ago.
Re: Coronado 15 project.
Posted: Thu Sep 20, 2012 5:17 pm
by TampaBay
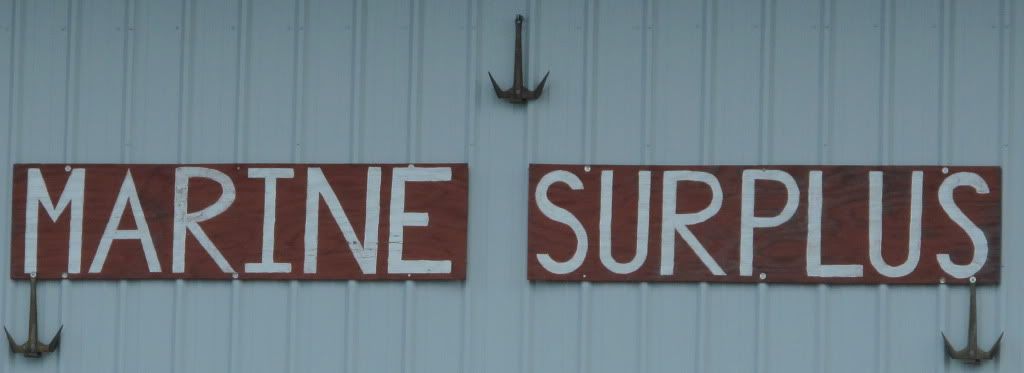
This business is just down the street. They have millions of items, discount prices, and people with expertise. http://www.marinesurplusinc.com In Sarasota, FL.
Re: Coronado 15 project.
Posted: Thu Sep 20, 2012 5:22 pm
by TampaBay
Zeke.
Re: Coronado 15 project.
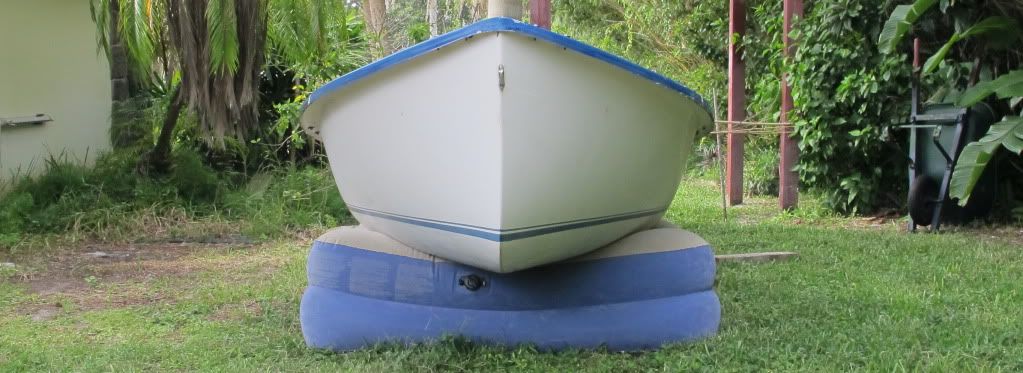
Posted: Wed Sep 26, 2012 3:50 pm
by TampaBay
For bulkhead installation, the boat was set on a queen size, inflatable mattress. This distributes pressure evenly, and will prevent the weight of my body from distorting the hull against a hard spot (like a rock in the yard.) When the bulkhead is set, that's the new shape of the hull.
 From starboard.

Re: Coronado 15 project.
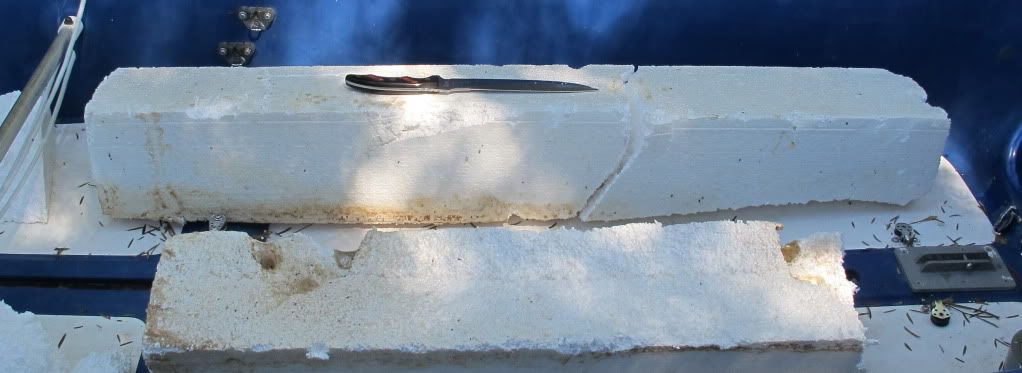
Posted: Wed Oct 03, 2012 12:03 pm
by TampaBay
This is the factory floatation; pulled from under the cockpit (starboard chunk, required breaking-up.) It was located along side of the centerboard trunk (as shown,) but I'll shift it further aft, and install a bulkhead in that position.
Re: Coronado 15 project.
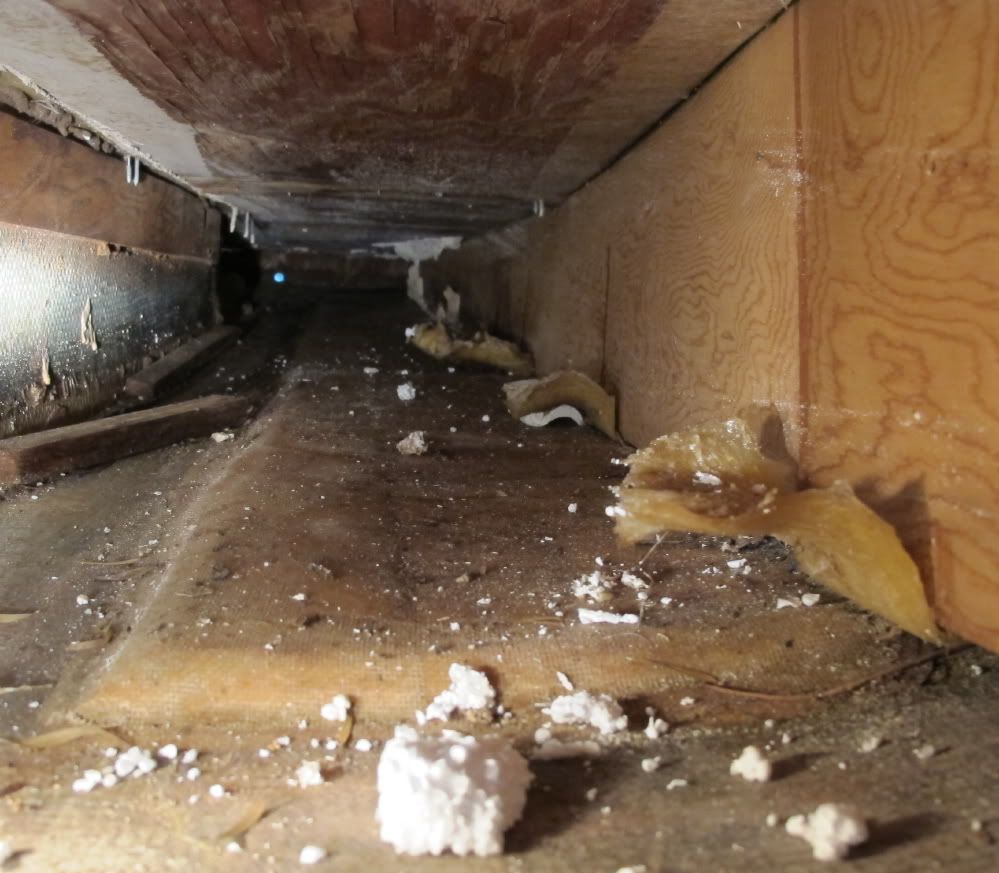
Posted: Wed Oct 03, 2012 12:13 pm
by TampaBay
An image: Under the cockpit, Looking aft. The trunk is left, and a "stringer" is right. The odd fiberglass tabs, act as feet for the stringer; also they held the floatation up, off the hull. The plan, is to add bulkheads here, strengthening the centerboard trunk, the mast step, and the hull.(A dot of light shines from the transom drain)
Re: Coronado 15 project.
Posted: Wed Oct 03, 2012 12:49 pm
by Crazer
Looking good, this is going to be the classiest, best taken care of Coronado on the water. Nice kitty too! :)
Re: Coronado 15 project.
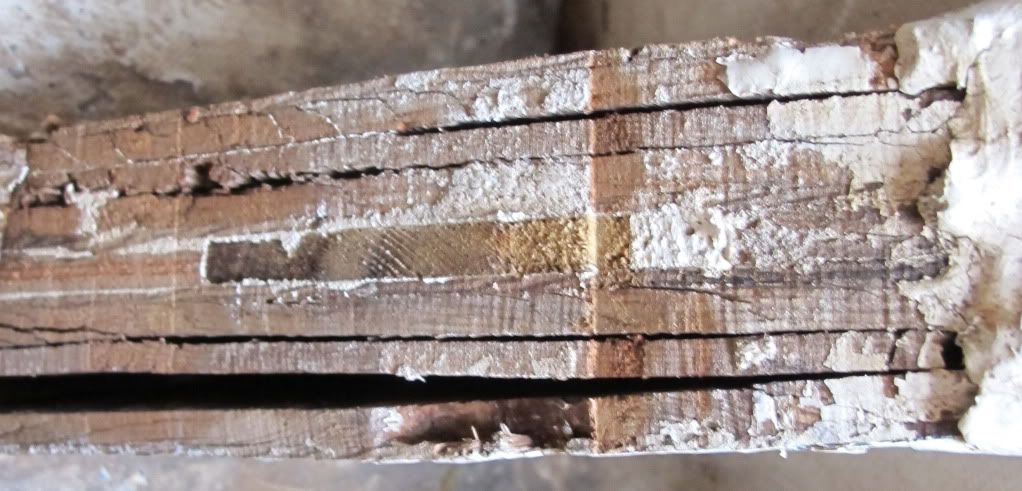
Posted: Sun Oct 07, 2012 2:56 pm
by TampaBay
Thanks Crazer. I should be sailing soon.
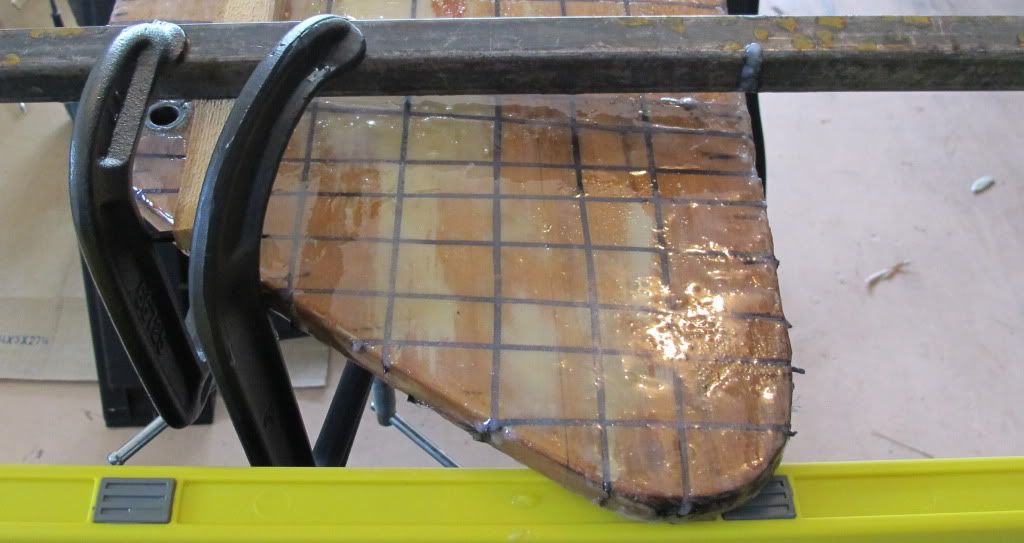
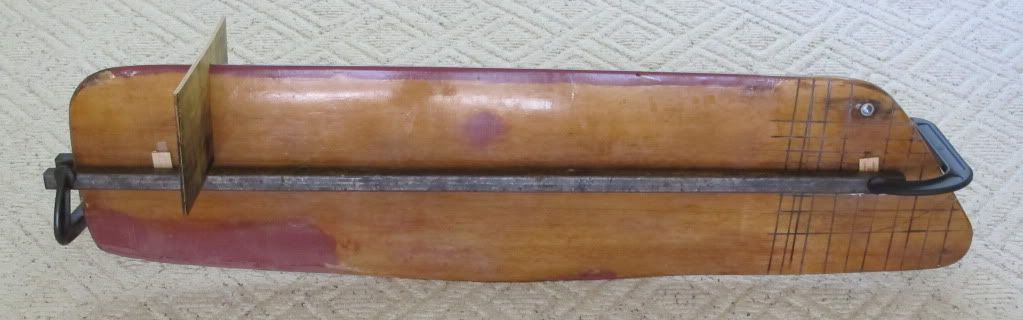
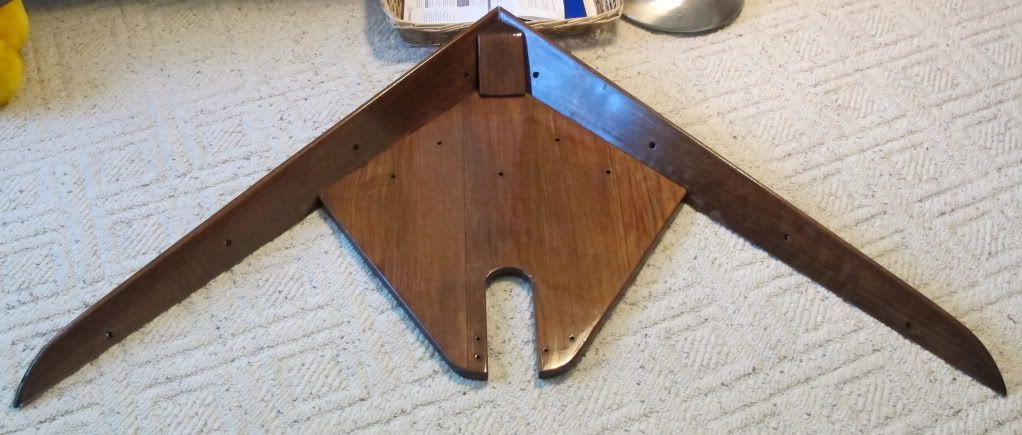
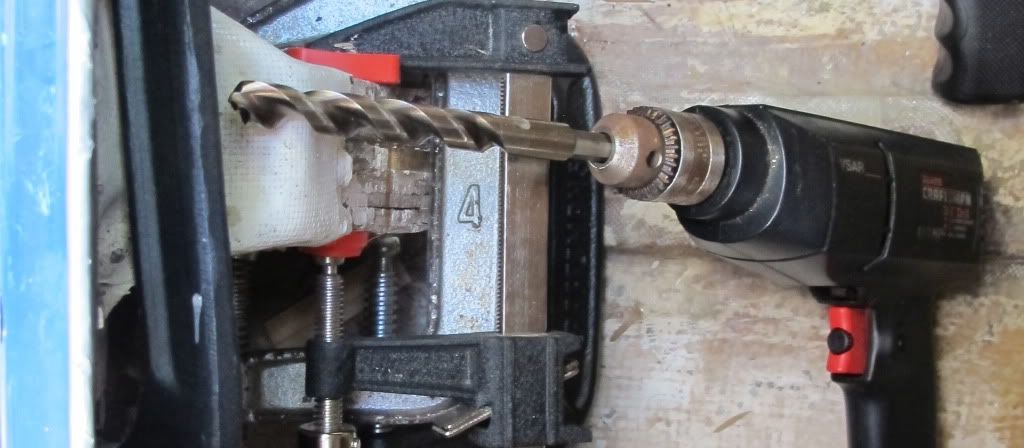
Reinforce the mast-step: These laminates have failed (Image on it's side.)
 With a 1/2" bit, and 4 clamps, the project begins. Mast step on the left. (Image is on it's side.)
Re: Coronado 15 project.
Posted: Sun Oct 07, 2012 7:55 pm
by TampaBay
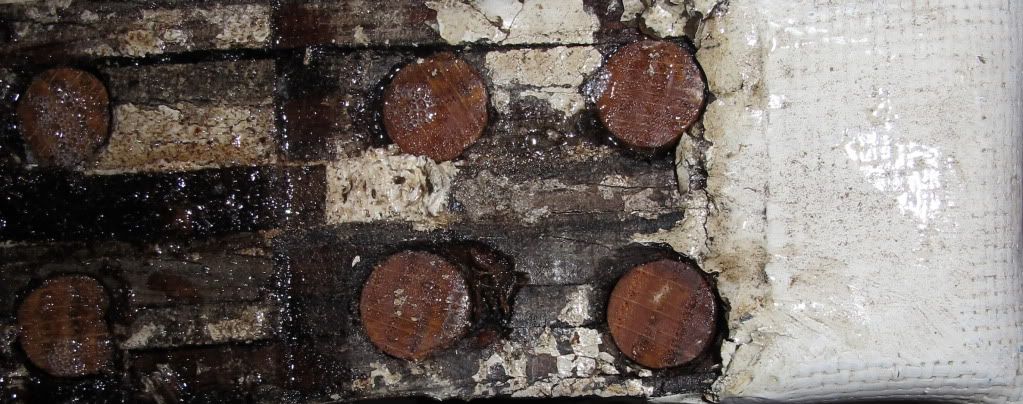
Six pegs epoxied into place: These are 1/2" hardwood dowels. I scuffed them with 80 grit, filled the holes with epoxy and hammered them home. Four more should do it.
Re: Coronado 15 project.
Posted: Mon Oct 08, 2012 3:36 pm
by TampaBay
The light bulb clicks on: I started work on the boat this morning and made 7 or 8 trips from the back-yard to the garage (before anything got done.) And so, I moved the boat to the garage; should have done that long ago.

Re: Coronado 15 project.
Posted: Wed Oct 10, 2012 10:52 am
by TampaBay
Mast step reinforced: The better course, might have been to replace this part, anew. However this does it for now (it worked before I "fixed" it.)
Pegs installed sideways? Crossing that bridge further down the road.
Re: Coronado 15 project.
Posted: Fri Oct 12, 2012 12:06 pm
by TampaBay
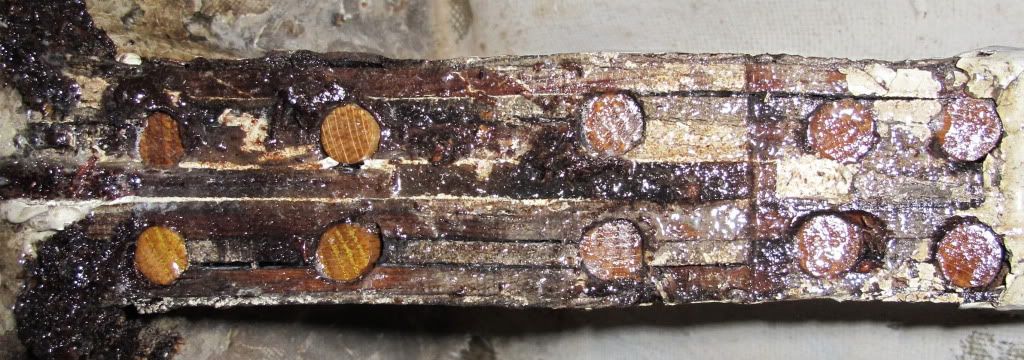
I did install four pegs, into the lower aft side. That image went missing.
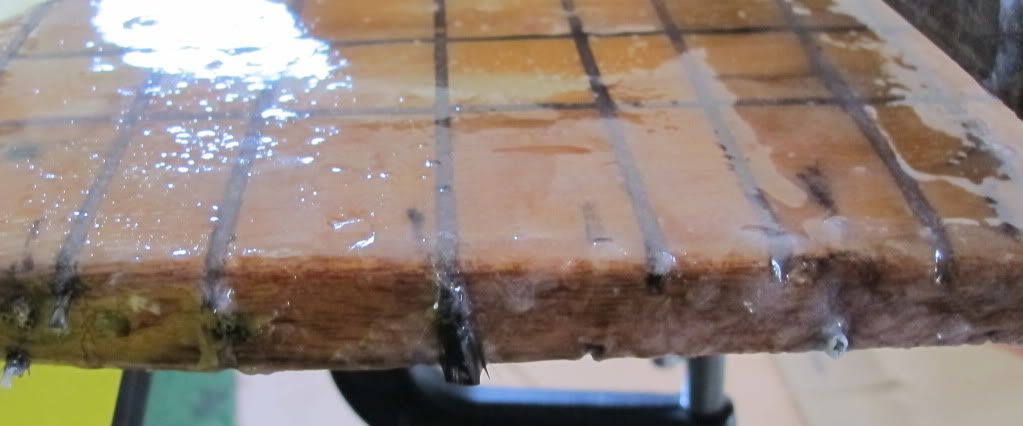
The front of the step: Cleaned up with a grinder, and filled with epoxy and microfibers. Next, I'm adding 1/2" ply to both sides.
Re: Coronado 15 project.
Posted: Fri Oct 12, 2012 5:48 pm
by TampaBay
Pegs epoxied through the sides.
Re: Coronado 15 project.
Posted: Sun Oct 14, 2012 9:55 am
by TampaBay
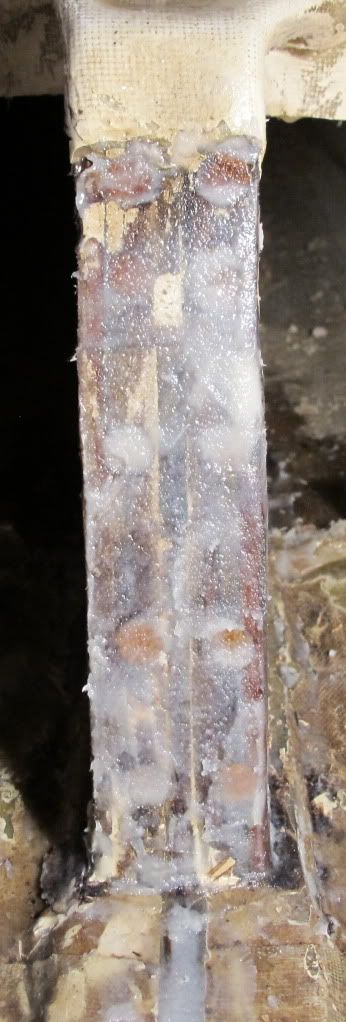
Half-inch plywood, to both faces of mast step: The new boards are saturated with epoxy, and the joining faces were covered with epoxy/microfibers. Three clamps, and 5 counter sunk screws (per side,) held the ply in place during the cure.
Re: Coronado 15 project.
Posted: Sun Oct 28, 2012 12:15 pm
by TampaBay
The masthead is off. I want to install it, so that it's water tight. Any suggestions?

Re: Coronado 15 project.
Posted: Sun Oct 28, 2012 5:57 pm
by earlylight
You could re-install the masthead with caulk (4200 or similar). You could also have the masthead welded to the extrusion.
Re: Coronado 15 project.
Posted: Sun Oct 28, 2012 5:59 pm
by earlylight
Are there any other openings that could let water in? If so you might be better off to drill a drainage hole or two at the base of the mast so it can drain.
Re: Coronado 15 project.
Posted: Sun Oct 28, 2012 7:35 pm
by TampaBay
I have 4200, but I am concerned that it's overly adhesive. This masthead should be water tight, but also removable.
Re: Coronado 15 project.
Posted: Sun Oct 28, 2012 10:28 pm
by earlylight
Then you might try poly-sulfide caulk instead.
Re: Coronado 15 project.
Posted: Sun Oct 28, 2012 10:30 pm
by earlylight
Another option might be butyl (available in tape form or caulking tubes)
Re: Coronado 15 project.
Posted: Wed Oct 31, 2012 10:42 pm
by TampaBay
Happy Halloween.


Re: Coronado 15 project.
Posted: Fri Nov 16, 2012 8:39 pm
by TampaBay
The last 52mls of hardener.
 This guy stopped buy for a visit. Anyone recognize him?

Re: Coronado 15 project.
Posted: Fri Nov 16, 2012 9:11 pm
by earlylight
If I'm not mistaken that is am Eastern Corn Snake which is non-venomous.
http://www.flmnh.ufl.edu/herpetology/fl ... ttatus.htm
Re: Coronado 15 project.
Posted: Wed Nov 21, 2012 11:53 am
by TampaBay
New jib halyard. I bought this line at West marine, to use as a sheet, but the jib halyard was in far worse shape. The old line went straight into the garbage can.

