Page 1 of 8
Coronado 15 project.
Posted: Sun Jan 10, 2010 3:27 pm
by TampaBay
.
Re: Coronado 15 project.
Posted: Mon Jan 11, 2010 9:21 pm
by TampaBay
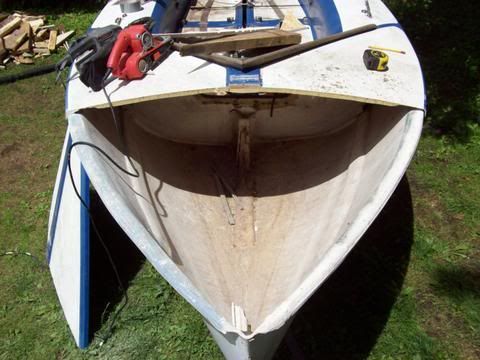
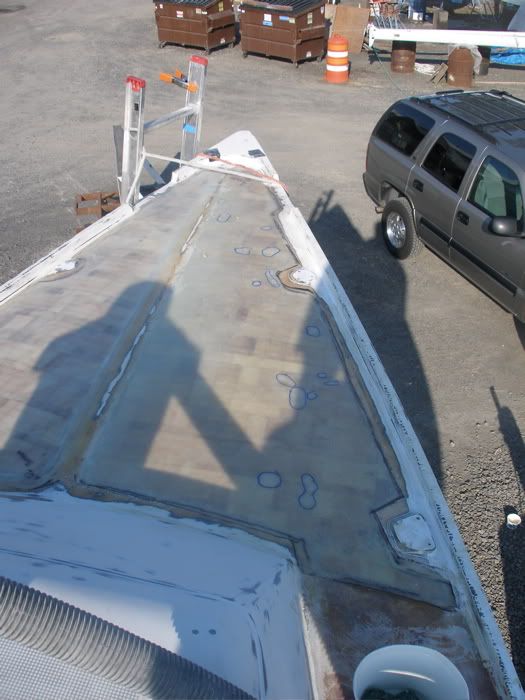
She has a small forward hatch. Some owners are climbing into this tiny port (partially visible) and rebuilding.
It would have been impossible (for me), working through that hatch, so I grabbed a good looking circular saw and took the deck off.
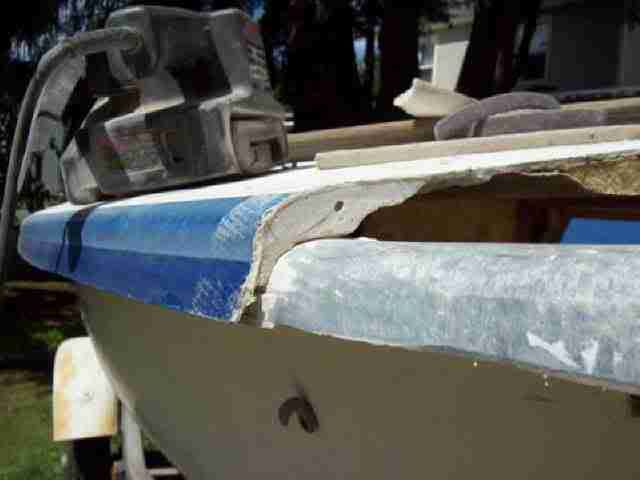
 The new 3/4" thick bulkhead was fit under the cut, made in the deck (and where the shadow meets the hull.) Another 3/4" strip of wood was epoxied and screwed, to front of the new bulkhead; This 1 and 1/2" top, supports the deck, forward and aft, of the new seam.
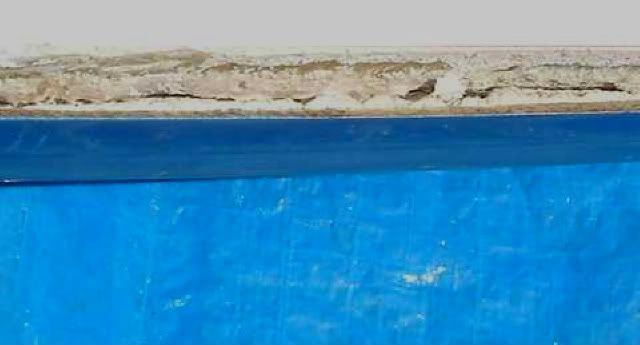
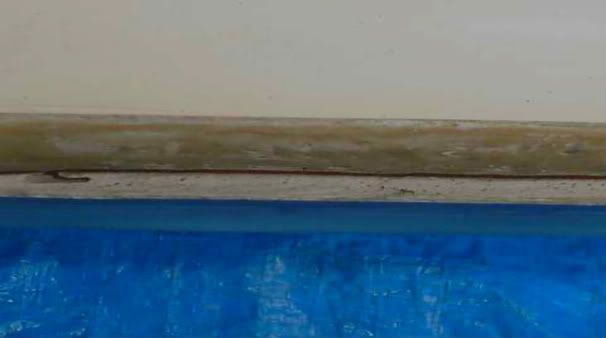
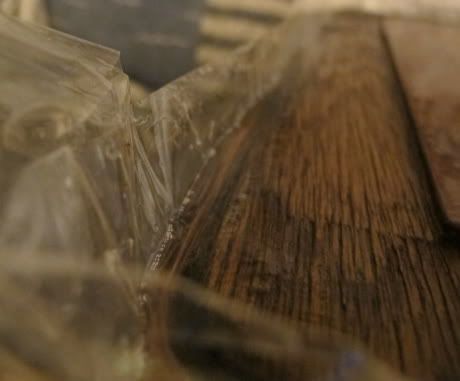
 This is a view of how the hull to deck joint was constructed. The sealant is very stiff and chalky; it appears to be mixed with saw dust. To the right, the foam core is visible. A good portion of the core was dug out, and replaced with thickened epoxy.
Re: Coronado 15 project.
Posted: Sat Jun 04, 2011 10:17 pm
by TampaBay
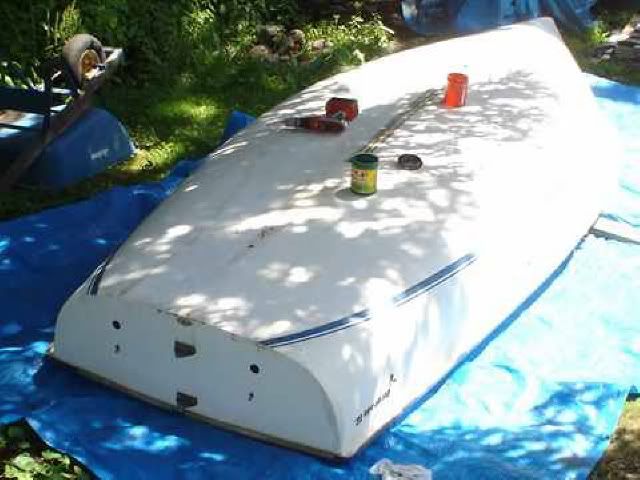
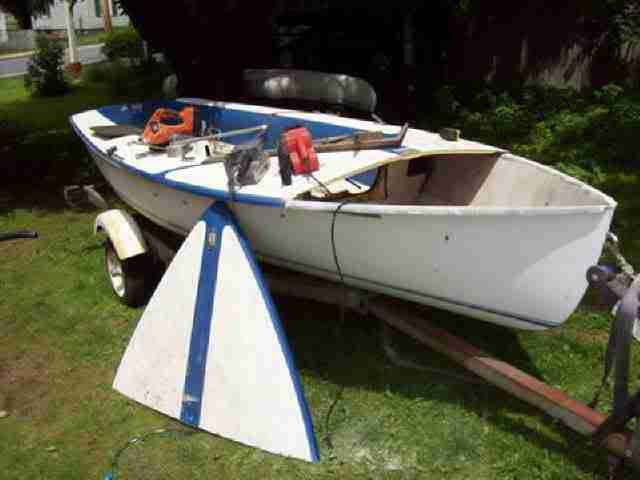
The project today was fixing a flat tire on the trailer: See the can in lower left of image?

Re: Coronado 15 project.
Posted: Sat Jun 04, 2011 11:24 pm
by radicalcy
Looks good. Good photos.
My biggest issue at this point is finding affordable sails and fairing and painting the whole thing. I found a rudder and tiller that fits, but has yet to be tested, and I need to reattach the keel trunk to the cockpit floor. I probably won't have time this season, but maybe next year.
Still have two Hobies and a British Dart, oh, and my three Columbias to finish. Can you spell "hoarder"?
Re: Coronado 15 project.
Posted: Sun Jun 05, 2011 12:58 pm
by TampaBay
Do you keep all those boats in your yard? I would like to see a picture of the fleet.
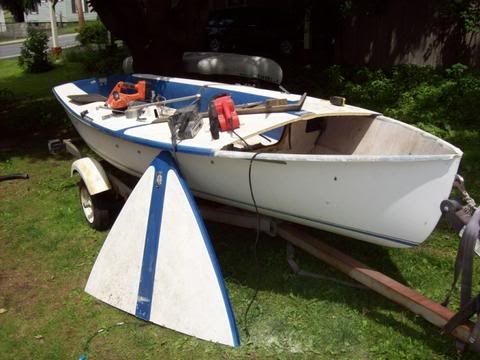
These are views from inside the bow (starboard and port). This is the first, that I have seen the boat like this (new camera.)
If the fiberglass work looks bad, It's because that's an area impossible for a Human to reach (aft side, bottom of deck.) The hull to bulkhead joint is very solid; West System epoxy and filler to bed the bulkhead and make a fillet, then two layers of 6" (or 8" can't remember) tape; both forward and aft sides.
The new hull to deck seam looks good, plenty of 5200. The stringers were reinforced at their forward ends (and under the bulkhead,) and the back of the bow eye
(reconditioned in a friend's shop) can be seen, with its new hardwood backing, and its bed of 5200.
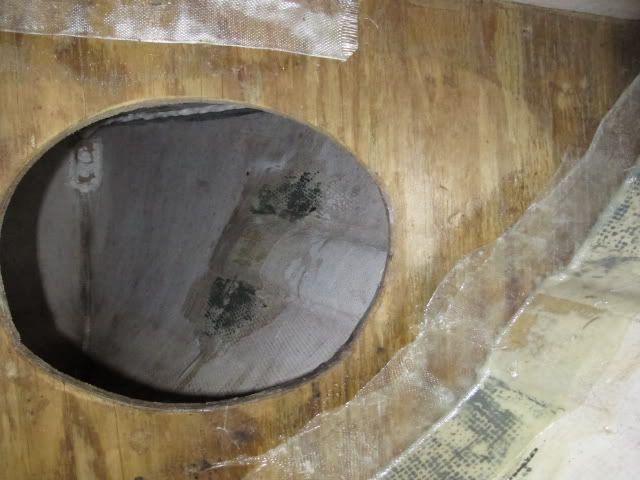
The port side shows the same, but with two aluminum paddles. To save weight, the round holes were traced using the bottom of a drywall compound bucket, and cut out with a dull jigsaw (looks pretty rough, I know.) Believe me, the glass work on other side of bulkhead is much nicer.

Re: Coronado 15 project.
Posted: Sun Jun 05, 2011 1:08 pm
by radicalcy
I'll have to find the file or take new pictures, but I'll do that and post them here.
Re: Coronado 15 project.
Posted: Sun Jun 05, 2011 4:28 pm
by ILikeRust
TampaBay wrote:If there is a better way to get good image posted, please let me know.
Yes - rather than uploading them directly to the thread here, upload the pics to a free photo hosting site - I use Photobucket - then use the "IMG" tags to link to the photo, and it will show up in the thread here. In Photobucket (or whatever hosting site you choose), you can crop and resize the photo as desired.
Re: Coronado 15 project.
Posted: Sun Jun 05, 2011 6:45 pm
by TampaBay
Thanks, I just joined Photobucket, and edited the thread with improved images; also with an upgrade to grammar, and capitalization.
Re: Coronado 15 project.
Posted: Sun Jun 05, 2011 6:58 pm
by ILikeRust
OK, now you need to resize the photos in Photobucket to make them a little smaller. Make them no bigger than 640 x 480 as a good rule of thumb.
Re: Coronado 15 project.
Posted: Sun Jun 05, 2011 8:35 pm
by TampaBay
Got that project started already. I re-sized one image, then cut away to get some work down around the house.
Re: Coronado 15 project.
Posted: Sun Jun 05, 2011 9:02 pm
by ILikeRust
What? House projects versus Plastic Classics forum? Priorities, man!
Re: Coronado 15 project.
Posted: Tue Jun 07, 2011 9:44 am
by TampaBay
Re: Coronado 15 project.
Posted: Wed Jun 08, 2011 5:43 pm
by Zach
An idea for you if you want to stiffen up the foredeck and not have to do any tabbing through that wee little hole.
When you cut the deck off you can grind the old to freshen up the bonding surface, and then hot glue cardboard, hardboard, plywood, masonite... melamine (you get the idea) to the edge, cutting it so you have a 4-5 inch overlap inside the boat. I stretch packing tape over the shelf to keep the epoxy from sticking. Now you lay your tabbing against the shelf or flange, whatever you want to call it... and wait for it to kick.
This is the same way an inward turning deck flange on some hulls was molded, while the boat was still in the mold. An aluminum shelf was bolted down to the sheer, the hull laid up to the flange and the shelf removed when it gelled.
When it kicks, pop off what will and grind off the rest of your shelf. Now you have a flange, on which to glue the new deck. Either 5200 or thickened epoxy on both the shelf and the deck and plop the two down together.
It certainly makes life a little easier when you are assembling pieces that are apart rather than working with pre-existing tight spaces!
Zach
Re: Coronado 15 project.
Posted: Sun Jun 12, 2011 4:09 pm
by TampaBay
Re: Coronado 15 project.
Posted: Sun Jun 12, 2011 10:03 pm
by TampaBay
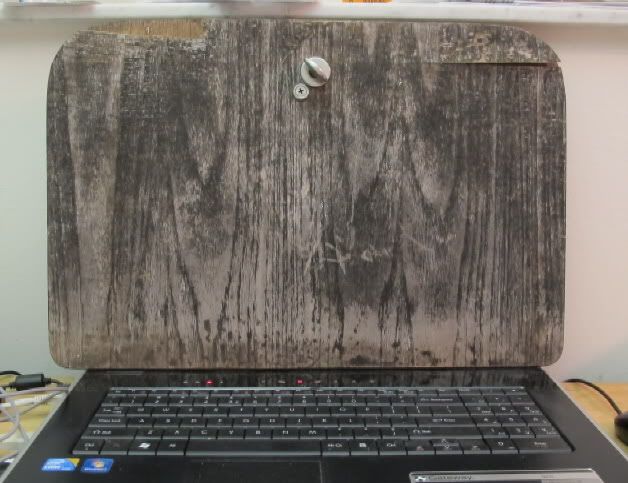
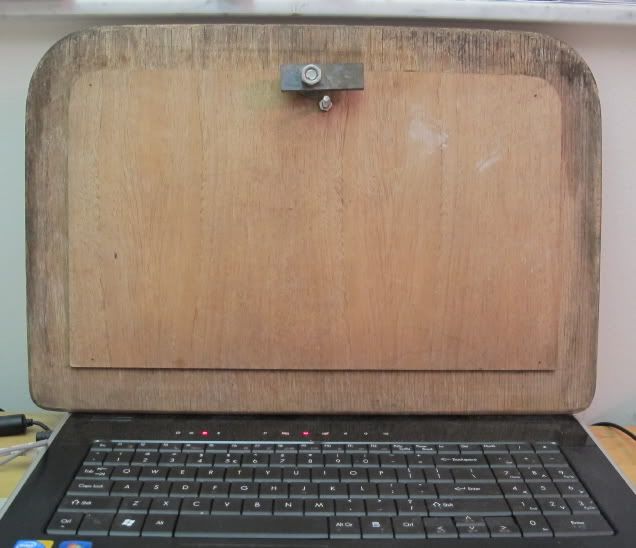
The weathered veneer parted from the hatch easily. I prepped both bonding surfaces with 40 grit, and mixed 90mls of epoxy. Both sides were coated, joined, and weighted down. When the epoxy in the mixing jar went hard, I took off the weights, and brought the project inside.
My question is: What now? Maybe it's time to buy a router.

Re: Coronado 15 project.
Posted: Sun Jun 12, 2011 10:49 pm
by radicalcy
A good razor knive and a steady hand, or a Dremel with a laminate trimmer, or, as you said a router, if you think you can get your money's worth out of it. I have two router tables and an extra plunge router and generally all I manage to do is mess up lots of good lumber.
I had a laminate trimmer that I bought on ebay for 20 bucks. Lasted 3 or 4 years and was for sure a great investment.
Re: Coronado 15 project.
Posted: Sun Jun 12, 2011 10:54 pm
by ILikeRust
Cut it oversize using a hand saw or jigsaw, use a belt sander, or a rasp and then files, or a block plane, and then sand paper, to smooth it down to the profile.
Re: Coronado 15 project.
Posted: Mon Jun 13, 2011 8:14 am
by Hirilondë
Routers are great. They can do some amazing things in short periods of time. One of them is add to your scrap pile.
ILikeRust wrote:Cut it oversize using a hand saw or jigsaw, use a belt sander, or a rasp and then files, or a block plane, and then sand paper, to smooth it down to the profile.
Variations of this idea work too. No need to invest in equipment you may have little use for, much more forgiving of slips, but it does take longer. Probably my most used technique in boat woodworking is the following process:
Make the piece knowingly too big.
Prove I made it too big.
Decide where I will remove some material to make it the right size and fit.
Remove less than I think I need to.
Prove I removed less than I needed to.
Decide where I will remove some more material to make it the right size and fit.
Rinse,
Repeat.
Etc..
With projects that take a lot of labor each step makes the piece you are working on more and more expensive. Therefor with each step more and more care in not making mistakes becomes justified. One - off work simply takes a lot of time to do well.
Re: Coronado 15 project.
Posted: Mon Jun 13, 2011 7:57 pm
by Drew
One - off work simply takes a lot of time to do well.
Well said.
drew
Re: Coronado 15 project.
Posted: Mon Jun 13, 2011 9:27 pm
by TampaBay
Thanks for the input.
Hello Hirilondë,
I did some sailing on a Pearson Renegade out of RI. I think her name was Sapience; ever see her around?
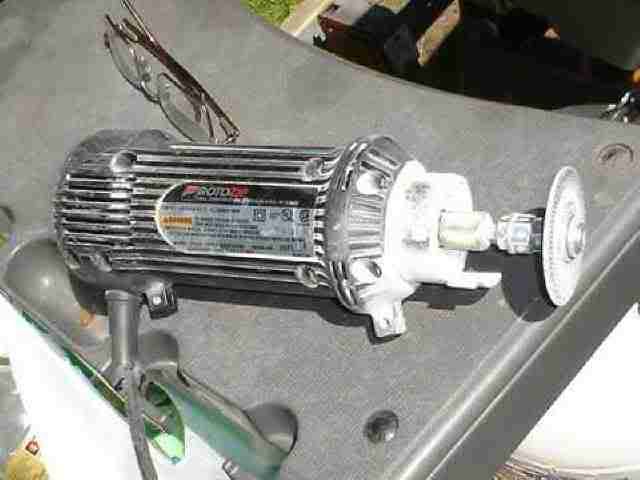
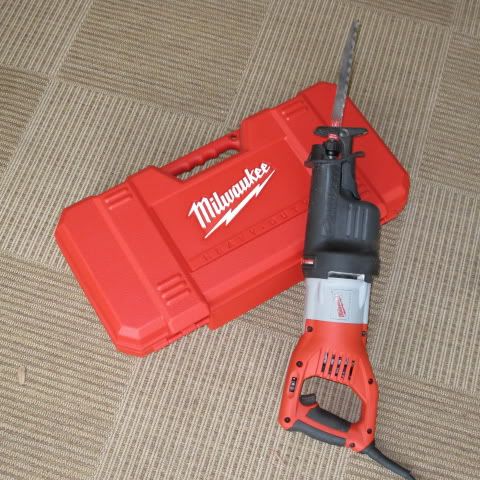
Tonight, I used this new saw, to rough that part out. If this thing was bolted into a work table, it might be half useful.
Re: Coronado 15 project.
Posted: Mon Jun 13, 2011 10:06 pm
by ILikeRust
I find my reciprocating saw to be indispensible. I've had it for probably close to 15 years, and I've had several projects I couldn't have done without it.
But it's the wrong tool for the job you depicted. It's a demolition tool, mostly. Very useful for cutting pipe and angle iron to length using hacksaw blades, and excellent at tearing out walls - put in one of the big ripper blades and hack 2x4s in half with impunity - particularly if you use a "nail eater" blade.
It's not a woodworking tool, though.
And the secret to keeping things from jumping around is to firmly press the "shoe" against the piece being cut so that the tool stays still while the blade reciprocates. If you don't apply sufficient force to firmly hold it in place, it will kick and buck.
I would have used a jig saw, or just a hand saw, if I didn't have a router with a bearing-guided bit (which I do, so I would have used that, actually).
Re: Coronado 15 project.
Posted: Tue Jun 14, 2011 7:34 am
by Hirilondë
TampaBay wrote:
Hello Hirilondë,
I did some sailing on a Pearson Renegade out of RI. I think her name was Sapience; ever see her around?
I used to keep Hirilondë in Stonington CT. During that time I did a cruise that included Narragansett Bay. I saw a Renegade in Wickford. I later moved my boat to Wickford but never saw that Renegade again. According to the
Renegade Site there is an unknown name Renegade in Wickford, but no record of Sapience by name. As this page is a voluntary project maintained by our very own Cesar Choppy and registration on it is voluntary it is not conclusive, although very helpful.
So I guess the simple answer is "maybe". It is fun to hear about other boats and the people who have owned and sailed on them.
Re: Coronado 15 project.
Posted: Tue Jun 14, 2011 11:03 am
by TampaBay
The Saws-All was a bit much for the job, a little dangerous too. Currently, I am working with a razor, and a file
Hirilondë, One weekend, I helped a friend move Sapience from Mattapoisett, MA to a mooring in Thompson Cove, RI. It was a great sail, with a brief stop at Great Salt Pond. If I had to guess how long ago that was,,,,I would say 12 years ago.
Re: Coronado 15 project.
Posted: Tue Jun 14, 2011 11:37 am
by TampaBay
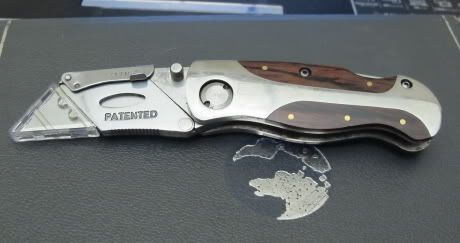
Here is a look at what just happened to my "heavy duty" razor blade. To be fair, I have been leaning into it.

Re: Coronado 15 project.
Posted: Tue Jun 14, 2011 11:38 am
by ILikeRust
Re: Coronado 15 project.
Posted: Tue Jun 14, 2011 11:40 am
by ILikeRust
I have probably 10 utility knives, if not more. I keep them everywhere, so I never have to hunt too much to find one. I also keep a couple of those 100-blade packs about so I never run out of new blades - they actually wear out pretty quickly when you're using them aggressively.
And I have managed to snap them, so be careful of that and wear safety glasses. When they snap, the fragments will shoot off at a pretty good velocity.
Re: Coronado 15 project.
Posted: Wed Jun 15, 2011 10:26 pm
by TampaBay
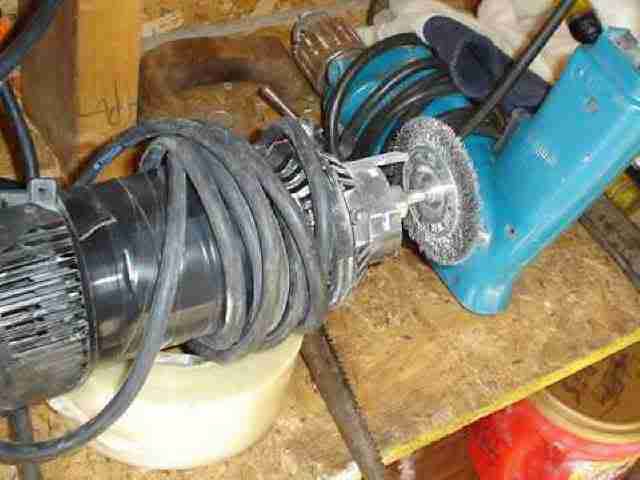
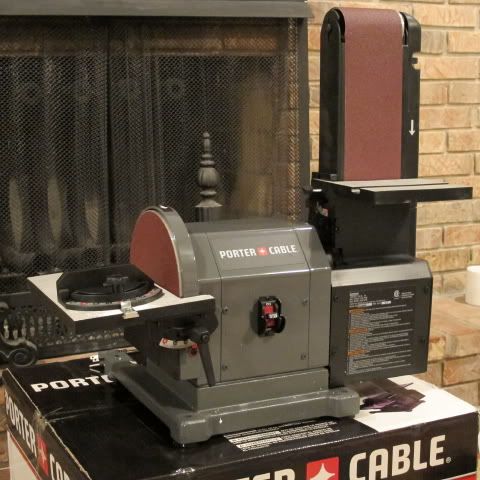
Ultimately, The hatch will be sanded into shape with this. I went shopping for a belt sander, but decided on this instead.
Re: Coronado 15 project.
Posted: Wed Jun 15, 2011 10:42 pm
by ILikeRust
You will find it quite useful.
A couple years ago, I needed a sanding machine on short notice, so despite my aversion to modern shiny plastic and aluminum tools, I ran out and bought the Ridgid oscillating benchtop spindle/belt sander. It's actually a pretty darn good little machine, and I've used it for lots of different tasks - metal, wood and fiberglass.
Re: Coronado 15 project.
Posted: Sat Jun 18, 2011 9:08 pm
by TampaBay
I picked up a utility knife at K-mart today. It looks, and feels very strong; time will tell. I have been using those older style "sheet rock knives" for long enough to know, that there must be something better.
This was only $15.

Re: Coronado 15 project.
Posted: Sun Jun 19, 2011 10:13 am
by earlylight
That's an impressive knife for the price. I just added it to my shopping list. Thanks for the tip.
Re: Coronado 15 project.
Posted: Sun Jun 19, 2011 12:53 pm
by TampaBay
I set up shop in the side yard; just managed to find a flat area, with a little shade. All work was done with the belt, and 40 grit paper. This part of the project was an absolute breeze. The sander is quite, powerful, and easy to work with.

The new laminate was sanded until the belt just kissed the old material. This beveled edge was easy to make; the shape matches that of the original laminate. The chips and voids in the old material will be filled with epoxy (and wouldn't graphite be cool around the edges.)
In this image, it's clear were some epoxy found a path onto the wrong side. I don't want to finish the front in epoxy, because of the eventual sun damage. Anyone know if these epoxy spots will disappear behind a clear coat of varnish?

Re: Coronado 15 project.
Posted: Sun Jun 19, 2011 3:15 pm
by Hirilondë
TampaBay wrote:
In this image, it's clear were some epoxy found a path onto the wrong side. I don't want to finish the front in epoxy, because of the eventual sun damage. Anyone know if these epoxy spots will disappear behind a clear coat of varnish?
Why no epoxy on the finished side? Actually, any plywood used exterior and finished bright that I work with is expoxied first on all surfaces. Not solid woods, just plywood. I use 3 coats timed out to allow hot recoat. Then allowed to cure completely and blush removed Then sanded smooth and varnished over to protect against UV.
edit:
But to address your original question it will mostly disappear but being that epoxy and varnish are different materials the wood behind them will always be slightly different in color. This is not why I recommend epoxy first, but would be another advantage of using it for the entire surface.
Re: Coronado 15 project.
Posted: Tue Jun 21, 2011 12:49 pm
by TampaBay
Thanks Hirilondë,
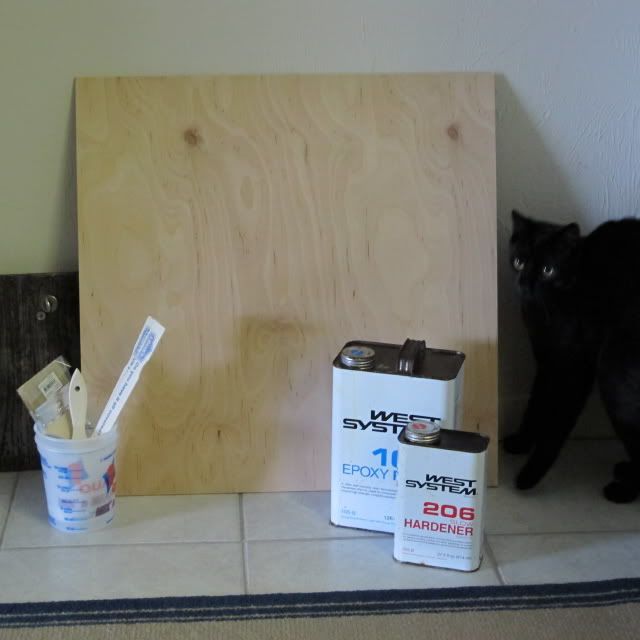
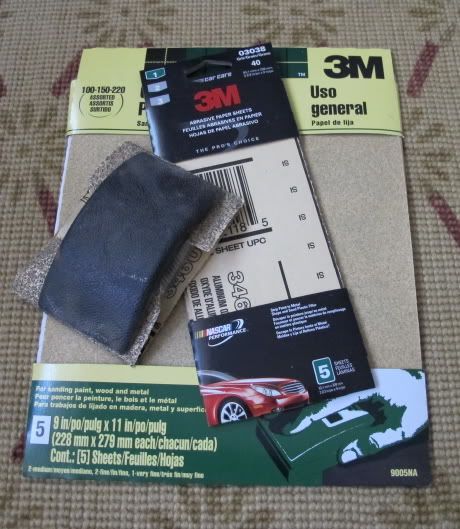
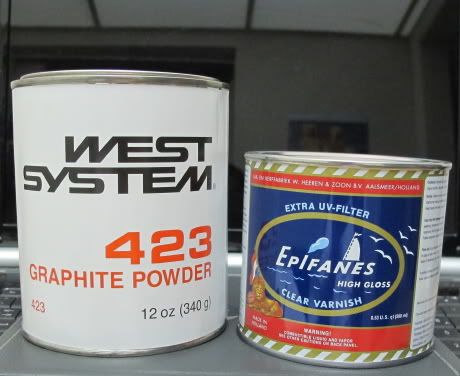
That is good advice: After some finale sanding, the hatch will get a coat of epoxy, then varnish. There is a 16oz can of West System graphite additive on order; due in town by Thursday. Today, I gathered together some of the things needed, for the next step.
Re: Coronado 15 project.
Posted: Wed Jun 22, 2011 9:06 pm
by TampaBay
And the progress continues: After a fair amount of sanding, I mixed up a small batch of epoxy (90mls) and covered the back of the hatch.
Here you can see, that I used plastic tape around the edge, to build a retaining wall for the liquid epoxy. The excess will grind off easily.
Re: Coronado 15 project.
Posted: Thu Jun 23, 2011 10:08 pm
by TampaBay
Tonight, I had some free time, so I put together a small batch of epoxy (30mls.) This is the smallest batch I've mixed, but with some practice, a 15ml batch should be no problem.
Here is the front of the hatch; 30mls of epoxy, tipped off with a paint brush. This photo is from inside, looking out the glass door (very hot and humid out there.)

Re: Coronado 15 project.
Posted: Fri Jun 24, 2011 8:11 am
by TampaBay
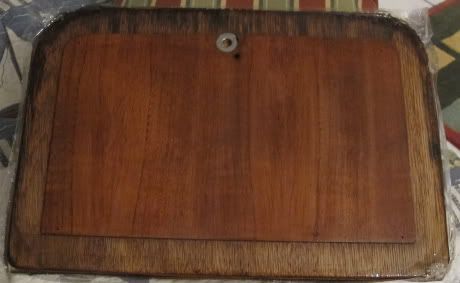
Here is a look at the Birch, with one coat of epoxy.
How do I apply epoxy, and avoid these trapped air bubbles?

Re: Coronado 15 project.
Posted: Fri Jun 24, 2011 8:17 am
by ILikeRust
Are those air bubbles, or dust particles?
Re: Coronado 15 project.
Posted: Fri Jun 24, 2011 8:25 am
by Hirilondë
TampaBay wrote:Here is a look at the Birch, with one coat of epoxy.
How do I apply epoxy, and avoid these trapped air bubbles?
There is air trapped in the outer layers of the wood. As the epoxy warms during curing it heats the wood which heats this air and it expands and gasses off through the epoxy. The most you can do to reduce this is to warm the wood in the sun or such prior to applying the epoxy and actually apply the epoxy in the late afternoon when the temperature is starting to drop. In this way the wood is not getting warmer as the epoxy cures, it might even be cooling some. This is not an exact science, but it helps a lot.
Re: Coronado 15 project.
Posted: Fri Jun 24, 2011 9:06 am
by ILikeRust
Also, perhaps applying a thinned coat of epoxy first would help minimize this, by being thin enough to allow any trapped bubbles to escape all the way out, and then after curing, it would seal the wood surface and prevent any more air bubbles from coming out? Give it a light sanding and cleaning, and then apply a layer of straight epoxy...
Re: Coronado 15 project.
Posted: Fri Jun 24, 2011 9:21 am
by Rachel
I had this problem once, years ago, when varnishing. I kept thinking I had dust particles. I redoubled my efforts to ensure a clean varnish room, but they persisted. Coat after coat... specks!
Finally I found reference to the fact that wood which was warming up as the varnish was drying could "outgas" and cause bubbles (this was before the existence of the forum, or I would have figured it out a lot more quickly when Hirilonde would have answered my query :).
So on my next coat I made sure the room/wood was cooling down as the varnish dried. That was the end of the bubbles. My trim sure did look nice with 14 coats of varnish on it though (how long it took to figure out what was going on!).
Based on that experience, I wouldn't have a lot of confidence in a "sealer" coat immunizing from the problem, and I would try to make sure the wood was cooling as the epoxy was curing for each coat (although maybe epoxy would behave differently).
Re: Coronado 15 project.
Posted: Fri Jun 24, 2011 10:21 am
by Hirilondë
ILikeRust wrote:Also, perhaps applying a thinned coat of epoxy first would help minimize this, by being thin enough to allow any trapped bubbles to escape all the way out, and then after curing, it would seal the wood surface and prevent any more air bubbles from coming out? .
Epoxy is a chemical curing process and the 2 parts are formulated by chemists. Any thinning you do compromises the product. I suggest that no one ever thin epoxy.
http://www.epoxyworks.com/indexprojects.html (click on "Epoxy Techniques & Materials", the scroll down to thinning)
Re: Coronado 15 project.
Posted: Fri Jun 24, 2011 12:12 pm
by TampaBay
edited
Re: Coronado 15 project.
Posted: Fri Jun 24, 2011 12:52 pm
by TampaBay
Thanks for that link.
With a couple pieces of scrap, I will repeat the previous project. This time, using two different methods. At this point, it looks like temperature was the cause of the bubbles, but there were bubbles in the epoxy as a result of mixing.
This is 5mm ply, with a Birch face; the surface was sanded, same as the hatch.
The Recreation board, I will prepare as before. The New Method Board will be warmed, coated with epoxy, and cooled.

Re: Coronado 15 project.
Posted: Fri Jun 24, 2011 3:22 pm
by Rachel
On the "recreation" one, in addition to prepping it as before, I would try to emulate the temperature swing. i.e. if the wood was warming as the epoxy cured (this would be my guess but you probably know for sure), then make sure this happens again.
I mention it because that sort of thing might not fall into the "prep" category so it might be missed.
Re: Coronado 15 project.
Posted: Sat Jun 25, 2011 1:54 am
by bigd14
I had a terrible experience with bubbles. Only solved by working in the evening when the sun was off the boat and temps cooling. what i should have done is put another sealer coat of epoxy on, then sanded it flat and applied the fiberglass. Next boat...
I built a stitch and glue sea kayak some years ago in cool weather (had to heat the garage in fact to get it to cure), and never had any issues with bubbles. There were plenty of bubbles in the mixed epoxy, but they disappeard once I rolled it on. The bubbles are definitely temperature related.
Bubbles outlined in sharpie day after installation. They all had to be ground out and patched. Ick.
Doug
Re: Coronado 15 project.
Posted: Sat Jun 25, 2011 3:01 pm
by TampaBay
The New Method looks like this.
First: Put board in air tight bag, and lay it in the Florida sun.

Second: Take bag of ice and place on counter top.

Third: Stack onto ice bag, a large cast iron pan (cooled for 1/2 day in freezer,) and add one warm board, coated with epoxy.

Re: Coronado 15 project.
Posted: Sat Jun 25, 2011 6:24 pm
by TampaBay
And, the results are in.
Fourth step: The ice cold pan slowly fills with water, a result of condensing humidity, and the water saturates the board.

I guess it's true what Hirilondë said, "this is not an exact science." For what it is worth (unexpected results and all,) there are much fewer air bubbles compared to the first try. One tiny bubble, that is barely visible, at about 2 o'clock.

This experiment is over for now. Next time, I will apply a thinner layer of epoxy for the first coat. Maybe, using a scraper, to take away the excess
Re: Coronado 15 project.
Posted: Mon Jun 27, 2011 5:54 am
by TampaBay
Well, I said that I was ending the epoxy tests, but last night, the weather was right and I was mixing epoxy anyway, so I finished the Recreation.
This board was kept in the air conditioned house (71f) and then brought out side to cure (90f.)
As you can see, many. and large, bubbles.

Re: Coronado 15 project.
Posted: Fri Jul 01, 2011 10:51 am
by TampaBay
Here are a couple of items I picked up at West Marine. The back of the hatch rides against a rubber gasket, and that is where the graphite additive will be useful.
Re: Coronado 15 project.
Posted: Sat Jul 02, 2011 1:51 pm
by TampaBay
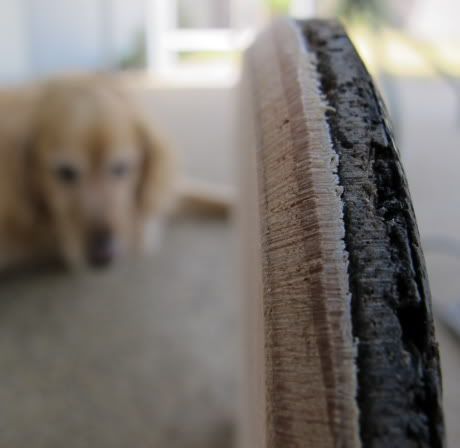
Whilst waiting for epoxy to cure, I thought it was a fine time to fix this sail. This Golden is not unhappy, his eyes may look sad, but we are on our way to the beach, right at this moment.
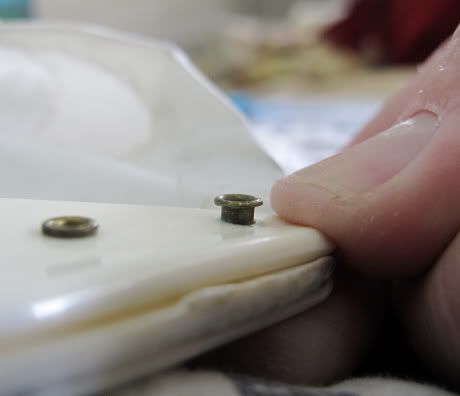
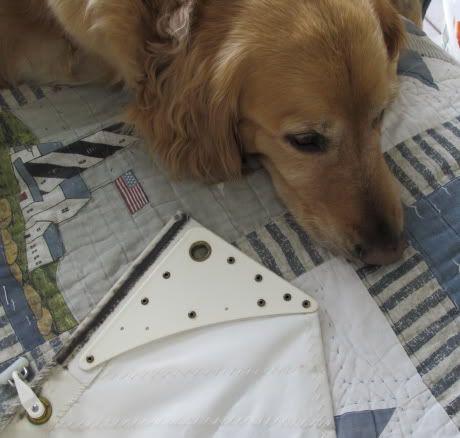 These rivets worked lose; so I went to ACE Hardware and found some s.s. bolts as replacements.