
I usually get weird looks, but if I don't suit up I have the same epoxy problem you do. Or, I'm careful through the whole project, and then in the last two minutes (like when I'm picking something up to carry it over to the Dumpster) I get some on me.
So now I just automatically suit up with Tyvek, hood at the ready but not on right away. Then put on a "base" pair of nitrile gloves which I tape to the wrist of my suit with 2" blue tape, and two more gloves over those on each hand (to peel off as necessary). Then I put on the blue shoe covers (because I often wear my everyday shoes) and tape those to the ankles of the suit. Respirator: check; Earplugs/earmuffs: check; Goggles: check. Okay, now's when I realize I forgot something and have to run get it, of course!
Sometimes when it's really hot out I'll cut off the legs of the Tyvek suit just below the knee. They're a lot cooler that way and for some reason epoxy doesn't seem quite as prone to jumping onto my ankles.
Sounds like you're making great progress on the boat and with your templating, cutting, epoxying techniques!
Rachel
Project Cal25
-
Oscar
- Candidate for Boat-Obsession Medal
- Posts: 320
- Joined: Thu Aug 16, 2007 6:54 pm
- Boat Name: Lady Kay IV
- Boat Type: 1990 Dragonfly 25
- Location: Bethlehem, PA
- Contact:
Re: Project Cal25
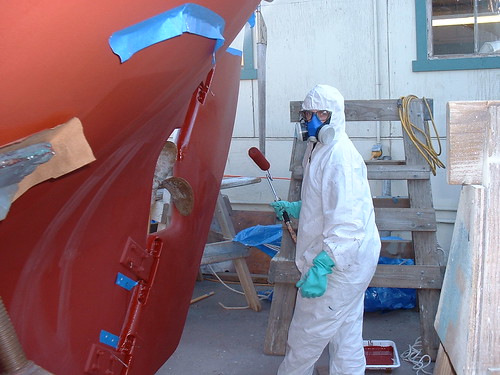
You sound like quite the appearance, Rachel. I suspect local mothers advise their children to "stay away from there!" 
Out there, alone, there is only truth.
Re: Project Cal25
What, I don't look like someone you'd trust your children to?
Re: Project Cal25
Thanks again to this forum, there is so much information shared its sometimes overwhelming.
I made a template of the next deck section to replace.

Not 100% confident of this approach I wanted to test it's fit before sanding and prepping the edges. Sure enough, it fits perfectly.
The area above the head, next to the forward hatch, is giving me some issues.

I removed the tabbing on the cabin top and tried to remove the forward panel. After cutting out a few plugs and removing the screws the panel is still in place. I think my next tactic is to leave the panel in place, remove all the tabing and then jack up the deck. Hopefully it will give me enough room to cut out the bad spots and slip in a new section. I'll wait to install the panel behind to give me extra room.
Here's another shot of the area above the head

Realizing summer is slipping by, did I mention I'd rather be sailing?, I spent ~2 hours at the boat last night. What too way too long on the port side was done in ~1.5 hours on the starboard side. No deck damage and 95% of the material is out.

I still need to clean up a few section and get out the DA, but was able to make a template for the replacement panel. I hope to get back friday and make some progress.
I made a template of the next deck section to replace.
Not 100% confident of this approach I wanted to test it's fit before sanding and prepping the edges. Sure enough, it fits perfectly.
The area above the head, next to the forward hatch, is giving me some issues.
I removed the tabbing on the cabin top and tried to remove the forward panel. After cutting out a few plugs and removing the screws the panel is still in place. I think my next tactic is to leave the panel in place, remove all the tabing and then jack up the deck. Hopefully it will give me enough room to cut out the bad spots and slip in a new section. I'll wait to install the panel behind to give me extra room.
Here's another shot of the area above the head
Realizing summer is slipping by, did I mention I'd rather be sailing?, I spent ~2 hours at the boat last night. What too way too long on the port side was done in ~1.5 hours on the starboard side. No deck damage and 95% of the material is out.
I still need to clean up a few section and get out the DA, but was able to make a template for the replacement panel. I hope to get back friday and make some progress.
Re: Project Cal25
Today I removed the lingering bits of material from the starboard side and cleaned it up in preparation for the new section of plywood. Thanks to the template the section fit like a glove.
The new section is clamped and propped in place, hopefully I'll have time to check it out tomorrow.
I realized I'm almost out of epoxy as well, joy. I think I'll stick with Raka, but now I need to figure out if I want to stick with the slow or move to fast hardener. Considering it's summer I figure slow is the way to go, especially since I am doing rather large sections of deck at a time; at least for me.
I wonder how the advertised pot life translates to workable time once thickened and spread out?
Hopefully I'll finish up the starboard side plywood this weekend, IF I have enough epoxy. On the short list of projects is to drill holes for deck hardware. I like the drill oversize, fill with epoxy and redrill approach, time to read up on the details.
-
bigd14
- Skilled Systems Installer
- Posts: 211
- Joined: Sun Jan 25, 2009 12:56 pm
- Boat Type: Ericson 27
- Location: Portland, OR
Re: Project Cal25
Use the slow hardener! I use Raka also. I mixed a small batch of neat epoxy with fast hardener in about 85 degrees, and it started smoking within about 10 minutes. But I wanted something to set quick so it all worked out. Unless the temp is below 70, I think the slow would be best, especially if you are doing something complicated and/or large.
Good luck!
Doug
Good luck!
Doug
Doug
1972 Ericson 27
1972 Ericson 27
-
Richincident
- Master Varnisher
- Posts: 114
- Joined: Sun Nov 23, 2008 5:01 pm
- Location: Hingham, MA
- Contact:
Re: Project Cal25
Reading this project is making me love my boat and RESPECT your work on the Cal 25. WOW! You have great resolve. The project is a great page turner. I hope you have someone you can at least crew with so you can get out on the water once in a while.
GREAT job and even better perseverance!
GREAT job and even better perseverance!
Richard McManus
1967 Soverel 28 #82
THE INCIDENT
1967 Soverel 28 #82
THE INCIDENT
-
Oscar
- Candidate for Boat-Obsession Medal
- Posts: 320
- Joined: Thu Aug 16, 2007 6:54 pm
- Boat Name: Lady Kay IV
- Boat Type: 1990 Dragonfly 25
- Location: Bethlehem, PA
- Contact:
Re: Project Cal25
I've been using the slow..... In this weather....70º-90º the pot starts warming in my hand in 10-15 minutes, so as much as I can process in that time is what I use as a max quantity. Once spread it takes 8-12 hours to stop being tacky. So far happy with the RAKA, and you can't beat the price.I wonder how the advertised pot life translates to workable time once thickened and spread out?
Out there, alone, there is only truth.
Re: Project Cal25
Good to know, thanks.
Today I checked on the aft starboard section and it's in there. I then made a template for the forward starboard section. Hopefully I can cut it out Sunday.
That will leave just the area around the forward hatch to replace and I need to figure out how far to take it. No time for photo's now, hopefully this makes senses. I cut out a ~4" section around the hatch as a test to make sure there was no rot. That's how I found the bad section above the head, glad I did. The next area of concern is forward of the hatch.
The wood appears to be in good shape, but it's delaminated from the deck. I cut out another ~6" forward today and it appears to be the same, wood is solid, but not adhering to the deck. Hmmm. Keep cutting out good wood, or draw the line and move one? I need to think about this.
On the short list is to make the mast support beam. Kinda funny, that's the main reason for this god forsaken job.
Thank you for the kind words. This forum has been a great help in that area, not only for the wealth of knowledge but for the support. I feel my little project is childs play compared to many on the forum, but it's still been a huge time commitment. My project doesnt require much skill, just stubbornness and persistence.GREAT job and even better perseverance!
Re: Project Cal25
I'm not saying I agree with you on the "not much skill" part, but the latter two qualities are what really count when it comes to getting projects done, methinks, and you've definitely got them :)cmartin wrote: My project doesnt require much skill, just stubbornness and persistence.
Rachel
Re: Project Cal25
The aft starboard section is in.

Epoxy oozed up through the lifeline mounting holes, hopefully this is an indication of adhesion throughout the panel.
An area of concern forward of the front hatch.

The wood seems to be in good shape, yet it's not completely stuck to the deck....
Saturday's work was subject to mother nature

This was the kind of storm that was beautiful to look at while at the dock yet would have got my heart pumping if I would on the water.
Today I cut out the forward starboard section, I love the templates. I sealed the edges with epoxy then started thinking. I wonder if it makes sense to put down a layer of cloth now, rather than wait until the panel is in place. I would still have to fill in the seems and edges and working on the bench is sure easier than overhead.
Lastly, I had a friend look at my new mast pedestal. It doesnt exactly fit inside the mast, even after a little sanding and cleanup. He has a mill that should do the trick, once I get the measurements exact. Too bad I cant take the mast and pedestal to his shop. Hmmm.....
Epoxy oozed up through the lifeline mounting holes, hopefully this is an indication of adhesion throughout the panel.
An area of concern forward of the front hatch.
The wood seems to be in good shape, yet it's not completely stuck to the deck....
Saturday's work was subject to mother nature
This was the kind of storm that was beautiful to look at while at the dock yet would have got my heart pumping if I would on the water.
Today I cut out the forward starboard section, I love the templates. I sealed the edges with epoxy then started thinking. I wonder if it makes sense to put down a layer of cloth now, rather than wait until the panel is in place. I would still have to fill in the seems and edges and working on the bench is sure easier than overhead.
Lastly, I had a friend look at my new mast pedestal. It doesnt exactly fit inside the mast, even after a little sanding and cleanup. He has a mill that should do the trick, once I get the measurements exact. Too bad I cant take the mast and pedestal to his shop. Hmmm.....
Re: Project Cal25
Over the weekend I got the last section on the starboard side installed. This is the largest piece and was a little tough to install. I used up the last drop of hardener, thankfully, and I used a lot of filler. I continued to mix small batches of epoxy, I'm still not confident mixing a large batch. The panel was just big enough to be hard to manauver inside the boat and get it in place, over the main bulkhead, without getting epoxy everywhere.

With the starboard side complete I now have several holes in the deck to fill. I plan to overdrill and fill the holes with epoxy but in the short run bedding compound should work ok.
The deck is strengthened by two magogany ( I think ) sections on the deck whick I removed to refinish.
The end is in sight! I need to finish the section above the head and in front of the forward hatch. I need to construct the mast beam then open my wallet, wide, and order new rigging.
Re: Project Cal25
Still recovering from the weekend, it was HOT!
I usually bring a few waters or tea, some G2 and maybe a beer when I work on the boat. After only ~2 hours I was out of liquid it was so hot. Maybe a blessing in disguise, I left a few tools at home sat so I trucked it back home for tools, a shower and lots of water. Did I never mention how hot it is with full face protection in 95+ in the boat? :)
I was able to get out most of the remaining bad deck material. Not sure if they just used low quality plywood or if this is just an error. Either way, knots are tough!

I cut out the tabbing above the head with the sawzall, took all of 10 seconds, then jacked up the deck with a bottle jack. Brilliant.
After removing the remaining material I made a template. At home I cut out the wood and applied a layer of glass. Doe it fit?

Not bad, all things considered. The section in front of the foreward hatch was a little tricky to install. The flat piece of plywood didnt want to bend with the deck. I cut several reliefs in the underside ~1/3 of the way through and it then bent perfectly.
It's good to see a plan come together.

Here the front hatch trim is removed, the jack is doing it's job, the panels are in place and the clamps are tight. You can never has enough clamps. Somehow, I always do.

Next big project is to make the mast beam. First I made a template. It's not exact but pretty darn close.

I plan to make the beam a little longer and then cut the ends at the correct angle.
I also measured the mast for wiring. I need to install a anchor light and need to figure out general wiring for the steaming light and antenna.
This week I hope to make the new trim for the forward hatch. I'm not a wood worker and so far it has been much more difficult than I expected. Having a table saw and knowing how to use said saw are two different concepts. I have the pieces roughly to size but need to find a way to cut them to the curve of the deck. Maybe a chisel and a few beers?
I have one panel to install and the deck will be dont for now. There is still an area in front of the forward hatch that needs new wood but it's not critical at this point. I need to get things moving.
I usually bring a few waters or tea, some G2 and maybe a beer when I work on the boat. After only ~2 hours I was out of liquid it was so hot. Maybe a blessing in disguise, I left a few tools at home sat so I trucked it back home for tools, a shower and lots of water. Did I never mention how hot it is with full face protection in 95+ in the boat? :)
I was able to get out most of the remaining bad deck material. Not sure if they just used low quality plywood or if this is just an error. Either way, knots are tough!
I cut out the tabbing above the head with the sawzall, took all of 10 seconds, then jacked up the deck with a bottle jack. Brilliant.
After removing the remaining material I made a template. At home I cut out the wood and applied a layer of glass. Doe it fit?
Not bad, all things considered. The section in front of the foreward hatch was a little tricky to install. The flat piece of plywood didnt want to bend with the deck. I cut several reliefs in the underside ~1/3 of the way through and it then bent perfectly.
It's good to see a plan come together.
Here the front hatch trim is removed, the jack is doing it's job, the panels are in place and the clamps are tight. You can never has enough clamps. Somehow, I always do.
Next big project is to make the mast beam. First I made a template. It's not exact but pretty darn close.
I plan to make the beam a little longer and then cut the ends at the correct angle.
I also measured the mast for wiring. I need to install a anchor light and need to figure out general wiring for the steaming light and antenna.
This week I hope to make the new trim for the forward hatch. I'm not a wood worker and so far it has been much more difficult than I expected. Having a table saw and knowing how to use said saw are two different concepts. I have the pieces roughly to size but need to find a way to cut them to the curve of the deck. Maybe a chisel and a few beers?
I have one panel to install and the deck will be dont for now. There is still an area in front of the forward hatch that needs new wood but it's not critical at this point. I need to get things moving.
-
bigd14
- Skilled Systems Installer
- Posts: 211
- Joined: Sun Jan 25, 2009 12:56 pm
- Boat Type: Ericson 27
- Location: Portland, OR
Re: Project Cal25
Wow, its really coming along. Thats a lot of overhead work. I admire your resolve to get it done like that. Not sure my arms would tolerate it! I can relate to the heat. We had 107 here two weeks ago- so I bailed on the boat for a few days, but still had to work some evenings in the high 90's, ugh.
As for cutting curves, you could borrow a jigsaw (or buy an inexpensive one from harbor freight and some good blades) and cut your curve a little wide, then sand down to your line. Table saws won't get you there!
Keep it going!
As for cutting curves, you could borrow a jigsaw (or buy an inexpensive one from harbor freight and some good blades) and cut your curve a little wide, then sand down to your line. Table saws won't get you there!
Keep it going!
Doug
1972 Ericson 27
1972 Ericson 27
Re: Project Cal25
I wish I could use a jigsaw for this!

I thought of making it out of two pieces and laminating them together. I bet I'm over thinking this, as usual. Another option is a router, although there seems like a lot of potential for destruction.
It wasnt quite that hot here but it was hot enough. For at least a few hours I was on my back, feet out the hatch working the sander, great fun.
Re: Project Cal25
Things are moving, although not at a pace I'm proud off.
The deck is complete, save a small section in front of the front hatch.
A layer of cloth is installed in the center section

and the after starboard section.

I wet out the cloth and install it with the plastic in place. After squeezing out the air bubbles and excess resin you get the first pic.
Today I drilled and filled the pop top hatch holes with epoxy. I like the over drill and fill idea, I just wish I used fast hardener. Hopefully I can sneak down during the week and finish off the holes.
I cut the plywood for the beam and started to fab the jig.

This attempt isnt working for me, take two coming soon.
I then put my attention to the mast. There are a few meat hook in the wire sections of the halyards so I plan to replace them with rope. I pulled out the sheaves, I prefer get a new set made for the wider rope.

So, I want to get the halyards replaced, an anchor light and steaming light wired up, install the beam and put on the stick. The hunt begins, I like the idea of LED, but want to get the bit ASAP.
The search is on, but please, I'm open to any thoughts.
The deck is complete, save a small section in front of the front hatch.
A layer of cloth is installed in the center section
and the after starboard section.
I wet out the cloth and install it with the plastic in place. After squeezing out the air bubbles and excess resin you get the first pic.
Today I drilled and filled the pop top hatch holes with epoxy. I like the over drill and fill idea, I just wish I used fast hardener. Hopefully I can sneak down during the week and finish off the holes.
I cut the plywood for the beam and started to fab the jig.
This attempt isnt working for me, take two coming soon.
I then put my attention to the mast. There are a few meat hook in the wire sections of the halyards so I plan to replace them with rope. I pulled out the sheaves, I prefer get a new set made for the wider rope.
So, I want to get the halyards replaced, an anchor light and steaming light wired up, install the beam and put on the stick. The hunt begins, I like the idea of LED, but want to get the bit ASAP.
The search is on, but please, I'm open to any thoughts.
-
fusto
- Master Varnisher
- Posts: 109
- Joined: Sun Aug 13, 2006 9:49 pm
- Boat Name: Erebus
- Boat Type: Apollo 16
- Location: Adams, MA
Re: Project Cal25
When I was working as a rigger for a boatyard in Bellingham WA, I occasionally came across sheaves that needed replacing for which there was no off-the-shelf option.
In those cases I would have custom sheaves made by this guy.
http://www.zephyrwerks.com
He's out of Port Townsend, WA but will ship to anywhere.
He's fast, helpful and the end product is great.
Plus, for custom boat parts his pricing is very affordable.
In those cases I would have custom sheaves made by this guy.
http://www.zephyrwerks.com
He's out of Port Townsend, WA but will ship to anywhere.
He's fast, helpful and the end product is great.
Plus, for custom boat parts his pricing is very affordable.
Zachary
Adams, MA
Adams, MA
Re: Project Cal25
Rachel wrote:What, I don't look like someone you'd trust your children to?
I really like this picture of you Rachel. Glad to see you are finally doing some work!!!! :)
Clint
"BRIER PATCH"
1976 Catalina 27
"BRIER PATCH"
1976 Catalina 27
Re: Project Cal25
I spent a ton of time with the table saw and a router and am getting better, slowly. I didnt want to finish the hatch trim until the deck was finished so it was time to get moving on the beam.
Version 2.0 of the jig with beam curing.

I made the beam 8' for both simplicity and for a margin of error for installation. Using the old beam pieces as a guide I measure 10 x and cute only a few. The ends were cut at ~22.5 deg. angles to match the hull.

I spent some time today drilling and filling most of the holes in the deck in preparation for installing the hatch drill and lifelines.

As of now the heavy lifting is complete. In the interest of sailing this year I can finish up the trim and some painting later. For now I need to get the rig figured out; including new lights, wiring, sheaves... Some one looked at my existing rigging and said it was ok. Hmmm. I really dont want to spend another dollar, but ...
Version 2.0 of the jig with beam curing.
I made the beam 8' for both simplicity and for a margin of error for installation. Using the old beam pieces as a guide I measure 10 x and cute only a few. The ends were cut at ~22.5 deg. angles to match the hull.
I spent some time today drilling and filling most of the holes in the deck in preparation for installing the hatch drill and lifelines.
As of now the heavy lifting is complete. In the interest of sailing this year I can finish up the trim and some painting later. For now I need to get the rig figured out; including new lights, wiring, sheaves... Some one looked at my existing rigging and said it was ok. Hmmm. I really dont want to spend another dollar, but ...
-
Ronin120
- Rough Carpentry Apprentice
- Posts: 53
- Joined: Thu May 31, 2007 1:19 pm
- Location: Northern Neck, Virginia
- Contact:
Re: Project Cal25
NIce work. That overhead is going to look really nice on that boat when its finished. I hope you're done and in the water by now. At least you project is going quicker than my current one. I'm 3 years into my 2-year refit....
Cheers.
Cheers.
Dave
1982 C&C 37 - under reconstruction
1988 Mako 26 CC - don't laugh, it needs work too.
1970's vintage Snipe
1970 Islander 37 - sold
1968 Cal 25 - sold but still racing...
Wave Man
1982 C&C 37 - under reconstruction
1988 Mako 26 CC - don't laugh, it needs work too.
1970's vintage Snipe
1970 Islander 37 - sold
1968 Cal 25 - sold but still racing...
Wave Man
Re: Project Cal25
Still not in the sailing yet. Two weeks vacation and some work travel basically killed 4 weekends. Life happens I guess.
Yesterday I put a coat of paint on the mast step, made the cut outs for the chainplates and ordered more hardware.
I made the decision, good or bad, to take it out at least once this year. If that means with old halyards and sheaves, so be it.
Yesterday I put a coat of paint on the mast step, made the cut outs for the chainplates and ordered more hardware.
I made the decision, good or bad, to take it out at least once this year. If that means with old halyards and sheaves, so be it.