Pylasteki's Story.

Post photos and descriptions of your ongoing projects here. No project is too big or too small.
Zach
Boat Obsession Medal Finalist
Posts: 684
Joined: Wed Jan 25, 2006 6:28 pm
Location: Beaufort, North Carolina
Contact:

Post by Zach »

Thanks Brian,

My plan for the icebox is to build it on the forward end of the port settee. I've got an evil plan that involves utilizing the space all the to the hull, as well as under the bunk its self... with a drain line can be drained off and so fresh water won't make its way into the bilge.

Same depth without being very tall to the eye... so the flat surface on top can be used as a table while sitting on the bunk.

I'm struggling though, directly above it would be a prime spot for a kerosene heater... but common sense dictates putting a heater and icebox as far away as possible. Maybe if your using one, the other isn't really needed... but I digress.

Image

Galley will end up looking something like this:

Image

More info on the galley plan: http://pylasteki.blogspot.com/
jollyboat
Candidate for Boat-Obsession Medal
Posts: 338
Joined: Wed Mar 29, 2006 11:51 am
Boat Name: Jollyboat
Boat Type: Pearson Triton
Location: Fairfield County, CT
Contact:

Post by jollyboat »

Oh - I see - yes that is a very interesting method - I like it. In as far as the stove is concerned might you consider the starboard bulkhead for this. With it's being set in about a foot this makes a cozy little spot for stoves.
Brian
Jollyboat, Triton #466
Sepi,Triton #346 (1st, Triton)

No Quarter
User avatar
Rachel
Master of the Arcane
Posts: 3044
Joined: Tue Dec 07, 2004 7:59 pm

Post by Rachel »

I'm not sure whether a heater would be good above the icebox either, but I'd think it would be more of an issue of icebox access and possibly having the heater much higher up than you'd want. The temperature conflict between them doesn't seem like as big a deal to me since heat rises and cold sinks, and you'd have the stove above the icebox.

I've mentioned this before -- and of course it depends on how you like to use the boat -- but for me it's of prime importance to keep two good spots for sitting "lengthwise" and reading or lounging, and that they each have a good "lean back" bulkhead. Or at least one if you're going to be solo. Just one more thing to fit into the 5 lb. sack :-)


Rachel
Triton 53
Almost a Finish Carpenter
Posts: 76
Joined: Mon Oct 01, 2007 12:12 pm
Boat Name: Alli-Ann
Boat Type: Triton
Location: Lincoln, RI
Contact:

Post by Triton 53 »

Zack

I just read your profile. I had not been on a sailboat since I was about 13 or 14 (excluding a 11ft plastic Sunflower). In 2002 I sailed on the Stars And Stripes in St. Marrtin, and now I'm the proud owner of a Triton also.
There has to be something magical about those great Cup boats.

Pete
bcooke
Master of the Arcane
Posts: 2272
Joined: Sat Oct 04, 2003 10:55 pm
Boat Name: Jenny
Boat Type: 1966 Pearson Triton
Location: Rowley, MA
Contact:

Post by bcooke »

www.marinestoves.com has some good info on where to place a heater.

Generally lower is better. My boat came with a bulkhead heater mounted about 12" below the cabin top and I managed to charcoal the balsa coring the first time I fired up the stove.

Somewhere around here is a picture of Robert's boat with a heater in the hanging locker area that looks really nice. A better position to get heat up to the V-berth too. I am sticking with a heater in the main saloon but I will also need a fan to evenly distribute the heat.

-Britton
-Britton
Work is overrated.

Most everything you read on the Internet is wrong.

The Website
The Blog
Robert The Gray
Candidate for Boat-Obsession Medal
Posts: 351
Joined: Thu Feb 19, 2004 1:54 pm
Location: Oakland California
Contact:

Post by Robert The Gray »

this will link to a construction picture of my solid fuel stove install
http://web.mac.com/robertthegray/iWeb/T ... 260008.jpg

finished picture
http://web.mac.com/robertthegray/iWeb/T ... 010064.jpg

I wrote some where here about how I would like to add some ducting/fan to get the warm dry air down to the cabin sole. We have fairly mild winters here, so the system works just fine as it is. the interior of the triton is quite small, especially if you close off the fore peak, i will often get that heavy cold air away from my toes by swinging around a towel.

i do not know the temprature differences between solid fuel, propane, and kerosene.the hottest part is the top of the flue.

r
Former Owner: Whisper, now Alma 1960 WC Triton
Whisper Projects
Daysailfilms
Zach
Boat Obsession Medal Finalist
Posts: 684
Joined: Wed Jan 25, 2006 6:28 pm
Location: Beaufort, North Carolina
Contact:

Post by Zach »

Thanks for the comments,

Rachel, I'll keep comfy lounging spots in mind. Haven't really thought about height of icebox other than basing it off the settee backs. I'll grab some plywood and mock it up. With a cubby on the other end, you are right... the port bunk may turn into a place that isn't lounge worthy.

Pete, I'm glad to hear it! Those boats are amazing, no idea how fast they were going but they felt like they were flying. I've got to believe they shortened the mast so mere mortals could grind the winches (Grin)

Britton/Robert, thats an excellent place to put a heater. I've been thinking to convert the hanging locker into drawers as my budget doesn't involve any pressed shirts.(grin) I'm wondering if a CPVC pipe with a small 12v fan would cure the cold feet, same as air circulation in a basement I'd think.

Robert, the joinery work you have done is superb. Would you care to do mine? That is beautiful.


How hot does the exhaust get on one of these heaters? Would a clumsy person be safe to walk around while underway?
Robert The Gray
Candidate for Boat-Obsession Medal
Posts: 351
Joined: Thu Feb 19, 2004 1:54 pm
Location: Oakland California
Contact:

Post by Robert The Gray »

zach,

I haven't spent that much time sailing with the heater going, but the charley noble does get hot. If you are planing to run your halyards aft the stack goes up right in that area so plan ahead before you cut the hole. Thanks for your complement on the wood work. I, of course, can see the flubs, but varnish makes it all look nice.

r
Former Owner: Whisper, now Alma 1960 WC Triton
Whisper Projects
Daysailfilms
bcooke
Master of the Arcane
Posts: 2272
Joined: Sat Oct 04, 2003 10:55 pm
Boat Name: Jenny
Boat Type: 1966 Pearson Triton
Location: Rowley, MA
Contact:

Post by bcooke »

Tough call on that hanging locker space. I like Robert's idea. I nearly put a storage area for clothing there myself. I decided to put a small icebox there instead but I might rip it out in a year or two if I miss the storage more than cold/ perishable food.

If I were living aboard then I probably would have decided on a clothing locker as I really don't have a good place anywhere else for it (other than in a dufflebag tossed in the V-berth.) Clothing takes up a lot of room unless you stay in the tropics.

And expect the stovepipe to get hot. I am not sure how much heel most heaters can take. Definitely investigate if you want heat while underway.

Better yet, head south when it gets cold. Unless you are in Chile and then head north. But I guess you could figure that out...

-Britton
-Britton
Work is overrated.

Most everything you read on the Internet is wrong.

The Website
The Blog
Zach
Boat Obsession Medal Finalist
Posts: 684
Joined: Wed Jan 25, 2006 6:28 pm
Location: Beaufort, North Carolina
Contact:

Post by Zach »

I'll do some calling around to the different manufacturers tomorrow.

Got a sneaky suspicion that one could give up some heat and wrap the exhaust with header wrap, and put another pipe around it with some air space to cut down on the surface temp.

The following of the sun is the end goal, but in the mean time I've got a year or two to stick around in NC. (Where it gets a bit nippy at times!)

Zach
User avatar
Rachel
Master of the Arcane
Posts: 3044
Joined: Tue Dec 07, 2004 7:59 pm

Post by Rachel »

Zach, here are some of my thoughts, slightly rambling because I'm under the weather and my head is foggy. This is from a background of heating land-structures with woodstoves up in northern Minnesota.

Edit stuck in to say that I thought about this more, and realize that you weren't exactly proposing to cool the pipe, and it kind of sounds like I thought you were. Actually, double pipe is often used to insulate the pipe and keep it hot inside and cool outside (like in an attic, where there's insulation between the two pipes structure; or in a heated room, where if you have a low clearance situation you can buy double metal pipe that's not insulated between)

Now back to my previous diatribe:

I don't think there's anything wrong with a hot flue. When burning wood (not saying you'll be doing this, but if you are), it's actually desirable, because it keeps creosote from forming inside the chimney (which can catch on fire and cause a chimney fire - those are scary). When you have a home woodstove, you're always endeavoring to keep the chimney or flue-pipe nice and hot. Not ridiculously hot, of course, but the last thing you want to do is "cool" the flue. One gadget that's handy for getting a feel for temps is something they make for metal stove pipes which is a magnetic thermometer. Very inexpensive and shows you what's going on (I suppose these days you could use an infrafred thermometer, but these are handy and simple and just sit there working all the time.)

What keeps the whole thing safe is a proper installation. That is, it should be installed in such a way that you don't have to worry if the flue gets hot (normally hot, anyway). In houses you achieve this mostly with air space, especially behind a suspended shield (i.e. metal sheet that's held 1" off the bulkhead, or the like). In home installations with metal pipe, there's a big, bulky, sheet metal fitting that carries the pipe through the rafters and roof safely, with lots of air space. There are similar things for boats, often with a well that's meant to have water in it. You can see lots about this at the oft-mentioned www.marinestove.com They have installation diagrams, etc. It's also important to keep the flue as small in diameter as the mfgr. recommends, because a larger flue will allow cooling and also compromise the draft.

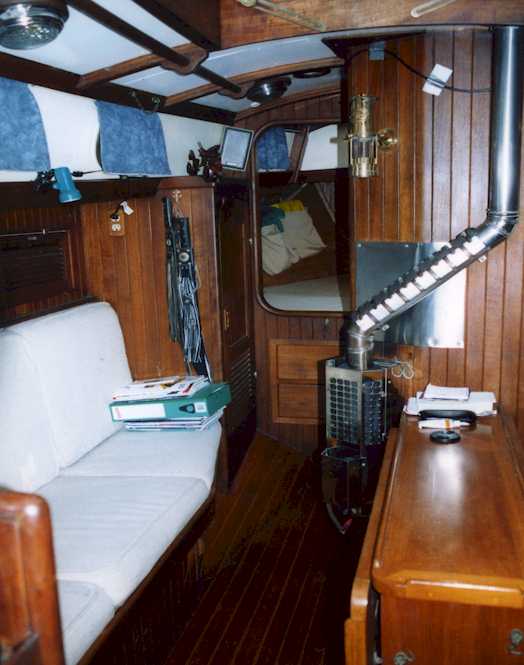
I don't believe diesel heaters get quite as hot as solid fuel, but the principles are similar. When I was in Northern British Columbia for a season, we had a Sigmar diesel heater (a fine unit) mounted on a bulkhead and ran it about 16 hours a day (always on except when sleeping). This was on a 10' beam 30-footer. I didn't install the stove, but it seemed like a mostly-good installation and we never had any overheating of the boat parts that I detected.

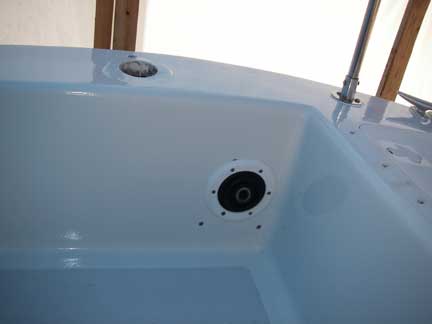
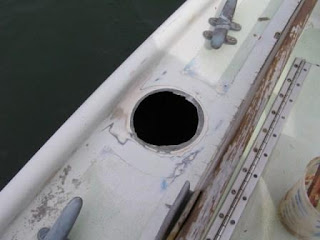
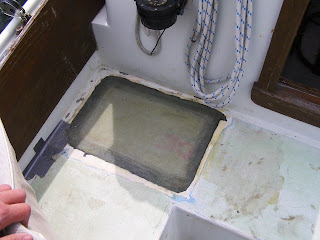
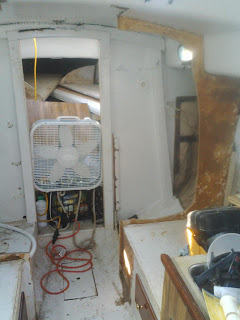
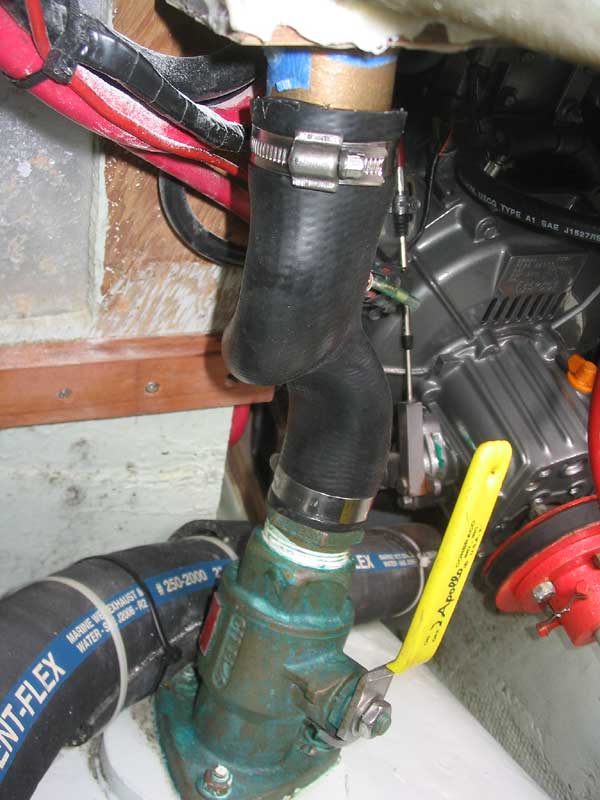
That said, I would have added more heat shielding of the bulkhead wood, were it my boat, especially in that little gap above the stove body, and then again on the upper bulkhead. Although the charring of the wood you see is from a previous owner's woodstove installation. The thing is that if wood gets really hot, over and over, it lowers the burn point, and then it can catch fire much more easily than it would have to begin with. We did have some metal heat shielding on the bulkhead behind the stove (this came with the stove, I think), and also behind the stovepipe (purpose fit). The stove was mounted near the sole, so no overhead protection was necessary. The through-deck fitting was not the water ring type.

There was also some perforated metal shielding around the flue pipe lower down, so that if you touched it you weren't touching super hot pipe. I'll put in a couple of photos that show it to some extent.

Image

So I guess if it were me, I'd be thinking about installing in such a way that the flue can safely get reasonably hot, more than trying to keep the flue cool.

Nothing like a cozy boat with a heater going! :)
Figment
Damned Because It's All Connected
Posts: 2846
Joined: Tue Apr 08, 2003 9:32 am
Boat Name: Triton
Boat Type: Grand Banks 42
Location: L.I. Sound

Post by Figment »

Gotta love the his-n-hers set of flogging devices hanging at the ready.
User avatar
Tim
Shipwright Extraordinaire
Posts: 5708
Joined: Tue Apr 01, 2003 6:39 pm
Boat Name: Glissando
Boat Type: Pearson Triton
Location: Whitefield, ME
Contact:

Post by Tim »

Note that many (not all) of the modern heaters available for boats have a double-walled flue pipe that not only insulates the hot exhaust (inside pipe), but also provides an outside source of combustion air (outside pipe).

Just something to keep in mind while you shop the various heater options.

For example, this Dickinson Newport LPG heater has this sort of intake/exhaust pipe.

Image
---------------------------------------------------
Forum Founder--No Longer Participating
User avatar
Rachel
Master of the Arcane
Posts: 3044
Joined: Tue Dec 07, 2004 7:59 pm

Post by Rachel »

Figment wrote:Gotta love the his-n-hers set of flogging devices hanging at the ready.
Tee hee. Actually, machetes from El Salvador. Useful for opening coconuts (although mine is sans fancy holster thingie).

Tim, good point about the "balanced draft" flues. I've never used one of these, but I can see their potential goodness. What I'm not sure about is whether you'd get the same air-and-stuff drying effect in the boat without the air coming in through various cracks throughout the boat and moving through on it's way to the flue. You may, I'm just not sure. I was happy to see, when I looked up my former Sigmar stove on the web, that it's offered as an option, and apparently you can also add it later, if you don't get it at first but then change your mind. (Granted that might require an adjustment to the boat - I didn't delve that far.)

Rachel
jollyboat
Candidate for Boat-Obsession Medal
Posts: 338
Joined: Wed Mar 29, 2006 11:51 am
Boat Name: Jollyboat
Boat Type: Pearson Triton
Location: Fairfield County, CT
Contact:

Post by jollyboat »

Rachel,
You would still get all of same effects with this flue arrangement as the act of circulation would still prevail with the difference in temptures from both outside of the boat but also from the unheated areas of the boat. Air movement can be tested/wintnessed with the smoke from a, match,cigar, candle, cigarette, ect. - just like sailing in light air.
Brian
Jollyboat, Triton #466
Sepi,Triton #346 (1st, Triton)

No Quarter
User avatar
Tim
Shipwright Extraordinaire
Posts: 5708
Joined: Tue Apr 01, 2003 6:39 pm
Boat Name: Glissando
Boat Type: Pearson Triton
Location: Whitefield, ME
Contact:

Post by Tim »

The Dickinson shown above features a circulation fan, so you'd get air movement too.
---------------------------------------------------
Forum Founder--No Longer Participating
Zach
Boat Obsession Medal Finalist
Posts: 684
Joined: Wed Jan 25, 2006 6:28 pm
Location: Beaufort, North Carolina
Contact:

Post by Zach »

Oooh thats a smooth installation! I like the location... actually about where I was pondering originally.

Will be the week before Christmas before I get back down to the boat... got a small block chevy to rebuild and a Vette frame to finish cleaning up. (Funding for Pylasteki!)
Zach
Boat Obsession Medal Finalist
Posts: 684
Joined: Wed Jan 25, 2006 6:28 pm
Location: Beaufort, North Carolina
Contact:

Post by Zach »

Whew... Waiting on parts to finish the vette engine. The frame is stripped, with lots of welding and grinding done.

Time to devote a few moments to picking your brain!

Pylasteki's deck is super soft, and will require recoring this spring. I'm trying to figure out what core has the highest insulating R-value. Balsa is cheap, which is tempting... but I'm think the details add up. The more the core does, the less headroom will be lost with bubble wrap or whatever else it takes to make her a cave in the tropical sun.

Any suggestion for deck colors? Bright white is a great color for keeping stuff cool, but it seers corneas, what colors are suggested from the practical requirements of being easy on the eyes and cool in the tropics? Light blue seems to burn feet.
bcooke
Master of the Arcane
Posts: 2272
Joined: Sat Oct 04, 2003 10:55 pm
Boat Name: Jenny
Boat Type: 1966 Pearson Triton
Location: Rowley, MA
Contact:

Post by bcooke »

I think the R-value for balsa is in the same ballpark as most of the other foam coring materials.

If you are really concerned about insulating the cabin roof you might consider some aluminum foil which will reflect a lot of the radiated heat energy. It wouldn't take up much space either. Foil alone would look ugly so maybe some automotive headliner for looks and a slight increase in thermal efficiency.

On most of these boats the largest areas of the deck are non-skid so the white areas might not blind as much as you think. A cream non-skid would be reasonably reflective and easy on the brightness level.

-Britton
-Britton
Work is overrated.

Most everything you read on the Internet is wrong.

The Website
The Blog
Zach
Boat Obsession Medal Finalist
Posts: 684
Joined: Wed Jan 25, 2006 6:28 pm
Location: Beaufort, North Carolina
Contact:

Post by Zach »

Thanks Britton.

I'll do some pondering on headliners.
triton318
Master Varnisher
Posts: 108
Joined: Mon Oct 08, 2007 3:34 pm
Boat Name: Dove
Boat Type: Pearson Triton
Location: Hayes, VA

Post by triton318 »

bcooke wrote:Yes, but my 'argument' is exactly that an A4 is simpler than an outboard.
When I bought my Triton in 1999, I had two choices: get the A-4 working properly or remove it and put an outboard on the transom. Re-powering was not an option--I had three kids, a mortgage, and very little disposable income. During the time I was deciding what to do, I lurked around several forums online and read about all of the headaches people have with gasoline inboards--the seemingly endless repairs, maintenance, cost, etc.

I decided to pull the A-4. I purchased a Nissan 9.8 and hung it on the transom.

1. The Nissan pushes the boat at hull speed without a problem.
2. The boat sails fine without the weight in the stern. (Some of the weight was replaced with a 28 gallon water tank under the cockpit sole.)
3. You get a lot of control when backing up because you can turn the engine.
4. Fuel costs are extremely low.
5. The only thing I've done to the engine is, once a year: change the lower unit oil; replace the spark plugs, replace the fuel filter. I've replace the zinc anode once. All of these procedures are VERY easy to do.

My wonderful Nissan has always started by the second pull (most often on the first). I installed an alternator on it which has always kept up with my modest power requirements. To be fair...yes, the prop sometimes comes out of the water in a heavy chop.

I'd have to argue that an outboard, while perhaps being "not simpler" than an A-4, is easier and less expensive to operate.

I'll admit that had someone offered to donate a brand new diesel engine and professionally install it in my boat, I would have accepted!
Jay
Dove, Pearson Triton #318
Hayes, VA
Zach
Boat Obsession Medal Finalist
Posts: 684
Joined: Wed Jan 25, 2006 6:28 pm
Location: Beaufort, North Carolina
Contact:

Post by Zach »

Bilge pumps!

Went down to check on Pylasteki yesterday and brave the snow and sleet. Not a whole lot of water in the bilge, but my piston style bilge pump has given its last pump.

I'd like to use a Blakes Lavac pump for my manual bilge pump. It appears the rebuild kit for both Top Action and Behind Bulkhead styles, is the same. So a few kits will cover all pumps on board, the head pump will have a line to the bilge so it can be pumped from the warmth of the cabin.

Looks like it moves a quart per pump stroke.

Any of you guys and gals used the Hendersom Mark V (the model that lavac uses) as a bilge pump? I'm thinking that it'd be best to mount one of the through bulkhead models in the cockpit, maybe behind a screw in deck plate so its water tight unless pumping.

Thoughts?

I'm working on building a light weight briggs and stratton powered pond pump as a crash pump. With high hopes of discovering a way to have a light weight frame to swap quickly between water pump and an alternator or air compressor.
User avatar
Tim
Shipwright Extraordinaire
Posts: 5708
Joined: Tue Apr 01, 2003 6:39 pm
Boat Name: Glissando
Boat Type: Pearson Triton
Location: Whitefield, ME
Contact:

Post by Tim »

Zach wrote:Any of you guys and gals used the Henderson Mark V (the model that Lavac uses) as a bilge pump?
Yes.

I used the available plastic bulkhead mount, so my cockpit installation isn't strictly watertight, but is water resistant for nuisance water and anything other than a filled cockpit (which isn't going to happen the way I use the boat anyway).

Image

Image
---------------------------------------------------
Forum Founder--No Longer Participating
User avatar
catamount
Candidate for Boat-Obsession Medal
Posts: 378
Joined: Sun Jun 19, 2005 7:30 am
Boat Name: GREYHAWK
Boat Type: Peterson 34
Location: Boothbay Harbor, ME
Contact:

Post by catamount »

I have a Henderson Mark V bilgepump mounted so that it can be pumped from the cockpit without opening any hatches:

Image

I believe the rubber bellows makes the installation water tight, but I haven't tested it.

I also have a Whale Gusher 8 manual bilge pump that can be operated from within the main cabin, although I still need to plumb it to an outlet...
Last edited by catamount on Thu Apr 30, 2009 7:06 pm, edited 1 time in total.
Tim Allen -- 1980 Peterson 34 GREYHAWK
Harborfields Housekeeping Cottages, West Boothbay Harbor, Maine
Sailors for the Sea, a new voice for ocean conservation
Zach
Boat Obsession Medal Finalist
Posts: 684
Joined: Wed Jan 25, 2006 6:28 pm
Location: Beaufort, North Carolina
Contact:

Post by Zach »

Nice setups guys!

I like the rubber belows, but at 50 bucks I may use a deck plate of some sort. The lanyard for the handle is an excellent idea, may have to add one to the head as well.

Do you have these run to their own outlets, or the cockpit drains? I had thought about glassing over the holes in the counter, but it'd be a bummer to have a cockpit awash... run out of capacity. On one hand I don't like extra holes in boats. Hopefully won't ever need to test that theory!

Thanks

Zach
bcooke
Master of the Arcane
Posts: 2272
Joined: Sat Oct 04, 2003 10:55 pm
Boat Name: Jenny
Boat Type: 1966 Pearson Triton
Location: Rowley, MA
Contact:

Post by bcooke »

The holes in the counter are above the waterline. In that area the outlet hose loops up to just under the deck height anyway so I wouldn't worry about holes in the boat.

If it is really a problem you can mount the outlet high on the face of the transom. This is really the best and safest place but spoils the look in my opinion.

Actually, now that I have installed several below water thru-hulls on my boat I don't worry about them either. Done right they are extremely safe.

I really don't see a need to empty your bilgepump into the cockpit. It probably violates some safety rule anyway.

If you are filling up the cockpit faster than it drains out through the cockpit drains then your hand pump is not going to save you. Get out and start swimming. (or walk since the Triton grounds out in four feet of water. For that to happen your boat has be seriously sinking and beyond the help of a hand pump.
-Britton
Work is overrated.

Most everything you read on the Internet is wrong.

The Website
The Blog
Zach
Boat Obsession Medal Finalist
Posts: 684
Joined: Wed Jan 25, 2006 6:28 pm
Location: Beaufort, North Carolina
Contact:

Post by Zach »

I'm just a little nervous about through hulls... my electric bilge pump outlet tried to sink me one day. Had a few people in the cockpit and saw light reflect off the water... through the hole in the cabin sole. An hour before it was dry as a bone!

With the extra people on board the counter was in the water on a port tack, and the Chesapeake was entering from all sides of the poorly bedded through hull!

The leak was stopped by having my brother go sit by the mast! (grin)
User avatar
catamount
Candidate for Boat-Obsession Medal
Posts: 378
Joined: Sun Jun 19, 2005 7:30 am
Boat Name: GREYHAWK
Boat Type: Peterson 34
Location: Boothbay Harbor, ME
Contact:

Post by catamount »

Zach, In general, bilge pumps should have their own outlet, and not be plumbed into the cockpit drains.
Tim Allen -- 1980 Peterson 34 GREYHAWK
Harborfields Housekeeping Cottages, West Boothbay Harbor, Maine
Sailors for the Sea, a new voice for ocean conservation
User avatar
Tim
Shipwright Extraordinaire
Posts: 5708
Joined: Tue Apr 01, 2003 6:39 pm
Boat Name: Glissando
Boat Type: Pearson Triton
Location: Whitefield, ME
Contact:

Post by Tim »

Just because someone in the past installed things wrong isn't a reason to worry about putting in something in the future. Learn how to do things right, and then do things right. It's amazing how many "worst case" worry problems that will solve.

It's nice to avoid unnecessary through hull fittings. But a certain number end up being necessary in most cruising boats, and you shouldn't try to avoid that necessity if it means compromising quality or integrity. Just be sure to do your installations right, and to continue to maintain them after the fact. Properly-installed and -maintained through hulls remain virtually problem-free for many years or decades.

Back siphoning through electric pumps is a concern with many installations. Careful installation and knowing the reasons behind this unpleasant phenomenon will minimize or eliminate any potential risk.

Don't plumb the bilge pump into the cockpit drains, especially on a Triton since your hose connection would be at or below the waterline if you did so, never mind the fact that there isn't physically room to add extra fittings down there. It's a bad practice in any event, but even worse thanks to the specifics of a Triton installation.
---------------------------------------------------
Forum Founder--No Longer Participating
Zach
Boat Obsession Medal Finalist
Posts: 684
Joined: Wed Jan 25, 2006 6:28 pm
Location: Beaufort, North Carolina
Contact:

Post by Zach »

Tim wrote:Just because someone in the past installed things wrong isn't a reason to worry about putting in something in the future. Learn how to do things right, and then do things right. It's amazing how many "worst case" worry problems that will solve.
But... but... What about the emotional scarring? (Grin)

Thanks for the input guys!
Zach
Boat Obsession Medal Finalist
Posts: 684
Joined: Wed Jan 25, 2006 6:28 pm
Location: Beaufort, North Carolina
Contact:

Post by Zach »

Update:

Icebox hatch is glassed in and withstands me jumping on it. The more I ground out, the more resin and filled goop I found, they didn't use a lot of cloth on the cockpit of this boat... Anyone need the cockpit icebox lid?
Gauge holes are glassed over and mostly faired in.
Power cord and bilge blower holes are glassed over. Plywood block for blower has been removed... (That was an odd angle.)
Shifter hole is glassed in.
Icebox drain is glassed in.
Wooden block on forward edge of cockpit has been removed from the engine room and surfaces faired out.

Port side drains are relocated to the side of the cockpit. (I never realized how lumpy the sides of the cockpit are!)

The "Christmas trees" are gone. They started all this... I lifted the hose out of the way during the removal of the gas tank, and the cockpit end fell off in my hand! Eeeeeek! (Both had my guestimation of two jelly rolls of that epoxy clay stuff like you'd use for patching a pin hole leak in the weld of a fuel tank on a big rig.)

The starboard cockpit drain is very temporary. Cut the edges off of a 1 1/2 plastic through hull fitting and ran a hole saw through to enlarge the original hole. Very ugly! The port side has been glassed and filled awaiting a solution that meets my standards. (Perfection.) The price of bronze cockpit drains with grates is grating my nerves... though I nearly lost my chuck key down the 1 1/2 inch hole today.

I found a dinghy that may sit on the cabin-top nicely. Phil Bolger's Tortoise. Picked up the plans and hope to knock it and a set of oars out this week. Its one ugly reptile but fits the load carrying and size constraints... Dynamite Payson is one clever writer. Any updates to his 1979 recommendation of 7/8ths bronze ring nails and WeldWood dry glue? I can't wait to get started on it, just have to button up an engine in the garage before making to much dust.

I'm also looking for a recommendations for building a pair of oars. Thinking eight feet is about right, as a short oar is about as much fun as grinding fiberglass with ill fitting goggles...

Stopped off at Vetus new showroom in Morehead City, NC to get a quote for bow and stern thrusters for the big boat wood boat I'm working on. Stood in awe of the tower of bow-thrusters. For a moment I considered adding one to Pylasteki and then reconsidered... it would get in the way of the water tank! (Big Big Grin.)
bcooke
Master of the Arcane
Posts: 2272
Joined: Sat Oct 04, 2003 10:55 pm
Boat Name: Jenny
Boat Type: 1966 Pearson Triton
Location: Rowley, MA
Contact:

Post by bcooke »

Dynamite Payson is one clever writer. Any updates to his 1979 recommendation of 7/8ths bronze ring nails and WeldWood dry glue?
Epoxy. Just epoxy.

If the Tortoise is the size i think it is, then 8 foot oars are going to be too long. As a general rule, 6 foot oars on an eight foot dinghy are fine. Of course rowing position and freeboard height play into it.

-Britton
-Britton
Work is overrated.

Most everything you read on the Internet is wrong.

The Website
The Blog
User avatar
Rachel
Master of the Arcane
Posts: 3044
Joined: Tue Dec 07, 2004 7:59 pm

Post by Rachel »

Thanks for the update, Zach. Your energy comes right through in the posts :) :shudder!: on the cockpit drains!

On the subject of oars, Shaw & Tenney (who handcraft lovely oars in Maine) have some great information on their site about sizing oars, how to figure out where to put the looms, etc. It's here, about 1/3 of the way down the page:

http://www.shawandtenney.com/wooden-rowing-oars.htm

Rachel
Zach
Boat Obsession Medal Finalist
Posts: 684
Joined: Wed Jan 25, 2006 6:28 pm
Location: Beaufort, North Carolina
Contact:

Post by Zach »

Thanks for the oar help folks.
I've had some car work to finish up that has hampered the start of that project.

This weekend I went down and did some work on Pylasteki, finished up a lot of glass work. Filled a bunch of holes in the coach roof. Popped the speedo out, as well as the teak screwed over another one on the starboard side of the companionway, ground and glassed those holes.

Removed the fuel filler, as well as the molded fiberglass pad that it sat on, and proceeded to battle with my random orbital sander. Sanding the same size hole as the pad, between a toe rail and coaming is a recipe for fun. (Flying sandpaper disks look a lot like skeet...)

Removed the door down by the head, and marveled at the increased interior volume.

Bought hose for the side deck drains to fit the through hulls I'm using to drain into the cockpit. Though I think I'm going to set aside the hose, and through hulls (even though I've installed two) and go with 1 inch hose. I used 1 1/8th through hulls but finding y valves in 1 and an 1/8th has proven to be difficult, and I'm not about to have 8 adapters on board. K.I.S.S. principle rules that out.

I pulled the plywood panel off the port side up under the deck (what would be above the icebox) and sketched out the future of the area, storage of some sort... mirroring the starboard side dish rack.

Figured out that the exhaust outlet is 1 1/2 inches, as is the output of the Henderson Mark V pump I'm using as a bilge pump. In the meantime hooked up to that, but in the future for drag reduction that copper tube is getting replaced with a flush through hull.

I spent the morning cleaning and vacuuming up the dust (anyone want some finely ground triton?) to take some pictures. Will upload them to the blog when I get a chance!

Thanks for the interest guys,

Zach
Zach
Boat Obsession Medal Finalist
Posts: 684
Joined: Wed Jan 25, 2006 6:28 pm
Location: Beaufort, North Carolina
Contact:

Post by Zach »

Pictures:

Image

Image

Image

Image

(6/9/08 Screen/hatch board pictures removed... took forever to load...)
Last edited by Zach on Mon Jun 09, 2008 2:37 pm, edited 1 time in total.
Zach
Boat Obsession Medal Finalist
Posts: 684
Joined: Wed Jan 25, 2006 6:28 pm
Location: Beaufort, North Carolina
Contact:

Post by Zach »

Strange discovery... Pictures next time, Tornado warnings make you work fast!

On the starboard side of Pylasteki, overlapping the location of the fuel filler there were two coats of super thick gelcoat of exactly the same color as the rest of the boat... separated by a piece of very light cloth.

Anyone seen that before? It looks like Pearson had to fair out a low spot under the winch stand, just in front of the fuel filler. Weird!

I had to grind out one of the speedometer holes in the cabin, as my fast hardener didn't. (Pump wasn't primed all the way... doh.)

Glassed in the fuel filler hole, the one in the cabin, and went back and glassed them from the inside as well. (Trying to stiffen up the opening!) Faired them all in and vacuumed out the boat.

Suffered from a Shop Vac Explosion and called it a weekend... Was an itchy dust cloud in the cockpit.
Zach
Boat Obsession Medal Finalist
Posts: 684
Joined: Wed Jan 25, 2006 6:28 pm
Location: Beaufort, North Carolina
Contact:

Post by Zach »

Update:

Spent the weekend grinding fiberglass, fairing out the cabin top with a long board and getting ready to do a little painting.

Glassed over the top of the port cockpit seat from the ex-icebox lid to an inch or so from the opening hatch, and overlapping under the companionway. 17 ounce biax, more will be going in on the underside of the cockpit to stiffen the corners as the port side is my preferred path for walking aft from the dock.

Spent a lot of time going through the electrical wiring, removed the side navigation lights, as beautiful as they are I am forever banging my shin on them. A bi-color bow light is in the future...

Spent a few hours rearranging the interior and cleaning up the accumulated dust, and found my Allman brothers CD under pile of line.

In other news, a previous owner was more weight conscious than me... (Does this anchor make my boat look fat?) they used 1/4 inch PLEXIGLASS under the stantion bases, and painted over them. Plexiglass... There is probably a law against such things!

In other news, I'm wondering if anyone has installed a bilge tank in a shallow bilge triton? Sure does seem like a good place for water... well metaphorically.
Zach
Boat Obsession Medal Finalist
Posts: 684
Joined: Wed Jan 25, 2006 6:28 pm
Location: Beaufort, North Carolina
Contact:

Post by Zach »

Time for a funny.

Building a Phil Bolger tortoise to be Pylasteki's dinghy.

Lost my protractor...

So I drew a 37 degree angle in cad (solidworks) and clicked print.

I've been giggling like a school girl for the last few minutes, if there ever was overkill... that was it. hehehee! Three dimensional solid models? No problem...
Zach
Boat Obsession Medal Finalist
Posts: 684
Joined: Wed Jan 25, 2006 6:28 pm
Location: Beaufort, North Carolina
Contact:

Post by Zach »

Update:

Image
Image
Image


After Britton rocked my world with the partial-bulkhead-endectomy... and Rachel shared pictures of a half bulkhead removal, I've had a need to see things with my own eyes.

Over the weekend I removed the two semi-structural bulkheads, aft of the head and hanging locker. Removed the lavac, and plumbing. Removed the shelving in the hanging locker...

And found that the tabbing on the starboard side of the main bulkhead is in sad shape. The plywood is rotten black goo behind the tabbing. Boats. It had a crusty exterior, but after removing the batten supporting the lower shelf the familiar smell permeated the boat. Rot. Better to find it now than later! (I bought a fiberglass boat to get away from rotten wood... but I digress.)

I have a few pictures of the new open airy feel, but need to find someone technologically adept to get them online... they are on my cell phone! I must warn you all that the boat is a disaster,

At the moment I'm planning to go ahead and build stainless exterior chain plates to keep the rig standing through the repairs. It appears that my current shrouds have enough threads in the turnbuckles to reach the new location. I haven't checked the spreader angles and all the other details, but I think it'll be good temporarily until I replace the rig. The mast extrusion has a good bit of corrosion at the step, and after thinking it over... I think I'm going to replace the whole rig at once to set my mind at ease.

P.S. The Lavac was fed through a slip fit PVC tube into the back, secured with film of silicone. Unbolted it from the fiberglass box on which it sat, and the hose slipped out! It scares me, the high caliber of craftsmanship...

Edit: The Galley unit is slid forward a few feet from its proper location in these pictures.
1961 Pearson Triton
http://pylasteki.blogspot.com/
1942 Coast Guard Cutter - Rebuild
http://83footernoel.blogspot.com/
User avatar
Rachel
Master of the Arcane
Posts: 3044
Joined: Tue Dec 07, 2004 7:59 pm

Post by Rachel »

First of all, major commiseration on the bulkhead. Like you say, best to find it now, but.... not what you wanted to find at all.

As for the after bulkheads (which I suppose were in dandy shape), well, I cannot tell you how much I love to see photos like this. At least for me, all the sketches in the world are no substitute for seeing it in real life (or a real-life photo). Wow, the possibilities stagger the imagination!

I was trying to tell from the photos if the berths could go all the way up to the main bulkhead at their stock height. Can you tell in real life? I know you don't plan that, but inquiring minds want to know (not sure if the berths on #144 were at stock height in his mod).

I like the look of the forward part of the (perhaps temporary) saloon being tucked under the lower part of the cabin.

I hope you're going to mock up a fabulous galley in cardboard or something and then photograph it :)

By the way, I have seen a photo of a Triton with exterior chainplates - I think it might have been Dove on the National Triton Association ---> MIR ---> Project Showcase page (or perhaps Tritons afloat if not PS).

Rachel
Zach
Boat Obsession Medal Finalist
Posts: 684
Joined: Wed Jan 25, 2006 6:28 pm
Location: Beaufort, North Carolina
Contact:

Post by Zach »

They would taper down to be quite small at the stock height. My rough guess is that raising them 3-4 inches would allow them to remain the same height along their entire length. (Something I'm pondering doing to add flotation foam in sheet form without sacrificing any storage space.)

The current thought is to add two water tanks aft of the bulkhead, and storage space on top. One side or the other will attempt for a full size chart table. The hanging locker will probably end up under the companionway.

Haven't found a plastic water tank that fits the shallow bilge, so put that idea on hold. Thats really where I'd like the water tanks!
1961 Pearson Triton
http://pylasteki.blogspot.com/
1942 Coast Guard Cutter - Rebuild
http://83footernoel.blogspot.com/
User avatar
Rachel
Master of the Arcane
Posts: 3044
Joined: Tue Dec 07, 2004 7:59 pm

Post by Rachel »

I probably shouldn't mention Britton's shiny, custom stainless tanks now, should I...

R.
Zach
Boat Obsession Medal Finalist
Posts: 684
Joined: Wed Jan 25, 2006 6:28 pm
Location: Beaufort, North Carolina
Contact:

Post by Zach »

I keep thinking the same thing... mainly because a friend has an old miller tig machine he's trying to sell!

Gotta stick to off the shelf parts, or I'll be making stuff for months and not sailing. I like making stuff... Just not as much as sailing. (Grin)
1961 Pearson Triton
http://pylasteki.blogspot.com/
1942 Coast Guard Cutter - Rebuild
http://83footernoel.blogspot.com/
User avatar
Rachel
Master of the Arcane
Posts: 3044
Joined: Tue Dec 07, 2004 7:59 pm

Post by Rachel »

Zach wrote:Gotta stick to off the shelf parts, or I'll be making stuff for months and not sailing.
Now just wait a minute: You've only owned your boat for a few months; you can't have figured that out already.

(Of course there's always a precocious one in the bunch, who can learn these lessons quickly ;^)
Zach
Boat Obsession Medal Finalist
Posts: 684
Joined: Wed Jan 25, 2006 6:28 pm
Location: Beaufort, North Carolina
Contact:

Post by Zach »

Updated the Blog today: http://pylasteki.blogspot.com/

Actually... Forgot I had this thread going here. Letting you guys down with the flow of pictures. (Sigh...)

My deck had balsa PLANKS. Not even end grain! That and loads of dry mat... Of course the top skin is close to 3/8ths thick. Could practically cut the inner skin out and glass some stringers to the underside! (The inner skin appears to be really, really thin. A layer of mat or two...

Zach
1961 Pearson Triton
http://pylasteki.blogspot.com/
1942 Coast Guard Cutter - Rebuild
http://83footernoel.blogspot.com/
bcooke
Master of the Arcane
Posts: 2272
Joined: Sat Oct 04, 2003 10:55 pm
Boat Name: Jenny
Boat Type: 1966 Pearson Triton
Location: Rowley, MA
Contact:

Post by bcooke »

Little bit of trivia I read from Dan Spurr's book on early fiberglass boat production, Pearson was the first to incorporate end grain balsa in their cored laminates.

I remember reading something about some communication between the balsa producer and Pearson that led to its incorporation. It came a bit later than your boat in the production schedule though.
-Britton
Work is overrated.

Most everything you read on the Internet is wrong.

The Website
The Blog
Zach
Boat Obsession Medal Finalist
Posts: 684
Joined: Wed Jan 25, 2006 6:28 pm
Location: Beaufort, North Carolina
Contact:

Post by Zach »

Interesting stuff, Britton. I'll have to track down that book.

So much wacky history involved with these old Fiberglass tubs...

This weekends work: Image

Yeah, its dusty... My shop vac has decided it doesn't want to function as a vacuum. I sacrificed half a roll of paper towels and acetone to get everything clean before glassing...

Anyone taken a PVC pipe or some sort of flex tube and run the exhaust side to a full size vacuum bag? Or even a pillow case... to heck with the squirrel cage and motor, I need something that won't get plugged up. Probably a bad idea, but I'm wondering if a 5 gallon bucket half full of water made into a bubbler would work. Bubble the dusty air through the water... Either that or build a huge bath air filter like old cars and tractors had.

Anyone used a wire brush on a drill motor to get out the old gooey balsa from under the lip? I'm getting tired of chiseling and scraping... Figuring a sheet of plastic or sheet metal laying on the inner skin would keep any damage from being done to the fiberglass.

Zach

P.S. Yeah, its the worlds weirdest dock line setup. Two bowlines looped through the chocks and down under the stem. Bow line looped through starboard side and back to the piling... port side the spring line and bow line are tied together and pass through the loop so I can pull her over to the dock. One of the first things planned for thursday is reinstalling the bow cleat!
1961 Pearson Triton
http://pylasteki.blogspot.com/
1942 Coast Guard Cutter - Rebuild
http://83footernoel.blogspot.com/
Zach
Boat Obsession Medal Finalist
Posts: 684
Joined: Wed Jan 25, 2006 6:28 pm
Location: Beaufort, North Carolina
Contact:

Post by Zach »

Been back to pondering through hulls and cockpit drains. (There seems to be no real easy way to make them serviceable in the stock location!)

Anyone seen a boat that run drains out port and starboard to the hull even with or above the waterline? I guess if the cockpit doesn't fill up with water in its current form... it probably won't fill up with a line running that way either. Just have to get enough drop to let them empty at rest. I don't like that we have to keep a through hull open to let the cockpit drain when the boat is unattended...

They'd be in a watertight cabinet accessible from inside the boat via watertight hatches on each side. Separate from the cockpit lockers by a mini-bulkhead that would make the lockers easier to use... can only get something barely out of reach instead of... "Damn."

Pondering glassing in some tubes in the aft end, but I'm thinking to raise them above sole level as standpipes. Help out loads for speed of draining if the cockpit ever ends up full... but not going to drool and make for damp feet.

Thanks,

Zach
1961 Pearson Triton
http://pylasteki.blogspot.com/
1942 Coast Guard Cutter - Rebuild
http://83footernoel.blogspot.com/
User avatar
Tim
Shipwright Extraordinaire
Posts: 5708
Joined: Tue Apr 01, 2003 6:39 pm
Boat Name: Glissando
Boat Type: Pearson Triton
Location: Whitefield, ME
Contact:

Post by Tim »

You removed your inboard, right? And it's staying out?

That might open up some space forward of the original cockpit drain location to allow for easier installation and access of through hulls and seacocks.

Don't discount the use of pre-formed, fabric-reinforced radiator hose to help you make those impossible twists and bends between the cockpit sole and seacocks. It works; it's strong; it makes the bends possible.

This is the one from Napa (hose #8426) that worked in my installation, with the seacocks installed directly over the original holes in the hull, but there are myriad other hose shapes available to fit almost any situation.

Others have used a variety of other valve types and positions to make the scuppers work, so there are several potential solutions already at hand.

Note also that I used 1-1/4" seacock valves with full-flow tailpieces (which take a 1-1/2" diameter hose), since the smaller sea valves are significantly less bulky and lower in profile than the 1-1/2" version, which made the installation feasible. You do get a corresponding decrease in the ultimate flow possible, but the 1-1/4" is still a larger hole than the original fiberglass tube provided, so you're at least equal to the original setup.

Image

Image
---------------------------------------------------
Forum Founder--No Longer Participating
Zach
Boat Obsession Medal Finalist
Posts: 684
Joined: Wed Jan 25, 2006 6:28 pm
Location: Beaufort, North Carolina
Contact:

Post by Zach »

Good stuff Tim,

Thanks for the idea! I fought with that wire reinforced exhaust hose for ages... finally went on, but sheesh!

Keep on working on a way to get rid of most of the through hull fittings that are below the waterline, but that sure is the best way I've seen to get those hoses on the stock fittings.

Thanks again,

Zach
1961 Pearson Triton
http://pylasteki.blogspot.com/
1942 Coast Guard Cutter - Rebuild
http://83footernoel.blogspot.com/
Post Reply