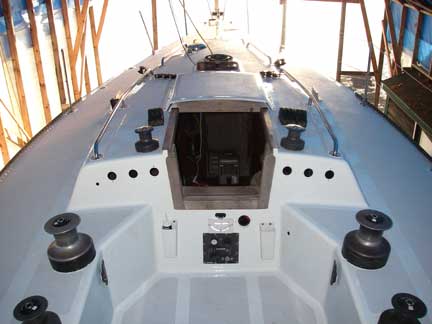
GREYHAWK's Refit -- Continued

Post photos and descriptions of your ongoing projects here. No project is too big or too small.
Post Reply
User avatar
catamount
Candidate for Boat-Obsession Medal
Posts: 378
Joined: Sun Jun 19, 2005 7:30 am
Boat Name: GREYHAWK
Boat Type: Peterson 34
Location: Boothbay Harbor, ME
Contact:

GREYHAWK's Refit -- Continued

Post by catamount »

GREYHAWK's Refit - Continued
September 2007 Update

The last real update I published was in early June. Fortunately, just because I haven't posted any updates over the summer, that doesn't mean that there's been no progress. Still, we spent a fair bit of time this summer sailing, on our San Juan 21 QUASAR as well as OPB's. Two "big adventures" of the summer were helping my father-in-law deliver his Catalina-Morgan 440 from Annapolis up to Boothbay Harbor in early July, and then racing QUASAR in the Boothbay Harbor Yacht Club's annual regatta, taking the little boat further out than she's ever been before.

Much of the work this summer wasn't particularly photogenic, nor really all that visible. One of the big projects was fitting the anchor roller assembly to the bow, which entailed building up significant "shims" of fiberglass and thickened resin, and then fairing the mess to the deck and hull sides.

A lot of time and effort was spent puzzling over ideal hardware placements (such as where to mount the spinnaker pole storage chocks), and then drillin' an' fillin' all the holes for the fasteners. This entailed placing the hardware, drilling the fastener holes, over-drilling the holes through the top skin, excavating coring from between the skins beyond the over-drilled hole, taping off the bottom of the hole from the inside, injecting the hole with thickened epoxy until full, sanding that flush after curing, and then placing the hardware again and re-drilling the fastener holes for the hardware. Hatches, cleats, deck organizers, rope clutches, bow and stern pulpits, handrails, etc...

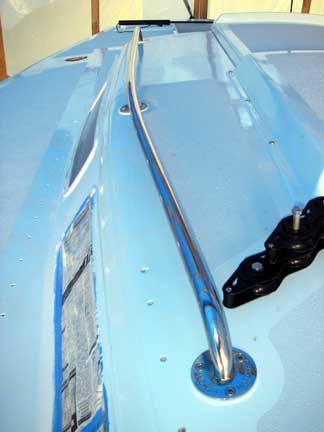
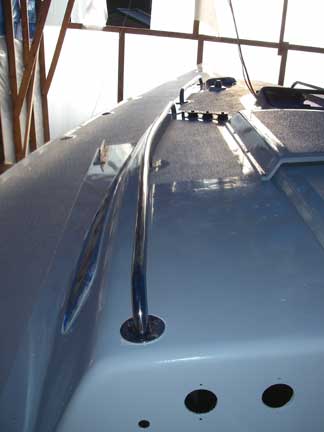
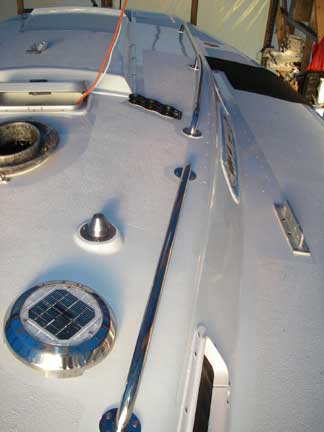
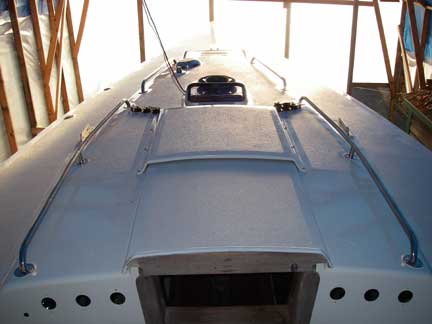
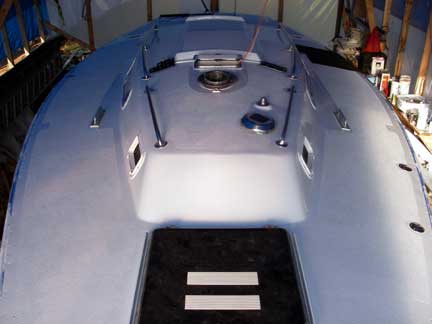
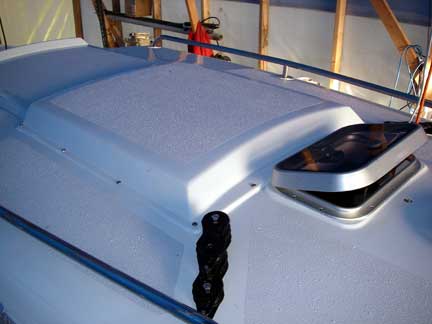
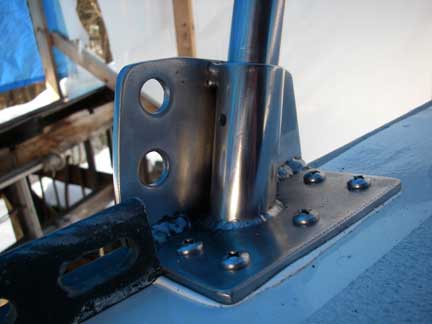
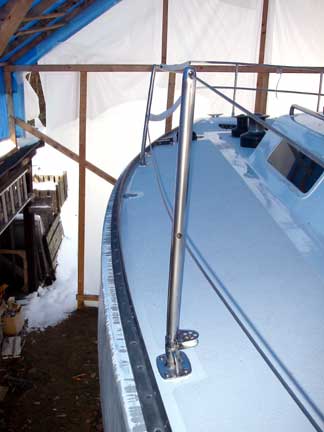
One neat trick I'm pretty proud of was custom bending my new stainless steel handrails to fit the curve of the cabin house. I did this using a forked tree in the back yard, and they really came out nice. I'll get a good pic once they're mounted...

Then there was prep for painting, including sanding the whole deck with belt sander and random orbit sander, as well as getting all the corners and edges and fiddly bits by hand, and more fairing where necessary. Then vacuuming, washing with soap and water, and finally wiping down with solvent.

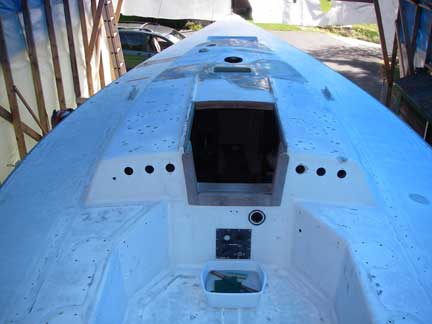
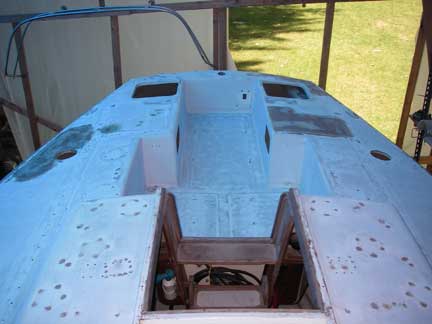
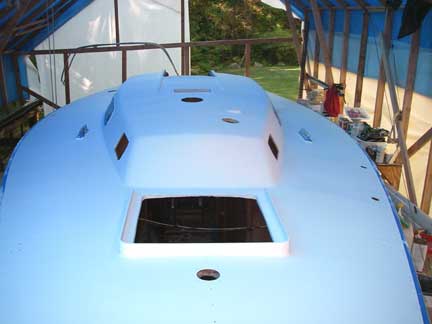
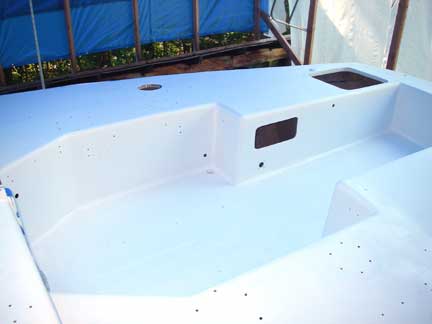
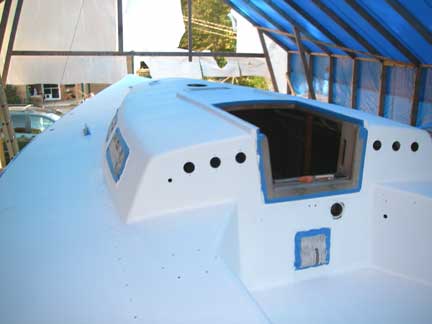
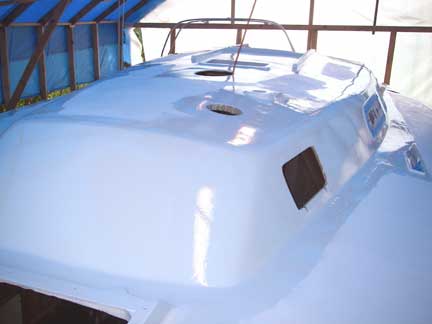
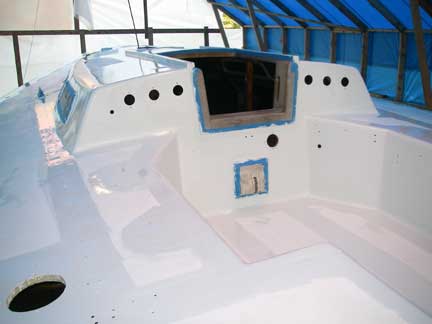
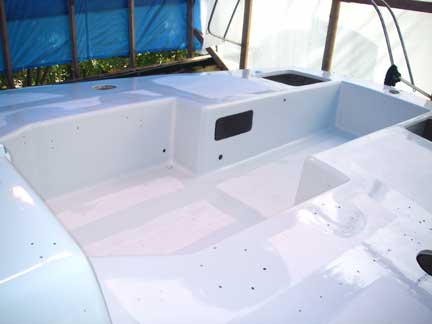
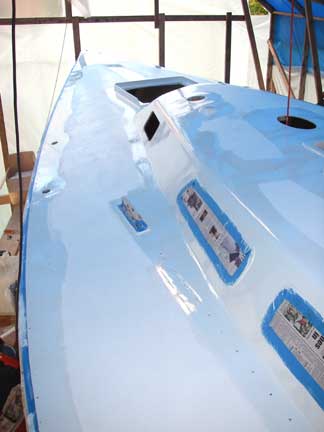
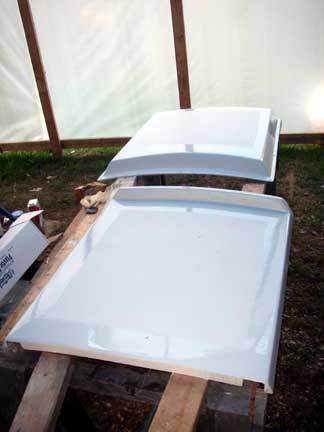
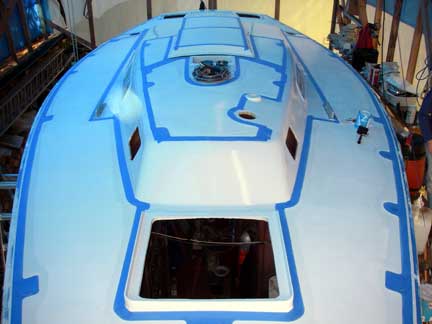
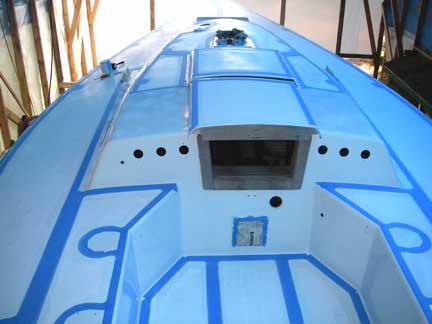
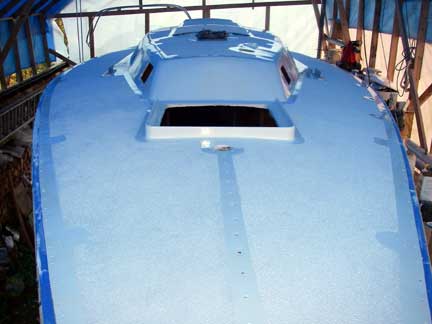
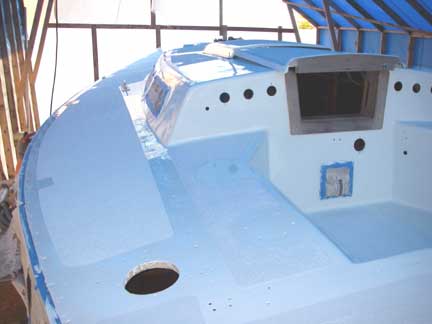
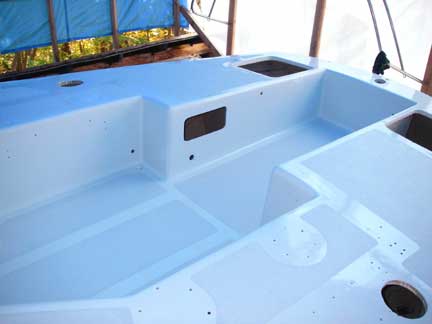
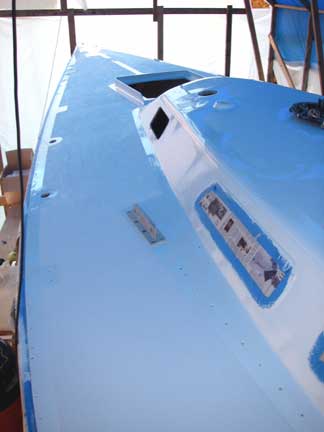
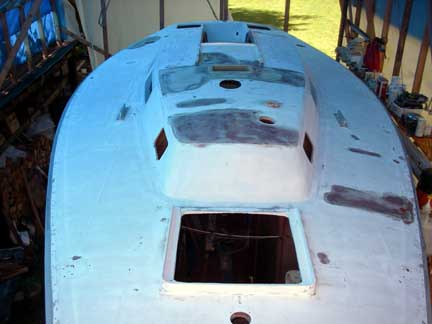
Finally a big change today: the first coat of high-build primer went on!

BEFORE

Image

Image

Image

AFTER

Image

Image

Image

It's far from a perfect job, and needs sanding and another coat or two before finish paint, but man, what a difference! Woo Hoo!
Last edited by catamount on Thu Apr 30, 2009 1:29 pm, edited 1 time in total.
Tim Allen -- 1980 Peterson 34 GREYHAWK
Harborfields Housekeeping Cottages, West Boothbay Harbor, Maine
Sailors for the Sea, a new voice for ocean conservation
User avatar
Tim
Shipwright Extraordinaire
Posts: 5708
Joined: Tue Apr 01, 2003 6:39 pm
Boat Name: Glissando
Boat Type: Pearson Triton
Location: Whitefield, ME
Contact:

Post by Tim »

It sure is nice when you start getting the primer on and start covering up that multi-colored patchwork that you've been getting so used to! Definitely one of the more significant moments in one of these sorts of restorations.
---------------------------------------------------
Forum Founder--No Longer Participating
A30_John
Candidate for Boat-Obsession Medal
Posts: 318
Joined: Mon Nov 01, 2004 3:46 pm
Location: Maine

Post by A30_John »

Looks great! What technique are you using to apply your paint?
John
User avatar
catamount
Candidate for Boat-Obsession Medal
Posts: 378
Joined: Sun Jun 19, 2005 7:30 am
Boat Name: GREYHAWK
Boat Type: Peterson 34
Location: Boothbay Harbor, ME
Contact:

Post by catamount »

The first coat of primer was rolled on with a standard 1/4" nap roller, and where the roller couldn't get I used a cheapo foam brush.

For subsequent primer coats and for the top coats, I plan to use a fine 3/16" nap mohair roller and probably badger hair brush.

I should probably point out that I think of my boat more as a sailing machine than as a fine yacht. I just hope to do a better job than the last time the deck was painted by a previous owner (runs and sags all over the place), but the Hinckley paint shop I am not! ;-) I'll be happy if there are no obvious blemishes when viewed from 10 or 20 feet away....

FYI, I'm using Pettit Easypoxy one-part paints, and Kiwi-Grip for the non-skid (which will get spread with their proprietary roller). For the areas that don't take non-skid, I'm currently planning to dull the Easypoxy down with their Satin Additive, as I don't like a deck that glares at me. The final color will be "Mist Gray" for the Easypoxy and "Gray" for the KiwiGrip.

FWIW, here's the rest of the color scheme: the mast and boom were done in "Whisper Gray" AwlGrip in 2006; the topsides are currently a medium sort of battleship gray color, and rather oxidized, with a black(?) bootstripe. There are red/orange vinyl graphics on the stern quaters (e.g. see my avatar). The hailing port on the transom was done in white vinyl. I have no immediate plans to paint the topsides, but that is something that might happen in the long term, at which time my wife would like to do something other than battleship gray. In the mean time, I will try to clean them up and polish them as best I can.

The previous owner used VC Offshore on the bottom (which comes in blue, black, and red) - he would put on a coat of red, wet sand that, then one of blue, wet sand that, and then mix what was left over in the cans and put that on (a sort of purple). He gave me a gallon of blue with the boat, so I'll be putting that on the bottom for starters. Still, I hear that you go much faster if you paint the keel and rudder orange....

Previous canvas work (e.g. mainsail cover) was a maroon red that sort-of matched the hull side graphics, and did match the bottoms and sides of the berth cushions. The tops of the berth cushions are grey with a cross hatch pattern in red. They are in good condition and actually look pretty nice. The lee clothes, pipe berths, and pipe berth cusions are all standard pacific blue sunbrella. I've go to make a new mainsail cover, and add a sun cover to the roller furling jib leach and foot, and make up some other canvas as well, for which I am considering going with (some version of) white. (I might line the mainsail cover with mylar space blankets to improve the UV protection, which is less with white sunbrella than with darker colors.)

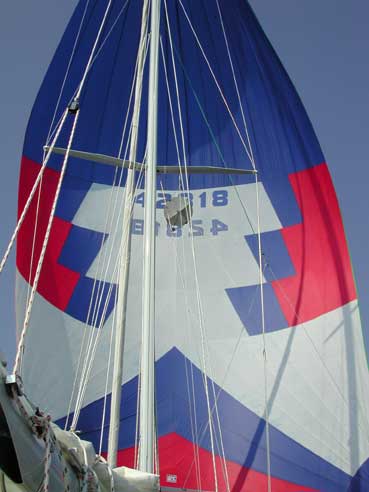
And for complete disclosure, you should know that the 1.5 oz spinnaker is white, medium blue, and hot pink!, while the 0.75 oz chute is red, white and blue...

Image
Last edited by catamount on Thu Apr 30, 2009 1:26 pm, edited 1 time in total.
Tim Allen -- 1980 Peterson 34 GREYHAWK
Harborfields Housekeeping Cottages, West Boothbay Harbor, Maine
Sailors for the Sea, a new voice for ocean conservation
deckhand
Rough Carpentry Apprentice
Posts: 59
Joined: Sat Jul 14, 2007 9:29 pm
Location: New Jersey

Post by deckhand »

Looking good! Can't wait to get to that stage, heck, I can't wait to finish this deck joint!
Dave
T30 #164 "Hobyn"
www.dkyrejko.com/hobyn
User avatar
catamount
Candidate for Boat-Obsession Medal
Posts: 378
Joined: Sun Jun 19, 2005 7:30 am
Boat Name: GREYHAWK
Boat Type: Peterson 34
Location: Boothbay Harbor, ME
Contact:

Deck Painting is Done!!!!!

Post by catamount »

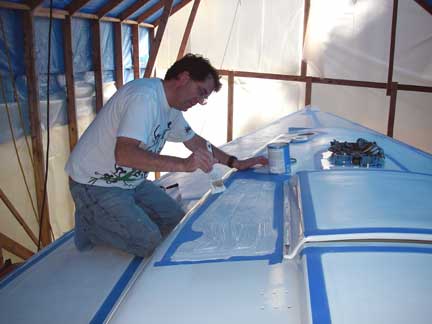
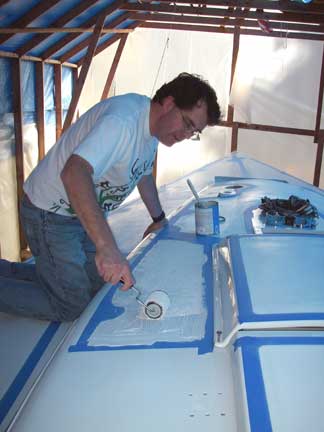
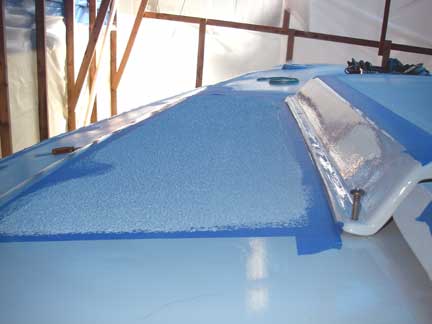
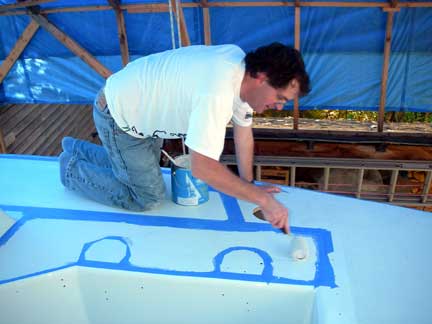
Last Month, a major transformation occurred as the deck was primed. Over the course of this month, we've finally finished painting the deck! Yeah!!!! This included a second coat of primer, sanding that smooth, a couple coats of "skid" paint (with sanding and cleaning in between), then taping off the "skid" areas for painting of the "non-skid" areas, more sanding and cleaning, and finally applying the non-skid (KiwiGrip).

While the weather was generally cooperative -- during the days -- it was still cool at night, so I ended up setting up a couple of electric heaters in the boat tents (about 3000 watts all together) to try to keep the temperature in range for the paint over those nights. I also spent a day early in the month re-assembling the end walls of the boat tent, and re-covering the tent with new 6-mil plastic sheeting to keep the rain and leaves from blowing in on the fresh paint. I had gotten about 12 months out of the old plastic. Also, earlier in September I covered the roof with a second layer of new blue tarps. With the old layer underneath, hopefully the new ones won't chafe through as quickly.

Here are some pics:

"Skid" Paint applied

Image

Image

Image

Image

Image
Companionway Sliding Hatch and Seah Hood

While I tried to do a bang-up job on the paint, it is far from perfect. There are quite a number of runs and sags, so don't look too closely! (But it looks good in these low-res images, though, doesn't it?)

Originally, I intended to use the Satin Additive to get a less glossy finish, but keeping it mixed into the paint proved problematic. While the gloss does show up the defects (in both the paint job and the preparation) more readily, it should stand up to the weather much better than the satin finish, and I think the glare will be manageable.


Taped off for application of Non-Skid

Image

Image

Applying the KiwiGrip Non-Skid

Image
"Trowelling" the KiwiGrip non-skid paint on with a brush

Image
Rolling the KiwiGrip out with their "Loopy-Goopy" roller

Image
I went for an aggressive texture -- it's supposed to be "non-skid" afterall!

Image
It's over ten feet down to the ground just over that edge...

The KiwiGrip went on very easily, and so far I am very happy with the results. It remains to be seen how well it holds up in use, but so far I would definitely recommend it to anyone lookng for a good non-skid surface for their decks. My dealings with the North American distributor were also very positive. See http://www.kiwigrip.com/

Done!

Image

Image

Image

Image

As the KiwiGrip cures, it will get a little darker, contrasting a bit more with the "skid" paint.

Next up will be re-installing all the deck hardware, which will require a bit of cleaning and polishing first, as well as some miscellaneous machining, etc....
Last edited by catamount on Thu Apr 30, 2009 1:25 pm, edited 1 time in total.
Tim Allen -- 1980 Peterson 34 GREYHAWK
Harborfields Housekeeping Cottages, West Boothbay Harbor, Maine
Sailors for the Sea, a new voice for ocean conservation
Noah
Skilled Systems Installer
Posts: 190
Joined: Mon Jan 10, 2005 2:17 pm
Location: Burlington, vt
Contact:

Post by Noah »

Looking Good!!
I want a shop!
Summersdawn
Skilled Systems Installer
Posts: 279
Joined: Fri Nov 04, 2005 6:34 pm

Post by Summersdawn »

A J30 moored near me used Kiwi Grip 2 summers ago. He reported the same as you - dealer was extremely helpful and knowledgable (the national distributor even stopped by to check on the progress!), and it went on very well. He painted his deck in stages - it was a work in progress, and were the overlaps occur, the seam is invisible, which is good news for the inevitable touch ups that will eventually be needed. The paint is holding up extremely well, and although it is quite aggessive looking, it is not at all hard on the feet.
Rick
Summer's Dawn
24 San Juan #380
Figment
Damned Because It's All Connected
Posts: 2846
Joined: Tue Apr 08, 2003 9:32 am
Boat Name: Triton
Boat Type: Grand Banks 42
Location: L.I. Sound

Post by Figment »

Nonskid also holds a bit of dirt after a while, which will give even better contrast against the smooth paint. I recall kicking myself for not using a darker paint on my nonskid when the finished deck first saw the light of day, but after a month in the real world it looked much better.

I agree with your desire for not-totally-glossy paint, and I wonder if there isn't a different way to go about it. The de-glossing agents sold with the various paint systems generally reduce the paint's durability, I think. I'm starting to think that it may be better to apply the paint in its full-gloss form to get a good hard coat, but then give it a buff with some light-duty rubbing compound or perhaps even a gentle scotch-brite pad to knock it down to semi-gloss.
User avatar
catamount
Candidate for Boat-Obsession Medal
Posts: 378
Joined: Sun Jun 19, 2005 7:30 am
Boat Name: GREYHAWK
Boat Type: Peterson 34
Location: Boothbay Harbor, ME
Contact:

Post by catamount »

Figment wrote:I recall kicking myself for not using a darker paint on my nonskid when the finished deck first saw the light of day, but after a month in the real world it looked much better.
The alternative, of course, is to try to get your skid and non-skid colors to match -- exactly -- which seems like it would be pretty hard to do, especially if using different systems.

The alternative alternative would be to paint non-skid everywhere and not even have any "skid" areas (which is more or less what I think a previous owner of my boat had done!).

Figment wrote:I agree with your desire for not-totally-glossy paint, and I wonder if there isn't a different way to go about it. The de-glossing agents sold with the various paint systems generally reduce the paint's durability, I think.
Yes, the spec sheet that came with the Easypoxy Satin Additive says exactly that: "NOTE: Generally, high gloss finishes are more resistant to weathering than are semi-gloss paint will be subjected to harsh sunlight and salt spray."

Figment wrote:I'm starting to think that it may be better to apply the paint in its full-gloss form to get a good hard coat, but then give it a buff with some light-duty rubbing compound or perhaps even a gentle scotch-brite pad to knock it down to semi-gloss.
I'm thinking along these same lines.... We'll see, though. I've got enough other stuff to do that I likely won't do anything like this until the boat has been in the water for a year or two, by which time it will probably be moot anyway...
Tim Allen -- 1980 Peterson 34 GREYHAWK
Harborfields Housekeeping Cottages, West Boothbay Harbor, Maine
Sailors for the Sea, a new voice for ocean conservation
User avatar
catamount
Candidate for Boat-Obsession Medal
Posts: 378
Joined: Sun Jun 19, 2005 7:30 am
Boat Name: GREYHAWK
Boat Type: Peterson 34
Location: Boothbay Harbor, ME
Contact:

Re: Deck Painting is Done!!!!!

Post by catamount »

catamount wrote:Image
I was chided in another venue for not wearing a respirator in these pics.

KiwiGrip is non-toxic and has no volatile solvents. The MSDS has this to say: "Respiratory Protection: Respirator is not required for normal application."

In case anyone was wondering....
Last edited by catamount on Thu Apr 30, 2009 3:13 pm, edited 1 time in total.
Tim Allen -- 1980 Peterson 34 GREYHAWK
Harborfields Housekeeping Cottages, West Boothbay Harbor, Maine
Sailors for the Sea, a new voice for ocean conservation
Zach
Boat Obsession Medal Finalist
Posts: 684
Joined: Wed Jan 25, 2006 6:28 pm
Location: Beaufort, North Carolina
Contact:

Post by Zach »

Looks good!

Can't wait to hear how it feels underfoot.

(I've been playing with the idea of non-skidding the whole thing. Though at the time the plan was mixing sand into the paint! Kiwigrip might earn Pylasteki the right of first stuccoed sailboat!)
User avatar
catamount
Candidate for Boat-Obsession Medal
Posts: 378
Joined: Sun Jun 19, 2005 7:30 am
Boat Name: GREYHAWK
Boat Type: Peterson 34
Location: Boothbay Harbor, ME
Contact:

Post by catamount »

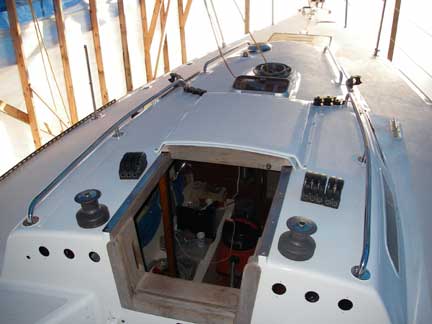
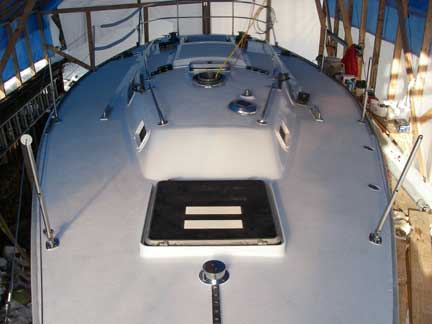
Last month, I mentioned the nifty bends I put in the stainless steel handrails and promised some pictures once they were installed. Here they are:

Image

Image

Image

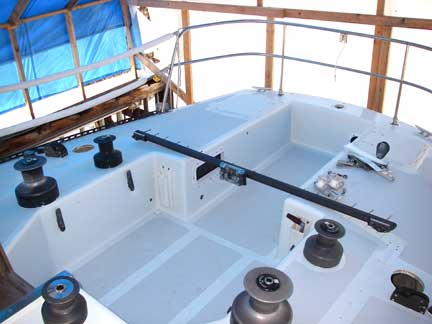
Looking forward from the cockpit:
Image

Looking aft from the bow:
Image

Detail of Sea Hood and new ventilation hatch:
Image

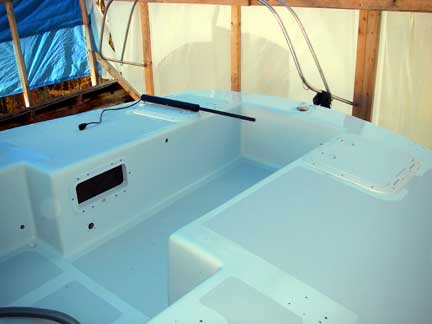
View of the back of the cockpit showing lazarette Hatches installed as well as the portlight to the quarterberth:
Image

Detail of tillerpilot arm over lazarette hatch:
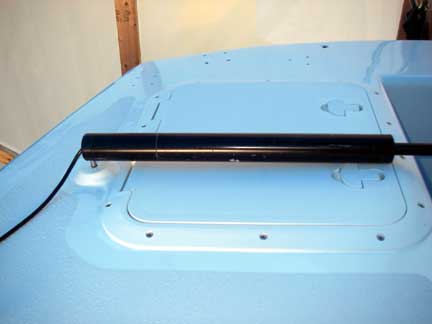
Image

Obviously still a lot of hardware to go on, but we're making progress!

Regards,

Tim A.
Last edited by catamount on Thu Apr 30, 2009 1:23 pm, edited 1 time in total.
Tim Allen -- 1980 Peterson 34 GREYHAWK
Harborfields Housekeeping Cottages, West Boothbay Harbor, Maine
Sailors for the Sea, a new voice for ocean conservation
Figment
Damned Because It's All Connected
Posts: 2846
Joined: Tue Apr 08, 2003 9:32 am
Boat Name: Triton
Boat Type: Grand Banks 42
Location: L.I. Sound

Post by Figment »

Good stuff man!

I can't tell from the pics, do those grabrails have any sort of knurl or texture to them?
User avatar
catamount
Candidate for Boat-Obsession Medal
Posts: 378
Joined: Sun Jun 19, 2005 7:30 am
Boat Name: GREYHAWK
Boat Type: Peterson 34
Location: Boothbay Harbor, ME
Contact:

Post by catamount »

Figment wrote: I can't tell from the pics, do those grabrails have any sort of knurl or texture to them?
No, they're smooth highly polished 316 SS, made by Anchor Hatches in New Brunswick as sold by Hamilton Marine...
Tim Allen -- 1980 Peterson 34 GREYHAWK
Harborfields Housekeeping Cottages, West Boothbay Harbor, Maine
Sailors for the Sea, a new voice for ocean conservation
Duncan
Candidate for Boat-Obsession Medal
Posts: 388
Joined: Fri Mar 03, 2006 7:28 am
Boat Name: Coquine
Boat Type: Cape Dory 27
Location: Montréal
Contact:

Post by Duncan »

Thank you! I have been looking for Anchor Hatches for two years now.

I saw a Friendship Sloop with a beautifully-made aluminum hatch in the cockpit sole (for engine access). He told me it wasn't expensive and that it came from Anchor Hatches. I never did manage to find them, though, until your post just now.
Image
Cape Dory 10 & 27
Jason K
Boat Obsession Medal Finalist
Posts: 741
Joined: Fri Mar 18, 2005 10:41 pm
Boat Name: Rambunctious
Boat Type: J/30
Location: Mandeville, LA
Contact:

Post by Jason K »

How's the refit coming along?
- Jason King (formerly #218)
J/30 Rambunctious
http://www.rambunctiousracing.com
User avatar
catamount
Candidate for Boat-Obsession Medal
Posts: 378
Joined: Sun Jun 19, 2005 7:30 am
Boat Name: GREYHAWK
Boat Type: Peterson 34
Location: Boothbay Harbor, ME
Contact:

Post by catamount »

Things are coming along... Yesterday, Sailing Anarchist redboat came over to help me re-install some of the toerails. I'll try to get some photos of the progress tomorrow (MLK day).
Tim Allen -- 1980 Peterson 34 GREYHAWK
Harborfields Housekeeping Cottages, West Boothbay Harbor, Maine
Sailors for the Sea, a new voice for ocean conservation
User avatar
catamount
Candidate for Boat-Obsession Medal
Posts: 378
Joined: Sun Jun 19, 2005 7:30 am
Boat Name: GREYHAWK
Boat Type: Peterson 34
Location: Boothbay Harbor, ME
Contact:

Post by catamount »

GREYHAWK's Refit - Continued
January 2008 Update


In the last full update (October 2007), I had just completed painting the decks (primer, "skid," and non-skid paints). Since then, I've been installing deck hardware (including overhauling of much of that hardware).

In mid-November, I showed you the stainless steel handrails that I had bent to fit the curve of the cabin roof. I was recently asked about my choice of metal rails versus the more traditional wooden hand rails, so here's my thinking on that: I haven't had my boat in the water since installing the stainless handrails, so I can't really comment on how well they work "under fire" as it were. But so far I do like them a lot. A handrail needs to be convenient to access and grab, and needs to be able to support the the load of a falling body. The wood rails, with their multiple loops, mean that you can't just grab them anywhere -- the metal rails are continuous and virtually un-interupted. The 25-year-old wood rails that I removed were cracked and worn, and I just didn't have a lot of confidence in their ability to hold me in a serious fall. I could have replaced them with new teak rails, but those would have been even more expensive than the metal rails. Another reason I chose metal over wood is that it is my sense that one reason for the failure of the sealant under wooden fittings is because of the shrinking and swelling of the wood as it's moisture content changes -- not a problem with metal (just have to worry about thermal expansion/contraction). There is an aesthetic issue, though. My boat didn't have a lot of exterior wood to begin with, and set up as a racing boat, has more of an industrial "sailing machine" look about it. The metal handrails fit with that look pretty well. For a more traditional cruising boat with a lot of other exterior wood trim, wooden hand rails make a lot of sense. If they are properly maintained, they should remain strong enough and shouldn't ever leak (proper maintenance would include re-bedding them occasionally, maybe in ten years?). FWIW, I will have a set of wooden handrails on the underside of the cabin roof for interior use...

One of the big projects in late November was overhauling the ten winches that came off of the boat (six #30's, two #44's, and two #55's).It was quite a job, as they were pretty loaded with lots of dirty grease and other gunk. I went through about 5 gallons of old diesel fuel as a solvent to clean all the innards. By the way, the number designations don't just refer to the winches' power ratios, but also represents the number of bits and pieces inside each one! ;-)

My general procedure was to soak the whole winch in a bucket of oil to soften up the old grease, disassemble the winch and scrub each of the pieces in the oil with a toothbrush, dental pick, etc..., then scrub each piece again in fresh clean oil to wash off the dirty greasey oil left from the first scrubbing, dry each piece with paper towels and/or newspaper, then wash each piece with hot water and dish soap in the kitchen sink, dry them again, and finally apply a very thin coating of fresh grease (oil on the pawls and springs) while re-assembling -- which is assuming that I could remember how to put all the pieces back together again (The 30's were easy, but for the 44s and 55s, I only did one winch at a time, so that I had it's pair still assembled to look at if I had any questions).

I only re-installed six of the ten winches, as I'm using spinlock rope clutches so that all the halyards can share a pair of winches rather than having a dedicated winch for each halyard.

Image

Image

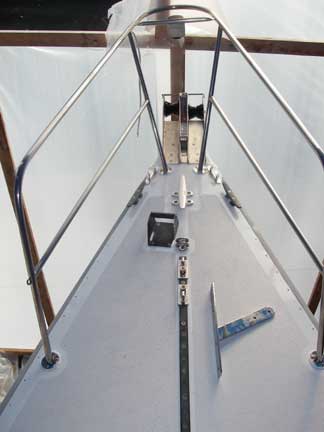
I had to do some machining on the anchor roller assembling before installation, but here it is along with the rest of the fore-deck hardware:

Image

The piece of metalwork laying on the starboard side is the stem piece and headstay chainplate, which I have yet to install. It comes up between the two channels of the anchor roller assembly, and there are a couple of bolt holes that need to match up. After my first attempt at drilling them, they didn't match up... So I've still got a bit of work to do there.

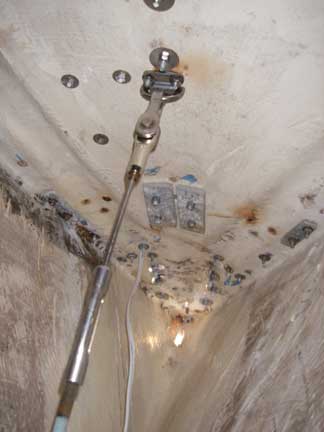
Next to the spinnaker pole chock, just ahead of the foredeck track, is a double folding padeye that is the attachment point for an inner forestay. Below deck, it is backed up by a tie-rod that will help transfer the load to the hull.

Image

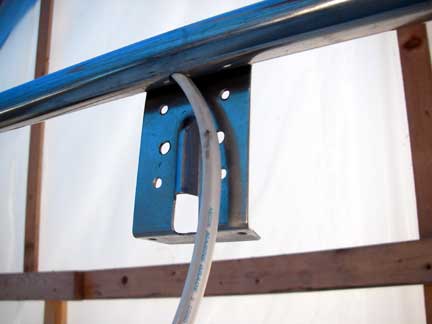
You can also see the backing plates for the three foredeck cleats, and the hole through which the headstay chainplate goes. The wire goes up into the bow pulpit and up to the bi-color running light hung.

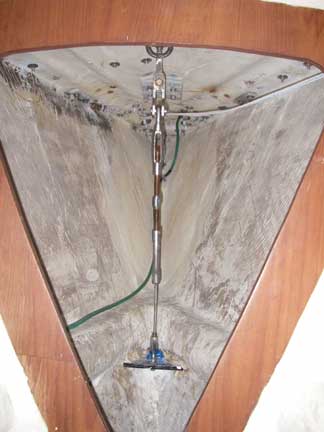
The base of the tie rod will fasten where the longitudinal hull stringers meet in the forepeak. I still have to fabricate the fitting for that... (waiting for another shipment from onlinemetals.com)

Image

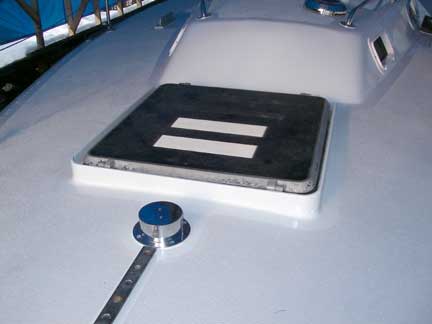
I located the anchor rode deck pipe just forward of the foredeck hatch, because I want to keep the weight of the anchor rode out of the bow as much as possible. You can also see, completed, the Wavestop I constructed around the foredeck hatch.

Image

I spent some time polishing the bow and stern pulpits, new stern pulpit bases, and lifeline stanchions and bases, and then re-installing them. You saw the bow pulpit above, here's one of the new bases for the stern pulpit, which replace some cast aluminum fittings that had broken:

Image

These also serve as attachment points for spinnaker blocks, so they are backed up with aluminum backing plates below deck. The wire going through this one runs up through the stern pulpit to the stern running light.

Image

Image

Most recently, after cleaning all the old caulking off, I started re-installing the toe-rails:

Image

I applied the sealant to the bottom of the rail, and then started inserting the screws from the aft working forward, bending the rail as I went, using clamps (or a line taken to a winch) to help with the bending and to hold the rail in place while I put in the screws. Below decks, a friend was putting nuts on, and then I would hold the screw while he torqued them down. But in bending the rail in place, I did smear some of the sealant... Clean up shouldn't be too bad (I hope). At least I'm not dealing with freshly painted topsides!

So here's some overview pics, looking aft from the Bow, and forward from the stern:

Image

Image

Left to install on deck are two more lengths of toe-rail, the genoa tracks and adjustment system, the jib sheet foot blocks, the main sheet traveller, and a few other miscellaneous items of deck hardware. Then I can turn my attention to the interior, starting with the Head compartment, where I've already done all the "demolition":

Image

BTW, I've made an appointment with my hauler (Marblehead Trading Co.) to have the boat launched and mast stepped on Friday, May 30th, ready or not...
Last edited by catamount on Thu Apr 30, 2009 1:22 pm, edited 1 time in total.
Tim Allen -- 1980 Peterson 34 GREYHAWK
Harborfields Housekeeping Cottages, West Boothbay Harbor, Maine
Sailors for the Sea, a new voice for ocean conservation
User avatar
catamount
Candidate for Boat-Obsession Medal
Posts: 378
Joined: Sun Jun 19, 2005 7:30 am
Boat Name: GREYHAWK
Boat Type: Peterson 34
Location: Boothbay Harbor, ME
Contact:

Post by catamount »

Just a quick note to celebrate the fact that I got the engine running again this evening, after it sat idle since August 2006 and having re-done the fuel system and engine electrical (as well as the prop shaft, stuffing box, cutless bearing, etc...).

A critical moment with launch only about a month away!

Lots of progress on other fronts, too, but few of the other projects are really "finished' yet.

Oh yeah, my Dad helped me get the rudder re-installed today, after I had dropped it out to clean the shaft and bearing tube.

Woo Hoo!
Tim Allen -- 1980 Peterson 34 GREYHAWK
Harborfields Housekeeping Cottages, West Boothbay Harbor, Maine
Sailors for the Sea, a new voice for ocean conservation
Figment
Damned Because It's All Connected
Posts: 2846
Joined: Tue Apr 08, 2003 9:32 am
Boat Name: Triton
Boat Type: Grand Banks 42
Location: L.I. Sound

Post by Figment »

Coming up for air anytime soon?
User avatar
catamount
Candidate for Boat-Obsession Medal
Posts: 378
Joined: Sun Jun 19, 2005 7:30 am
Boat Name: GREYHAWK
Boat Type: Peterson 34
Location: Boothbay Harbor, ME
Contact:

Post by catamount »

Figment wrote:Coming up for air anytime soon?
I should have some new pics and maybe some stories to tell in another week or so! (stay tuned...)
Tim Allen -- 1980 Peterson 34 GREYHAWK
Harborfields Housekeeping Cottages, West Boothbay Harbor, Maine
Sailors for the Sea, a new voice for ocean conservation
User avatar
catamount
Candidate for Boat-Obsession Medal
Posts: 378
Joined: Sun Jun 19, 2005 7:30 am
Boat Name: GREYHAWK
Boat Type: Peterson 34
Location: Boothbay Harbor, ME
Contact:

GREYHAWK's Refit - Continued -- May 2008 Update

Post by catamount »

GREYHAWK's Refit - Continued May 2008 Update

In the last major update (January 2008), I reported on installing most of the deck hardware, but even at that writing there was still a lot of hardware to put back on. None of it is particularly photogenic, though.


Holding Tank and Head Plumbing

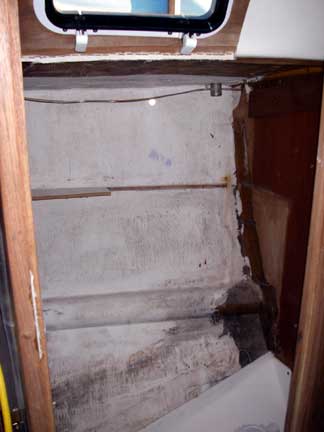
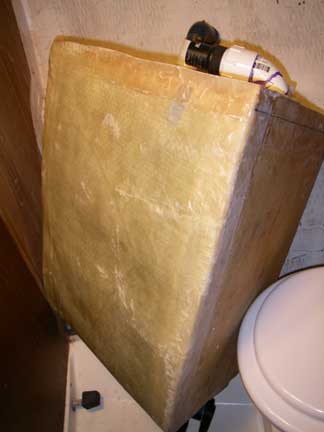
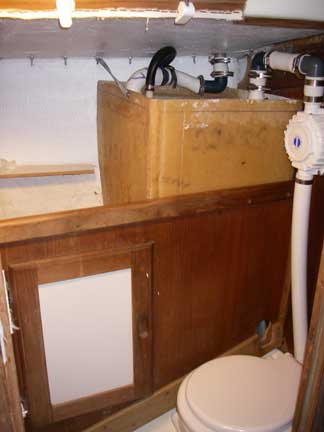
I had left off on the January Update with a teaser about the head compartment. I had previously relocated the thru-hulls for the toilet intake and discharge, and planned to construct a holding tank from recycled fiberglass panels taken from the MOB Horseshoe Buoy storage "wells" that I removed from the deck. I decided that the back wall of the tank should be form-fitted to the hull to maximize tank volume, so I taped waxed paper to the hull interior and laminated the tank wall in place out of roving and epoxy resin.
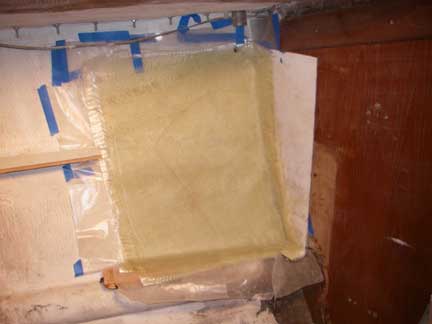
Image

Image

The top of the tank is recessed about an inch below the top of the tank walls, creating a flange that was used to secure the tank to the bulkhead, and which will contain any leaks from any of the fittings. These include (from left to right) the pump-out dip tube, vent, access/view port, and inlet fitting.
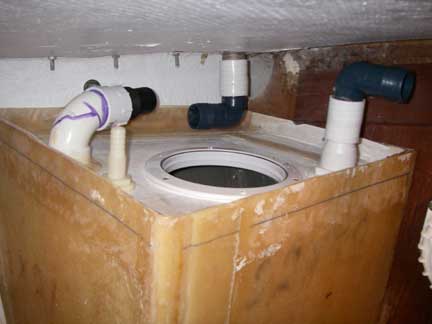
Image

Access/View Port? Why would anyone want to see into their holding tank? But I believe the regs require some means of monitoring the tank level -- with a clear insert screwed into the access port, I can shine a flashlight and see just how full the tank is (or isn't).

Here's a view into the tank, where you can see the pump-out dip-tube tabbed to the side of the tank, and the internal baffle that I installed. I had bought some WEST Barrier Coat additive so used that to coat the insides of the tank.
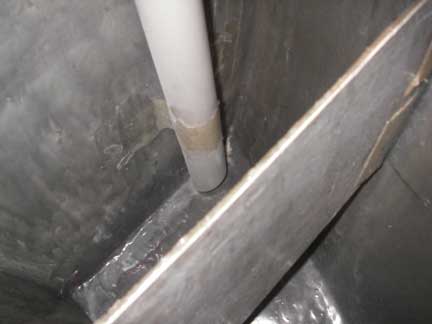
Image

I mounted the pump for my Lavac Popular toilet as high as I could so that there would be little waste standing in the plumbing. Besides being bolted to the bulkhead through the top flange, the tank is also resting on one of the longitudinal hull stringers, and I've added a tie-rod connecting the tank flange to on of the toe-rail bolts. The tank will also be constrained by the cabinetry when that gets installed.
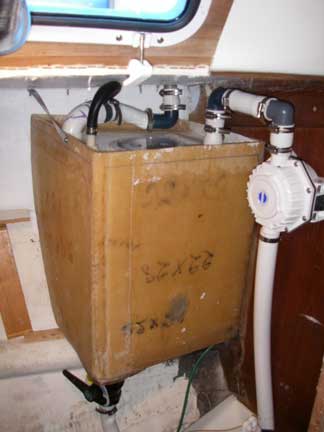
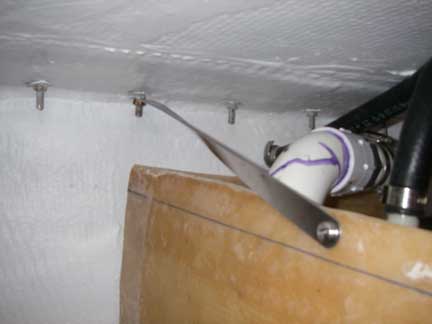
Image

Image

I went with a KISS-type system where the bottom of the tank sits just above the waterline and drains through the bottom to the discharge thru-hull. On my installation, I have a valve at the bottom of the tank as well as the seacock on the thru-hull. I know a lot of folks are wary of fittings on the bottoms of tanks, especially toilet waste holding tanks, but these fittings are the same fittings we use on the bottoms of our hull to keep the sea out. Anyway, I can tell you from experience so far that the system works really well!
Image

I did get a crude counter top in place and installed the wash basin, but no pics yet... The basin drains into the head intake (with a shutoff valve), so one can flush the head with freshwater if desired.


Other Plumbing

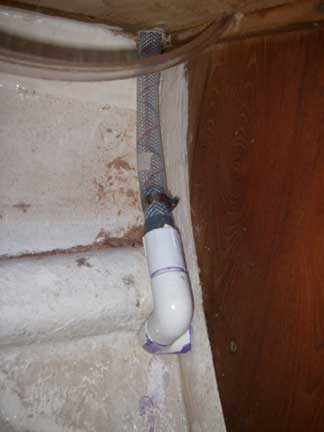
An offshore boat such as this needs to have two manual bilge pumps, one operable from above decks, the other from below, both with all hatches closed. The boat came with two manual bilge pumps, but the below-deck pump had not been plumbed overboard -- you would have had to have a hatch open in order to throw the outlet hose outside. I prefer to have bilge pump outlets discharge aft, so I had a run of about 18 feet to make. PVC pipe is a lot cheaper than marine hose, so that is what I used (with some bits of hose along the way to make a few interconnections).
Image

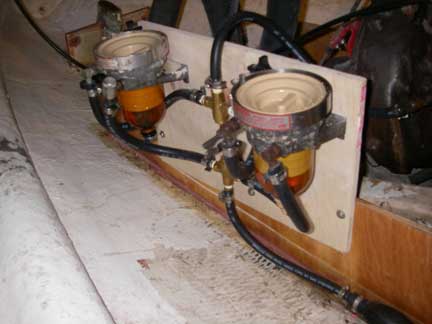
And here's yet another "plumbing" project: fuel filters in parallel with valves for changing over from one to the other without stopping:
Image


Battery Boxes and Electrical System

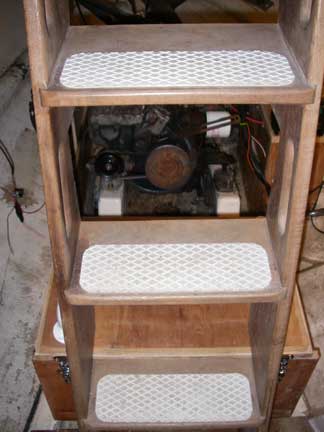
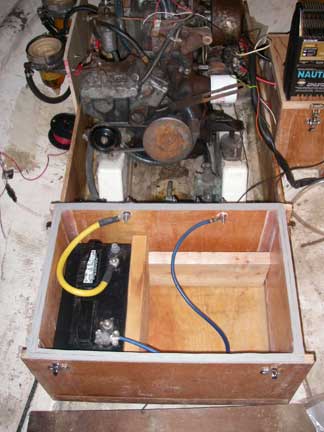
I built two fiberglass-sheathed plywood battery boxes, one for the house battery bank and one for the separate dedicated starter battery. The house box was designed to hold four Golf Cart batteries, but could also accommodate up to 3 Group-27 batteries. At the moment, I've only got on Group-27 battery in there. The house box was located at the base of the companionway ladder, just ahead of the engine and just aft of the keel, just above the bottom of the boat -- optimal placement for locating the weight of the batteries, but also makes the batteries more subject to the possibility of being inundated should we be taking on water. So I made the box waterproof. The lid seals to the box with two strips of closed-cell foam weatherstripping, the electrical connections are made with sealed Blue Sea System's Feed Through Connectors. I also installed a couple of thru-hull fittings in the lid for connecting ventilation hoses ("snorkles"). The box is securely screwed through exterior flanges to the floors and is also constrained by the engine box foundations and the companionway ladder. The lid is clamped down with four anti-rattle door latches -- a much better arrangement than the flimsly strap the boat came with!
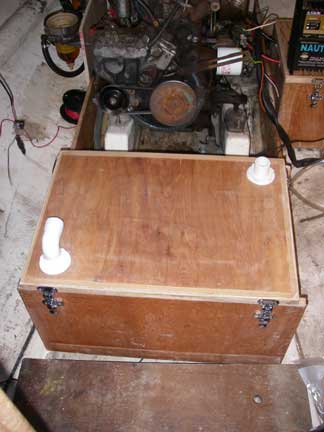
Image

Image

Image

I built a separate battery box for the dedicated start battery, which is located right next to the starter motor to keep the wiring as short as possible. This box accommodates a Group-27 battery. It is not waterproof, but it is located bit higher than the house box. The box is epoxied to the engine box foundation and the hull, and when I get a chance I may add some tabbing. Again, the lid is secured with anti-rattle door latches.
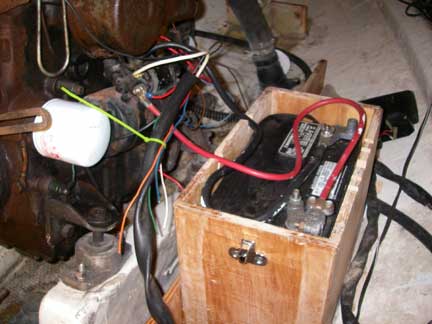
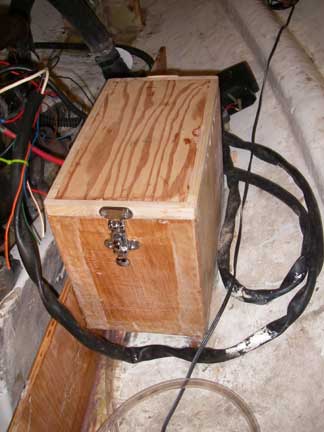
Image

Image

I have not yet added any emergency cross-over wiring for starting the engine from the house bank or for running house loads from the start battery, but that could be done in the future.

The electrical system consists of a main distribution bus (un-switched), the existing "Master Control Panel" with six circuit breakers and a master on-off switch (what used to be the old "Off-1-both-2" battery switch), a distribution fuse box fed from the master panel, and a switch panel for those loads that don't have their own built-in on-off switches (such as the navigation lights), fed from the master panel and the fuse box. All charging sources are directed to the house batteries; the start battery is kept topped up by a Xantrex Digital Echo Charge device. The state of the house battery is monitored by a Xantrex Battery Monitor or XBM. There's nothing special to report about the charging sources as for now I'm just using the stock alternator on the engine and a small solar panel. Installing a shore-power system and upgrading the alternator and its regulator are planned for sometime in the next year.
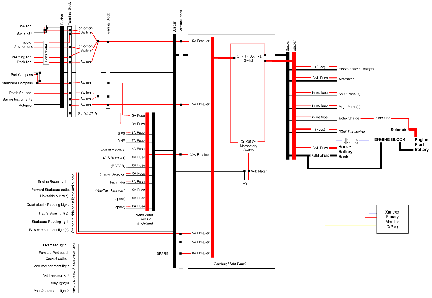
Image
click for a readable version


Here's the nav light Switch Panel and it's wiring (the big grey thing is the reservoir for hydraulic fluid for the Navtec Hydraulic Panel for the vang and backstay adjusters). The panel is out of the splash zone of the companionway, but is still accessible from the cockpit.
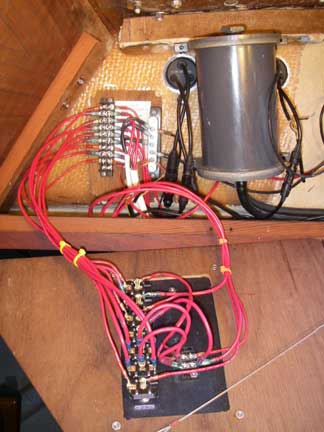
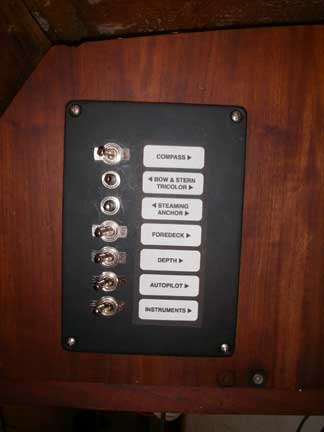
Image

Image

A related system is the Lightning ground. I've got AWG#6 wires leading from the port and starboard chainplates, the stem fitting and bow pulpit, the mast step, and the diesel fuel tank, to a copper bus bar that I fabricated which spans two of the keel bolts under the mast step. The keel itself, 5000 pounds of lead in an external fin, serves as the ground plate. I also plan to bond the mast itself into this system with a piece of copper tubing as a conductor.
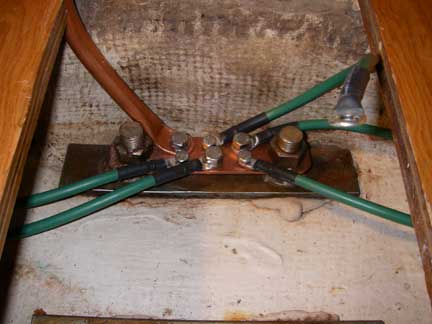
Image

I'll try to get some more pictures of the rest of the electrical installation the next time I'm on the boat.


Rigging

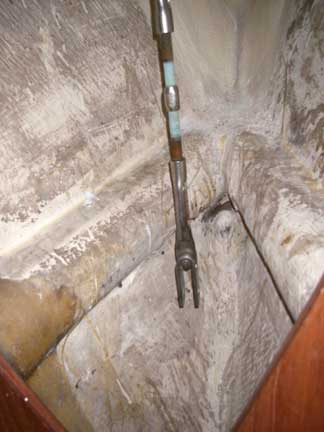
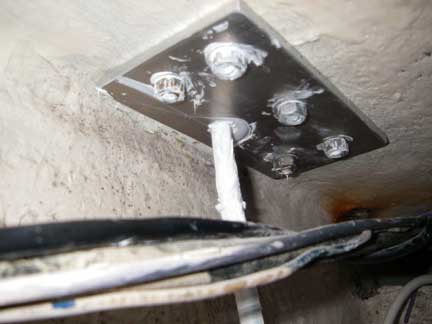
One of the unfinished items in a previous update was the tie-rod that backs up the inner forestay. To anchor the tie-rod, I fabricated a triangular-shaped piece of 3/8" aluminum plate which spans the longitudianl stringers where they meet at the bow. A slot milled in the middle of this plate accepts the marine eye on the end of the tie rod. A 3" long piece of 1/2" stainless steel rod passes through this eye on the underside of the plate, transferring the load from the tie rod to the plate and to the hull stringers. The whole assembly was epoxied into place.
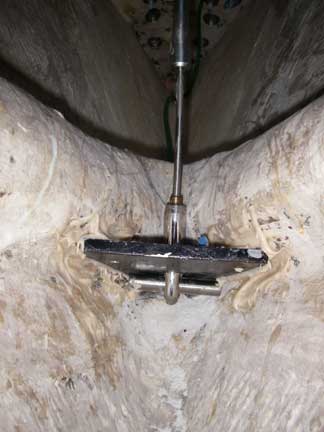
Image

Image

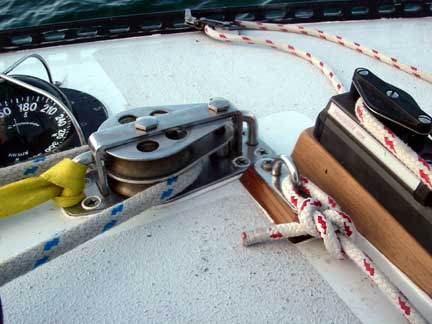
The boat came with some double foot-blocks with 4" sheaves that were not in great shape. New double foot blocks with an equivalent load rating sell for about $750 each! So I decided to rebuild the ones I had. The main thing was to fabricate new divider plates between the upper and lower sheaves. Although the original aluminum dividers were highly corroded and worn, and I contemplated trying some other material like a UHMW plastic, in the end I just made new aluminum plates. The teak blocks supporting the ends of the traveller were also in pretty bad shape, so I made new ones of those as well (laminated from several pieces), re-orienting the lamination to be under compression by the bolts holding the traveller to the deck.
Image


Keel and Bottom

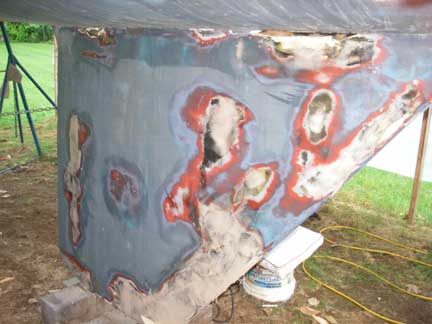
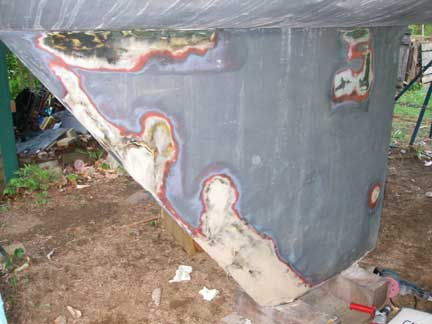
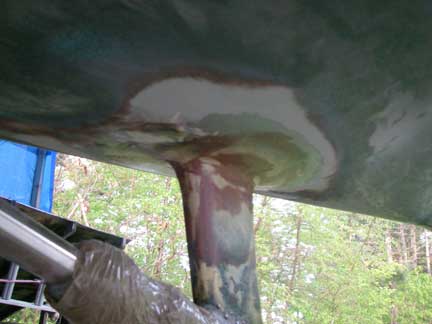
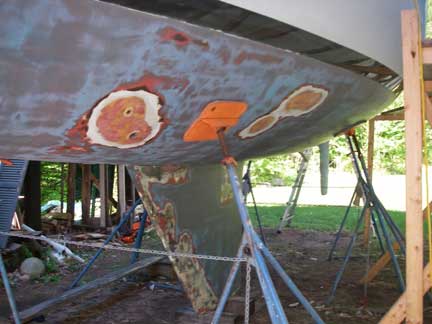
There were a number of spots on the keel where the paint and/or fairing was no longer adhereing to the underlying lead. We ground these areas down to bright metal, wire brushed wet epoxy into the fresh lead, and then re-faired the keel.
Image

Image

I also worked on re-fairing the prop-shaft strut. Inside the boat I added some reinforcement to the strut as well, but I don't seem to have a picture of that; I'll get one next time I'm on the boat.
Image

All the faired areas were given another coat of epoxy to serve as a barrier. Then I vacuum sanded the entire bottom with 220 grit and washed all residual dust off in preparation for bottom painting.
Image

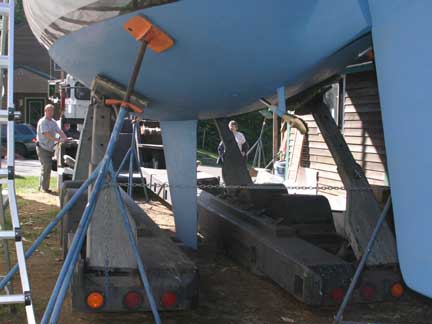
The bottom had been painted with VC Offshore, and the boat came with an un-opened gallon of the stuff, so that is what I used. The previous owner told me that he would put on a coat of red, then wet-sand that until he started to see whatever was underneath. Then he would put on a coat of blue and wet-sand that until he started to see the red. Finally, he would mix the left-over red and blue to make purple (the bottom took about 2/3 of a gallon), roll that on and then wet-sand again -- through 400 grit, followed by burnishing. Indeed the bottom was very smooth. I only put on one coat of blue, rolling it on with a 3/16 mohair roller. Then I wet-sanded with 220, concentrating on the forward 2/3's of the hull, keel, and rudder. That's all I had time for... Now the fun part: I will collect some soil samples from under where the boat was and analyze them in my lab at work for lead an copper content (I'm an environmental geochemist by profession ;).

The goal is, of course, a fair and smooth (fast) bottom. I think we did OK for the first shot at it:
Image

(As an aside, you might remember my prop-shaft saga from February 2007. Last summer I took the old shaft and coupler to H&H Prop in Brunswick, ME, and they supplied with with a new shaft and coupler. I also replaced the cutlass bearing and the stuffing box hose, and re-packed with GFO packing.)


Topsides

We never did do anything to the topsides, other than to give them a good washing. I had hoped to compound and polish the old gelcoat, but just ran out of time. Oh Well! She may not be as shiny as some other yachts out there, but she's still a fine sailing machine!


Launch and Delivery

On Thursday, May 29, my Dad and I went down to Marblehead to work on the mast (which was stored there). We installed some new halyards, additional stays, fixed the steaming light, and installed the Tides Marine Strong Track for the mainsail.

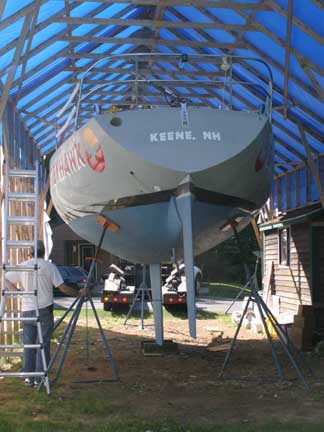
On Friday, May 30, my trucker, Ron Wiswell from Marblehead Trading Company, showed up with his truck and trailer right on schedule at about 8:45, just as I finished taking down my scaffolding alongside the boat. We loaded the boat onto the trailer and were on the road by about 9:15. I rode in the truck with Ron while my Wife and my Dad drove seperately to Boothbay Harbor in order to spot a car there. They would then drive down to Marblehead to meet me there.

While waiting around for the boat to get launched, a fellow introduced himself (although I don't think he ever gave me his name) -- he recognized the boat from my website; he had been following along on the progress of my project as he had bought a boat (a Seidelman 30, if I remember correctly) of similar vintage around the same time I had acquired GREYHAWK.

In the afternoon, the boat was launched and the mast was stepped despite some misgivings by the yard master/crane operator about our state of readiness (or lack thereof). Wendy and my Dad showed up around 17:00, we went out to dinner, and then spent the night tied to the float in Marblehead while we finished rigging the boat and organizing all the stuff that had been loaded on at the last minute.
Image
This is the scariest part for me -- when the boat is balanced on three stands while the trailer is being backed under her!

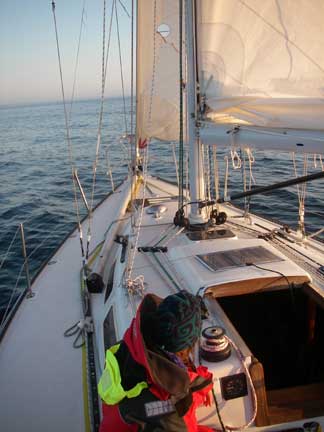
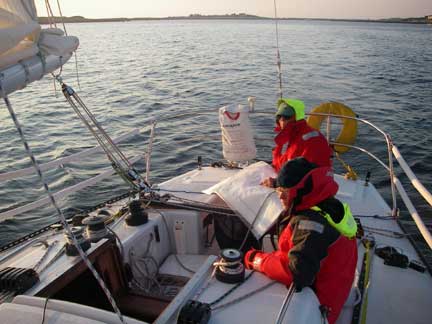
We got underway just before 09:000 on Saturday, May 31, to a call of "good luck!" from the yard master. The forecast called for relatively big winds and seas that night, but they would be from behind us so the apparent wind would be less. We motored slowly out of Marblehead harbor, past all the Transat Class 40 yachts, raised our sails and got under way. Out around Cape Ann the winds were blowing at 25+ knots, and the seas were running 6 to 10 feet. We were really moving along, often surfing at speeds topping 10 knots. The forecast said the conditions wouldn't get any worse, but also that they wouldn't get any better until early Sunday morning. Normally, I would have sailed on, but I was pretty tired from the long run-up preparing for the re-launch (e.g. I was up until 04:00 Thursday night loading stuff onto the boat) and my crew didn't relish the idea of surfing through the dark night, so we put in at the Isles of Shoals for the night, picking up a mooring there at about 16:00. We got underway again about 05:45 on Sunday, June 1.
Image

Image

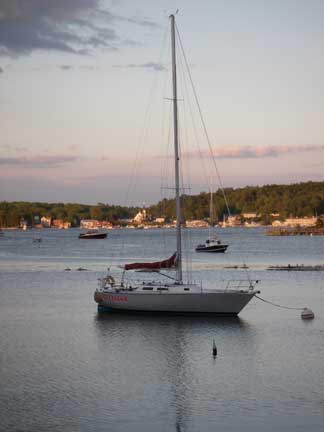
We were running before southwest winds of 10 to 15 knots and seas of 2 to 4 feet all day, arriving in Boothbay Harbor around 19:00 that evening. There's still a lot to do, but it feels great to have her back in the water and sailing again! Wahoo!!!!!
Image


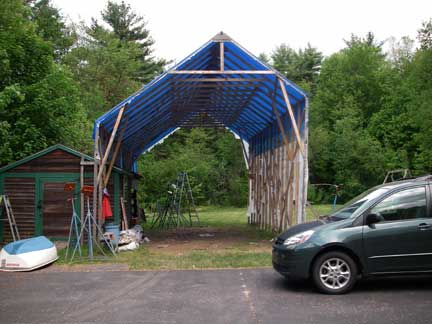
One of the next projects will be dismantling this tent now that it's empty. Man, is it ever cavernous!
Image


If there are any details any of you would like further pictures of, let me know and I'll try to get them next time I'm on the boat. And if any of you are going to be in the vicinity of Boothbay Harbor sometime this summer and want to see things in person, let me know! I'ld be happy to show off! ;-)

Regards,

Tim A.
Last edited by catamount on Thu Apr 30, 2009 3:54 pm, edited 3 times in total.
Tim Allen -- 1980 Peterson 34 GREYHAWK
Harborfields Housekeeping Cottages, West Boothbay Harbor, Maine
Sailors for the Sea, a new voice for ocean conservation
Tim Mertinooke
Skilled Systems Installer
Posts: 200
Joined: Wed Jan 11, 2006 12:50 am
Location: Massachusetts
Contact:

Post by Tim Mertinooke »

Here is a nice example of a multiple fuel filter system. Do you plan on using the existing system or creating a new one? Your boat looks great by the way!

Image
Fuji 32 Ketch "Excalibur"
User avatar
Tim
Shipwright Extraordinaire
Posts: 5708
Joined: Tue Apr 01, 2003 6:39 pm
Boat Name: Glissando
Boat Type: Pearson Triton
Location: Whitefield, ME
Contact:

Post by Tim »

Congratulations, Tim A, and thanks for the great documentation of your work during the project. Enjoy the boat this summer!
---------------------------------------------------
Forum Founder--No Longer Participating
vindo40
Deck Grunge Scrubber
Posts: 32
Joined: Wed Jul 25, 2007 9:35 pm
Location: Clearwater, FL
Contact:

Question

Post by vindo40 »

[quote="Tim Mertinooke"]Here is a nice example of a multiple fuel filter system.

Tim,
I like your "multiple fuel filter".... do you have in detail what did you use ?

Thanks
Hirilondë
Master of the Arcane
Posts: 1317
Joined: Thu Dec 28, 2006 8:50 am
Boat Name: Hirilondë
Boat Type: 1967 Pearson Renegade
Location: Charlestown, RI

Post by Hirilondë »

catamount wrote:This is the scariest part for me -- when the boat is balanced on three stands while the trailer is being backed under her!
I've watched the H&L team at work for years, and they do that several hundred times a year, and it still scares me when they do it to my boat.

Looking good Tim, you've certainly paid your dues.
Dave Finnegan
builder of Spindrift 9N #521 'Wingë'
--------------------------------------------------------------------------------------------------------------------------------------------------------------------
Gresham’s Law of information: Bad information drives out good. No matter how long ago a correction for a particular error may have appeared in print or online, it never seems to catch up with the ever-widening distribution of the error.
Tim Mertinooke
Skilled Systems Installer
Posts: 200
Joined: Wed Jan 11, 2006 12:50 am
Location: Massachusetts
Contact:

Re: Question

Post by Tim Mertinooke »

vindo40 wrote:Tim,
I like your "multiple fuel filter".... do you have in detail what did you use ?
Thanks
This is on another guy's Fuji 32. He is restoring it nicely to do some high latitude cruising. That was a picture he posted on the Fuji Forum.

Here's his website: http://www.anzam.com/images/fuji/projec ... elcome.htm
Fuji 32 Ketch "Excalibur"
Post Reply