Page 1 of 2
Rub Rail Modifications
Posted: Wed Sep 05, 2007 1:36 pm
by jhenson
Posted: Wed Sep 05, 2007 1:44 pm
by Figment
Good god man I know workboats with rubrails more fragile than that!!!
Great stuff.
Filled with chopped strand and silica?
Posted: Wed Sep 05, 2007 4:31 pm
by jhenson
Filled with chopped strand and silica?
I am using silica/chopped glass strand per Tim?s suggestion. The resulting structure seems pretty sound, but will require considerable fairing. The luan plywood only gets the curve ?about? right. Furthermore, despite making a custom squeegy, I failed to get a consistent angle at the top of the rail. This was due, mainly, to the numerous clamps in the way during the application process. I would like the caprail to lie about parallel to the slope of the deck.
Joe
Posted: Wed Sep 05, 2007 6:33 pm
by bcooke
Hey!,
It looks like you have been busy!
-Britton
Posted: Wed Sep 05, 2007 6:55 pm
by Hirilondë
Very ambitious project, and looking good too. Will the final result be like a short bulwark with a cap rail?
Posted: Wed Sep 05, 2007 8:43 pm
by dasein668
PICTURES!!!!
Thanks, Joe!
Posted: Wed Sep 05, 2007 8:51 pm
by jhenson
It looks like you have been busy!
Britton,
I have had a good week of warm weather, and I need to get going again in earnest on the project. Are you moving right along towards paint this fall? I don't think, given the amount of fairing, that I'll get paint on the decks befor the weather changes.
Will the final result be like a short bulwark with a cap rail?
Dave,
I waver a bit on the design. I probably will have only a cap section like the Alberg 35:
http://newimages.yachtworld.com/1/6/1/9 ... 3197681000
However, I remember seeing a wooden boat a few years back that I felt had very beautiful rails. It looked something very similar to those on the custom Triton Daysailor that has been for sale on yachtworld for some time:
http://newimages.yachtworld.com/1/4/2/9 ... 4757464000
Joe
Posted: Wed Sep 05, 2007 9:28 pm
by bcooke
Are you moving right along towards paint this fall?
Ummm... yeah. I hit a little snag in my life-outside-of-boats this week but I expect to be back at the boatyard tomorrow. The boat will be primed and ready for paint this fall but the actual application may wait a bit.
-Britton
Posted: Thu Sep 06, 2007 6:33 am
by Tim
bcooke wrote:I hit a little snag in my life-outside-of-boats this week but I expect to be back at the boatyard tomorrow.
It sure is easy to come up with reasons not to get work done... ;<)
And what is this "life-outside-of-boats" thing that some people talk about? There's life outside of boats? Really? What's that like?
Posted: Thu Sep 06, 2007 6:42 am
by Tim
Looks good, Joe! I'm looking forward to seeing how it all comes out. It's a lot of work, but worthwhile if it helps you achieve the look you're going for with the rail.
And all that extra epoxy and glass will make that toerail bulletproof--or T-bone proof, as the case may be. I know that all the epoxy in my boxed rail minimized the actual damage to my hull and deck when I was T-boned a few years ago.
(I won't post the photo again...and didn't intend to mention the incident again so soon either!)
Posted: Thu Sep 06, 2007 12:23 pm
by Peter
Very nice job on the rails, Joe!
That's a nice looking Alberg 35. It's
for sale in Bellingham WA for $24500.
Sorry to digress.....
Posted: Mon Dec 03, 2007 7:04 pm
by jhenson
I started the process of milling the cap rails this week. The weather is too cold to continue with fairing the rails they attach to, but I think they are close enough to measure the cap sections.
I began by making a prototype of two rail sections out of pine to primarily figure out the measuring jigs for the shape of the rail and scarf joints. Also, it gave me a general idea of how the finished product might look:

I milled the first section today and screwed it down to scribe the other half of the scarf joint on the next section.


Joe
Posted: Mon Dec 03, 2007 7:54 pm
by Figment
Joe I am thoroughly jealous. That's going to be a great addition to the boat.
Are you planning on a small piece beneath the caprail on the hull surface?
(a "stool" in architectural parlance)
Posted: Mon Dec 03, 2007 8:29 pm
by jhenson
Mike,
Thanks! This is kind of exciting to finally do something other than fiberglass work.
Are you planning on a small piece beneath the caprail on the hull surface?
(a "stool" in architectural parlance)
No, this thing is just a cap that sits on the top of the existing rail. I deliberated long and hard on this, but I’m moving slow enough as it is. I don’t want to add any additional complexity.
I’m guessing that Pacific Seacraft and others cut a groove on the underside of the rail to fit around the top of the molded (fiberglass) section of the rail. I thought about doing this for strength as well, and would have probably done so if this was mahogany. However, it’s Ipe, so I’m hoping the inherent strength of this species will compensate for not taking this step.
Joe
Posted: Tue Dec 04, 2007 6:46 am
by Tim
Looks great, Joe! I can't wait to see the continued work--that should be a very classy-looking rail when you're all done.
There's nothing like putting the first wood on the boat after all that grinding.
Posted: Tue Dec 04, 2007 7:54 am
by Ric in Richmond
My A35 actually has a two piece cap. The solid top rail and a 3/4 thick outer rail that is probably there as a sacrificial piece.
Based on how thin the plugs on the screws are I am guessing it is original.
Posted: Tue Dec 04, 2007 9:15 am
by jhenson
My A35 actually has a two piece cap. The solid top rail and a 3/4 thick outer rail that is probably there as a sacrificial piece.
Is the main section of the rail substantially thinner than the outside lamination on your A35. If so, I can understand the reasons for that. I can already see that the cap I’m making looks a bit too thick when viewed from the deck side. I’m very pleased with the rail thickness around the outside though. This material is Ipe 5/4 X 6” decking, and I didn’t want to get into the complexity of resawing and laminating too much. I’m going to run it all the way around the perimeter of the deck, and see how I like the thickness. If it looks too thick, I’ll take some material off the top of the sections with a thickness planer.
Joe
Posted: Tue Dec 04, 2007 9:56 am
by MikeD
Joe, are you actually bending the wood as you install the toe rail, or do you cut the pieces with a curve?
Looks great, BTW!
Posted: Tue Dec 04, 2007 9:58 am
by Figment
I really LIKE the thick appearance on the deck side!
Posted: Tue Dec 04, 2007 10:40 am
by Tim
Figment wrote:I really LIKE the thick appearance on the deck side!
Ditto.
Given the height and thickness of the mini-bulwarks, the width of your wooden caprail, and the general appearance of the whole thing, I think the heft of the caprail seems appropriate.
Posted: Tue Dec 04, 2007 11:08 am
by jhenson
There is thankfully no bending involved (this wood is
very stiff). The other half of the scarf joint will be cut and refined in the second plank first. The plank will next be screwed down temporarily to the boat. I'll use a 3/8" batten to mark the outside curve, and a homemade guage to scribe the inside curve. Then, I'll just cut the plank with a bandsaw and smooth the curves with an adjustable compass plane and card scraper. The edges are rounded over with a router.
A picture of the guage for marking the inside curve is visible in this photo:
.
Figment wrote:
I really LIKE the thick appearance on the deck side!
Ditto.
Given the height and thickness of the mini-bulwarks, the width of your wooden caprail, and the general appearance of the whole thing, I think the heft of the caprail seems appropriate.
Thanks guys. As usual, I'm probably over analyzing this project.
Joe
Posted: Tue Dec 04, 2007 11:27 am
by Figment
Now you've gone and done it.
You have an adjustable compass plane?
I must now insist upon pics of this thing in action. :)
Posted: Tue Dec 04, 2007 4:26 pm
by Ric in Richmond
My two piece A35 rail looks just like your pieces...same thickness inside and out. I didn't even notice it was two pieces until I did some refinishing on it.
I even have the same joint like you have cut.
Imagine if yours was square on the outside, then you added a 3/4" thick piece the same height as your cap. Then you used a round over bit in the router.
If you gouged the outside you could just pull the 3/4" piece off and fix it instead of getting into the whole rail.
Of course it is much thinner as it has been sanded WAY too much. Probably a 1/4" thinner than orriginal. All the fittings are on little mountains of wood where they were never removed and the original height remains.
Where did you souce you IPE??? I am going to have to replace my rails one of these days and need a good supplier.
You can see the rails here.

Posted: Tue Dec 04, 2007 4:26 pm
by jhenson
Ask and ye shall receive:

It is hardly an essential tool to own, but it works well for planing curved surfaces.
Joe
Posted: Tue Dec 04, 2007 4:59 pm
by jhenson
Where did you souce you IPE??? I am going to have to replace my rails one of these days and need a good supplier.
Ric,
The Ipe comes from Vienna Hardwoods. The supply on hand was not that plentiful recently, but they can get it from their wholesale supplier in a couple of days. They have both 4/4 and 5/4 available.
http://www.viennahardwood.com/
Beautiful boat you have there! I love the cap rails. Thanks for the pictures!
Joe
Posted: Wed Dec 05, 2007 11:23 am
by bcooke
Those are some yummy tools. Is it too late to change my list to Santa?
And nice caprail. If I had an early model Triton I would flagrantly copy your idea.
-Britton
Posted: Wed Dec 05, 2007 11:30 am
by Figment
Nice. I've monkeyed with a few of those, but I've never actually had a chance to use one. That ipe must be hell on the iron, though!
Posted: Wed Dec 05, 2007 7:40 pm
by Hirilondë
Maybe this portion of the discussion belongs in "boat nerdery", but I would call your adaptation a short bulwark and cap rail. But regardless of how one describes it, it looks great!
No matter how many new fangled electronic gadgets man creates some tools reached their peaks in technology many years ago. A well tuned and sharpened hand plane is a joy to use. A keen eye for true and fair, and a tool that can get you there little by little and under control.
Posted: Wed Dec 05, 2007 8:11 pm
by jhenson
But regardless of how one describes it, it looks great!
Thanks Dave!
That ipe must be hell on the iron, though!
Ipe is hard and does dull tools fairly quickly, but it’s definitely workable. I remember a short article about it a couple of years ago in American Woodworker magazine that showed a guy standing over it with a welder in his hand. Maybe I’ll say differently later, but It’s really not that bad, (at least the material I’ve used so far). I have an old 14” bandsaw with only a 1 hp motor using a regular carbon steel blade. It takes a while to cut out a section of the rail, but the blade is holding up reasonably well with a slow feed rate. As with other very dense hardwoods, it seems to work nicely with scrapers and steeply bedded hand planes.
I have the typical mixture of wood species on my Triton that everyone else describes. The coamings are teak ,but the companionway hatch trim is mahogany. This Ipe is much darker than teak, and a bit darker than the mahogany. The plan is to use the offcuts from the rail for the eyebrow moldings. I may use it for the lazerette hatch, anchor platform, and dorade boxes as well.
It is reported to have difficult gluing properties when exposed to the elements, even with epoxy, and that concerns me a little. I may use butterfly inlays at the scarf joints and will clean the joints well with acetone before gluing.
Joe
Posted: Wed Dec 05, 2007 9:45 pm
by MikeD
jhenson wrote:The plan is to use the offcuts from the rail for the eyebrow moldings.
Oh! I can't wait for the pictures on this mod! Eyebrows on a Triton - cool!
PS
Posted: Wed Dec 05, 2007 9:54 pm
by MikeD
And just to beat Tim or Nathan to the punch - this is
NOT what I'm talking about!

Posted: Wed Dec 05, 2007 10:26 pm
by Figment
Joe I can see why you'd want to match the color tone and all that, but really ipe is about the last wood I'd think to use for eyebrow and other trim bits. For fussy little bits like that I'd want something that works and bends easily, and takes glue without a thought.
Use the scraps for a cockpit grate. =D
Posted: Wed Dec 05, 2007 11:17 pm
by Rachel
Ooh, Angry Triton! Amazing how those two little bits of wood transform it. I'd almost want to keep a couple of short pieces of wood and some Velcro around just so that I could put those on at the right moment. Say, when people anchor too close... ;^)
Posted: Wed Dec 05, 2007 11:29 pm
by Figment
I have a different signal for that.
Posted: Wed Dec 05, 2007 11:33 pm
by Peter
Figment wrote:I have a different signal for that.
I didn't know grapeshot was still legal ;-)
Re: PS
Posted: Wed Dec 05, 2007 11:37 pm
by catamount
MikeD wrote:And just to beat Tim or Nathan to the punch - this is
NOT what I'm talking about!
Ha! Reminds me of this character:
(well, not his normally sunny expression as shown here, but Mike's Triton looks exactly like Theodore Tugboat when he's mad...)
Posted: Wed Dec 12, 2007 6:00 pm
by jhenson
Posted: Wed Dec 12, 2007 10:35 pm
by Figment
So, the outer surface (curve) of the caprail is indexed to the inner surface of the toerail?
Posted: Wed Dec 12, 2007 11:41 pm
by jhenson
So, the outer surface (curve) of the caprail is indexed to the inner surface of the toerail?
No. That guage only does the inside curve. For the outside, I just use a 3/8" thick batten pressed against the hull. The line is drawn on the underside of the plank.
Joe
Posted: Thu Dec 13, 2007 12:08 am
by David VanDenburgh
Joe,
Looking nice! I like it.
David
Posted: Thu Dec 13, 2007 7:32 am
by jhenson
Thanks David!
Joe
Posted: Thu Dec 13, 2007 8:52 am
by Tim
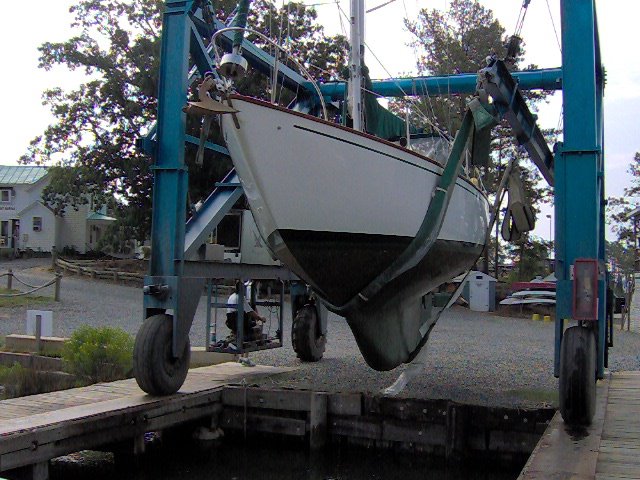
[completely unrelated question] Maybe it's just the camera angle, but I'm curious how your boat hauler managed to drop your boat at such an angle to your driveway, since he'd have to pull straight out from beneath and it looks like the driveway is at a completely incompatible angle. (Sorry...weird thing to notice and even weirder to ask about.) [/completely unrelated question]
Back on topic: The caprail is looking good! Thanks for the update.
jhenson wrote:For the outside, I just use a 3/8" thick batten pressed against the hull. The line is drawn on the underside of the plank.
How do you then transfer this to the top so that you can follow the cut line?
cap rails and trailer skills
Posted: Thu Dec 13, 2007 10:42 am
by jollyboat
Oh that is funny - but a good question. Yeah what he said, - Joe what gives with your boats driveway angle! Oh, and by the way - sweet cap rail Joe. <grins>
Posted: Thu Dec 13, 2007 11:43 am
by jhenson
[completely unrelated question] Maybe it's just the camera angle, but I'm curious how your boat hauler managed to drop your boat at such an angle to your driveway, since he'd have to pull straight out from beneath and it looks like the driveway is at a completely incompatible angle. (Sorry...weird thing to notice and even weirder to ask about.) [/completely unrelated question]
He had to take the truck well off the driveway to get it where it rests now. There are some low bushes in the background of the photos that he just straddled with the truck when he backed up with the boat. I actually wanted the boat in the woods, but he somehow convinced me not to do so. I still think it would have been better in the spot I planed for it. The stern literally backs up to a retaining wall that drops about 3 feet, so I need to build a platform this spring just to do any serious work on the transom.
Overlap at the Bow Increasing Aft:
How do you then transfer this to the top so that you can follow the cut line?
I simply cut the outside curve first on the bandsaw (upside down) and smooth the edge. Then I flip it over and use a long batten to mark the inside curve from the gauge tick marks confirming that the width of the rail is about that desired, then cut it out. The width is about ½” wider at the bow than the section midsection and widens again slightly as it approaches the stern. There is no overlap on the inside curve at the bow, but gradually increases to about 3/8” over the first 8 feet of the rail and remains constant aft until it approaches the stern. One could (and probably should when I think about it) mark off the inside curve from the completed outside curve. I really made the gauge primarily to help me mark off the “transitions” near the bow and stern, but it seems to be quick and easy way to mark off the rest. Also, I wanted to confirm that rail overlap would match the hull curvature when viewed from the cockpit.
Overlap at the Bow Increasing Aft:"
Joe
Posted: Thu Dec 13, 2007 12:02 pm
by Figment
You wouldn't be the first guy to have to prune a few trees to get a project boat off-site!
Ipe
Posted: Thu Dec 13, 2007 12:06 pm
by David
Joe,
Great job on your caprail! How does the epoxy handle the ipe? Did you consider resorcinal instead for the scarfs? Are you planning to glue the caprail to the top of the bulwark or bed it?
Thanks,
David
Posted: Thu Dec 13, 2007 12:09 pm
by Tim
jhenson wrote:I simply cut the outside curve first on the bandsaw (upside down) and smooth the edge.
Oh duh. For some reason, I was thinking that you'd have to cut it with the rail in place on the boat. I don't know why I didn't infer that (of course) the rail wasn't permanent and you could take it off to cut.
Kids, stay away from harsh solvents, lest this happen to you.
Posted: Thu Dec 13, 2007 4:41 pm
by jhenson
Did you consider resorcinal instead for the scarfs? Are you planning to glue the caprail to the top of the bulwark or bed it?
Dave,
I have yet to glue the first scarf joint, and have not worked with this wood before. I only know of what I read of Ipe. I am not sure if some of the information about this wood on the internet is reliable though. Like many tropical species, the oil and acidity of the wood makes gluing difficult. Some people have reported glue failures using outdoor grade glues and even epoxy, though there was an article in Fine Woodworking not long ago where the author used polyurethene glue with Ipe with success to build an outdoor table. While I’m not going to use polyurethane glue, I am strongly considering the use of resorcinol for the scarf joints.
All the scarfs will be attached also with stainless screws inserted sideways through the joint. Again, butterfly joints are also a possibility. The rail will be put down with bedding compound.
Here is an article with references to Ipe and Resorcinol:
http://www.djmarks.com/pdf/ureaglue.pdf
Joe
Ipe and glue
Posted: Fri Dec 14, 2007 9:27 am
by David
Joe,
A good article; thanks. Curious that his only mention and use of epoxy in it was to seal end grain. I think ipe is an interesting wood for boats, but have resisted the temptation mostly becuase of its weight. Resorcinal glue lines shouldn't be especially visible for your scarfs.
Have you considered biscuit joining the scarfs?
Thanks,
Dave
Posted: Thu Jan 03, 2008 11:31 pm
by Triton 185
Hi Joe,
Nice looking work. What is the total height of the glass rail above the deck? As well, what did you go to the hull joint?


