The mahogany rudder on my Alberg 35 has reached the end of it's useful life. I guess 48 years isn't bad. It would probably still be serviceable but at some point, a PO coated with something. The material looks almost like gelcoat. Needless to say, water got in, the wood swelled, the coating cracked to pieces. The wood is quite rotten. I can break sizable chunks off by hand. During haulout last week, an inexperienced travel lift operator put the aft strap around the rudder and took out a 1' x 2' section from the trailing edge. I guess that sealed its fate.
I know this has been discussed on the forum before, but I figured I would solicit some opinions anyway. I guess I have two options for replacing the rudder. Either build one from laminated marine plywood/glass (with lead shot encapsulated for neutral buoyancy) or build a new mahogany rudder like the original. The mahogany rudder lasted for nearly 50 years so it seems like a good option. Which would be better option overall and the least effort to implement?
Rudder Replacement Options
-
Hirilondë
- Master of the Arcane
- Posts: 1317
- Joined: Thu Dec 28, 2006 8:50 am
- Boat Name: Hirilondë
- Boat Type: 1967 Pearson Renegade
- Location: Charlestown, RI
Re: Rudder Replacement Options
Building a rudder, especially as a one off project is going to take a lot of hours no matter what materials you use. I would rebuild it just as it was, but then I am a carpenter. You still have enough evidence at hand of how it is done. Just take pictures, draw patterns, measure and such before you destroy the old one and make it again. When you are done just don't add the gelcoat or whatever that was. African Mahogany with bottom paint lasts longer than you will. And you know it works.
Dave Finnegan
builder of Spindrift 9N #521 'Wingë'
--------------------------------------------------------------------------------------------------------------------------------------------------------------------
Gresham’s Law of information: Bad information drives out good. No matter how long ago a correction for a particular error may have appeared in print or online, it never seems to catch up with the ever-widening distribution of the error.
-
Ric in Richmond
- Boat Obsession Medal Finalist
- Posts: 518
- Joined: Fri Sep 09, 2005 12:26 am
- Boat Name: Andiamo
- Boat Type: Alberg 35
- Location: Richmond VA
Re: Rudder Replacement Options
I have pics in my files I can shoot you.
You can discern the planks.
Let me know if you need to see them.
You can discern the planks.
Let me know if you need to see them.
Ric Bergstrom
http://andiamoadventures.blogspot.com/
Archived old blog:
http://andiamo35.blogspot.com/
~~~~~([\~~~([\~~([\~~~~~~([\~~([\~~~~~~
~~~~~~([\~~~~~~~([\~~~~~~~~~~~~~~~
http://andiamoadventures.blogspot.com/
Archived old blog:
http://andiamo35.blogspot.com/
~~~~~([\~~~([\~~([\~~~~~~([\~~([\~~~~~~
~~~~~~([\~~~~~~~([\~~~~~~~~~~~~~~~
-
brob76
- Deck Grunge Scrubber
- Posts: 29
- Joined: Mon Dec 14, 2009 1:45 am
- Boat Name: Auriga
- Boat Type: Alberg 35
- Location: NYC
Re: Rudder Replacement Options
That would be great if you could. I have yet to yank the rudder and start dissecting it. Would be nice to see how the planks fit together before I start. I did find a local lumber yard that has pretty good prices for quarter sawn mahogany planks so I think I am going to go with wood rather than a ply/glass lamination.
Thanks!
Brian
Thanks!
Brian
-
Paulus
- Skilled Systems Installer
- Posts: 199
- Joined: Mon Nov 22, 2010 12:05 pm
- Boat Name: Guillemot
- Boat Type: Mariner Ketch
Re: Rudder Replacement Options
My rudder is made from wood as well - I thought Mahogany but the Mariner forum says it's made from "Yakal", or "Yacal" - some kind of Phillipino Teak renown for its resistance to decay.
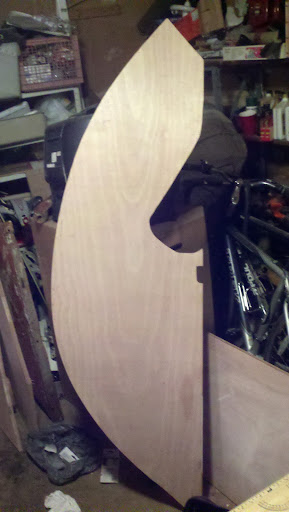
This is a pic of the rudder (in a wood barn, Nanette, with some metal framing stored behind the boat ;-))
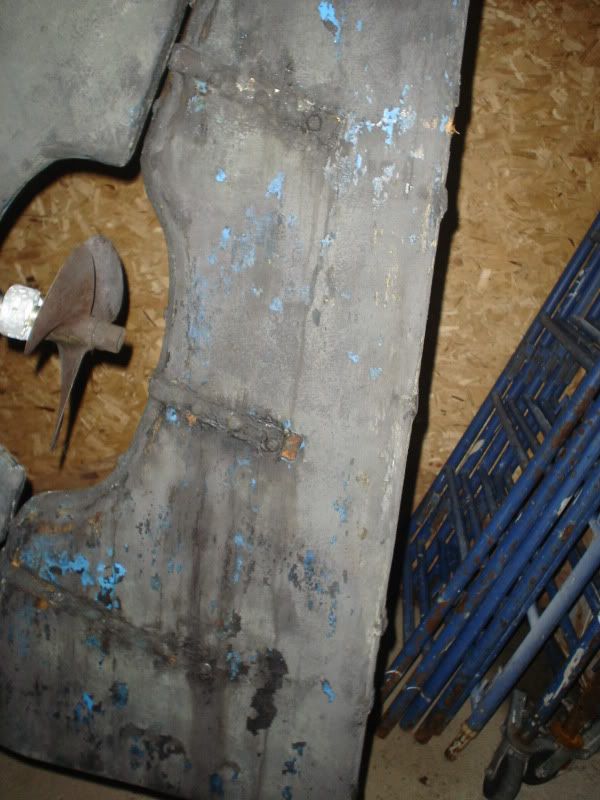
It doesn't look like this anymore - I sanded it smooth today and except for some minor splitting at the top and some wood missing near the rudder tubing, she looks good to go for another 40 years...
Most folks are against coating the wood with anything but filler (tar for the cracks), primer and bottom paint.. It's all this one has had to date and she's faired well with it. I will post a pic of the cleaned wood and another with some tar and primer added so you folks can follow along and give some pointers if you'd like.
A surprising find was that the brackets shown in the picture above, seem to be made from stainless - as are the bolts that pass through the rudder. I thought that stainless under water is not really recommended... Given that everything else is bronze, this was a surprise to me.
This is a pic of the rudder (in a wood barn, Nanette, with some metal framing stored behind the boat ;-))
It doesn't look like this anymore - I sanded it smooth today and except for some minor splitting at the top and some wood missing near the rudder tubing, she looks good to go for another 40 years...
Most folks are against coating the wood with anything but filler (tar for the cracks), primer and bottom paint.. It's all this one has had to date and she's faired well with it. I will post a pic of the cleaned wood and another with some tar and primer added so you folks can follow along and give some pointers if you'd like.
A surprising find was that the brackets shown in the picture above, seem to be made from stainless - as are the bolts that pass through the rudder. I thought that stainless under water is not really recommended... Given that everything else is bronze, this was a surprise to me.
-
Hirilondë
- Master of the Arcane
- Posts: 1317
- Joined: Thu Dec 28, 2006 8:50 am
- Boat Name: Hirilondë
- Boat Type: 1967 Pearson Renegade
- Location: Charlestown, RI
Re: Rudder Replacement Options
That is surprising. Bronze would certainly be a better choice for the reason you stated and to avoid mixing metals in close proximity. Stainless and bronze do get along quite well, but under water it is really pushing it. It appears in the picture that the straps wrap around the rudder post? Do the drifts (bolts that pass through the rudder tying planks together) go through the rudder post as well?Paulus wrote: A surprising find was that the brackets shown in the picture above, seem to be made from stainless - as are the bolts that pass through the rudder. I thought that stainless under water is not really recommended... Given that everything else is bronze, this was a surprise to me.
It sounds like your choices for repair techniques are good ones. Tar as a seem fill is most adequate and has been used for hundreds of years, but I have found polysulfides, even though a more modern material works quite well and is less messy. The main thing is to realize that the wood is going to expand again when wet and there is nothing you can do to stop it. So learn to cooperate with this fact by using an elastic filler.
Dave Finnegan
builder of Spindrift 9N #521 'Wingë'
--------------------------------------------------------------------------------------------------------------------------------------------------------------------
Gresham’s Law of information: Bad information drives out good. No matter how long ago a correction for a particular error may have appeared in print or online, it never seems to catch up with the ever-widening distribution of the error.
builder of Spindrift 9N #521 'Wingë'
--------------------------------------------------------------------------------------------------------------------------------------------------------------------
Gresham’s Law of information: Bad information drives out good. No matter how long ago a correction for a particular error may have appeared in print or online, it never seems to catch up with the ever-widening distribution of the error.
-
Paulus
- Skilled Systems Installer
- Posts: 199
- Joined: Mon Nov 22, 2010 12:05 pm
- Boat Name: Guillemot
- Boat Type: Mariner Ketch
Re: Rudder Replacement Options
Yes they do.Hirilondë wrote: Do the drifts (bolts that pass through the rudder tying planks together) go through the rudder post as well?.
In addition to baring the wood, I also removed the plugs/bongs covering the nuts on the drift blots on the trailing end of the rudder - what I can see looks good , but I am hesitant to dig deeper... I would think the rudder will give me some advance warning before all four drift bolts fail...
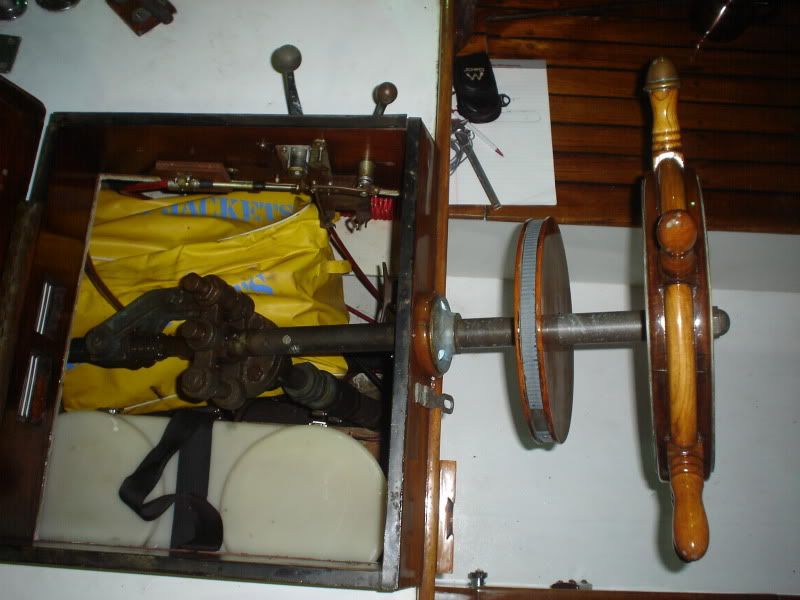
The rudder post, buy the way, turns out to be a solid piece of bronze - a good match with the solid bronze steering gear...
-
Hirilondë
- Master of the Arcane
- Posts: 1317
- Joined: Thu Dec 28, 2006 8:50 am
- Boat Name: Hirilondë
- Boat Type: 1967 Pearson Renegade
- Location: Charlestown, RI
Re: Rudder Replacement Options
This is typical of wooden boats and the early plastic boats that used traditional rudders. When it comes time to rebuild, and hopefully that is a ways off, I would suggest new bronze drifts and straps. Actually, you may not need the straps at all, they are probably an after thought. Welded to the post is the curved piece that forms the inside of the prop aperture. This and drifts that pass through the post provide more than enough fastening to deal with the torque when steering. The drifts should provide enough stability to the planks. Let in straps are usually repairs.Paulus wrote: The rudder post, buy the way, turns out to be a solid piece of bronze - a good match with the solid bronze steering gear...
Dave Finnegan
builder of Spindrift 9N #521 'Wingë'
--------------------------------------------------------------------------------------------------------------------------------------------------------------------
Gresham’s Law of information: Bad information drives out good. No matter how long ago a correction for a particular error may have appeared in print or online, it never seems to catch up with the ever-widening distribution of the error.
builder of Spindrift 9N #521 'Wingë'
--------------------------------------------------------------------------------------------------------------------------------------------------------------------
Gresham’s Law of information: Bad information drives out good. No matter how long ago a correction for a particular error may have appeared in print or online, it never seems to catch up with the ever-widening distribution of the error.
-
Tom Young
- Skilled Systems Installer
- Posts: 215
- Joined: Sat Aug 27, 2005 7:57 am
- Location: Rockport Maine
Re: Rudder Replacement Options
I don't know if this will help, but in rebuilding my rudder a few years ago, I took it down all the way. One drift is tapped into the rudder stock, another is through bolted. Screws hold the lower area. A bronze frame around the tailing edge helps hold it all together.
The threaded drift was snapped off inside the stock and the through bolt had some play, as did the screws, in the bronze stock. I wouldn't have discovered this without complete disassembly.
But the good news was, I was able to go up one size in each drift and the wood screws to bore new holes in both the mahogany and the bronze for a better than new refit. The wood was as good as new as was the heavy bronze stock. The rudder turns 50 this year.
-
brob76
- Deck Grunge Scrubber
- Posts: 29
- Joined: Mon Dec 14, 2009 1:45 am
- Boat Name: Auriga
- Boat Type: Alberg 35
- Location: NYC
Re: Rudder Replacement Options
Thanks for the pics. My rudder is very similar. The drifts were all tapped in on mine however. I had to cut the drifts with a grinder through the wood to get the post off. Could not work them out for anything.
I've decided to build a new blade in the laminated marine ply fashion. I'm having trouble sourcing long silicone bronze screws. I need bronze 3/8-16 slotted flathead screws of about 16" each. The longest I'm able to find are 12". Anyone know where I might be able to find these? I'll post pictures of the project as I go along.
I've decided to build a new blade in the laminated marine ply fashion. I'm having trouble sourcing long silicone bronze screws. I need bronze 3/8-16 slotted flathead screws of about 16" each. The longest I'm able to find are 12". Anyone know where I might be able to find these? I'll post pictures of the project as I go along.
-
okawbow
- Almost a Finish Carpenter
- Posts: 92
- Joined: Fri Apr 10, 2009 8:45 am
- Boat Name: Thursdays' Child
- Boat Type: Privateer 26 Schooner
- Location: Southern Illinois
- Contact:
Re: Rudder Replacement Options
You could have some made from rod or threaded rod stock. I've made long bolts from threaded rod, by brazing a nut on one end, and then turning or grinding a tapered head. The slot can be cut with a file.
mcmaster-carr has rod and nuts. if you take the materials to a small job shop; it shouldn't be too expensive. If you can't find anyone, I could make them for you.
Chuck
mcmaster-carr has rod and nuts. if you take the materials to a small job shop; it shouldn't be too expensive. If you can't find anyone, I could make them for you.
Chuck
Chuck
1976 Bristol 24
"Harmony"
1976 Bristol 24
"Harmony"
-
brob76
- Deck Grunge Scrubber
- Posts: 29
- Joined: Mon Dec 14, 2009 1:45 am
- Boat Name: Auriga
- Boat Type: Alberg 35
- Location: NYC
Re: Rudder Replacement Options
Thanks Chuck. I called around today and found a company in the Buffalo area, CC Fasteners, that carries all sorts of bronze and stainless fasteners. They had the 16" lengths I need. Now it's time to start hacking into that $140 piece of mahogany ply I bought today :-)
-
brob76
- Deck Grunge Scrubber
- Posts: 29
- Joined: Mon Dec 14, 2009 1:45 am
- Boat Name: Auriga
- Boat Type: Alberg 35
- Location: NYC
Re: Rudder Replacement Options
Got started on the rudder rebuild project this week. I'm using two thicknesses of 3/4" BS1088 grade Okoume Mahogany marine ply. Pictures and comments are below.
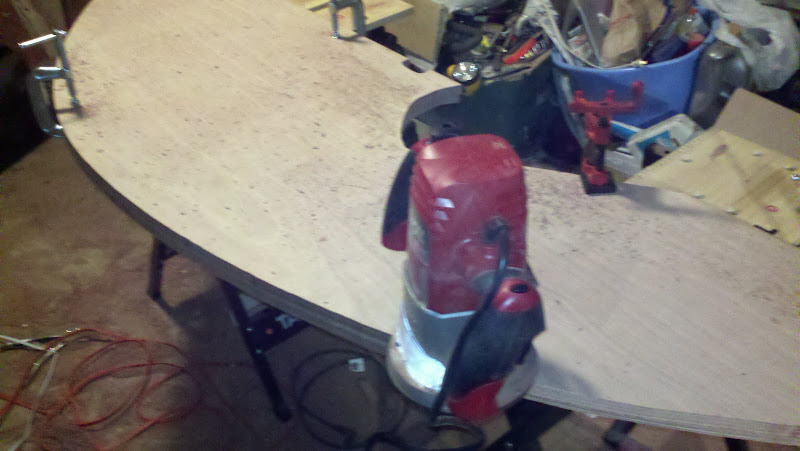
I used what was left of the old blade to trace the shape onto one half of the ply. I then cut out the rough shape (cutting about 1/2" outside the traced line) using a jigsaw. Next I tacked a batten down to follow the traced curvature line of the trailing edge. This batten was used as a template to run the pilot on the router bit against. I used a 1 1/2" flush cut bit. Produced a pretty clean curve.

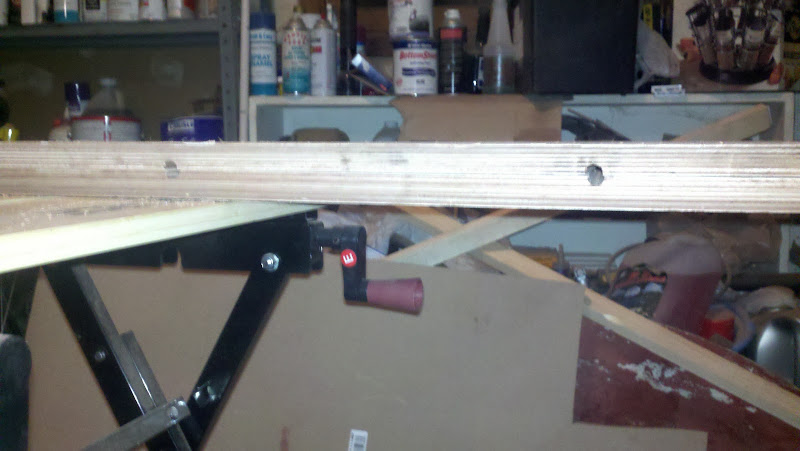
Here's a view of the batten/router template from below. I've cleaned up most of the edge. Next, I went around and pulled the tacks one by one and cleaned up those areas. Found this method pretty effective for getting a clean shape.
Here's the first half of the blade nearly complete. I'll need to run around the edges with a rasp and do a bit of sanding but it's almost there.
To cut out the second half, I roughly cut the shape with a jigsaw as before then used the first half as a template and ran the router around the blade. Best method I could think of. Made a perfect copy.
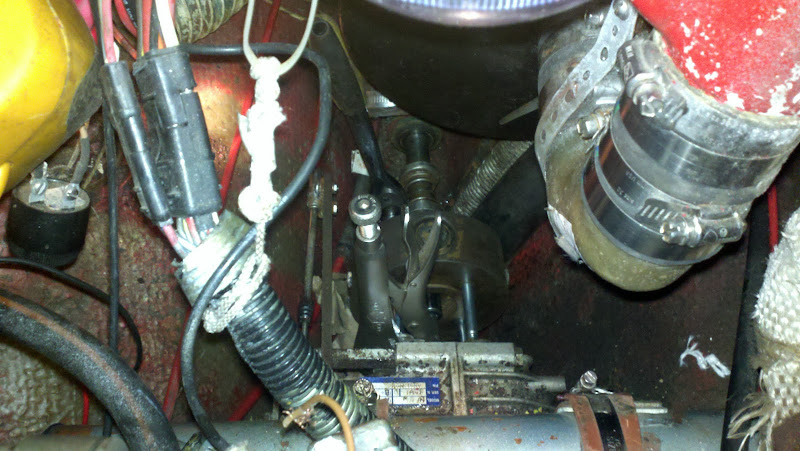
I need to remove the prop shaft so I can remove the top half of the rudder stock. I'm also planning to replace the archaic sealol face seal with a traditional stuffing box. I've done a lot of difficult and nasty jobs on old boats. Plumbing jobs that resulted in being covered in raw sewage, stripping bottom paint, being covered in itchy fiberglass dust etc. Nothing I've done has been as much a pain as pressing out this shaft from the flex coupling. Even after multiple applications of penetrating oil over a number of weeks, I've spent the better part of two days laying over the engine trying to press this thing out. With the limited space back there, you only get about a 1/16 of a turn on the ratchet. I still have about half and inch to go. Hopefully I'll be able to get it out tomorrow. It has resulted in busted knuckles, bruised ribs arms and legs, uncountable things lost to the depths of the bilge (nuts, bolts, wrenches.....) and lots of profanity. If I had it to do over again, I would have taken the grinder to it and had a new shaft made. Live and learn I guess.
This weekend I'll be routing out the cove in the leading edge where the posts will lay. I'm also going to try to get the bolt holes routed out and glue the two halves together.
The previous owner blessed me with 1000 lbs worth 50 lb lead ingots (expensive experiment with extra ballast). I'm going to melt about 10 pounds down and cast some pucks which will be added to the trailing edge.
I'll post more pictures as the project progresses.
I used what was left of the old blade to trace the shape onto one half of the ply. I then cut out the rough shape (cutting about 1/2" outside the traced line) using a jigsaw. Next I tacked a batten down to follow the traced curvature line of the trailing edge. This batten was used as a template to run the pilot on the router bit against. I used a 1 1/2" flush cut bit. Produced a pretty clean curve.
Here's a view of the batten/router template from below. I've cleaned up most of the edge. Next, I went around and pulled the tacks one by one and cleaned up those areas. Found this method pretty effective for getting a clean shape.
Here's the first half of the blade nearly complete. I'll need to run around the edges with a rasp and do a bit of sanding but it's almost there.
To cut out the second half, I roughly cut the shape with a jigsaw as before then used the first half as a template and ran the router around the blade. Best method I could think of. Made a perfect copy.
I need to remove the prop shaft so I can remove the top half of the rudder stock. I'm also planning to replace the archaic sealol face seal with a traditional stuffing box. I've done a lot of difficult and nasty jobs on old boats. Plumbing jobs that resulted in being covered in raw sewage, stripping bottom paint, being covered in itchy fiberglass dust etc. Nothing I've done has been as much a pain as pressing out this shaft from the flex coupling. Even after multiple applications of penetrating oil over a number of weeks, I've spent the better part of two days laying over the engine trying to press this thing out. With the limited space back there, you only get about a 1/16 of a turn on the ratchet. I still have about half and inch to go. Hopefully I'll be able to get it out tomorrow. It has resulted in busted knuckles, bruised ribs arms and legs, uncountable things lost to the depths of the bilge (nuts, bolts, wrenches.....) and lots of profanity. If I had it to do over again, I would have taken the grinder to it and had a new shaft made. Live and learn I guess.
This weekend I'll be routing out the cove in the leading edge where the posts will lay. I'm also going to try to get the bolt holes routed out and glue the two halves together.
The previous owner blessed me with 1000 lbs worth 50 lb lead ingots (expensive experiment with extra ballast). I'm going to melt about 10 pounds down and cast some pucks which will be added to the trailing edge.
I'll post more pictures as the project progresses.
-
Hirilondë
- Master of the Arcane
- Posts: 1317
- Joined: Thu Dec 28, 2006 8:50 am
- Boat Name: Hirilondë
- Boat Type: 1967 Pearson Renegade
- Location: Charlestown, RI
Re: Rudder Replacement Options
Maybe this comment belongs in the Technical Data and Nerdery, section but for the record Okoume, aka Gaboon is not really a Mahogany. Like Cambara, Meranti, Luan and a host of other woods, even though marketed as a Mahogany, it really is not.
Okoume is very strong and light weight, which is why the plywood is used so much in boat building. My 9 foot dinghy made of the stuff, even after epoxy impregnation, paint, hardware and all weighs just 70 pounds. And when fabricated to Lloyds BS 1088 standard it is a really superior plywood for many structural applications.
And for the record, Lloyds is no longer certifying plywood manufacture, but their standard is still used by manufacturers. You have to trust them based on reputation as to whether or not the product really meets the standard.
Unlike Mahoganies in general, Okoume is not very rot resistant. Make sure to seal it very well with 3 coats of epoxy before painting.
Dave Finnegan
builder of Spindrift 9N #521 'Wingë'
--------------------------------------------------------------------------------------------------------------------------------------------------------------------
Gresham’s Law of information: Bad information drives out good. No matter how long ago a correction for a particular error may have appeared in print or online, it never seems to catch up with the ever-widening distribution of the error.
builder of Spindrift 9N #521 'Wingë'
--------------------------------------------------------------------------------------------------------------------------------------------------------------------
Gresham’s Law of information: Bad information drives out good. No matter how long ago a correction for a particular error may have appeared in print or online, it never seems to catch up with the ever-widening distribution of the error.
-
Quetzalsailor
- Master of the Arcane
- Posts: 1100
- Joined: Fri Aug 26, 2005 9:53 am
- Boat Name: Quetzal
- Boat Type: LeComte North East 38
- Location: Philadelphia, PA
Re: Rudder Replacement Options
An advantage to the plywood is that, as you plane the taper in you'll be able to compare sides by the appearance of the veneers.
I understand that the Okume only gets its BS 1088 by virtue of wood preservative. Even so encapsulation is terribly important, particularly at fastening holes and at ding-prone places. You might wish to glass the surface in order to improve ding-resistance and to ensure ample thickness of epoxy.
I think that Okume only made it into the marine plywood market because the Khaya and before that the Mahogany became commercially extinct. That's what Shelmarine told me when I corresponded with them about buying some more Khaya. (For the nerds, one of the species of Khaya is quite close to the properties and appearance of Mahogany; they're in the same family.)
-
brob76
- Deck Grunge Scrubber
- Posts: 29
- Joined: Mon Dec 14, 2009 1:45 am
- Boat Name: Auriga
- Boat Type: Alberg 35
- Location: NYC
Re: Rudder Replacement Options
I'm planning to first seal with epoxy then laminate some carbon fiber on the leading and trailing edges. Following that, I will laminate the entire blade with a layer of 1708 biax followed by a layer or 10 oz cloth. Then fair and barrier coat. Sound like a good schedule?
-
Hirilondë
- Master of the Arcane
- Posts: 1317
- Joined: Thu Dec 28, 2006 8:50 am
- Boat Name: Hirilondë
- Boat Type: 1967 Pearson Renegade
- Location: Charlestown, RI
Re: Rudder Replacement Options
No, there are many things that make up the standard, and the choice of wood isn't even one. It has to do with laminate thikness (hence the number of laminations per given thickness), having no voids in laminations, glue and the process of gluing and other things. Basically it is a guarantee of certain manufacturing criteria. I think it is interesting to note that there is no BS 1088 plywood manufactured in the USA. You will find that the dimensions of it are all metric. The thicknesses are actually 6mm, 9mm, 12mm, 18mm etc instead of 1/4", 3.8", 1/2" and 3/4" and a sheet is slightly larger than 4' x 8'.Quetzalsailor wrote: I understand that the Okume only gets its BS 1088 by virtue of wood preservative.
That may have had some effect on the decision to use Okoume in the scheme of the world market, but the primary reason is the weight / strength ratio of the wood. There are BS 1088 plywoods available in Baltic Birch, Meranti and Sapele to name a few. Sapele is the most rot resistant and used in large boat construction, mostly in Europe. Meranti is very reasonable in price, more abrasion resistant than Okoume, but quite heavy. The choice of which to use, like most choices in materials, should be based on the requirements of the project. And of course price and availability usually play into the decision.Quetzalsailor wrote:I think that Okume only made it into the marine plywood market because the Khaya and before that the Mahogany became commercially extinct.
Dave Finnegan
builder of Spindrift 9N #521 'Wingë'
--------------------------------------------------------------------------------------------------------------------------------------------------------------------
Gresham’s Law of information: Bad information drives out good. No matter how long ago a correction for a particular error may have appeared in print or online, it never seems to catch up with the ever-widening distribution of the error.
builder of Spindrift 9N #521 'Wingë'
--------------------------------------------------------------------------------------------------------------------------------------------------------------------
Gresham’s Law of information: Bad information drives out good. No matter how long ago a correction for a particular error may have appeared in print or online, it never seems to catch up with the ever-widening distribution of the error.
-
Zach
- Boat Obsession Medal Finalist
- Posts: 684
- Joined: Wed Jan 25, 2006 6:28 pm
- Location: Beaufort, North Carolina
- Contact:
Re: Rudder Replacement Options
Looking good...
Some stuff ya might want to ponder:
The easy way to laminate two pieces of plywood together without a twist, is to rip two 2x4's straight, lay them on saw horses and screw from the underside with some screws, diagonally through the side of the 2x4. If you take a long straight edge and lay it on your work bench, I'll bet you a dollar it isn't dead flat. By taking two framing squares and putting them on each end of the boards you can sight down the length, and see if they are out of square...
Now lay the top layer down, clamp it so that it is square, and pop a few 1 5/8 screws in to the top making sure the edge stays straight. I wait to rout the top piece and just cut it close with a jig saw or skill saw until this point... it makes it easier to make an identical copy that fits perfectly smooth to the edge. Make some sharpie marks around the screw holes to ease the assembly. Take a 1/4 inch drill bit and pop a few holes in the top, once every 6 square inches or so...
When gluing, I coat both sides with epoxy and let it sit for a minute, then come back with a notched spreader, and mix some epoxy with cabosil don't mix the epoxy to peanut butter... keep it just stiff enough that it'll hold the peaks of the notched spreader. I use the smallest notches. Now lay the two together, and push down turning the top layer so it beds down and forces most of the air out line up the edge on one side... Change your gloves, put in one screw on one end with a 3/16ths fender washer under it (stainless releases from the glue easier.) Go to the other and rotate the top layer till it is flush around the edge. Put in another screw with fender washer... and now work from the center out pulling down tight. I don't use the clutch on the drill, instead watching for the glue to squeeze out evenly. I put a lot of screws in to the plywood... Say one every 4 to 6 inches, in rows.
Hold the screws like this...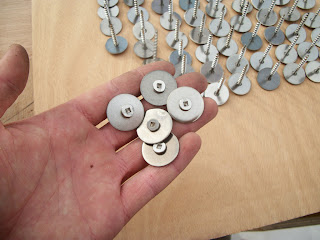
When done, take a straight edge, and lay it on the top of the plywood. If it has some highs and lows, tighten up the screws to pull them out.
Go ahead and take a plastic squeedgee and wipe up the excess that has squeezed out from around the edge, and from the holes on top. Keep the glue out of the screws... (I use #2 square drive stainless screws... the ones i use for laminating get recycled.
When this kicks off, (keep your bucket and don't wipe it out so you know that everything went as it should... and lets you know the status of the glue!) Back out the screws.
I suggest that you wait to fill the screw holes until all your grinding and shaping is done... Vacuuming out the holes just before you start fiberglassing. If you are power planing you absolutely have to wait, or the hard epoxy will chip the blades on your planer. To fill: mix up some epoxy and cabosil like mayonnaise and squeedgee it into the holes with slow hardener... Come back in 5 or 10 minutes and go over it again, as the air will work out of the holes and you'll need a little more glue. Fiberglass the sides with the holes, as soon as you've got the holes full... so you don't have to wait for it to cure... come back and sand and do it all again. If you wait to long the squeedgee marks and goo clumps will be sticky, and fight your fiberglassing efforts.
To taper the blade:
A skill saw riding on a wedge that is the correct taper (thick at the stock and thin at the tip is a very easy way to keep things straight. Make the wedge long so you can adjust it to the trailing edge width...
A power plane works quite well, but that means you can't have any screws in the plywood, which means that any that don't want to come out can't just have the head ground off, and the fender washer popped off... then ground just below flush. So, I tend to stray from the power plane...
I remove the majority of the waste with a sharp 1 inch wide chisel can do if you make your cuts about an inch apart. Hold the chisel bevel down, and just a bit off the line which you want to follow and pare down to your grooves diagonally to the cuts. Just as you would cutting off a wooden plug over a countersunk screw.
You don't have to go down to a feather edge, a 3/16 or so is good so that when it is glassed its a 1/4 inch wide. If it were a foil rudder on a stock, or a racing boat with a naca foil it'd be a different story... but then it probably wouldn't be plywood.
I use a 7 inch hard back 36 grit grinding disc to smooth everything out... since the power plane needs to run perpendicular the rudder stock. The glue lines in the plywood make it very easy to keep the surface fair and smooth. Lay it flat to the surface and move it around and let it do its thing... Save a few discs when they start to scorch the wood, as when you are close, switch to the used one and it'll take a little less wood. Sand with 60 grit on a random orbital when you are done to give a better tooth for the epoxy.
You might consider a hardwood block to take the load on your bolt rod... Just a square with an opening for you to get a wrench on the nut. Plywood doesn't like to be compressed under a washer... it likes to delaminate, or pucker up at the load. Bore the hole a bit oversize for the screws and set the screw into a bed of epoxy and cotton fiber to stop water from tracking down the screws. Glass the leading edge of the rudder at the rudder stock before you put it together, and put a layer or two of cloth around the rudder stock to take some of the load off the screws. I'd also sand the leading edge of the rudder and squirt some 5200 between it and the rudder shaft but I've been known to overkill...
The build schedule I would use: 2 layers of 1708, and 1-2 layers wrapping around the rudder stock. I wouldn't use 17 ounce biax with no mat, as the mat adds a lot to the water resistance of a layup... its very resin rich. The 10 ounce cloth won't help you out to much... you'll end up sanding through it while fairing. I'd mix up some glass microballoons and coat the glass right after you are done air rolling. Personally I think carbon is overkill on a plywood rudder...
For glassing the edge, the easy way is to cut a piece of biax cloth out of the center of the roll, following a 45 degree angle 6 inches or so wide, and another 3 inches wide coat the plywood with a layer of neat epoxy and let it sit for a few minutes, then come back with some cabosil added and smear it along the side... Wet out your glass and put it to the edge. The cloth cut on a bias makes it bend easier since the fibers are running on a clock angle of a 2:00 to 8:00 and 10:00 to 4:00 than trying to get the 12:00-6:00 and 3:00 and 9:00 to take the bend of the outside edge. You can start from forward end of the rudder on one side, and successfully get the glass to take the curve by lapping 3 or 4 inches around to the other side and taking your gloved hand and pushing and wiggling the cloth until the lay loosens and work it around the edge. Basically what you are doing is wrapping a piece of paper around a basketball, so you are stretching one side and asking the rest to lay flat... Cutting darts isn't normally required with a little bit of thinking when you cut the glass.
For the 45 degree cut glass: Put down the 6 inch layer first, followed by the 3 inch... Mark a centerline with a sharpie to keep them even on both sides. Lay your next two layers so they butt at the seams. It puts more glass that is solid on the edge, than you do having to cut darts all over the place to get it to lay flat. Wait till it just starts to go green, where it is gooey but not tacky... Cut your glass to the seam so it just does butt up and glass the rest of the rudder. You probably wouldn't be the first person to screw the rudder to a stud in your garage so you can glass both sides at the same time vertically... then go back and grind/back fill the screw hole...
You can also load the odds a bit in your favor for some longevity, by making a solid edge of epoxy and chopped cotton or milled glass on the trailing edge, bottom, and leading edge up to the lowest gudgeon. Do this after all the rest of the shaping is done, but before glass... You don't want to grind epoxy with cotton fiber or chopped glass... Lay the rudder down on a flat board with some packing tape stuck to the bottom side, and a batten tacked down through it, packing taped... then fill up the moat you've formed with the goo. When it kicks, lay a piece of sheet metal down on the plywood of the rudder and grind down to the right angle... then get it flush with some 80 grit on a random orbit so you don't carve up the plywood. Makes for something that if you end up chafing on an anchor line or back over a cable it doesn't crush the plywood and start taking on water...
Cheers,
Zach
1961 Pearson Triton
http://pylasteki.blogspot.com/
1942 Coast Guard Cutter - Rebuild
http://83footernoel.blogspot.com/
http://pylasteki.blogspot.com/
1942 Coast Guard Cutter - Rebuild
http://83footernoel.blogspot.com/
-
sscoll
- Master Varnisher
- Posts: 116
- Joined: Fri Sep 25, 2009 8:26 am
- Boat Name: Medora Jane
- Boat Type: Pearson Triton #532 E.C.
- Location: Wisconsin
Re: Rudder Replacement Options
Gotta say Zach, this is the second entry of yours that I've read today. The other was on the NTA site regarding deck recoring. I for one really appreciate the lengths you go to to explain your methods. I'll be reading them again as I have occasion to dig into those elements of my own Triton. Oh, and that A4 you gave me is sitting patiently up in the barn. Been -20F this weekend but I think I got it pretty well drained.
Steve
Steve
-
brob76
- Deck Grunge Scrubber
- Posts: 29
- Joined: Mon Dec 14, 2009 1:45 am
- Boat Name: Auriga
- Boat Type: Alberg 35
- Location: NYC
Re: Rudder Replacement Options
Thanks for all the great info Zach. I thought about wrapping a few layers of glass around the rudder stock but I don't think it will clear the cove in the trailing edge of the keel if I do. Looks like there is only maybe 1/8" of clearance between the stock and the cove in the keel. I was wondering how I was going to glass the edges. Great idea cutting 1708 on the diagonal. I'm definitely going to give that a try.
-
Quetzalsailor
- Master of the Arcane
- Posts: 1100
- Joined: Fri Aug 26, 2005 9:53 am
- Boat Name: Quetzal
- Boat Type: LeComte North East 38
- Location: Philadelphia, PA
Re: Rudder Replacement Options
I suppose I should have been clearer about my understanding of Okoume and BS 1088. The standard requires a rot resistant wood plus a host of other requirements, like veneer quality (voids repairs, etc.) glue and so on. The Okoume is not rot resistant enough for the standard so it's treated.
Glassing around sharp corners and tight radii can be achieved by forming. Make up a mould or jig that forces the glass to the shape you want. I formed the glass around the trailing edge of my rudder some years ago. Worked fine. You have to pay attention to how tight your work is; easy to pinch things and make other messes.
Glassing around sharp corners and tight radii can be achieved by forming. Make up a mould or jig that forces the glass to the shape you want. I formed the glass around the trailing edge of my rudder some years ago. Worked fine. You have to pay attention to how tight your work is; easy to pinch things and make other messes.
-
Quetzalsailor
- Master of the Arcane
- Posts: 1100
- Joined: Fri Aug 26, 2005 9:53 am
- Boat Name: Quetzal
- Boat Type: LeComte North East 38
- Location: Philadelphia, PA
Re: Rudder Replacement Options
I should have remarked, re maintaining required clearances: you can mill the required clearances into the substrate. Been there, done that. For instance: slightly larger diameter and smaller overall dimension for the rudder shaft, slightly thinner to account for lapping layers of glass, etc.

Re: Rudder Replacement Options
That's a good point, Quetzal. If there is a concave "cove" in the trailing edge of the keel it's quite possible that it is solid (i.e. not a hollow section with the inside of the boat just on the other side) and that it could be "opened up" a little bit to accommodate a slightly thicker rudder edge. Of course that idea may already have been considered and rejected for good reason.
-
Quetzalsailor
- Master of the Arcane
- Posts: 1100
- Joined: Fri Aug 26, 2005 9:53 am
- Boat Name: Quetzal
- Boat Type: LeComte North East 38
- Location: Philadelphia, PA
Re: Rudder Replacement Options
Rachel,
I think his clearance for 'glass might be required so that the glassed new wood fits correctly against the rudder post.
A concave trailing edge of a keel should, I think, be left well enough alone, after any paint buildup has been removed. There may well be lots of glass there, on the trailing edge of a keel, but who could be sure. It's not a happy shape to lay up. There was a concave shape like that on the Morgan 27 and it was mostly filler and quite brittle.
-
brob76
- Deck Grunge Scrubber
- Posts: 29
- Joined: Mon Dec 14, 2009 1:45 am
- Boat Name: Auriga
- Boat Type: Alberg 35
- Location: NYC
Re: Rudder Replacement Options
I haven't messed with the concave cove on the keel but I would bet it is mostly filler. You can see where a few small chunks have broken away and I don't see any fibers underneath. I'm not sure there would be enough benefit to glassing around the stock to justify the extra hassle. I'd really hate to have to form that cove. I'll have eight 3/8" bronze bolts, ranging in length from 6"-16", attaching the blade to the stock. It's the same method that was used to attach the old mahogany rudder to stock so I think it should be sufficient. As Zach suggested, I'm going to use some hardwood (probably mahogany) as compression blocks for the nuts/washers to bear down on.
-
brob76
- Deck Grunge Scrubber
- Posts: 29
- Joined: Mon Dec 14, 2009 1:45 am
- Boat Name: Auriga
- Boat Type: Alberg 35
- Location: NYC
Re: Rudder Replacement Options
After many hours over many days I was able to press the prop shaft out of the coupling. Now I can't get the key out of the shaft no matter what I try. Any suggestions? I may just cut the shaft tomorrow.
-
okawbow
- Almost a Finish Carpenter
- Posts: 92
- Joined: Fri Apr 10, 2009 8:45 am
- Boat Name: Thursdays' Child
- Boat Type: Privateer 26 Schooner
- Location: Southern Illinois
- Contact:
Re: Rudder Replacement Options
I can usually get the keys out by clamping vise grips tightly on one end, and then prying it up with a crow bar. In extreme cases, I have welded a piece of steel to the key and pried it up.
Chuck
1976 Bristol 24
"Harmony"
1976 Bristol 24
"Harmony"
-
Zach
- Boat Obsession Medal Finalist
- Posts: 684
- Joined: Wed Jan 25, 2006 6:28 pm
- Location: Beaufort, North Carolina
- Contact:
Re: Rudder Replacement Options
One or two map gas or propane torches, a leather glove, and a rag wet with water... or an ice cube are my favorites.
Heat up the shaft all around 4-6 inches or so along the length... With steel I take it to straw color, and its probably fine to do if the keyed end is above the waterline, (Ie not a prop shaft) if you overheat stainless below the water it'll bring up some carbon and might make it rust, when the grooves, burrs and high spot start goin purple I'd stop.
Also study the shape of the key. If it has a rounded end at the inside end, as viewed perpendicular to the shaft it was cut on a milling machine.
If the end of the keyway tapers up to nothing, or close to nothing, level with the top of the shaft it was cut on a broaching machine.
If it was broached you can take a center punch and get a small spot peened in the middle of the keyway with a small 12-16 oz hammer... then smack the daylights out of it once or twice with a 3 or 4 pound maul. Since the end tapers up you can sometimes get them freed up, and then hit the other direction (the lip now sticking proud at the inboard (not the end) of the shaft with a brass or bronze drift pin.
In any case, heat cycles and penetrating oil ( I like Pb blaster...) will eventually do the trick. Don't mushroom the key into the keyway when you hammer, so always hit up away from the centerline of the shaft if possible.
Cheers,
Zach
1961 Pearson Triton
http://pylasteki.blogspot.com/
1942 Coast Guard Cutter - Rebuild
http://83footernoel.blogspot.com/
http://pylasteki.blogspot.com/
1942 Coast Guard Cutter - Rebuild
http://83footernoel.blogspot.com/
-
brob76
- Deck Grunge Scrubber
- Posts: 29
- Joined: Mon Dec 14, 2009 1:45 am
- Boat Name: Auriga
- Boat Type: Alberg 35
- Location: NYC
Re: Rudder Replacement Options
Thanks Zach. I ended up going with the angle grinder quick method. Spent to much time trying to get it out and needed to get on with the project. It ended up being a good thing because there was significant stuffing box and cutlass bearing wear on the shaft. Also, going to be moving up to a larger gear box that protrudes back another 1.5" so I would have needed to get it trimmed anyway.
-
brob76
- Deck Grunge Scrubber
- Posts: 29
- Joined: Mon Dec 14, 2009 1:45 am
- Boat Name: Auriga
- Boat Type: Alberg 35
- Location: NYC
Re: Rudder Replacement Options
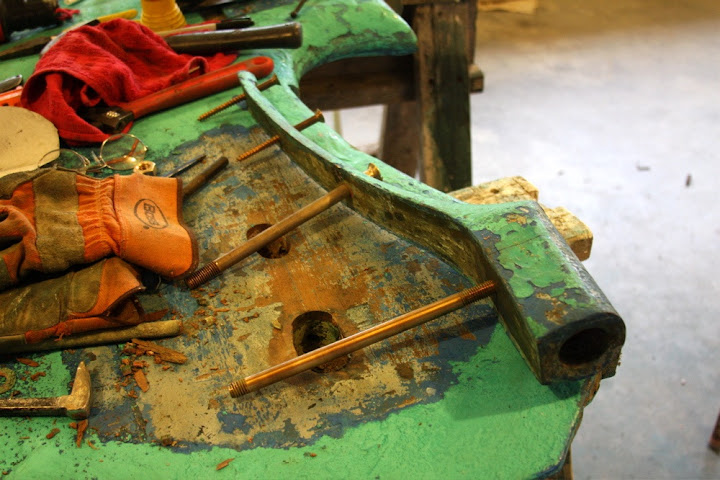
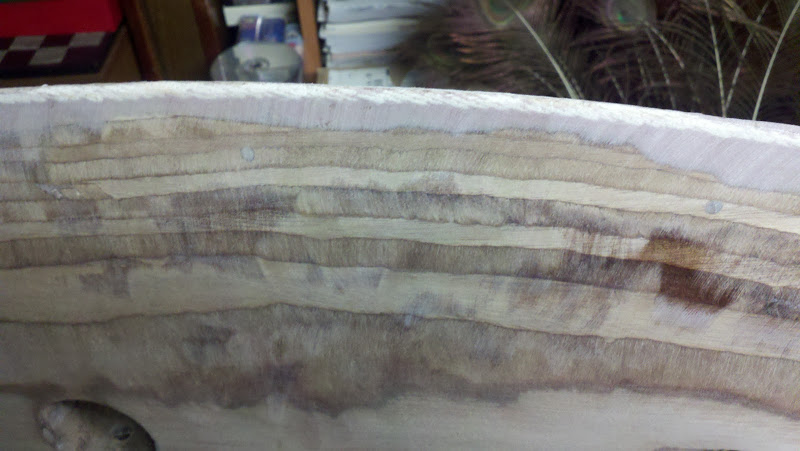
I cleaned up my lower bronze rudder post today and there are some minor pinkish spots on the surface. You can sort of make out the spots in the photo below. The post looks to be in good shape other than the pink spots. No pitting or anything of the sort. The shoe and gudgeon are in about the same shape. I'm wondering if the pink hue means it's time to scrap them and have others made. Really don't want to spend the $$ right now.

-
Paulus
- Skilled Systems Installer
- Posts: 199
- Joined: Mon Nov 22, 2010 12:05 pm
- Boat Name: Guillemot
- Boat Type: Mariner Ketch
Re: Rudder Replacement Options
Pure copper will have a pink hue - brass, exposed to galvanic reaction will have some of its zinc alloy removed and show such hue. Bronze contains tin, which is not as affected by acid (galvanic action).
It is possible that the post contains zinc.
You could test a section with some hydrochloric acid - the metal will turn pink if it contains zinc; yellow if the alloy is with tin/lead...
It is possible that the post contains zinc.
You could test a section with some hydrochloric acid - the metal will turn pink if it contains zinc; yellow if the alloy is with tin/lead...
Re: Rudder Replacement Options
I can't really see the colors in your photo, but as I understand it, bronze* turning pink indicates de-zincification (it will be weaker). Can you check to see if it is just on the surface or if it goes deeper? Sometimes there can just be a light surface amount of pink/damage.
Rachel
* Some bronze ("bronze"?) alloys have zinc in them
Rachel
* Some bronze ("bronze"?) alloys have zinc in them
-
brob76
- Deck Grunge Scrubber
- Posts: 29
- Joined: Mon Dec 14, 2009 1:45 am
- Boat Name: Auriga
- Boat Type: Alberg 35
- Location: NYC
Re: Rudder Replacement Options
The pink spots are only on the surface. I can sand and bit and they come off and expose healthy looking bronze.
-
Quetzalsailor
- Master of the Arcane
- Posts: 1100
- Joined: Fri Aug 26, 2005 9:53 am
- Boat Name: Quetzal
- Boat Type: LeComte North East 38
- Location: Philadelphia, PA
Re: Rudder Replacement Options
Good, throw it back together and go sailing.
Dad noticed large divots out of the bronze driveshaft on the Morgan 27. He cleaned it up and had it hardcoated. It suffered no more corrosion for the twenty or so more years that that boat was in the family. By large divots I mean several 3/8" or so wide, 1/2" or so long and maybe 1/16" deep on a 7/8" dia shaft.
Should you plan to take that boat offshore, perhaps reinspection will be good.
I guess the thing that concerns me about this sort of corrosion in important items is the extent of the damage. I had the cast aluminum maststep on that Morgan 27 re-anodized. It looked pretty lousy when I brought it to the anodizer; they cleaned it up chemically. Some of it looked like silvery Swiss cheese. The new anodizing seemed to have preserved the remaining 95% of the casting, but I also had raised it off the bottom by 1/2" so it was more normally dry.
-
brob76
- Deck Grunge Scrubber
- Posts: 29
- Joined: Mon Dec 14, 2009 1:45 am
- Boat Name: Auriga
- Boat Type: Alberg 35
- Location: NYC
Re: Rudder Replacement Options
Made quite a bit of progress on the rudder over the past few weeks. Almost ready to hang it back on. Got my new prop shaft and cutlass bearing as well so this project should be done by next weekend. Here are a few pictures of the progress:
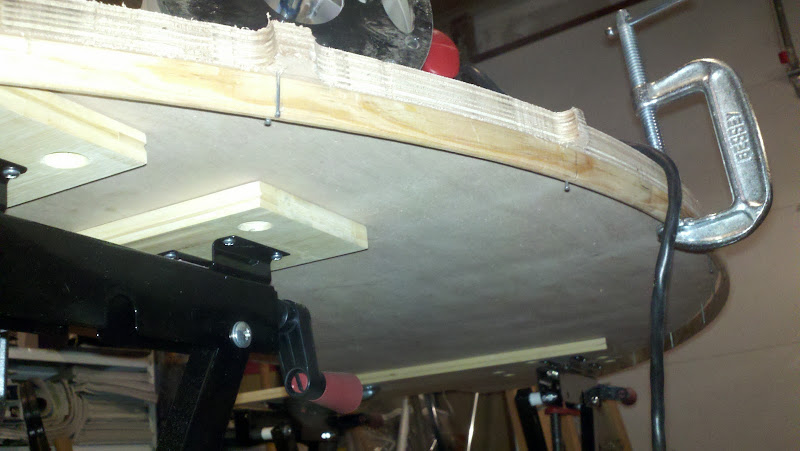
I decided to route out the bolt passages on each half before laminating rather than try to drill the passages out after gluing the two halves together. Worked out pretty well.

Laminating the two halves was pretty straight forward. I first drilled holes for the screws spaced about 6-8" apart. I then spread Cabosil thickened epoxy with and 1/8" trowel on both halves, laid the halves together and worked the air out from the middle of the blade out to the edges. I then screwed the halves together with stainless screws and fender washers and used c-clamps and some extra weights. I backed the screws out before full cure and had no problem removing them. I used 3/8" OD Pex tubing in the bolt hole passages to keep the passages from filling with epoxy. I waxed these heavily and removed them before full cure without issue.

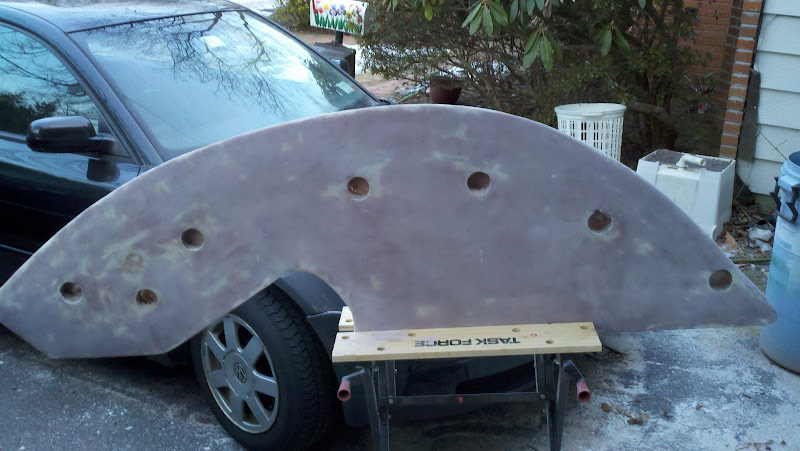
After gluing the two halves, I wanted to test-fit the blade on the boat. Luckily, all was well. Needed a few minor tweeks but it fit perfect for the most part.

For the taper, I used an angle grinder with a 36 grit disk and a belt sander. I copied the shape of the old blade as best I could.

To add a sort of barrier to the trailing edge, I used a method I had read about in Duckworks some time ago. This is similar to the method Zach suggested above. I soaked a length of 1/4 cotton rope in epoxy and then tacked it along the entire length of the trailing edge. The photo below is after fairing and sanding. This should add some protection to the trailing edge in case I were to back into a line or something.
Here's the blade after the first layer of glass. I'm using two layers of 1708 biax.

Fully glassed and the first round of fairing complete. Just ordered 10lbs of lead shot. Once that gets here I'll bolt on the posts, fill the holes with lead shot and glass over them. One final round of fairing and a few coats of epoxy for a barrier coat and I should be done.
Hirilondë mentioned early on in this thread that a one-off rudder would take quite a few hours. I have found this to be quite true. I probably have 60+ hours and about $500 in this project so far and another 10 hours or so left.
I decided to route out the bolt passages on each half before laminating rather than try to drill the passages out after gluing the two halves together. Worked out pretty well.
Laminating the two halves was pretty straight forward. I first drilled holes for the screws spaced about 6-8" apart. I then spread Cabosil thickened epoxy with and 1/8" trowel on both halves, laid the halves together and worked the air out from the middle of the blade out to the edges. I then screwed the halves together with stainless screws and fender washers and used c-clamps and some extra weights. I backed the screws out before full cure and had no problem removing them. I used 3/8" OD Pex tubing in the bolt hole passages to keep the passages from filling with epoxy. I waxed these heavily and removed them before full cure without issue.
After gluing the two halves, I wanted to test-fit the blade on the boat. Luckily, all was well. Needed a few minor tweeks but it fit perfect for the most part.
For the taper, I used an angle grinder with a 36 grit disk and a belt sander. I copied the shape of the old blade as best I could.
To add a sort of barrier to the trailing edge, I used a method I had read about in Duckworks some time ago. This is similar to the method Zach suggested above. I soaked a length of 1/4 cotton rope in epoxy and then tacked it along the entire length of the trailing edge. The photo below is after fairing and sanding. This should add some protection to the trailing edge in case I were to back into a line or something.
Here's the blade after the first layer of glass. I'm using two layers of 1708 biax.
Fully glassed and the first round of fairing complete. Just ordered 10lbs of lead shot. Once that gets here I'll bolt on the posts, fill the holes with lead shot and glass over them. One final round of fairing and a few coats of epoxy for a barrier coat and I should be done.
Hirilondë mentioned early on in this thread that a one-off rudder would take quite a few hours. I have found this to be quite true. I probably have 60+ hours and about $500 in this project so far and another 10 hours or so left.
-
Quetzalsailor
- Master of the Arcane
- Posts: 1100
- Joined: Fri Aug 26, 2005 9:53 am
- Boat Name: Quetzal
- Boat Type: LeComte North East 38
- Location: Philadelphia, PA
Re: Rudder Replacement Options
Some good tricks shown here.
Always good to drill, rout, or otherwise provide long holes if and as the assembly allows it. I drilled each board of a solid wood countertop before epoxying the boards together. Since the threaded rods did not extend to the edges, like Robs' I assembled the bolts with their lengths taped as I glued.
The bolt ends can be seen in the recesses milled by plunge cutting with a dadoe blade in my radial arm saw; the boards were clamped to the saw table so all I had to do was crank the arm down the right number of turns.
Done
Another trick is to cut mortices with a dadoe blade if the stiles are to be laminated to thickness.
These door stiles were laminated of 3/4" thick stock. The panels were cut from 5/4 stock and the rails were cut from 1 1/2" stock.
Assembled doors. Two paneled, one epoxy coated and glazed for a shower door.
This paneling, and all doors and shutters were made with 5/4 stock and morticed with a morticing chisel mounted in a drill press. That's a lot more like work; my chisel cuts a 3/8" square hole and the jig has to be good enough to cut repeated holes side by side accurately and easily to get the desired width of mortice.
I like the rope-edge trick, especially if it wet out completely. I might well adopt the idea for the leading edge of rudder and centerboard on the Flying Dutchman project. A negative of such an idea is that the reinforcement would cause more extensive damage if it's hit hard enough, and be more difficult to repair.
Always good to drill, rout, or otherwise provide long holes if and as the assembly allows it. I drilled each board of a solid wood countertop before epoxying the boards together. Since the threaded rods did not extend to the edges, like Robs' I assembled the bolts with their lengths taped as I glued.
Another trick is to cut mortices with a dadoe blade if the stiles are to be laminated to thickness.
I like the rope-edge trick, especially if it wet out completely. I might well adopt the idea for the leading edge of rudder and centerboard on the Flying Dutchman project. A negative of such an idea is that the reinforcement would cause more extensive damage if it's hit hard enough, and be more difficult to repair.
-
Quetzalsailor
- Master of the Arcane
- Posts: 1100
- Joined: Fri Aug 26, 2005 9:53 am
- Boat Name: Quetzal
- Boat Type: LeComte North East 38
- Location: Philadelphia, PA
Re: Rudder Replacement Options
Jeeze, I meant to write first that you're doing a great job!
-
Zach
- Boat Obsession Medal Finalist
- Posts: 684
- Joined: Wed Jan 25, 2006 6:28 pm
- Location: Beaufort, North Carolina
- Contact:
Re: Rudder Replacement Options
Very nice work!
The rope is a new one on me... Only time I've seen it was on a rolling dolly for a wharram tiki 21, wheels 3-4 layers of 3/4 plywood laminated together and wrapped in rope/epoxied.
Very slick, I'll be using that tip.
Zach
The rope is a new one on me... Only time I've seen it was on a rolling dolly for a wharram tiki 21, wheels 3-4 layers of 3/4 plywood laminated together and wrapped in rope/epoxied.
Very slick, I'll be using that tip.
Zach
1961 Pearson Triton
http://pylasteki.blogspot.com/
1942 Coast Guard Cutter - Rebuild
http://83footernoel.blogspot.com/
http://pylasteki.blogspot.com/
1942 Coast Guard Cutter - Rebuild
http://83footernoel.blogspot.com/