I have an idea.. I am kind of reluctant to try it, though.
Sanding the small area below my teak rubrail is a pain in the butt, my random orbital sander is too large to get in the nook, and my palm sander is useless as it gums up with paint immediately.
When doing my 2 part compatibility test, the rag soaked in brushing reducer 2333 did a great job of dissolving the old paint, and leaving only gelcoat behind.
My idea is to cut long 3" strips of paper, saturate them with the reducer, and then lay over the old paint along the rubrail. When the paint is dissolved or at least softened, I can come back and wipe it away-leaving only gelcoat behind.. This would eliminate alot of annoying sanding.
My concern is that I can vaguely recall reading somewhere that it's not good to apply harsh solvents directly to gelcoat, but this may be my imagination.
Is there a risk in this idea? I always cut my own throat when I try to cut corners like this, but I think that it might work very well.
I would be sure to clean the area very well afterward, before coming back with a palm sander.
Please let me know what you guys think!
Brush reducer as a paint stripper?
-
moonie5961
- Bottom Paint Application Technician
- Posts: 23
- Joined: Sun Sep 20, 2009 2:22 pm
- Boat Name: Banzai
- Boat Type: 1974 Contest 31
-
The Froon
- Almost a Finish Carpenter
- Posts: 99
- Joined: Tue Sep 23, 2008 11:18 pm
- Boat Name: TBD
- Boat Type: Westsail 32
- Location: Jacksonville, FL
- Contact:
Re: Brush reducer as a paint stripper?
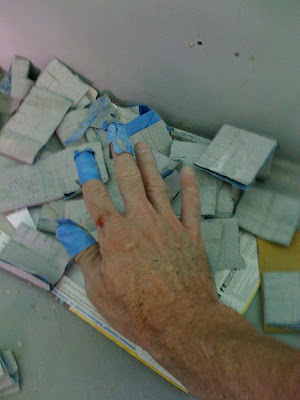
....18 hours across three days, 15 sheets of 60 grit paper....to get the "tight" spots....sometimes you just got grin and bear it.
Brian
Brian
"My best days are ahead of me..."
http://www.seasprite217.blogspot.com
http://www.westsailstory.blogspot.com
http://www.seasprite217.blogspot.com
http://www.westsailstory.blogspot.com
-
moonie5961
- Bottom Paint Application Technician
- Posts: 23
- Joined: Sun Sep 20, 2009 2:22 pm
- Boat Name: Banzai
- Boat Type: 1974 Contest 31
Re: Brush reducer as a paint stripper?
Brian, Thanks for the response.
As for your picture... well, THAT is dedication! Such a beautiful boat certainly warrants such meticulous work.
I just re-read through your blog, and have to say I'm really impressed with your attention to detail and workmanship. You're doing a great job of documenting the project, too. Project logs like yours, Tim's and others on this site are invaluable for newbies like myself.
I tried the paper idea, it didn't hold enough solvent to remove paint... I think I am still going to try it with an old sheet ripped into 3" strips.
I'll still have to sand afterward, maybe this will help, though. I'm sure that my fingers will be adorned with bandages by the end. =)