Page 6 of 8
Re: Coronado 15 project.
Posted: Thu Apr 25, 2013 5:38 pm
by earlylight
Agreed,, wrong bit for the job at hand.
Re: Coronado 15 project.
Posted: Thu Apr 25, 2013 5:54 pm
by TampaBay
Squidd wrote:Ummm...pilot points are for wood and non ferrous metals...
What? These are cobalt coated and rated for stainless. That's why I bought them. I'll have to learn more about drill bits.
Re: Coronado 15 project.
Posted: Thu Apr 25, 2013 6:14 pm
by TampaBay
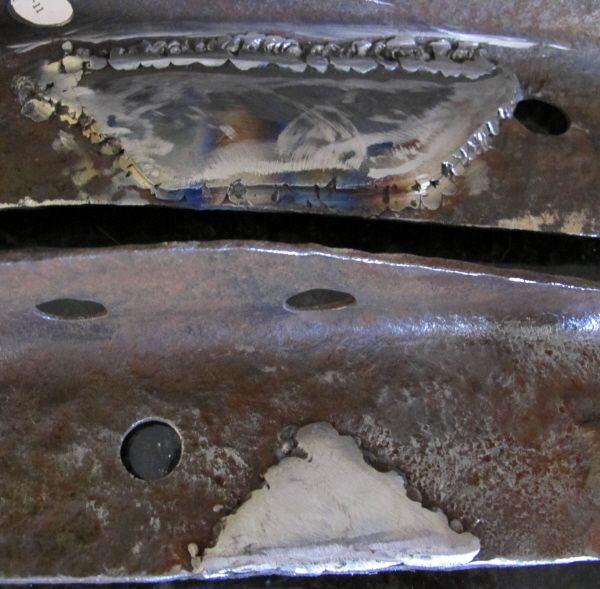
Four patches in total, they are cut from 1/8th inch sheet.
The trapezoidal patch (top) is the largest, the triangular patch (bottom) is the penultimate, but the best looking :)
Re: Coronado 15 project.
Posted: Thu Apr 25, 2013 9:29 pm
by earlylight
My bad. I had never seen pilot point bits capable of drilling stainless steel. After a quick search on Google I found them. Thanks for enlightening me. :-)
Re: Coronado 15 project.
Posted: Fri Apr 26, 2013 10:08 am
by TampaBay
This looks like the set I have.
http://www.tylertool.com/dewalt-dw1263- ... map=DW1263
They snap in an instant, that has been my experience. Also, when they cut through the bottom of the hole, they grab like a vise.
Re: Coronado 15 project.
Posted: Mon Apr 29, 2013 9:04 am
by TampaBay
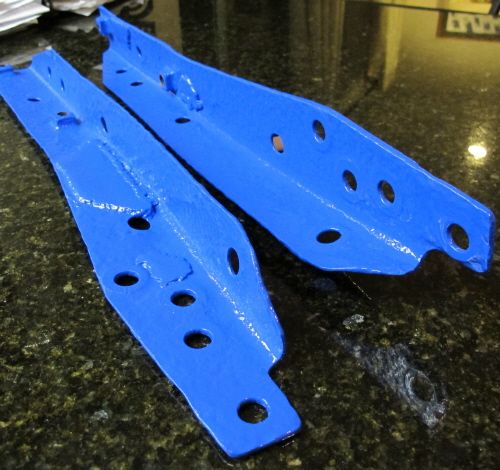
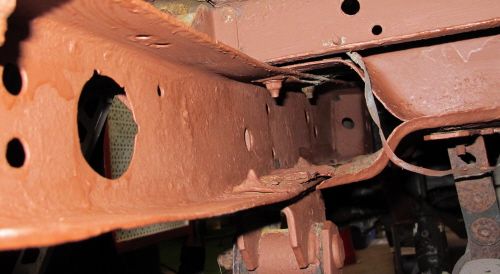
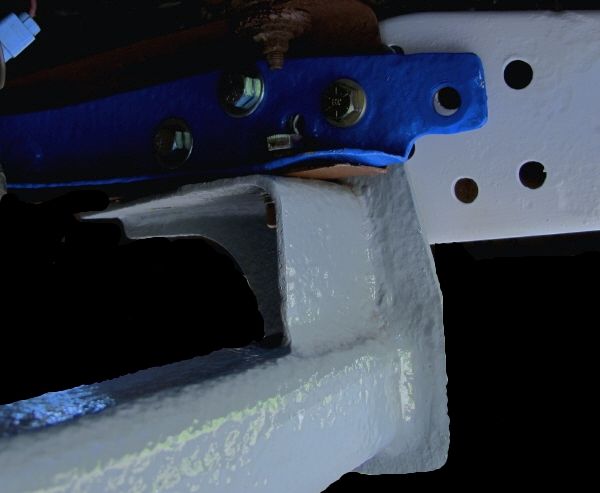
The frame stiffeners ready to reinstall.
Re: Coronado 15 project.
Posted: Mon Apr 29, 2013 2:17 pm
by TampaBay
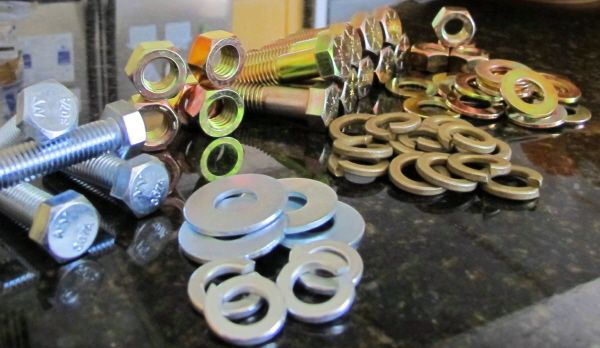
Grade-5 and grade-8, these bolts get the hitch attached.
With some anti-seize and a little maintenance, these fasteners should last a lifetime.
Re: Coronado 15 project.
Posted: Wed May 01, 2013 8:29 am
by TampaBay
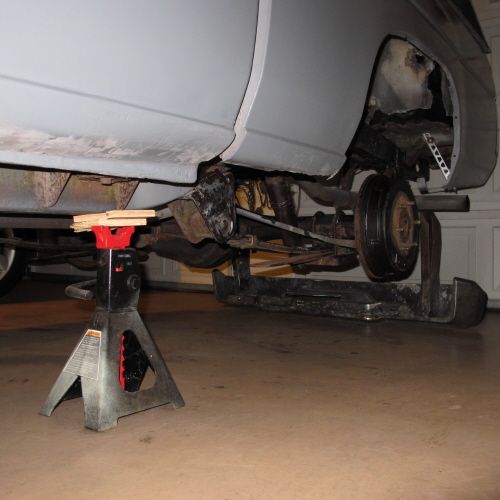
A long day of grinding: I cleared away rust from the frame (and everything else I could reach) with an angle grinder, a wire brush, and the shop-vac.
 Here the grinding is finished. This is a good time to inspect those back brakes.
Re: Coronado 15 project.
Posted: Wed May 01, 2013 11:41 am
by TampaBay
You might file this under "the answer to a question that nobody is asking." Here is a South African Gardenia seed pod, after a couple months in the sun.
Very fluffy, there must be some seeds in there someplace.


Re: Coronado 15 project.
Posted: Fri May 03, 2013 10:34 am
by TampaBay
Almost ready to reinstall the hitch. Frame horns are cleaned and painted.
Re: Coronado 15 project.
Posted: Sat May 04, 2013 10:04 am
by Zach
Have you tried POR15?
It is ridiculously tough paint for the underbody of cars, and wants a layer of flash rust to bond to. You can't break it beating it with a hammer, nor chip it off.
Zach
Re: Coronado 15 project.
Posted: Sun May 05, 2013 11:16 am
by TampaBay
I have heard about Por15. Other work is needed on the frame, and the Rustoleum is easy to remove. Plus, it's very cheap and has a low level of toxicity.
If I pull the bed, and the frame becomes accessible, that would be an ideal time for the Por15..
The truck sees only light duty (at most,) and it's kept in the garage. I'm curious to see how the Rustoleum weathers.
Re: Coronado 15 project.
Posted: Sun May 05, 2013 2:37 pm
by TampaBay
I reinstalled the hitch closer in, under the truck. It could be installed 3 1/2" further out, but the frame and hitch are stronger with it tucked in closer.
With a cutoff disk, I removed a section of the bumper that fell directly above the ball's new location. In theory, the bumper is less strong, but in reality it's nothing but junk, and it's only good for license plate holding.
Before.
 After.
 Grind away sharp edges.
Re: Coronado 15 project.
Posted: Mon May 06, 2013 3:44 pm
by TampaBay
Hitch is bolted in, and ready to go: Very glad to see this project completed.
See the red, white, blue and grey colors? The right paint scheme adds one extra ton of towing capacity to a Nissan hitch.
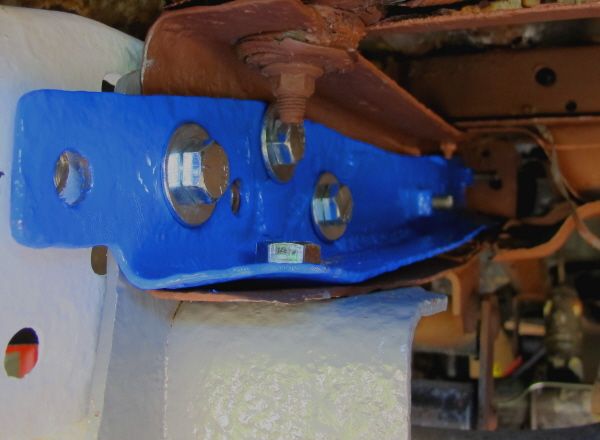 Red = frame, blue = stiffener, grey = hitch, white = bumper bracket. I filled in the background so that the individual parts are easier to see.
Re: Coronado 15 project.
Posted: Wed May 15, 2013 10:10 am
by TampaBay
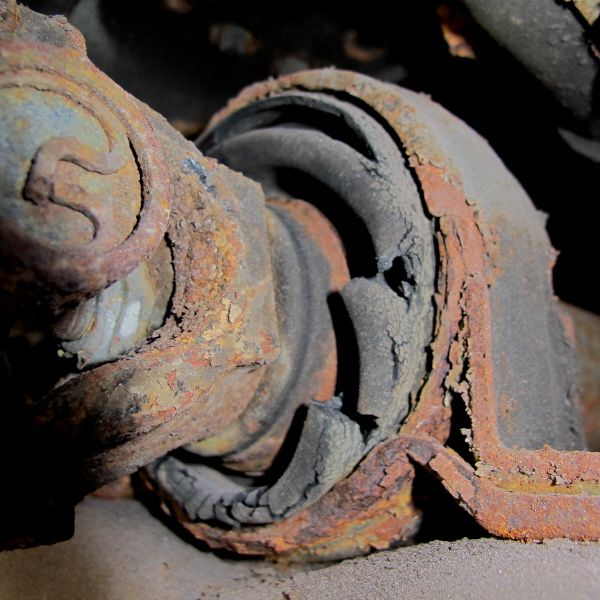
Yikes! This has to be replace. The new parts are on the way.
Center carrier bearing and brackets.
Re: Coronado 15 project.
Posted: Wed May 15, 2013 6:26 pm
by Squidd
You live in Florida...?
I'm surprised that truck has so much undercarriage rust...more likely to see that up here where they put salt on the roads 7 months a year...
Re: Coronado 15 project.
Posted: Wed May 15, 2013 7:31 pm
by TampaBay
Squidd wrote:You live in Florida...?
I'm surprised that truck has so much undercarriage rust...more likely to see that up here where they put salt on the roads 7 months a year...
Well, the truck was bought new in Louisiana, then went to Texas, and then to N. Carolina where my Father bought it from his friend. Dad took it to Northern New York then gave the truck to me. I took it to Boston and then brought it to Florida.
Yes, it does need work, but any truck that's been used continuously for 25 years (it's an 88) is bound to need a few parts repaired or replaced.
Re: Coronado 15 project.
Posted: Wed May 15, 2013 9:03 pm
by Squidd
They're good little trucks and and seem to run almost forever...just surprised by the rust, but New York and Boston explain alot...
Re: Coronado 15 project.
Posted: Mon May 20, 2013 9:43 am
by TampaBay
It was used in a couple "road salt" States.
In Florida, I used the truck (for a few years) to shuttle liquid chlorine from the pool store, to my house. That stuff is infamous for rusting out trucks.
Re: Coronado 15 project.
Posted: Tue May 21, 2013 7:32 pm
by TampaBay
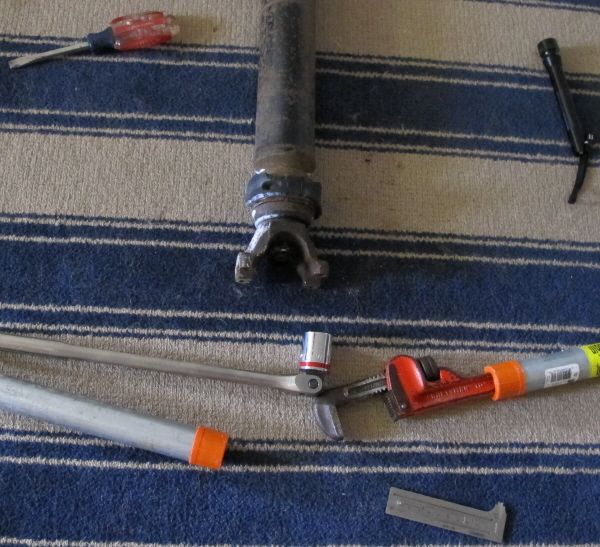
The new center support bearing was delivered.
Now, the drive shaft is disassembled on the living-room floor.
Re: Coronado 15 project.
Posted: Thu May 23, 2013 6:12 pm
by TampaBay
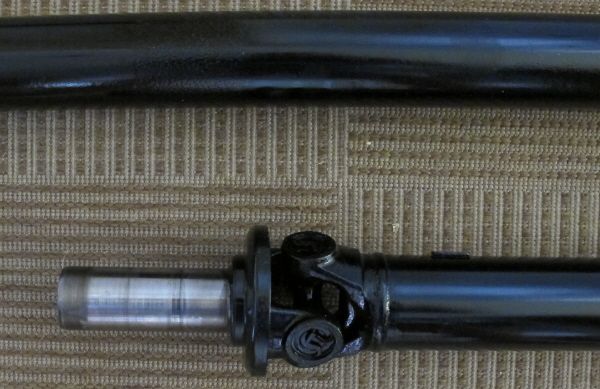
Drive shaft is re-built: The first machine shop installed three new universals and the center bearing. This morning I took it to another shop, and they did the balancing and painting.
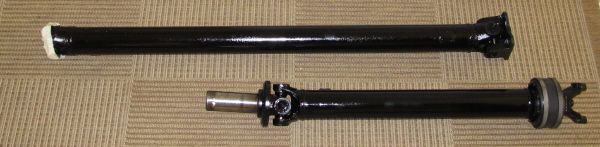 The transmission end.
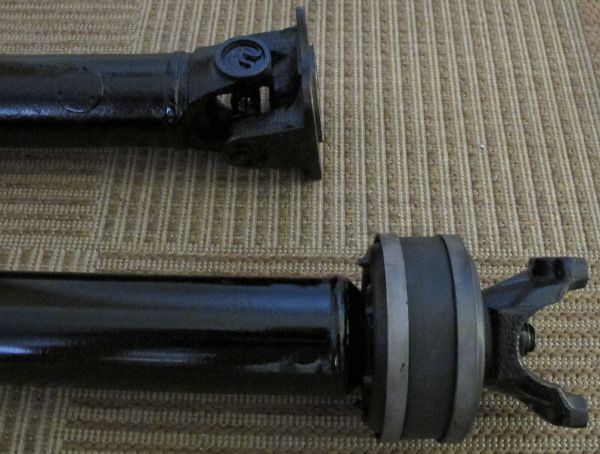
 The top is the differential coupling, and at the bottom, is the new center bearing.
Re: Coronado 15 project.
Posted: Fri May 24, 2013 4:15 pm
by TampaBay
The carrier bearing: I used a wire brush and then some Emory cloth, to remove a few areas of rust; and finished with a coat of "rusty metal primer."
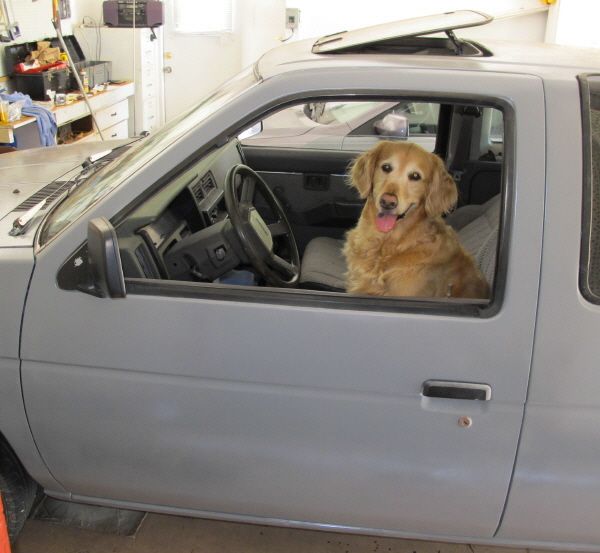
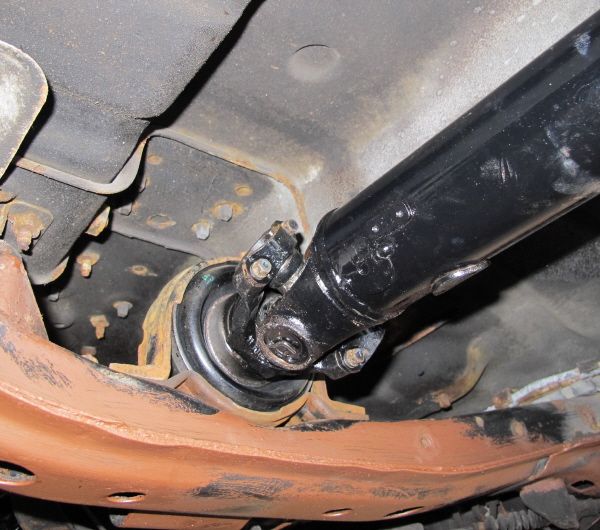 Drive-shaft installed: Wow, what a project. My #1 test pilot is ready to RUN this fierce jalopy!
Re: Coronado 15 project.
Posted: Sun May 26, 2013 5:03 pm
by TampaBay
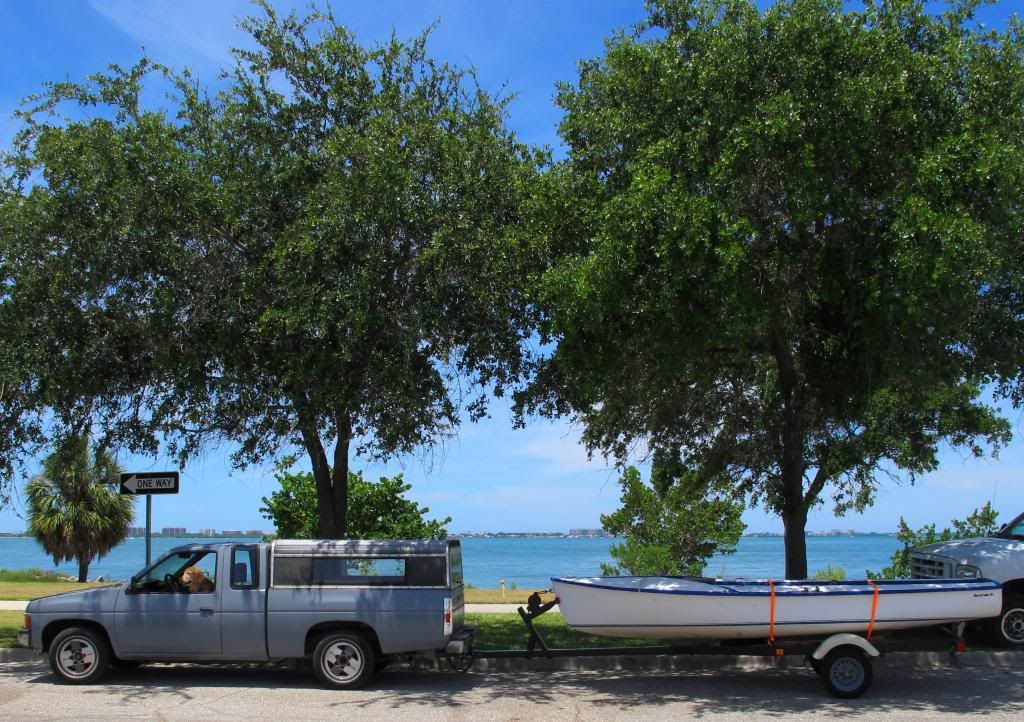
The weather today is fantastic.
I drove to the boat launch, for a test tow (the boat launch is very crowded.) First, the ground wire was reattached, then I hitched up and hit the road. The maximum speed was 60mph (no problems with the truck or trailer.)
That is Sarasota Bay in the background.
Re: Coronado 15 project.
Posted: Sat Jun 01, 2013 2:44 pm
by TampaBay
I found this tarp at a "bring and take." Sheets of plywood span the cockpit, and prevent it from filling with rain.
Re: Coronado 15 project.
Posted: Fri Jun 14, 2013 10:34 am
by TampaBay
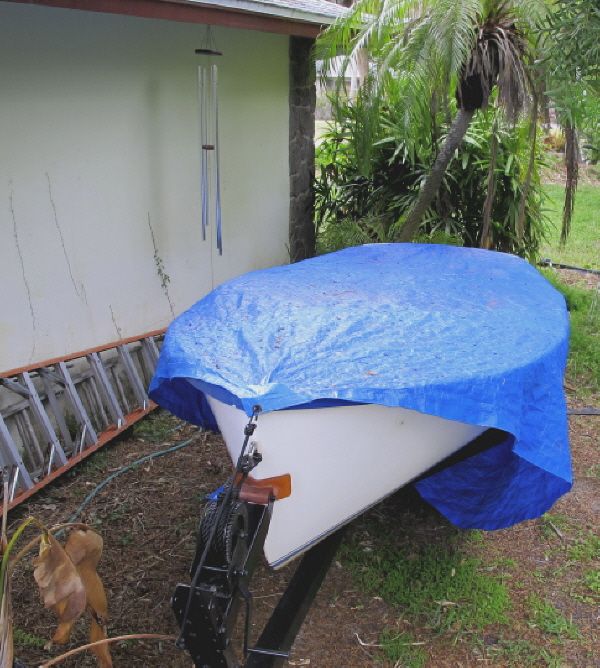
The old tarp is gone; relegated to yard duty (needed to drag piles of weeds and the like, out to the curb for pickup.)
This is a new tarp from Wal-Mart (12' by 24'.) Looking like a giant sleeping bag.

Re: Coronado 15 project.
Posted: Fri Jun 21, 2013 12:08 pm
by TampaBay
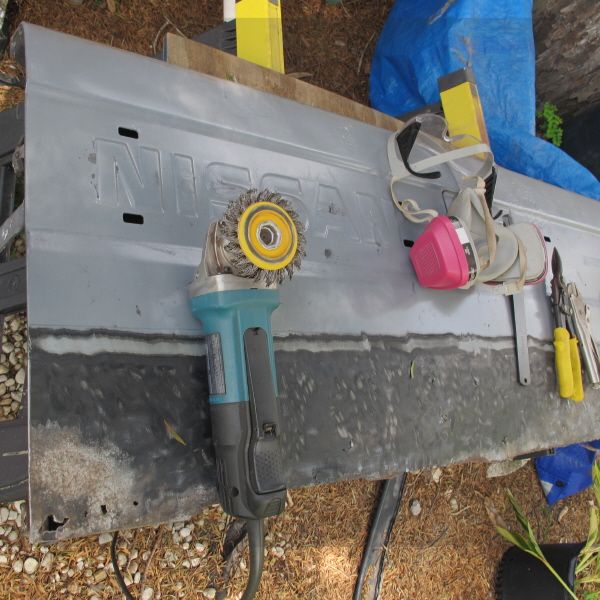
Work begins on the tailgate.
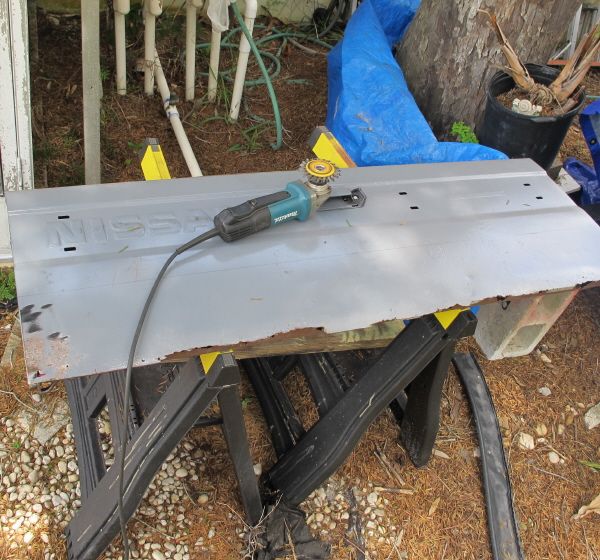 Adding one large rectangular patch (unless a better idea materializes within the next couple hours.)
Re: Coronado 15 project.
Posted: Fri Jun 21, 2013 1:35 pm
by TampaBay
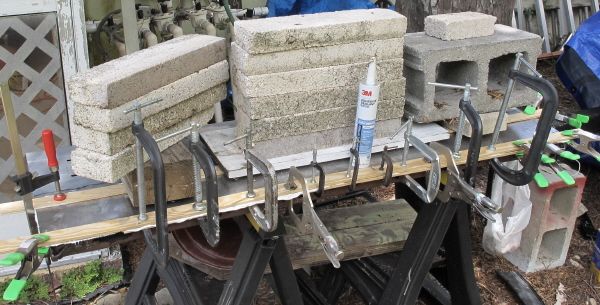
A tube of 5200 was dispensed across both surfaces (sanded and cleaned.) What I really needed here, was about 15 more clamps.
Three fairing strips were used to distribute clamping pressure; one strip is under the bricks, and two strips are at the bottom edge, sandwiching the old steel and the new.
Re: Coronado 15 project.
Posted: Sat Jun 22, 2013 9:42 am
by TampaBay
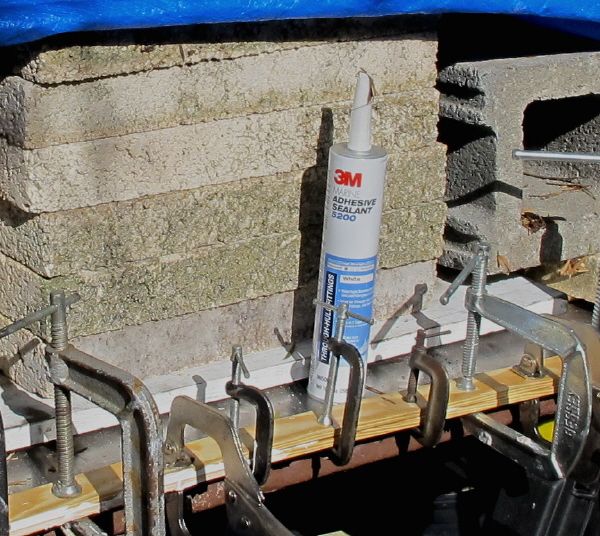
This is "slow cure" 5200. The instructions read "full cure in 7 days." The fast cure version completes in 24 hours.
I'll wait 48 hours, then it's on like Donkey Kong.
Re: Coronado 15 project.
Posted: Mon Jun 24, 2013 2:37 pm
by TampaBay
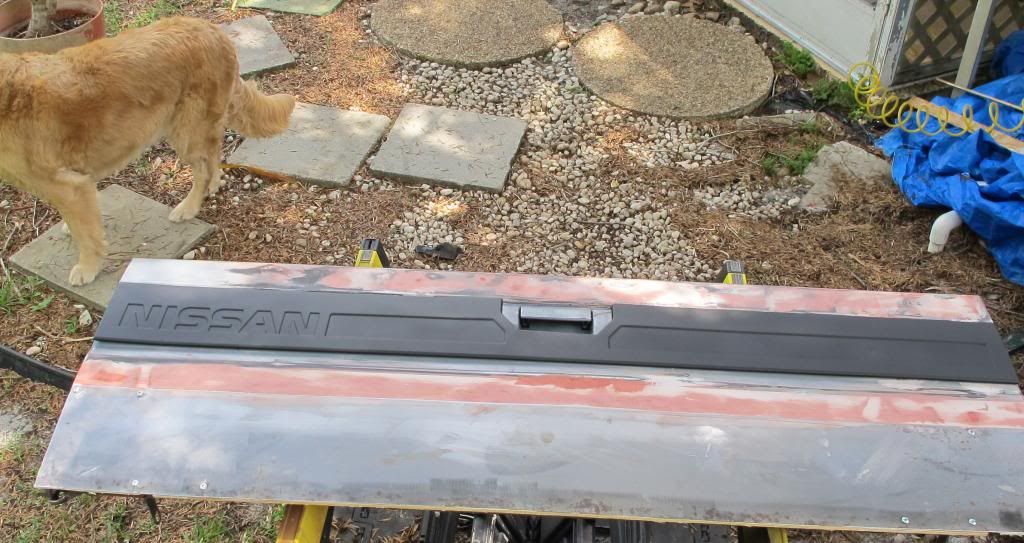
The 5200 bonded poorly in a few spots with too much squeeze-out. Just to be safe, I installed eight sheet metal screws. I don't think I'll enter this truck in the Pebble Beach Concours D'Elegance (it's a very fancy car show.)
I fared in the new panel with Bondo and then glazing. The trim piece is painted flat black, and next comes a coat of primer.
Re: Coronado 15 project.
Posted: Thu Jun 27, 2013 8:48 am
by TampaBay
The gate is reinstalled. I'll attach the missing trim panel soon.

Re: Coronado 15 project.
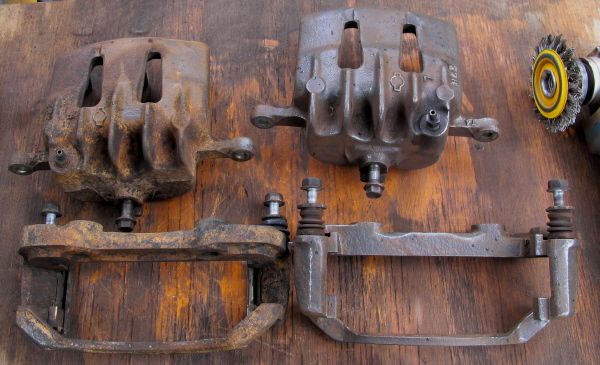
Posted: Sat Jul 13, 2013 9:06 pm
by TampaBay
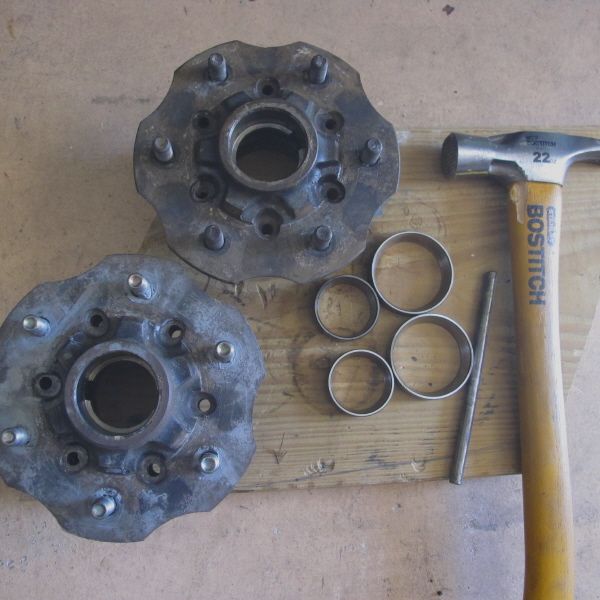
I've been busy installing new front brakes.
 There isn't a replacement brake caliper within 7 counties of here. So, I'm rebuilding these.
 Cleaned up the hubs and installed new bearings (here, old races are punched out.)
Re: Coronado 15 project.
Posted: Tue Jul 16, 2013 9:10 am
by Cruiser2B
Love seeing your dedication to making old things new again...I am getting ready to pull the engine on my 66 VW beetle, driven daily.....but needs a freshen up.....way cheaper than a new car, just requires a bit of elbow grease..and its get 28-30mpg!
Re: Coronado 15 project.
Posted: Tue Jul 16, 2013 11:24 am
by TampaBay
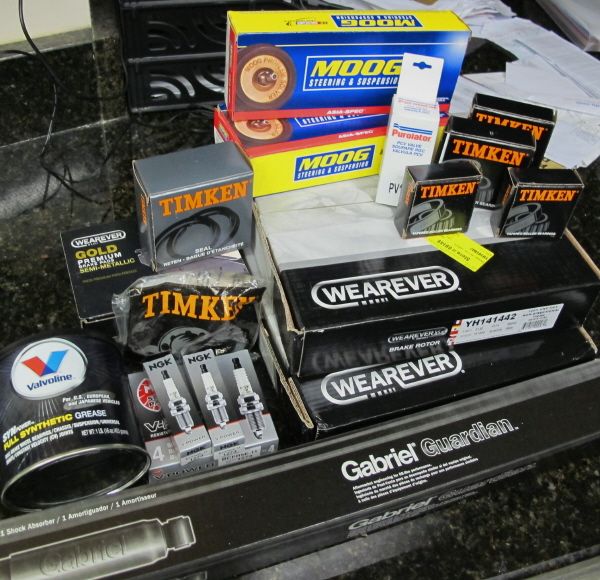
Thanks! The truck requires work now and again. As long as there's a use for the vehicle, it's much less expensive than buying new. I used to let the maintenance slide, but when I started towing, I got more serious.
This is what I'm replacing now (bearings and races, sway bar end links, rotors, calipers, pads, shocks, spark plugs and the PCV valve.
Re: Coronado 15 project.
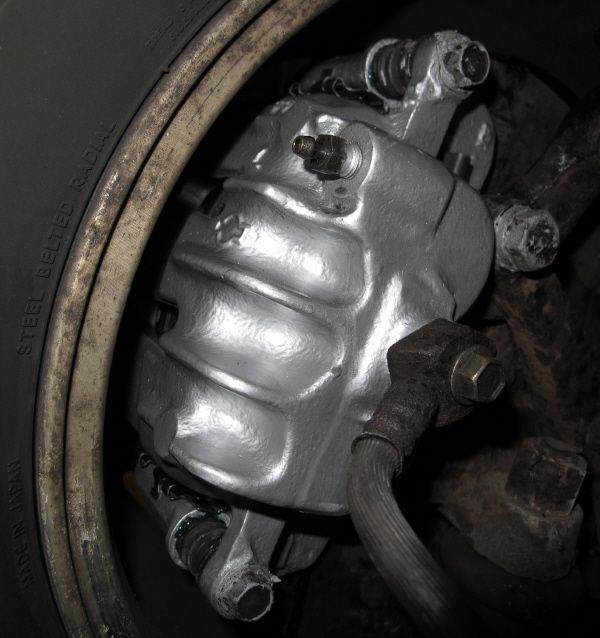
Posted: Sun Jul 21, 2013 10:24 pm
by TampaBay
The rebuilt and painted front brake caliper.
Re: Coronado 15 project.
Posted: Mon Aug 05, 2013 4:31 pm
by TampaBay
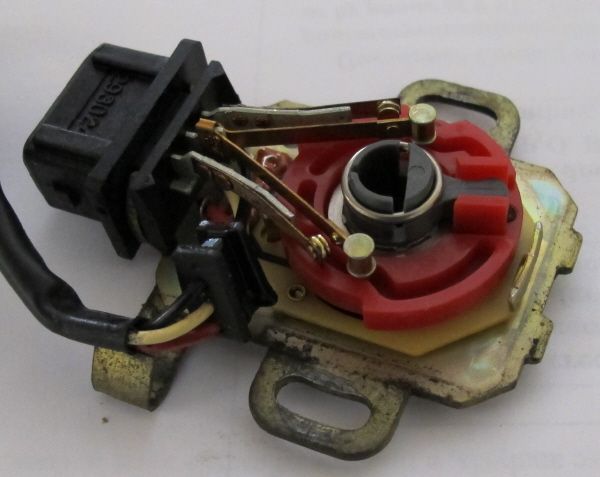
The inside of a throttle position sensor (mine.) If you step on your gas peddle you will rotate the throttle shaft. This sensor fits onto that shaft.
That red disk is rotated and the electrical signal generated (from 0.2 to 4.0 volts) tells the computer how to manage fuel and spark. Before you shell out 100+ clams for a new one, spray it with contact cleaner. Mine stopped working but after a cleaning it was back in service.
Re: Coronado 15 project.
Posted: Fri Oct 18, 2013 12:43 pm
by TampaBay
After 2 coats of resin, I wet out this length of fiberglass tape (4 inches wide, it runs from 7 o'clock up to 2 o'clock in this image.) This is strong enough for a sunshade. All it needs now is paint.

Re: Coronado 15 project.
Posted: Mon Nov 04, 2013 10:22 pm
by TampaBay
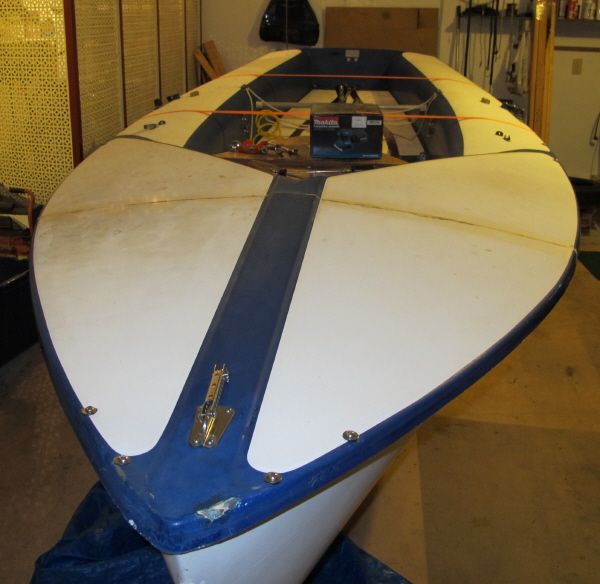
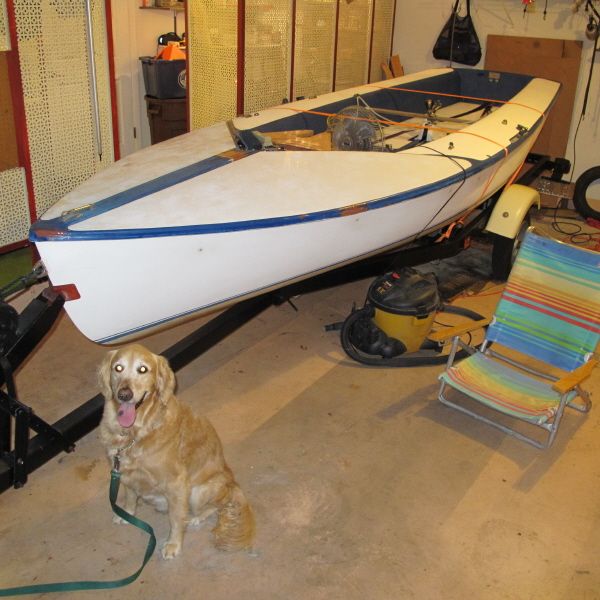
I pulled the tarp, towed it to the car wash, then parked it here. I'm thinking about sanding off the non-skid from the foredeck, and then repainting.
Re: Coronado 15 project.
Posted: Tue Nov 05, 2013 7:12 pm
by TampaBay
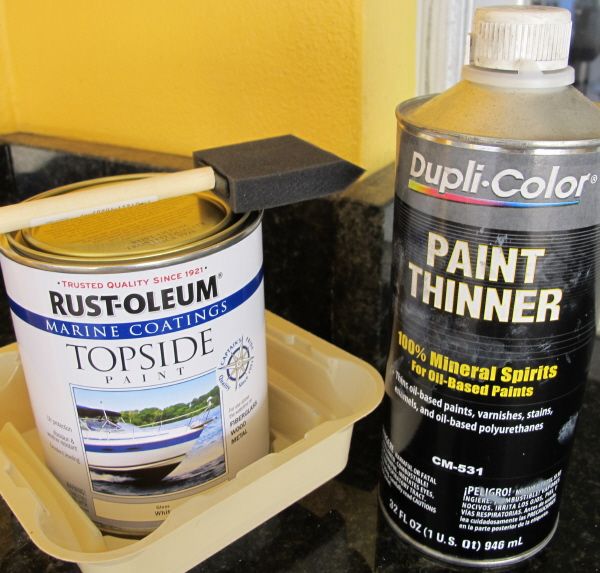
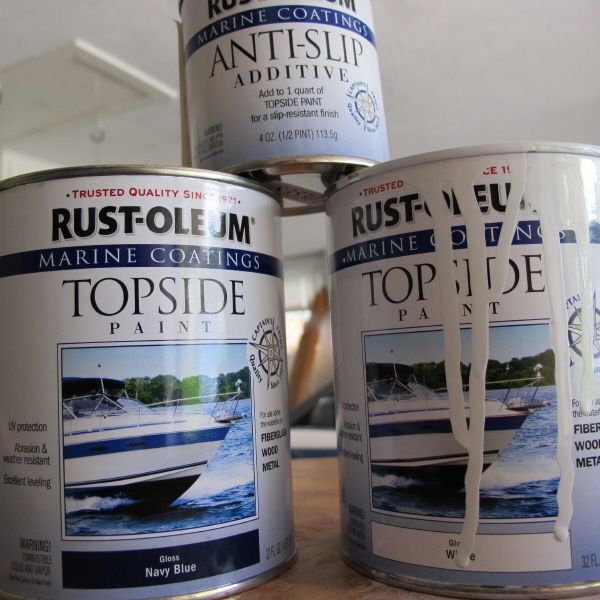
Picked up the paint and non-skid additive at Lowes. The thinner is for clean up.
Re: Coronado 15 project.
Posted: Tue Nov 05, 2013 8:08 pm
by TampaBay
This was easier than anticipated. I sanded the surface, taped off the edges, and rolled on 2 coats. Then I sprinkled the non-skid additive onto the still tacky paint and rolled out the 3rd coat.
 Not perfect, but much better than expected.

Re: Coronado 15 project.
Posted: Thu Nov 14, 2013 11:29 pm
by TampaBay
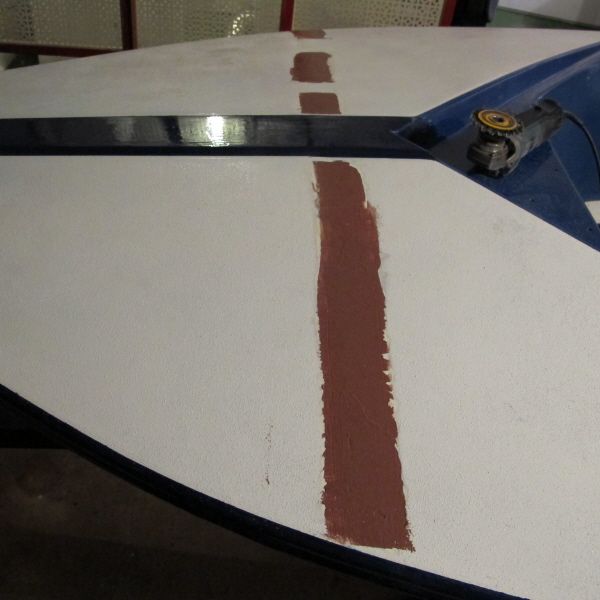
I made a trip to West Marine today, to buy a small can of West System 206 slow hardener. With thickened epoxy I faired in the blue areas and also a gouge on the port bow (see the red spots.) It's time to take a seat and enjoy some cool Florida weather.
Re: Coronado 15 project.
Posted: Fri Nov 15, 2013 10:48 am
by seasailor55
Nice job on the boat! You've put a lot of time and effort in a 15 footer and it shows. I tackled a similar project on a Cape Cory 22. The boat had a serious encounter with a dock in Galveston, Tx. during hurricane Ike and had soft spots in the deck. I recored sections of the deck, repainted the entire boat, then applied contrasting non-skid to the deck, using Hatteras White two part polyurethane tinted a sand color and mixed with polymer particles. Makes a world of difference wet or dry and covers the patched areas nicely. By the way, how does that Coronado 15 sail?
Re: Coronado 15 project.
Posted: Fri Nov 15, 2013 11:56 am
by TampaBay
Hello seasailor55,
The Coronado 15 sails well. It has plenty of sail and a comfortable cockpit. The hull and the foils have been faired, the boat has many new parts and it gets faster every year. The trailer is also in very good condition; it received a lot of time, and resources.
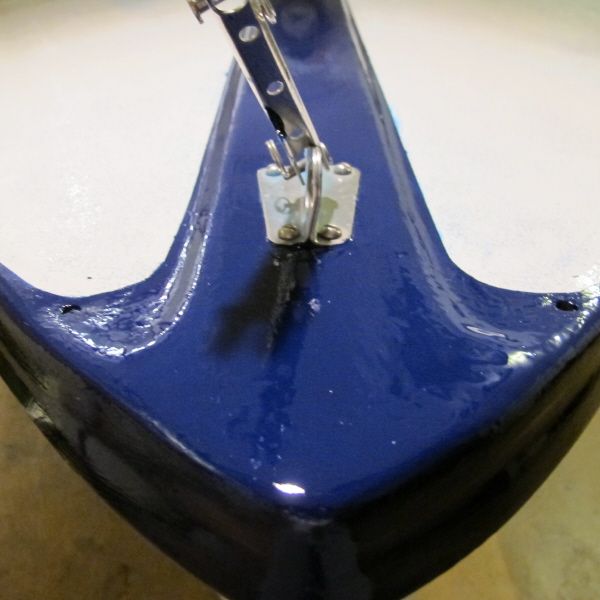
A closer look at the new fairing work: I removed this deck and installed a full bulkhead. It makes the hull many times stiffer, and when punching into large waves, no flex is perceptible.
 The paint: It's 12 dollars a quart. Because the boat spends most of it's time under cover, this paint could hold up for a long time. If after awhile I change my opinion, this small area can be sanded back to bare glass in half an afternoon and the project can restart from square one.
Re: Coronado 15 project.
Posted: Fri Nov 15, 2013 9:06 pm
by TampaBay
Here it is, painted and ready to roll.
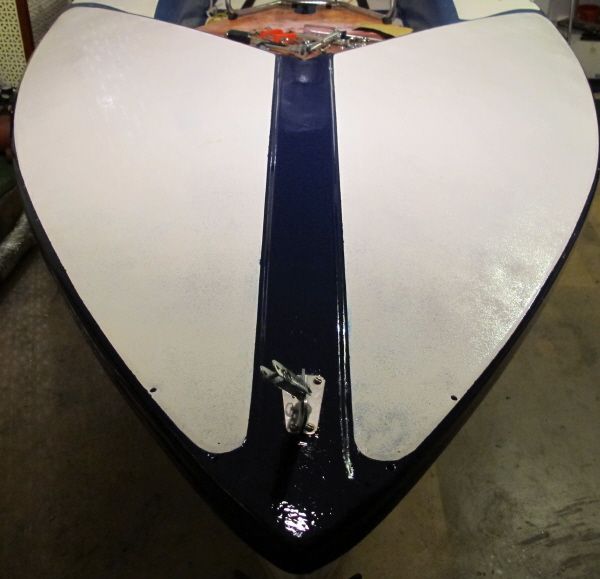 Navy blue and white.
Re: Coronado 15 project.
Posted: Sun Nov 17, 2013 9:12 pm
by TampaBay
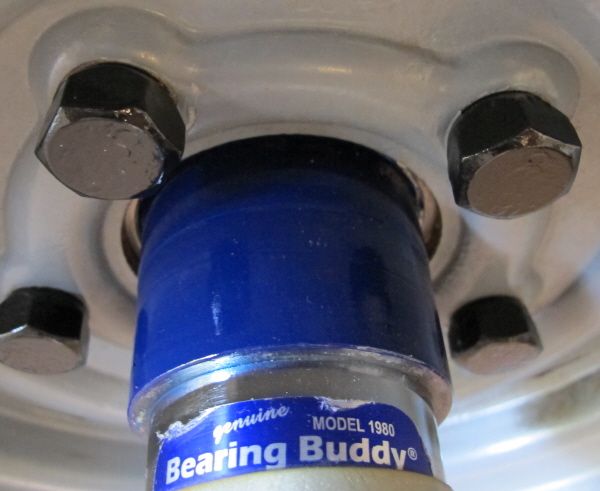
I did some maintenance on the trailer this weekend. This rust and old paint was removed with a wire wheel.
 With the tire off, I replaced one bolt into the hub and hit it with the wires. Repeat times 10 and then attack the hub itself (repeat times 2.)
 Repainted and reassembled.
Re: Coronado 15 project.
Posted: Mon Nov 18, 2013 5:03 pm
by Paulus
The blue matches the boat... ;-)
Re: Coronado 15 project.
Posted: Wed Nov 20, 2013 8:49 pm
by TampaBay
Lots of left over blue paint.
Re: Coronado 15 project.
Posted: Fri Nov 22, 2013 8:24 pm
by TampaBay
I really didn't want to do this, but the fairing work wasn't good enough. I ground off some paint and refaired the deck.