Page 5 of 8
Re: Coronado 15 project.
Posted: Thu Jan 17, 2013 11:38 am
by TampaBay
After sailing, I angled the bow up, and pulled the drain plug. Not a drop of water inside (always a good thing.)

Re: Coronado 15 project.
Posted: Sat Jan 19, 2013 12:46 pm
by TampaBay
Now, I'm spending a little time in my "head scratching chair." Wondering what direction to head next.
Re: Coronado 15 project.
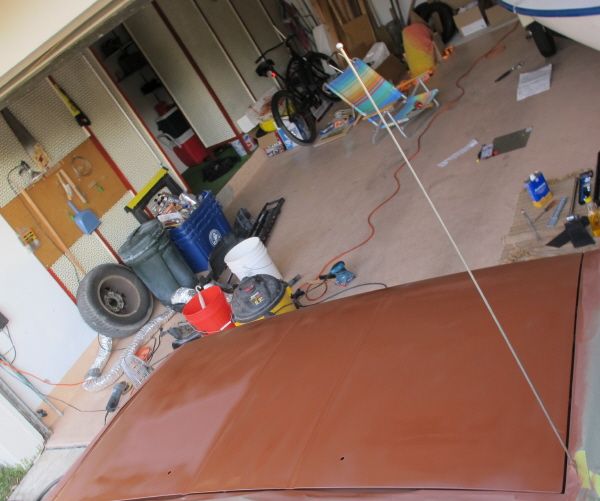
Posted: Sun Jan 20, 2013 10:42 am
by TampaBay
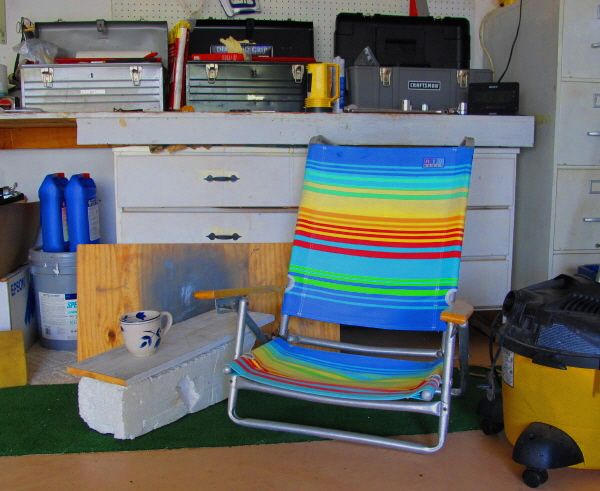
The garage is cleaned up.
Re: Coronado 15 project.
Posted: Sun Jan 20, 2013 7:20 pm
by TampaBay
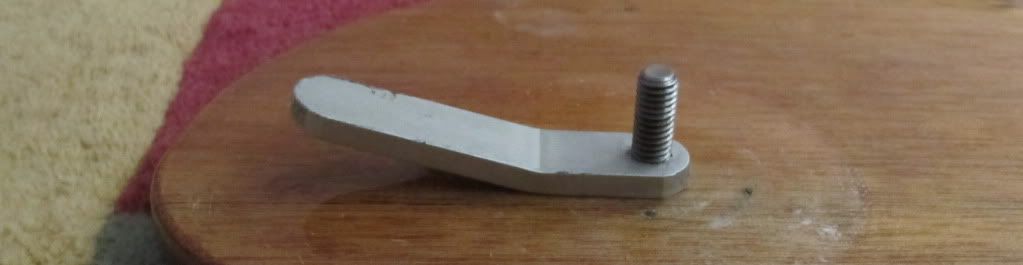
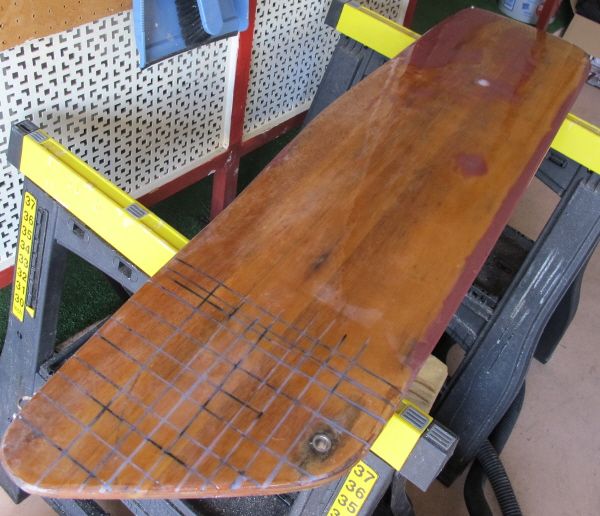
The bolt (pivot point,) for the rudder, had worn against the wood. The hole was chew up slightly, out of round, and not protected against water absorption.
Epoxy was syringed into the extra space, then the bolt was held in position with it's specialized clamp.
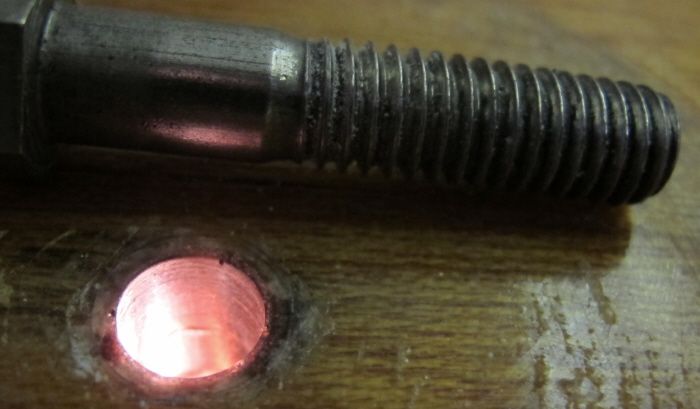
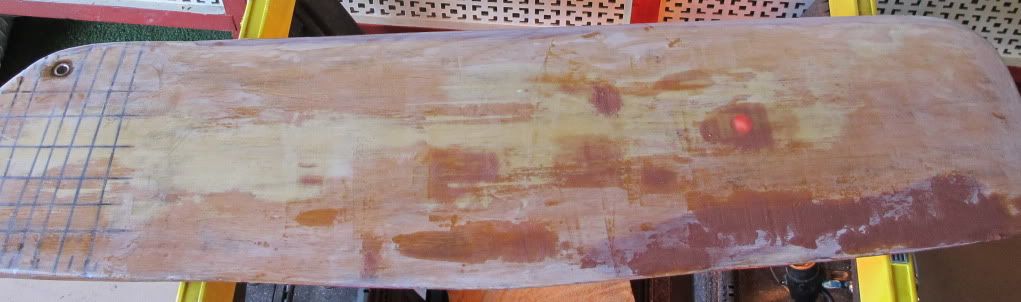
 Back-lit, the new epoxy bearing surface is visible.
Re: Coronado 15 project.
Posted: Tue Jan 22, 2013 2:37 pm
by TampaBay
The centerboard had a small section of PVC tube, glued into the middle.
The purpose is to "pin up" the board at deck level, and there's a nice aluminum pin. It's an OK idea; but, it doesn't work, it makes the board weaker, and it creates turbulence.
 A series of jig saw cuts around the PVC.
 The pieces snapped away easily.

Re: Coronado 15 project.
Posted: Thu Jan 24, 2013 2:51 pm
by TampaBay
Back-lit: I didn't mix enough straight epoxy, so I filled to half way, then added microfibers to what remained in the pot. Here is a ball of thickened epoxy floating in a pool of resin.

Re: Coronado 15 project.
Posted: Tue Jan 29, 2013 4:12 pm
by TampaBay
Fairing the centerboard, and sealing with epoxy.
Re: Coronado 15 project.
Posted: Thu Jan 31, 2013 11:26 am
by TampaBay
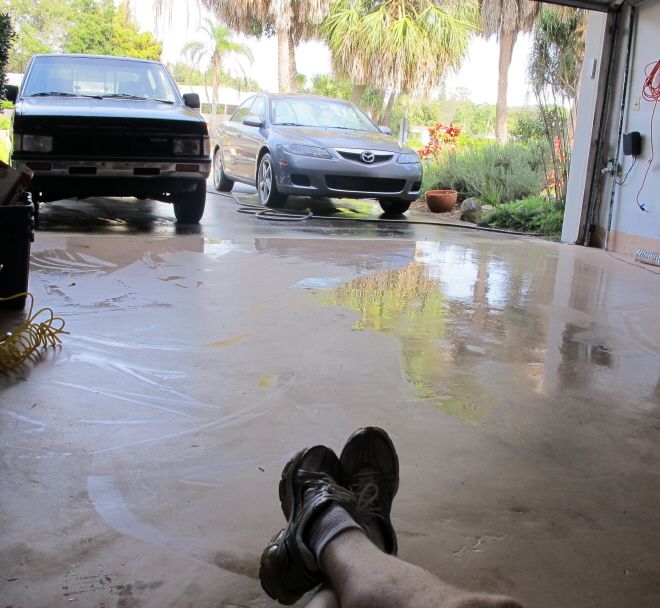
The staff is on a break.
Re: Coronado 15 project.
Posted: Thu Jan 31, 2013 2:27 pm
by TampaBay
Flip board and repeat: Used fairing filler in the low spots. This foil is far from perfect, but significantly better than it was a couple weeks ago.
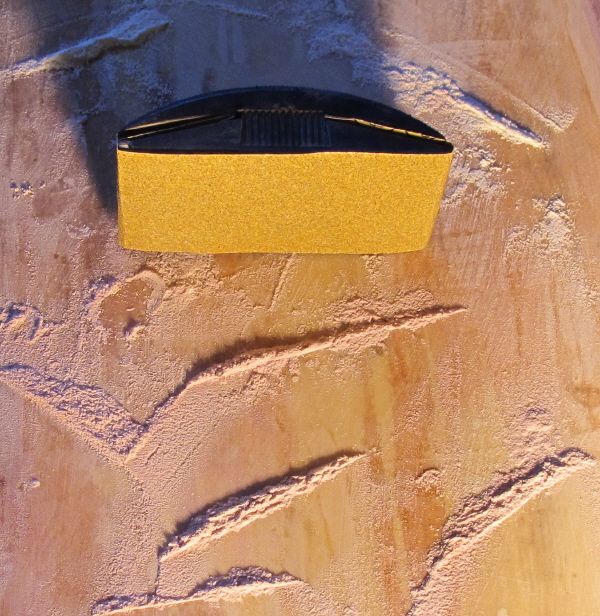
Re: Coronado 15 project.
Posted: Fri Feb 01, 2013 11:18 am
by TampaBay
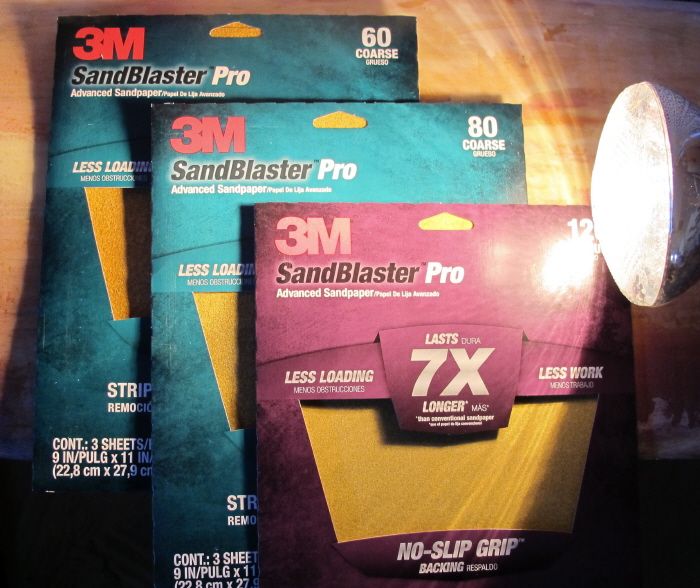
Today: Trying out new sandpaper.
Re: Coronado 15 project.
Posted: Fri Feb 01, 2013 12:20 pm
by TampaBay
So far, very good stuff. It stays sharp and clears easily.
Re: Coronado 15 project.
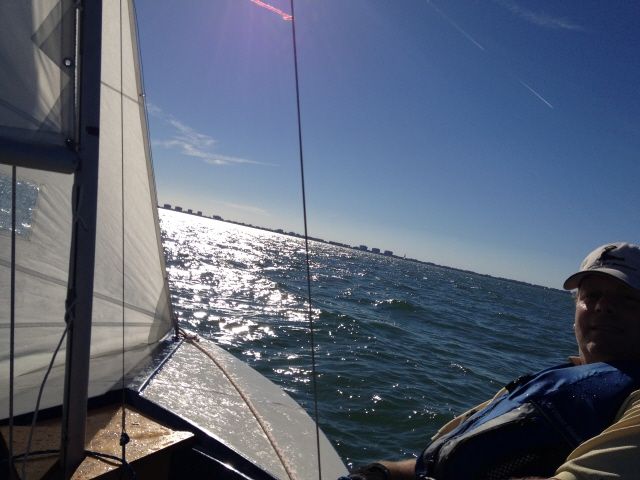
Posted: Tue Feb 05, 2013 11:41 am
by TampaBay
Another good day sailing.
Re: Coronado 15 project.
Posted: Thu Feb 07, 2013 1:48 pm
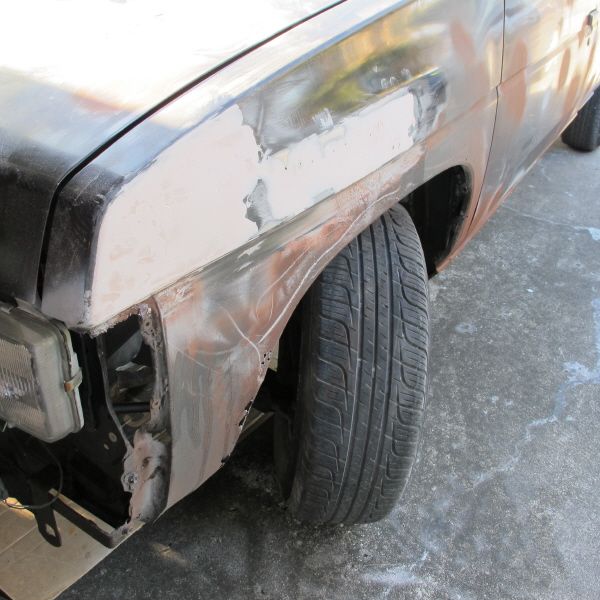
by TampaBay
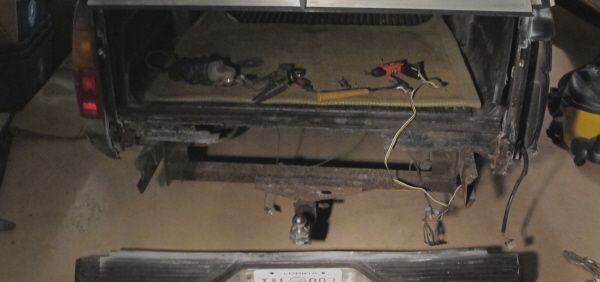
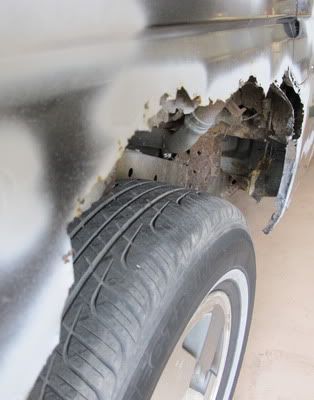
Attention shifts to the tow vehicle.
Bondo
 Fix head lamp.
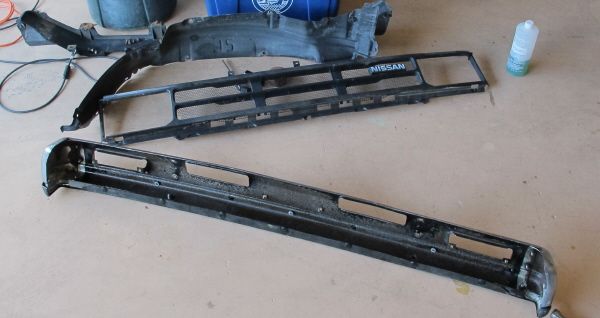
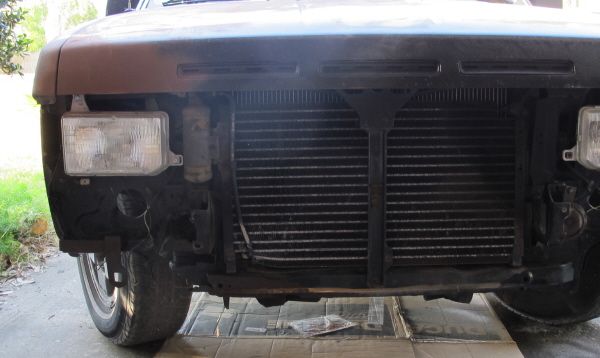 Straighten bumper and apply rust treatment to the back side. Sort through the grill, air dam, and inner fender well.
Re: Coronado 15 project.
Posted: Fri Feb 08, 2013 2:55 pm
by TampaBay
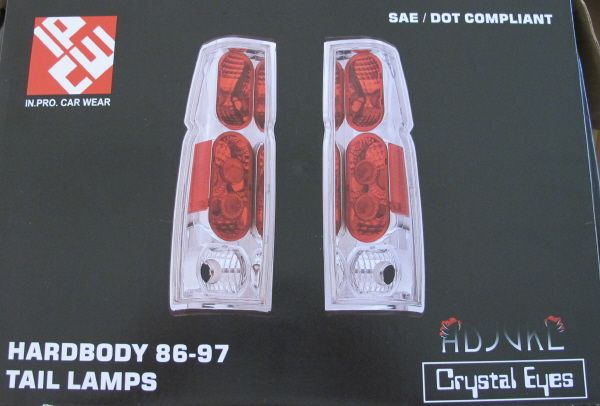
New tail lamps.
Re: Coronado 15 project.
Posted: Sat Feb 09, 2013 8:33 pm
by TampaBay
Tow vehicle progress.
The back of the bumper was rusty, so I wire brushed, treated with Ospho, applied some masking tape, and painted with primer.
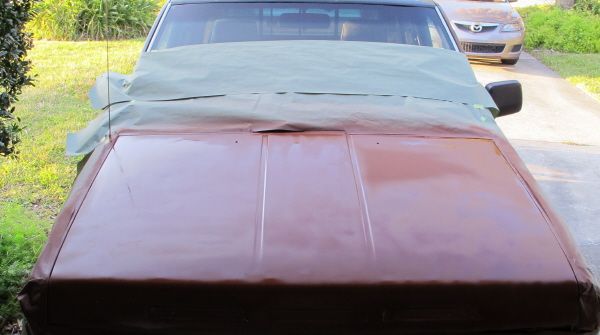
 The hood: Lots of Bondo, and sanding.
 From an other angle; the first coat of primer.
Re: Coronado 15 project.
Posted: Tue Feb 12, 2013 8:47 pm
by TampaBay
The back bumper is finally on the ground. Those were four VERY tough bolts.
Re: Coronado 15 project.
Posted: Fri Feb 15, 2013 11:18 am
by TampaBay
Wheel off, inspect brakes, pull out a few dents.
Re: Coronado 15 project.
Posted: Sat Feb 16, 2013 3:46 pm
by TampaBay
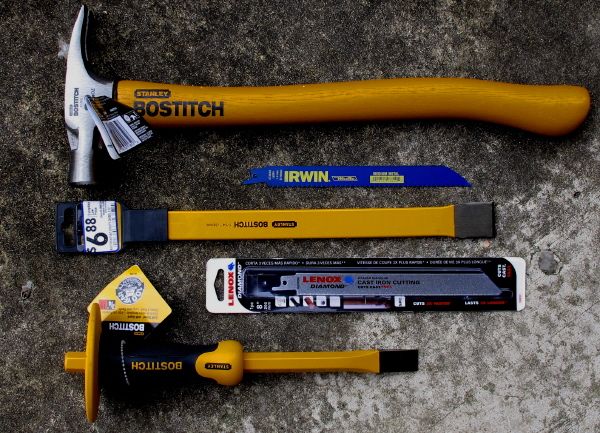
Working on the hitch today. First thing is to pick up new tools at Lowes.
BFH, chisels, and a couple SawsAll blades.
 The hitch was rusted into place. After sawing, and hammering with a chisel, I was able to fold it inward, then knock it out.
Re: Coronado 15 project.
Posted: Mon Feb 18, 2013 9:31 am
by Zach
That takes serious dedication...
One of the guys I worked with a few years ago told me a story about such dedication. The night before, he got off work and and walked out to his truck... and someone was hammering, banging, prying and trying with all their might to steal the ball and hitch off the back of his truck.
He goes back inside, calls the police... Says, "There is a guy trying to steal my hitch off the back of my truck... I'm watching him from across the street, please don't surprise him... I've been trying for years to get it out."
The police get there, and lay in wait... ten minutes later, it springs free and they turn the blue lights on to rescue his hitch.
I'm still not sure whether that is a happy or sad story, knowing the work involved in freeing a rusted hitch! Grin.
Zach
Re: Coronado 15 project.
Posted: Mon Feb 18, 2013 11:34 am
by TampaBay
I'm laughing out loud. Thanks.
It was rusted into place; and I mean good.
Well, now it's fixed, and the best part is, I have a few new tools.
Re: Coronado 15 project.
Posted: Wed Feb 20, 2013 1:11 pm
by TampaBay
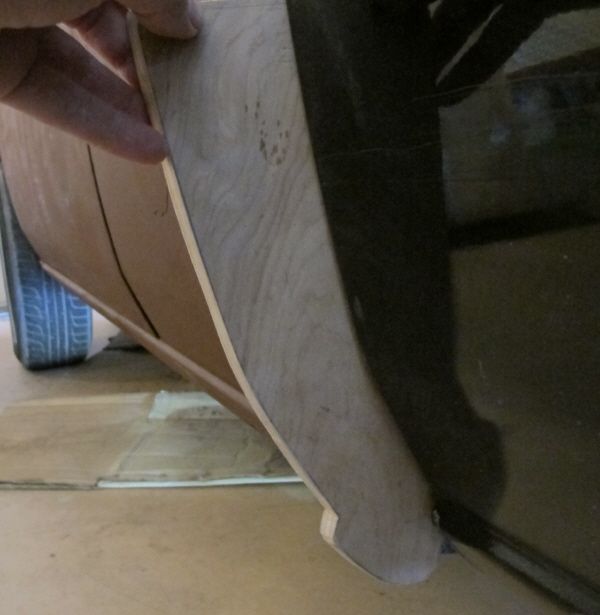
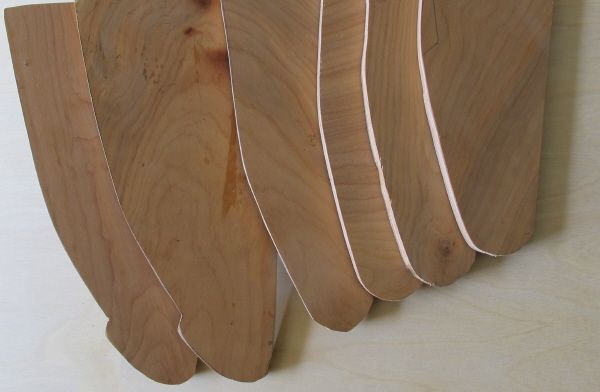
Using the good side of the truck as a template, I'm building plywood frames (five in total so far.)
Re: Coronado 15 project.
Posted: Thu Feb 21, 2013 9:30 am
by Zach
Quick tip:
Put mylar packing tape down the side of the truck where you want the frame.
Rough up the edge of the frame with 40 grit. Slather Bondo on the front side of the frame with no air pockets. Press against the mylar packing tape. Have a friend hold it there for 3-5 minutes... Pull it back off after the edges are hard.
Instant perfect pattern. Easy for you... Just have to apply beer to the friend. Grin.
If you are wanting to make a buck to do some metal work on that fender and the outside needs to become the inside outside, lay the pattern on a board. Mark the line with a mechanical pencil. A bandsaw makes it easy... A jigsaw with a metal cutting blade and a wood rasp makes for a little less easy, but just as fine of fitment to the line.
The little book "Metal Bumping" by Frank T Sargetn is the tomb.
http://www.amazon.com/Martin-BFB-Bumpin ... al+bumping
It takes some tools, but harbor freight carries good enough junk to learn the ropes... and you don't care to much if you need to put a grinder in to them to make what you need for the job. Good news is, that after you've got the ropes anything metal that moves when you hammer it can be straightened.
Zach
Re: Coronado 15 project.
Posted: Thu Feb 21, 2013 10:46 am
by TampaBay
Zack, Good idea for making frame patterns. The first one was easy, all I did was trace along the forward edge of the bed. The other frames are very similar, the shape does not change much other than getting progressively shorter.
Here are the frames. The rails that support the bed extend out to just behind the sheet metal; they are in good places for anchoring the wooden frames.
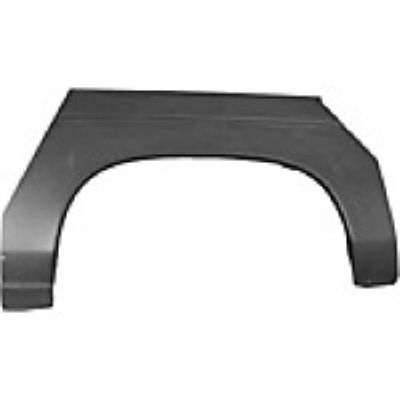
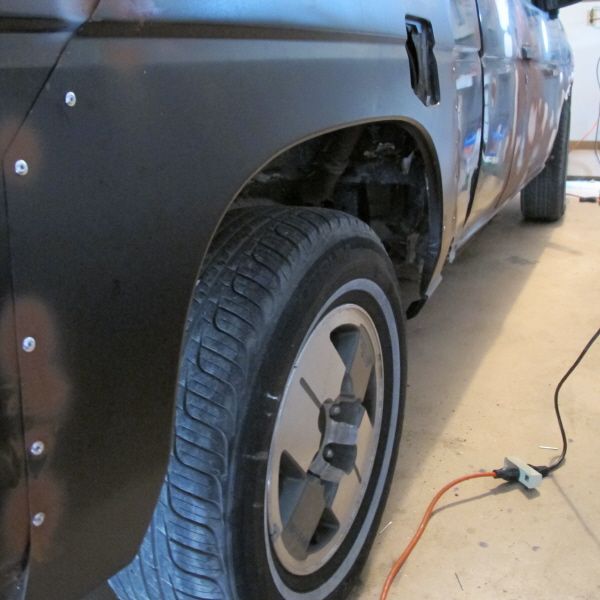
 Ordered a patch panel from J.C. Whitney.
Re: Coronado 15 project.
Posted: Mon Feb 25, 2013 6:36 pm
by TampaBay
Before.
 After.(the rivets look shabby but that will work for now.)
Re: Coronado 15 project.
Posted: Wed Feb 27, 2013 9:48 pm
by TampaBay
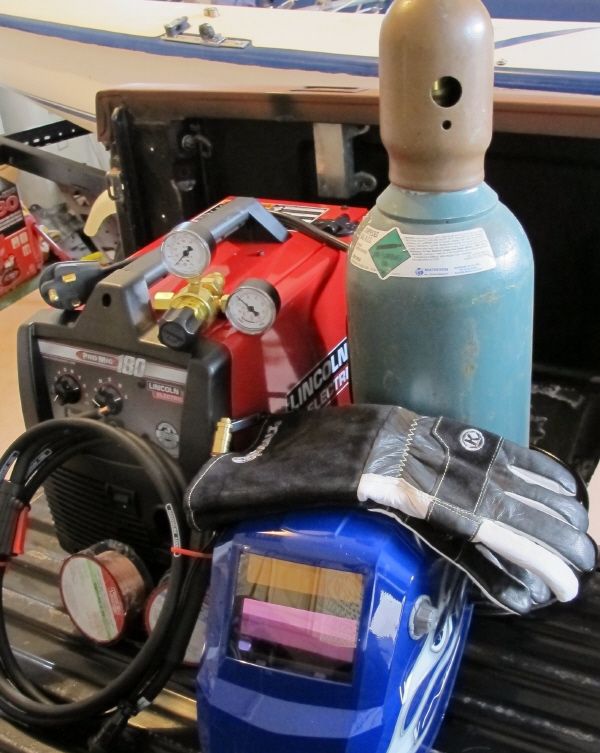
I picked up some new gear. Practice starts tomorrow.
Re: Coronado 15 project.
Posted: Thu Feb 28, 2013 9:27 am
by Zach
Quick tip... Try to find a chunk of aluminum or copper roughly 4x4x 1/2 inch thick. Hold that on the back side of the weld as a heat sink, until the tack cools and it will keep the panel from warping as badly.
Also, both sides of the panel need to be completely free of paint, grease and oil for optimum results. Grin. Wire wheel followed by an acetone bath works wonders.
You'd also be ahead of the curve, to make a butt joint, rather than a lap joint as lap joints hold water and will rot out the patch panel pretty darn quick.
Have fun!
Zach
Re: Coronado 15 project.
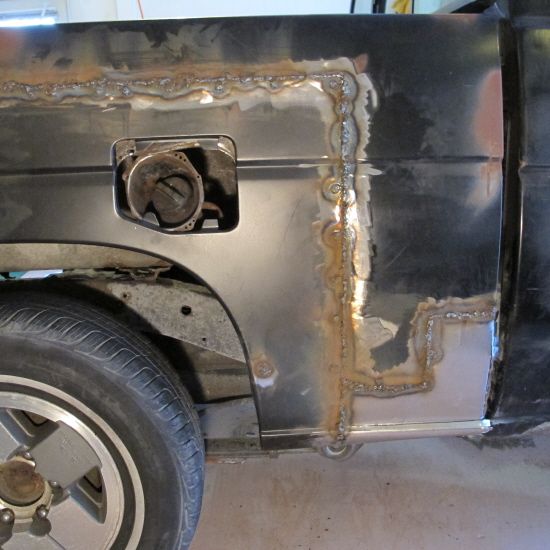
Posted: Sat Mar 02, 2013 12:29 pm
by TampaBay
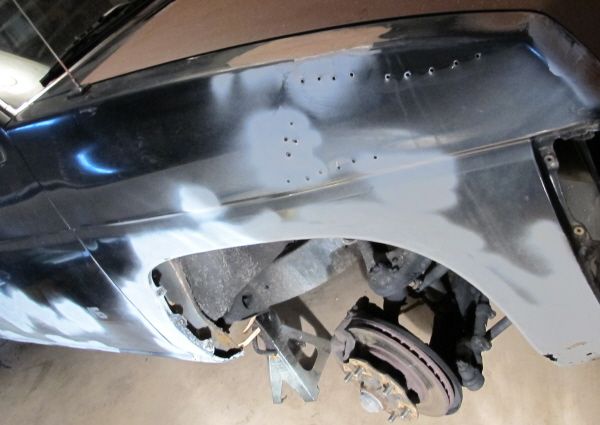
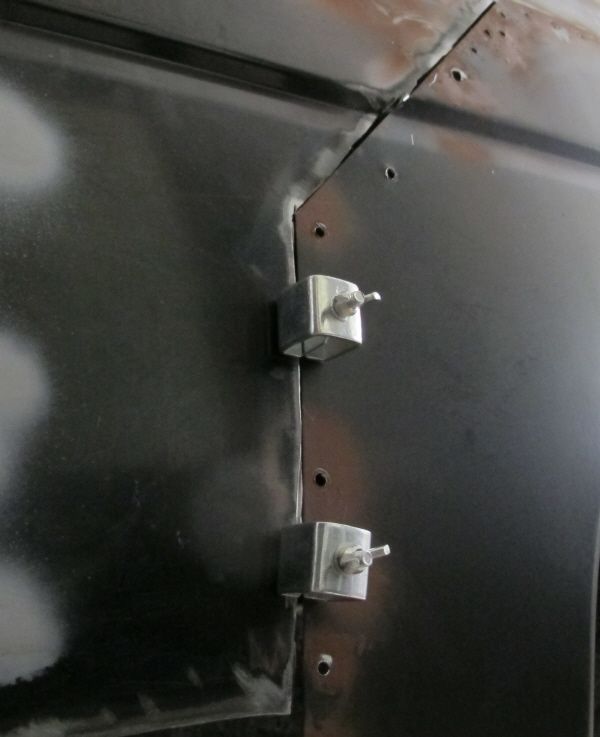
Thanks for the tips Zack, they are needed. Welding takes more practice than I imagined. Three panels of 26 gauge (useless for this job) went back to Lowes. Then I visited a steel supply company close to home. I Bought 16 square feet of 20g sheet, and a 4' by 1" strip to use as seam backing.
The rivets were removed and, with a grinder, the rusted sections were cut away. Now, the new panel is being test fit with the help of a few clamps.
 Here, three panels intersect (at bottom of the image 6 o'clock.) I can get it welded, but I'm not sure it will look good.
Re: Coronado 15 project.
Posted: Mon Mar 04, 2013 10:00 am
by TampaBay
Two patches in.
Re: Coronado 15 project.
Posted: Tue Mar 05, 2013 5:34 pm
by TampaBay
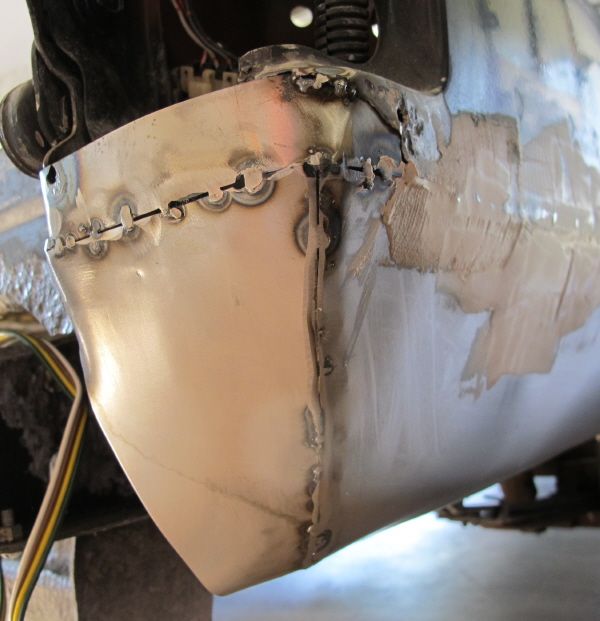
This section is under the passenger side tail lamp. The welds are not good, but I'm getting a little better.
Re: Coronado 15 project.
Posted: Wed Mar 06, 2013 2:32 pm
by TampaBay
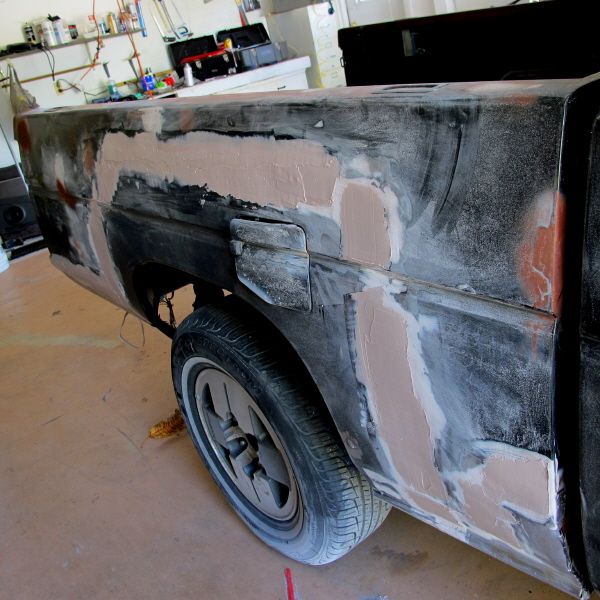
More Bondo work.
Re: Coronado 15 project.
Posted: Fri Mar 08, 2013 10:51 am
by TampaBay
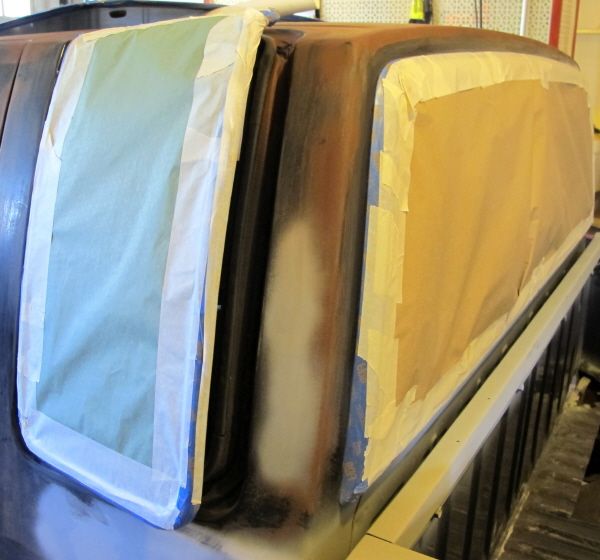
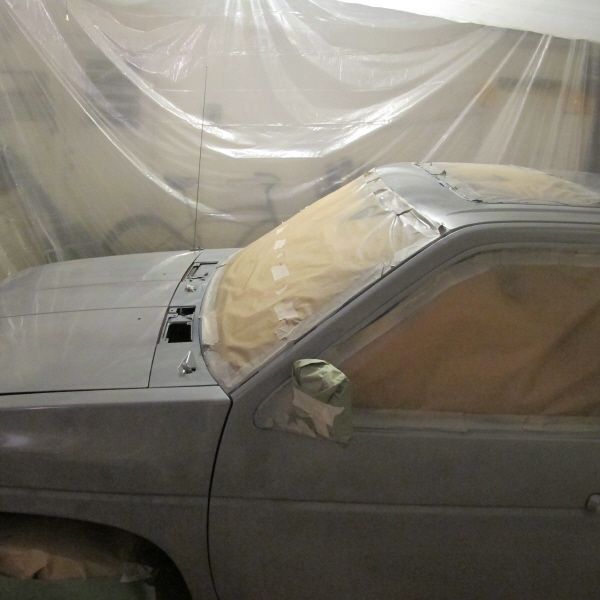
Testing paint: This is Rustoleum Ultra Flat Camouflage (light greenish tan.) It lays down perfectly even. I am planning to spray the truck in the garage, and cancel the trip to to Maaco.
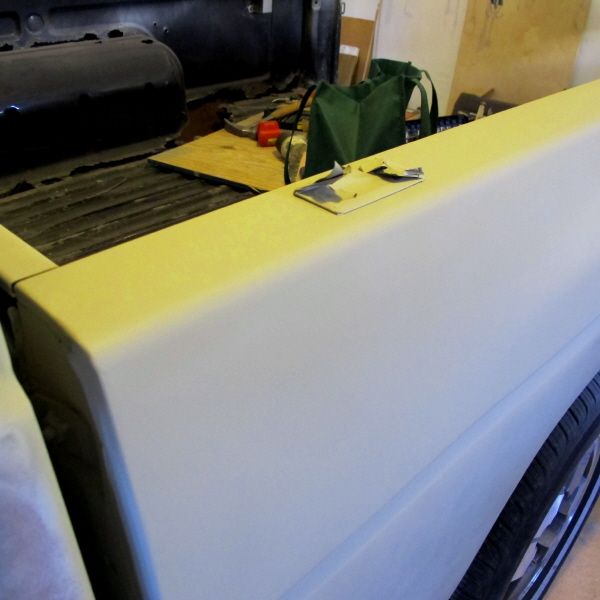 Glass is taped and papered.
Re: Coronado 15 project.
Posted: Fri Mar 08, 2013 10:47 pm
by TampaBay
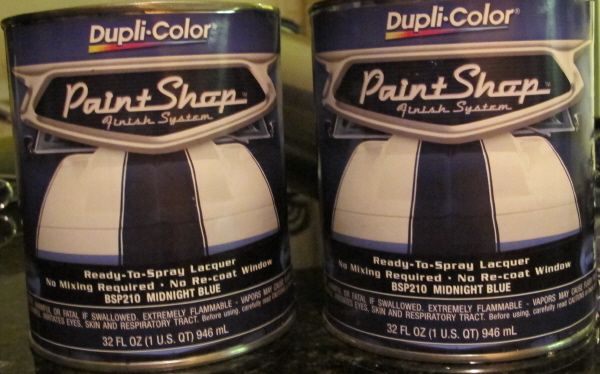
Changed my mind about this greenish tan ( on right, the primer is left.)
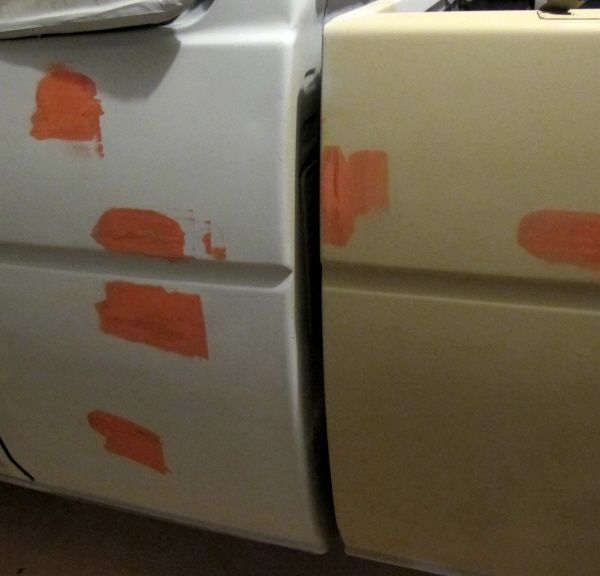 The new color is Midnight Blue.
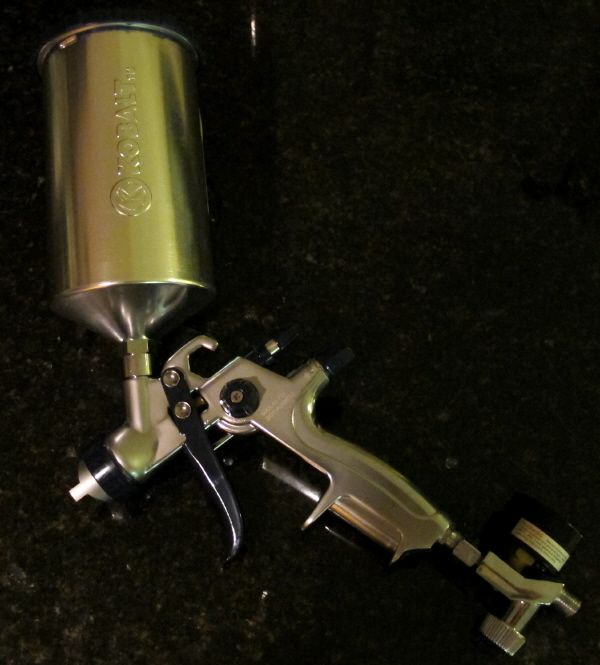
 A gravity feed spray gun.
Re: Coronado 15 project.
Posted: Mon Mar 11, 2013 8:41 pm
by TampaBay
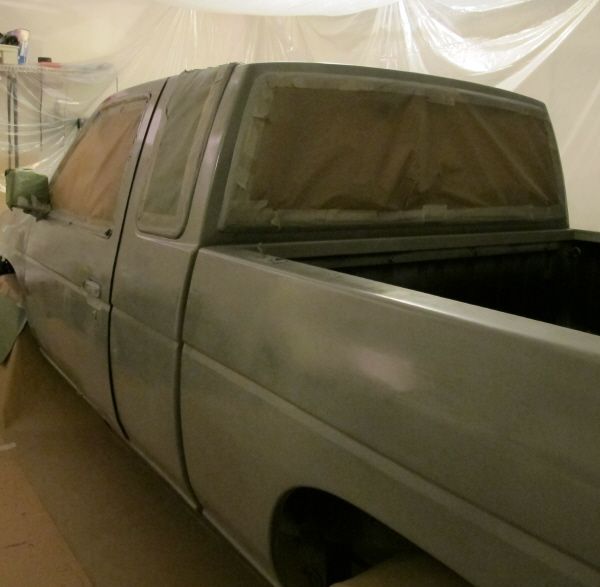
I switched paint. As it turns out, an enamel primer is not compatible with a lacquer top coat. The first top coat went on tonight; it's Smoke Grey enamel.
 The paint has a couple runs. Unexpected things happen, for example if the air pressure gets to low, the paint stops spraying and starts squirting (who knew?) The imperfections can be sanded down later.
Re: Coronado 15 project.
Posted: Tue Mar 12, 2013 9:00 am
by Zach
How to use what you've got and not pull your hair our:
A small Gauge on the gun its self is a good idea, as is setting the tank pressure as high as possible with an inline regulator to bring the pressure down to 5 PSI or so above what the gun needs... and reducing the pressure further with a gun mounted regulator or air adjustment. The goal being you can pay heed to what the gauge says and stop when it starts to quiver and let the compressor catch up for a minute or three until continuing spraying.
When you have access to enough air that all that doesn't matter and you can just focus on laying an even coat of paint, the paint job always seems to come out later. (Grin).
You keep a wet edge, and get by with a smaller compressor.
You want enough air to spray the whole pot and let the compressor catch up while you refill the pot:
Even though your air compressor is to small for the job, if you can find another 50-100 gallon air compressor tank, or old propane tank and plumb your air compressor so it feeds in to the larger tank, giving a cushion between being out of spraying at a low pressure and being... out of air.
A short hose with a male fitting comes off the air compressor, and goes to a T piped to the inlet of the large tank with three plus female quick connect fittings.
If the tank is large enough you can connect two air compressors to the tank, just set the older or weaker air compressors pressure switch lower than the larger one, because they will both run full tilt at a much higher pressure than what they would normally do... as they will be trying to bring 50-100 gallons up to their max pressure setting. Small compressors don't run near max pressure for any length of time in their normal use, but you can get in the ball park of CFM requirement to do what you are trying to do with a minimal outlay so long as you know its a 1 year or 2 year solution for a couple hundred bucks instead of $1500 for one that will last 10 years.
If you put a run of 1 1/2 black iron pipe 30 feet or so along the ceiling, with an elbow coming back down the wall on both ends, with a drain spigot high enough for a 5 gallon bucket to sit under, with a T 3-5 feet up the wall with a T with red bushings reducing it down to the diameter you need for the female quick connection you are using, it works as a stand in for a full size dessicant dryer and you can run a small gun mounted disposable dryer from the paint store, without needing a $350 rig.
If and when you want a real compressor, Graingers is where I source the small ones and Ingersoll Rand for the large ones. You want as high a duty cycle rating as possible. Most of the homeowner grade ones are 30% or lower... Which means it is designed to run for 30% of each hour and rest the remainder of the hour... Which is also why they blow up when someone tries to use them for any length of time, they are meant to air up tires or paint a porch swing.
Zach
Re: Coronado 15 project.
Posted: Wed Mar 13, 2013 3:50 pm
by TampaBay
Zach,
There is a small gauge on the heel of the spray gun. I turned it's adjustment knob until it read 40lbs when the trigger was fully pulled (while painting.) Everyone on Youtube was saying that "40lbs at the regulator equals 10lbs at the nozzel." The compressor has adjustments, but I left those alone because I think they are at "all open."
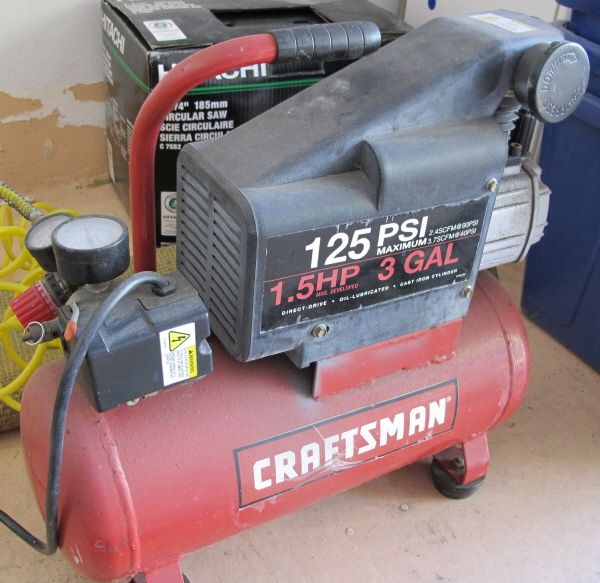
Here is an image of my air machine, I knew it was small for painting, but I blew the tool budget when I bought the welder.
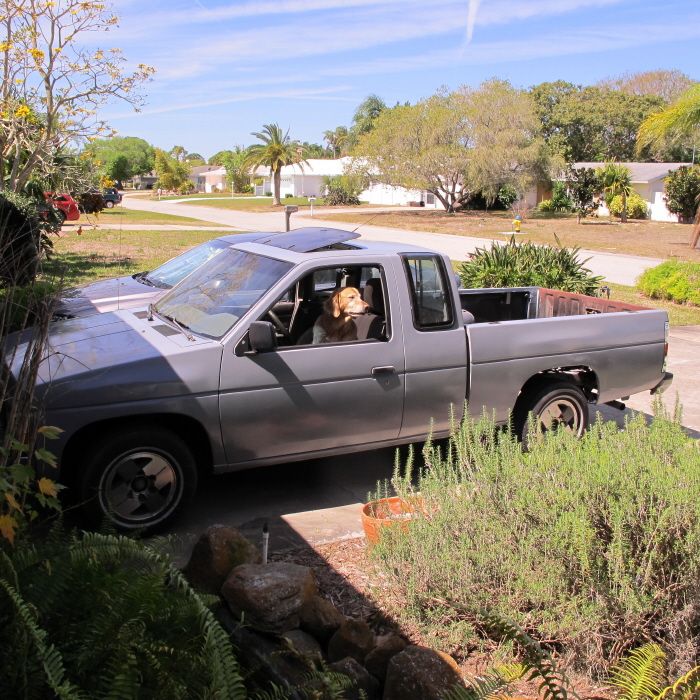
 It's a good looking day here, and I took the truck out for the first drive. It felt great.
Re: Coronado 15 project.
Posted: Wed Mar 13, 2013 10:17 pm
by Paulus
Palm trees!
Re: Coronado 15 project.
Posted: Thu Mar 14, 2013 8:17 pm
by TampaBay
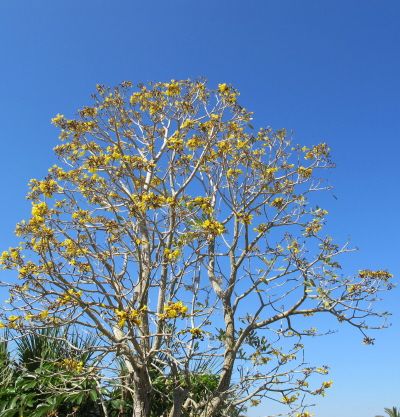
That's a palm tree back there, but let me point out a few of the other plants.
The bush in the bottom right corner is Rosemary. It's great to cook with. When I need some I grab a pair of scissors and head for the front yard.
Just above the Rosemary, and above the back corner of the truck is a Bird of Paradise plant. It kicks out amazing flowers.
And the tree in the upper left of the picture is full of yellow flowers, but I have no idea what it is.
Also in the lower left is some bamboo and ferns.
Re: Coronado 15 project.
Posted: Fri Mar 15, 2013 11:22 am
by TampaBay
Another look at the tree with yellow flowers: Can anyone can identify it?

Re: Coronado 15 project.
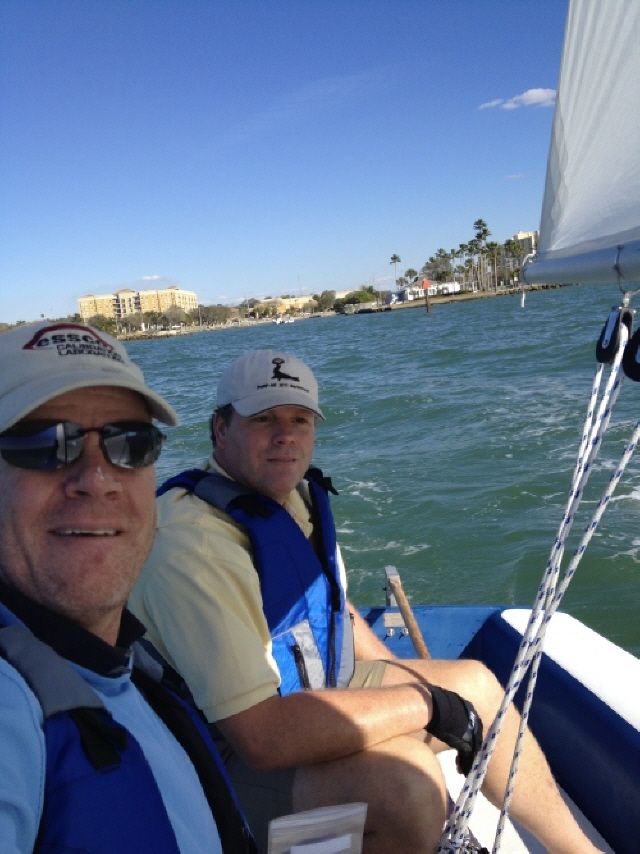
Posted: Thu Mar 21, 2013 1:55 pm
by TampaBay
OK, no one knows what type of tree is? The mystery lives on.
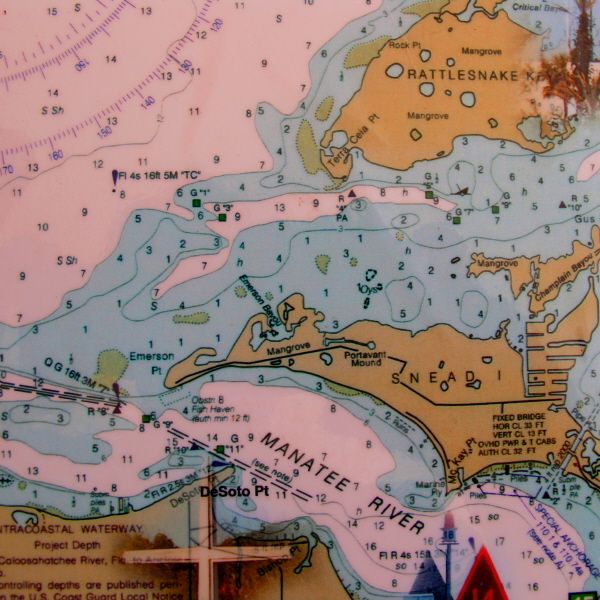
Spring break is a couple days away, and I will be able to find crew. The Manatee river is just north of here, and I'm planning to sail just far enough West to catch a look at the Sunshine Skyway Bridge.
Picture to follow as soon as the battery is charged.
Re: Coronado 15 project.
Posted: Thu Mar 21, 2013 4:49 pm
by TampaBay
Re: Coronado 15 project.
Posted: Thu Mar 21, 2013 7:49 pm
by earlylight
Agreed!
Re: Coronado 15 project.
Posted: Wed Mar 27, 2013 11:29 am
by TampaBay
Time to get this party started.
Over the last couple days, the wind was gusting to 30+ knots. That's to much wind, but a new weather pattern has moved in.
Here is the Gulf side of the Manatee river. We'll launch South East, and sail North West.
Re: Coronado 15 project.
Posted: Wed Mar 27, 2013 11:57 am
by TampaBay
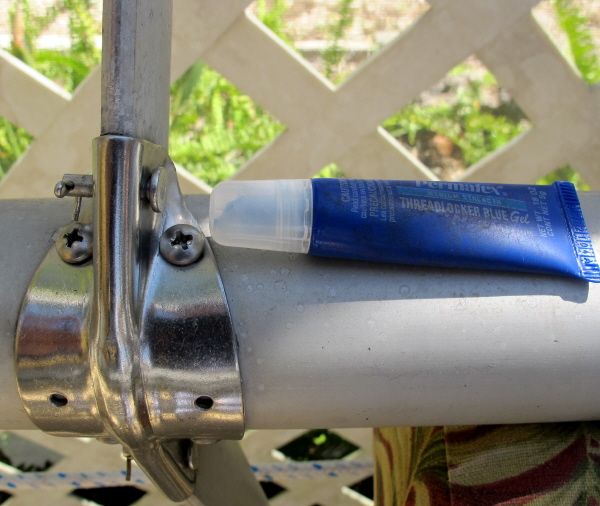
I applied blue thread lock onto these spreader bracket screws. Oops, they are not properly clocked, I'll remember that for next time.
Re: Coronado 15 project.
Posted: Thu Apr 04, 2013 3:25 pm
by TampaBay
Not good for sailing, but we need the rain.

Re: Coronado 15 project.
Posted: Tue Apr 09, 2013 4:44 pm
by TampaBay
Now that the boat and the truck are in good shape, it's time to work on the golf game.
Great day at the TPC Prestancia.

Re: Coronado 15 project.
Posted: Thu Apr 11, 2013 12:49 pm
by TampaBay
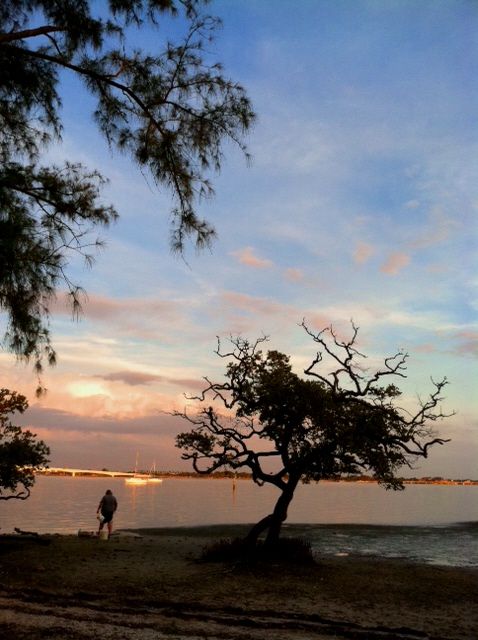
Last night at low tide, this fisherman was trying his luck on the South East corner of City Island.
Re: Coronado 15 project.
Posted: Mon Apr 15, 2013 10:09 am
by TampaBay
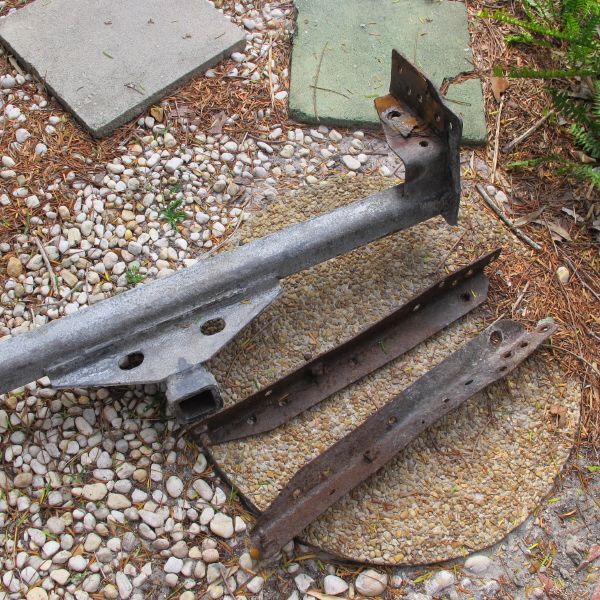
I drove the truck to Dang Welding & Machine Shop in Sarasota. The guys put the truck on a lift and torched away the hitch, the bumper, and the hitch supports.
I considered taking this project on myself, but I turned it over to the Pros, and they did great work.
These parts will be cleaned up and the bolts replaced.
Re: Coronado 15 project.
Posted: Thu Apr 18, 2013 10:39 am
by TampaBay
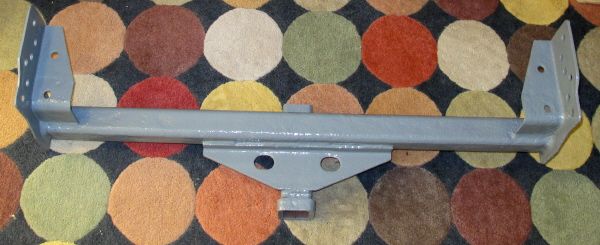
Plenty of prep work went into this (grinding, sanding, sealers and primer,) and now the hitch is refinished. Looking good in grey.
Re: Coronado 15 project.
Posted: Thu Apr 25, 2013 1:40 pm
by TampaBay
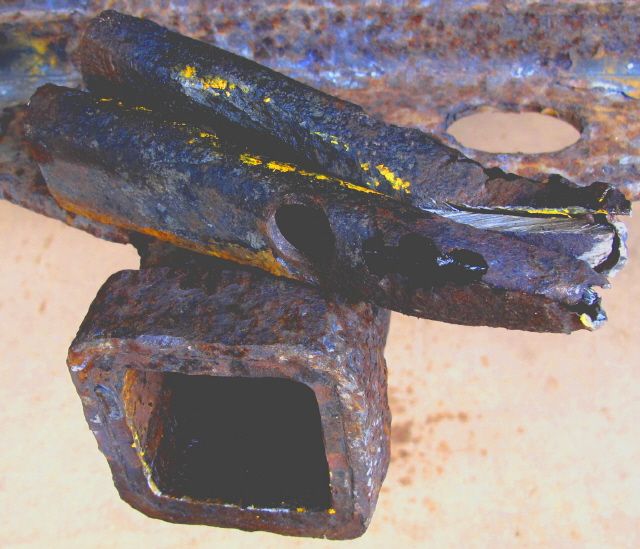
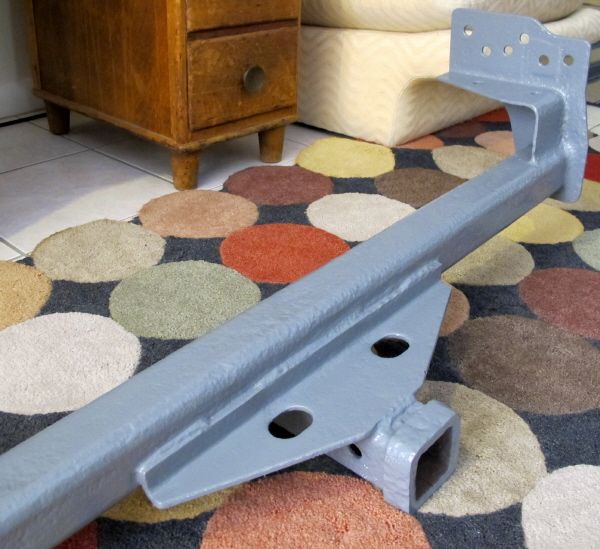
The hitch is looking better, but these frame stiffeners need work. The small arrow at top points to a rust hole that will get patched today.
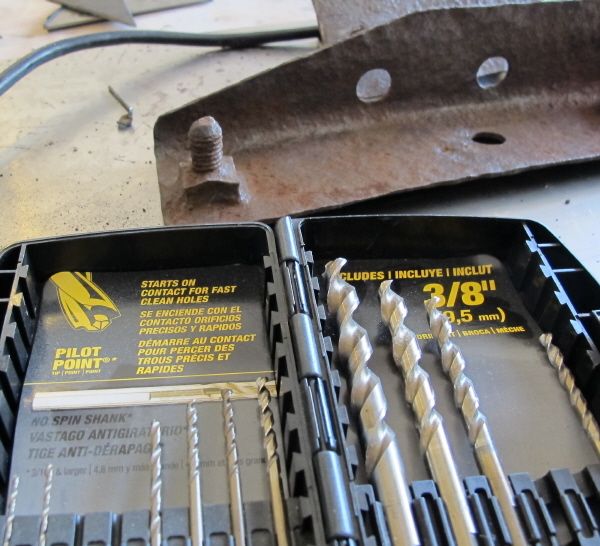
 Sections of the original bolts remain, and must be removed (easier said than done.) See the spots for the missing four drill bits? Those belong to the bits that I broke this morning, drilling into the bolts.
Re: Coronado 15 project.
Posted: Thu Apr 25, 2013 2:43 pm
by Squidd
Ummm...pilot points are for wood and non ferrous metals...


