Page 3 of 5
Re: Ericson 27 Project
Posted: Sun Apr 18, 2010 10:38 pm
by bigd14
Haven't posted in awhile, but stuff has still been happening. I got a sheet of 1/2 inch G10 epoxy and with that and some thinner G10 I had on hand made and installed a bunch of backing plates for every major piece of hardware on the boat. I burned up a band saw blade and trashed my favorite carbide tooth table saw blade cutting through this stuff. The day after I did that I learned that other apparently smarter people use a grinder to cut through this stuff. Sigh.
Here are a couple of photos.
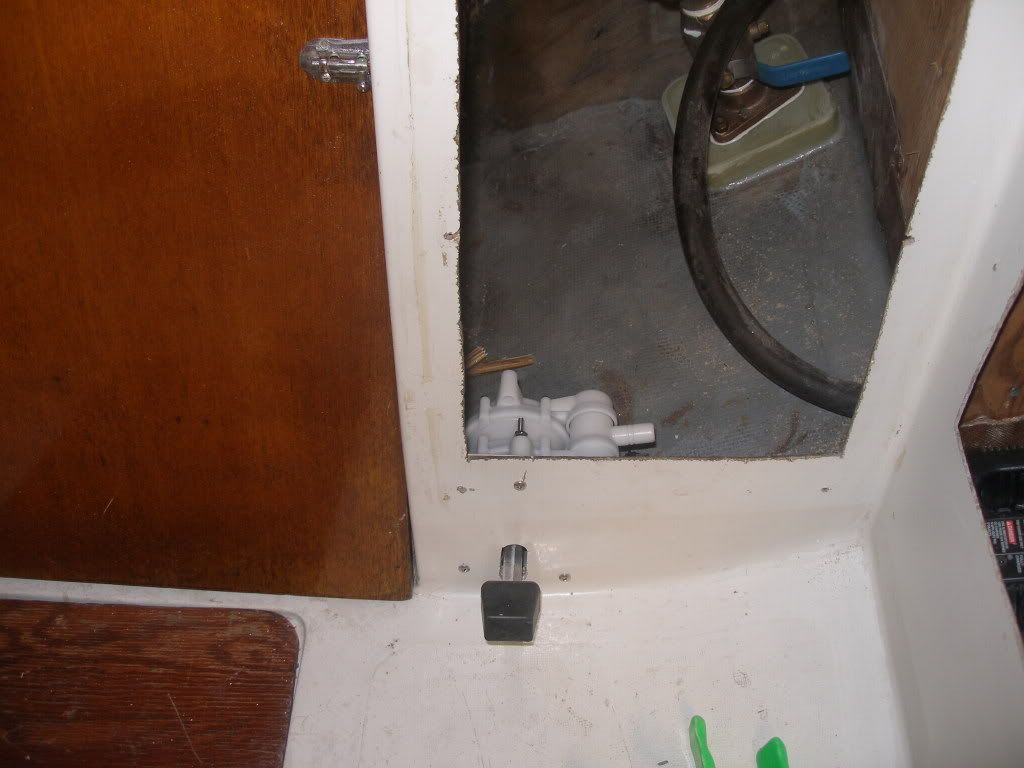
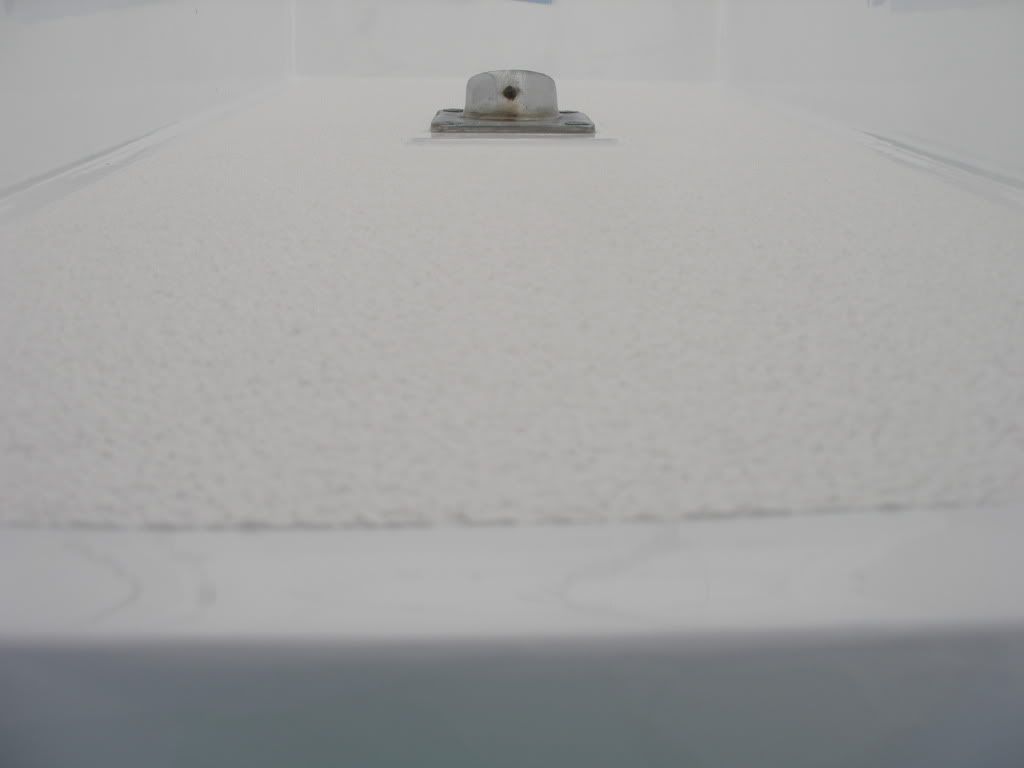
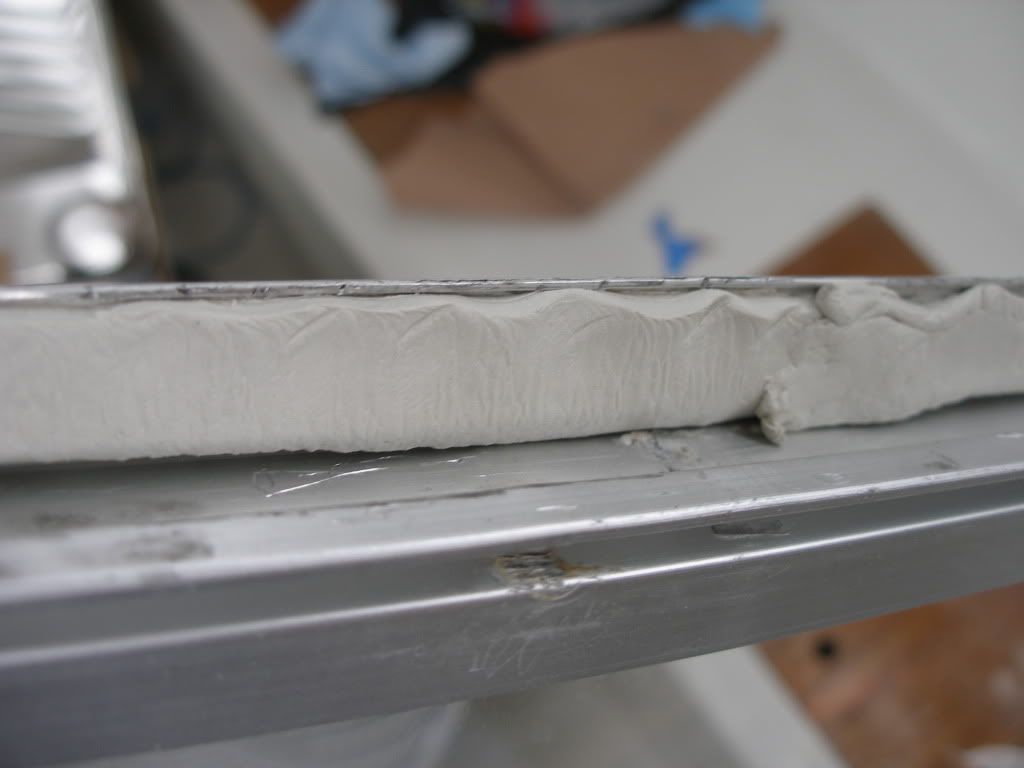
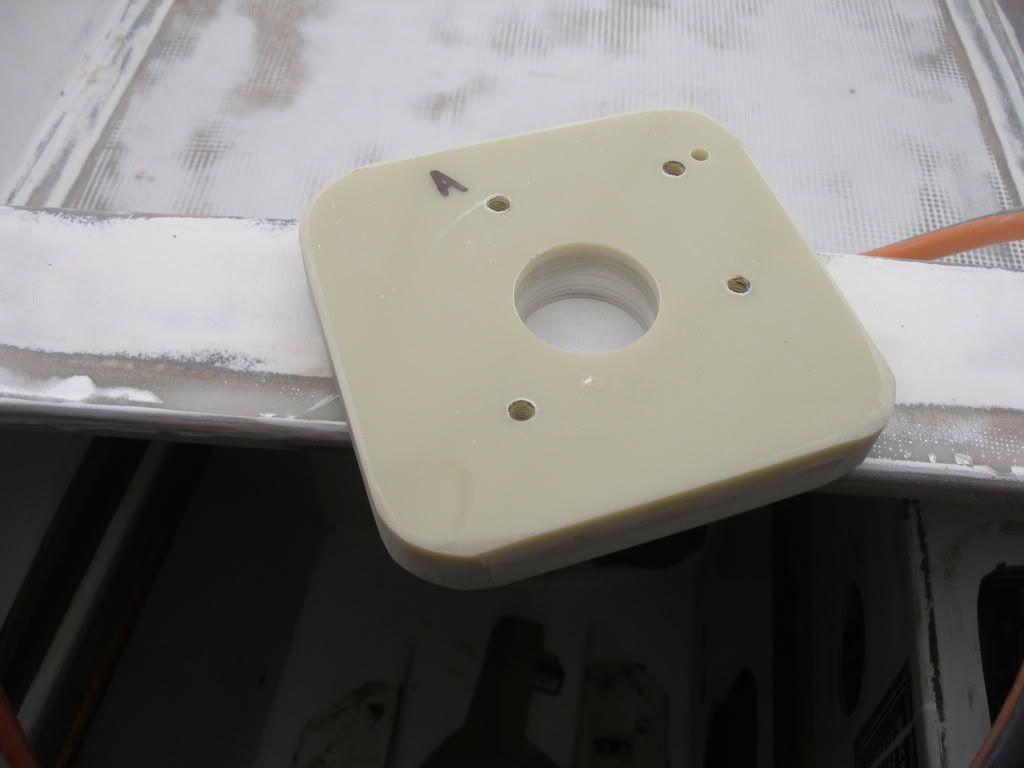
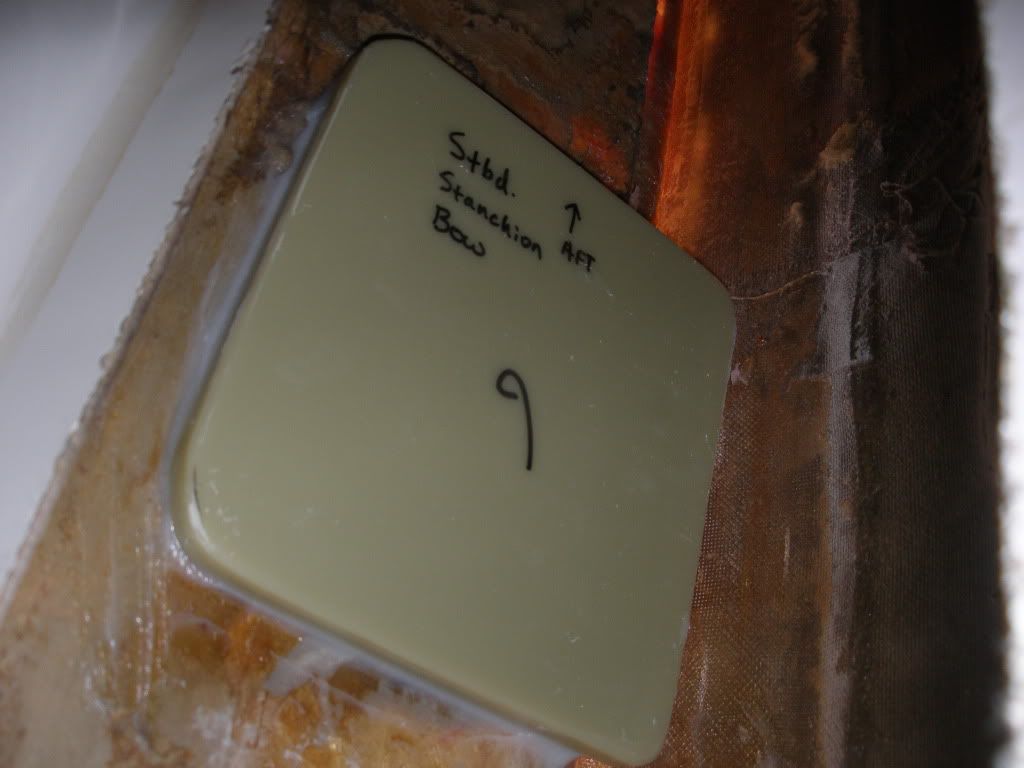
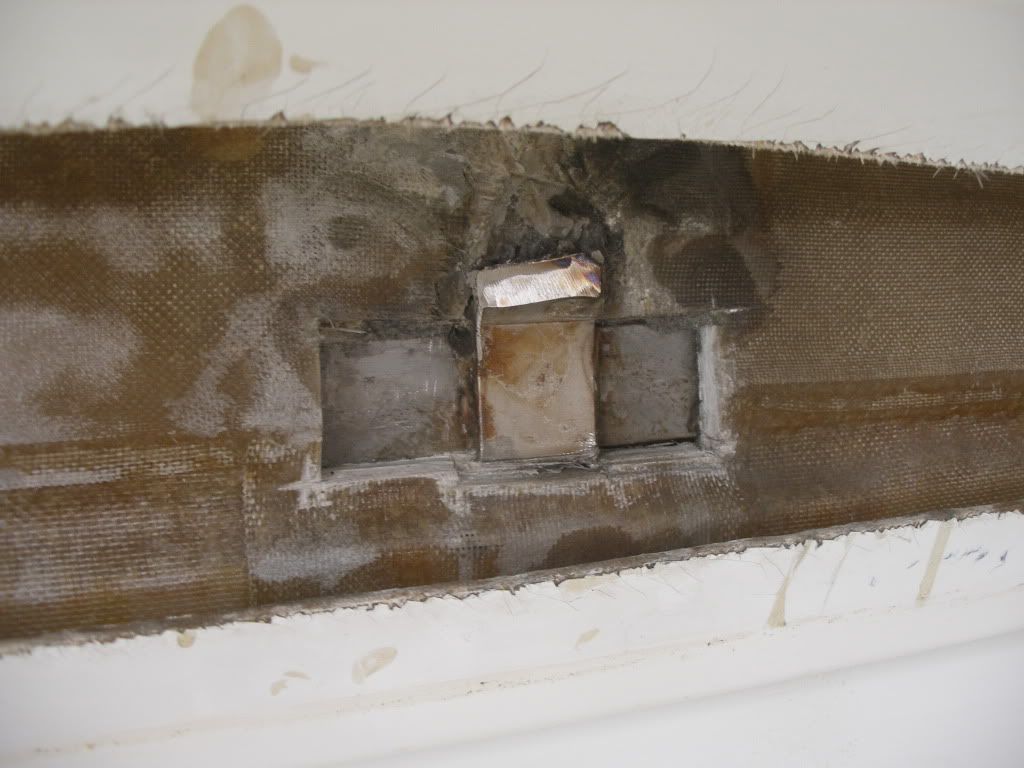
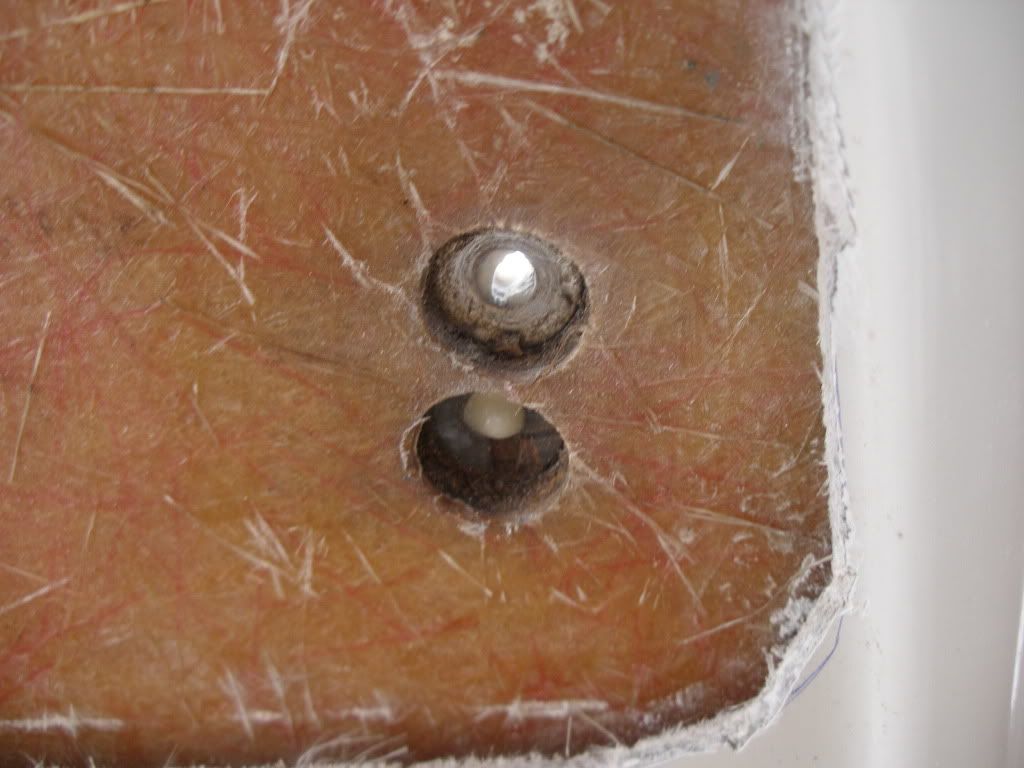
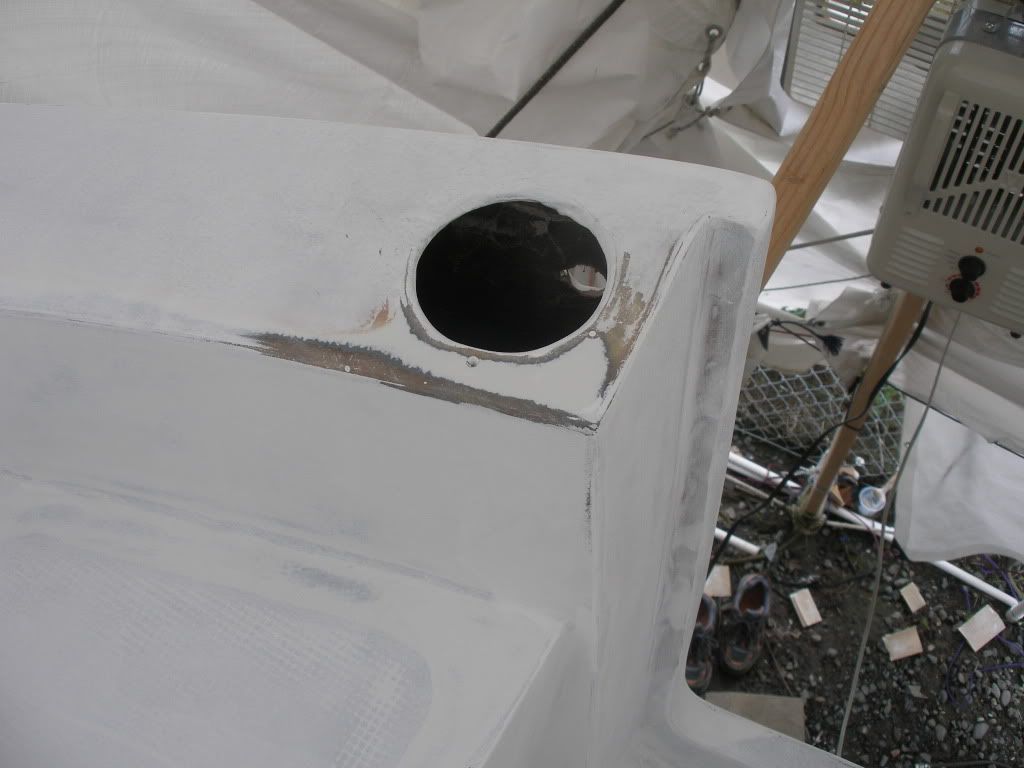
Here is a shot of the massive backing plate for the sink drain seacock/adaptor. I epoxied two 1/2 inch thick pieces of G10 together to get almost 1 inch of thread depth. Obviously this is way overkill. The two holes in the upper right corner are my test holes. I tried tightening a bolt into the threaded one with as much force as I could muster and the threads held fine. So I figure it will be strong enough.
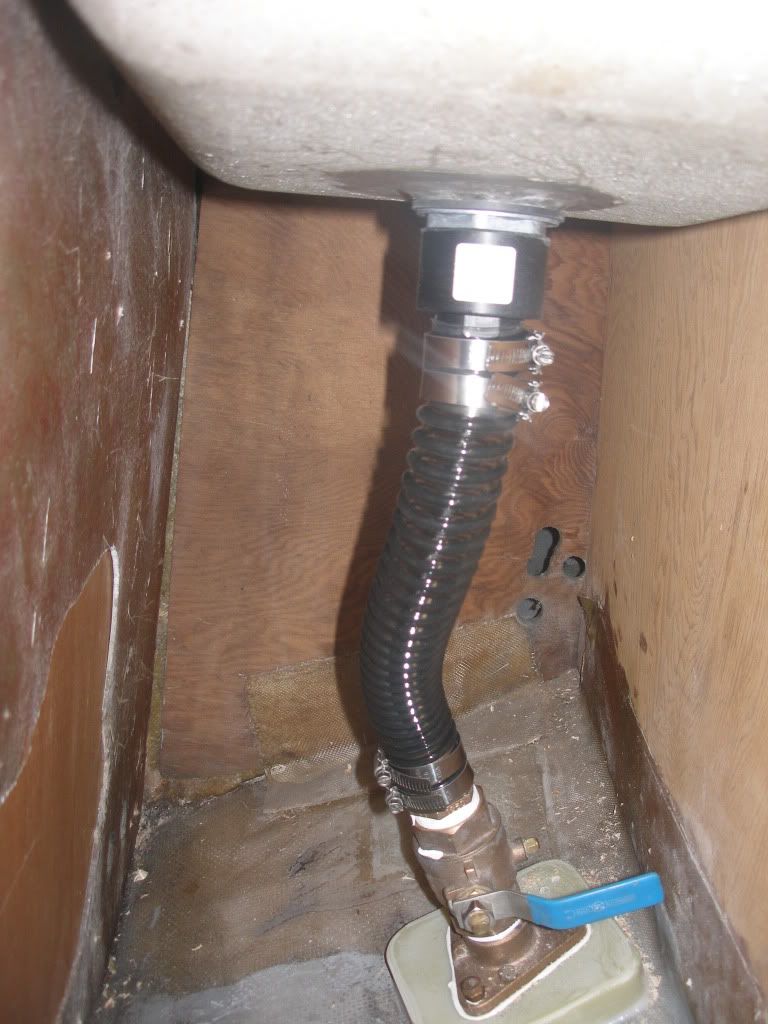
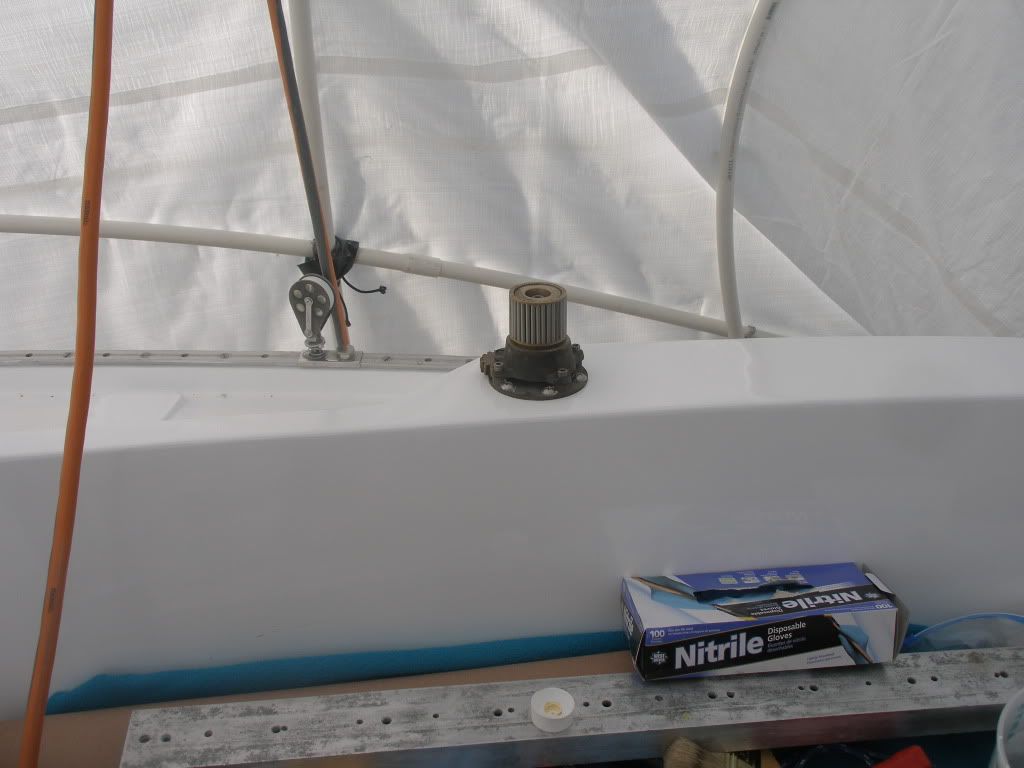
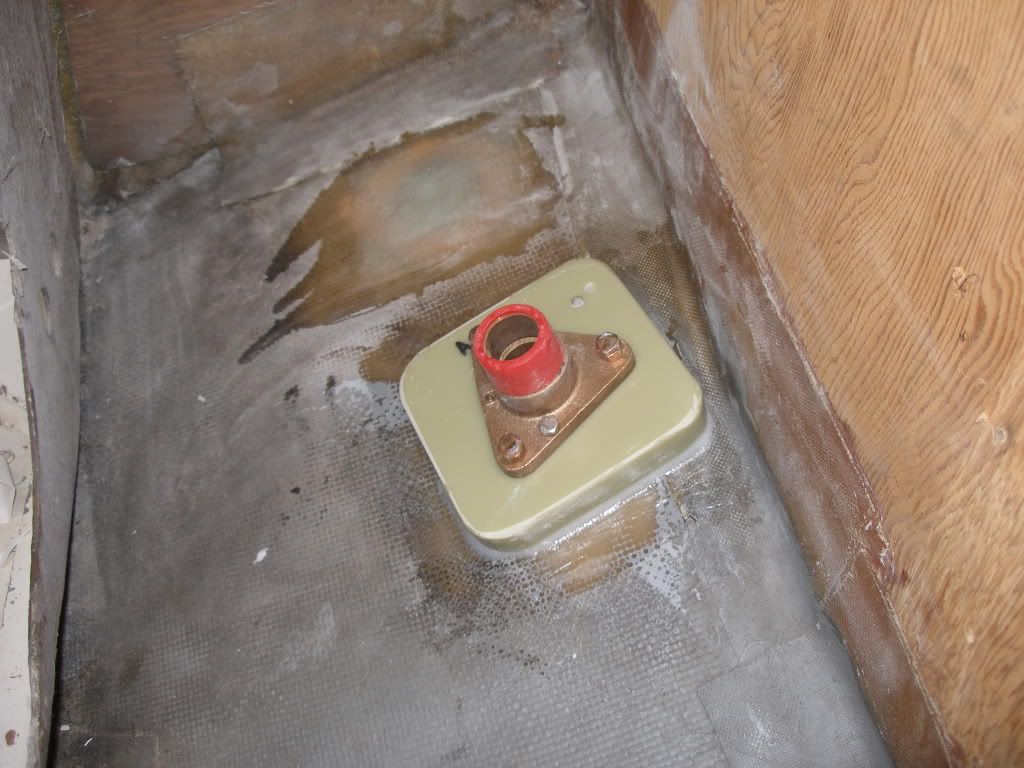
Here is the installation. I had to twist the plate around a little more than I wanted to get a good alignment on the thru-hull.
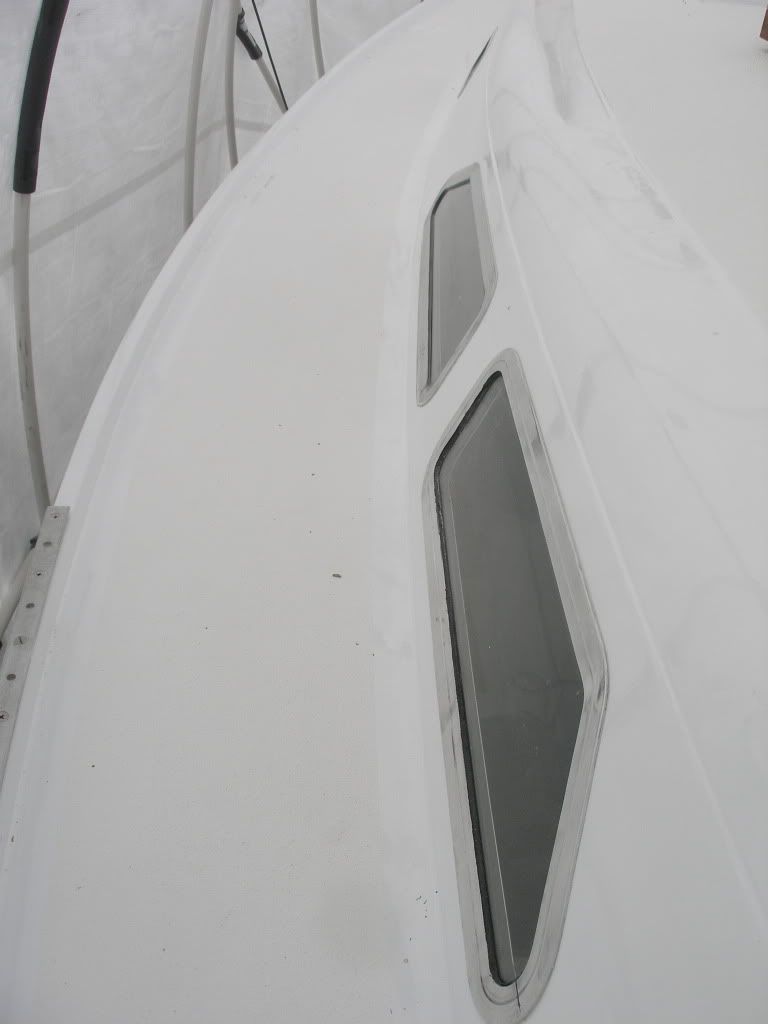
Here is one of the backing plates. If this comes out its taking half the deck with it...
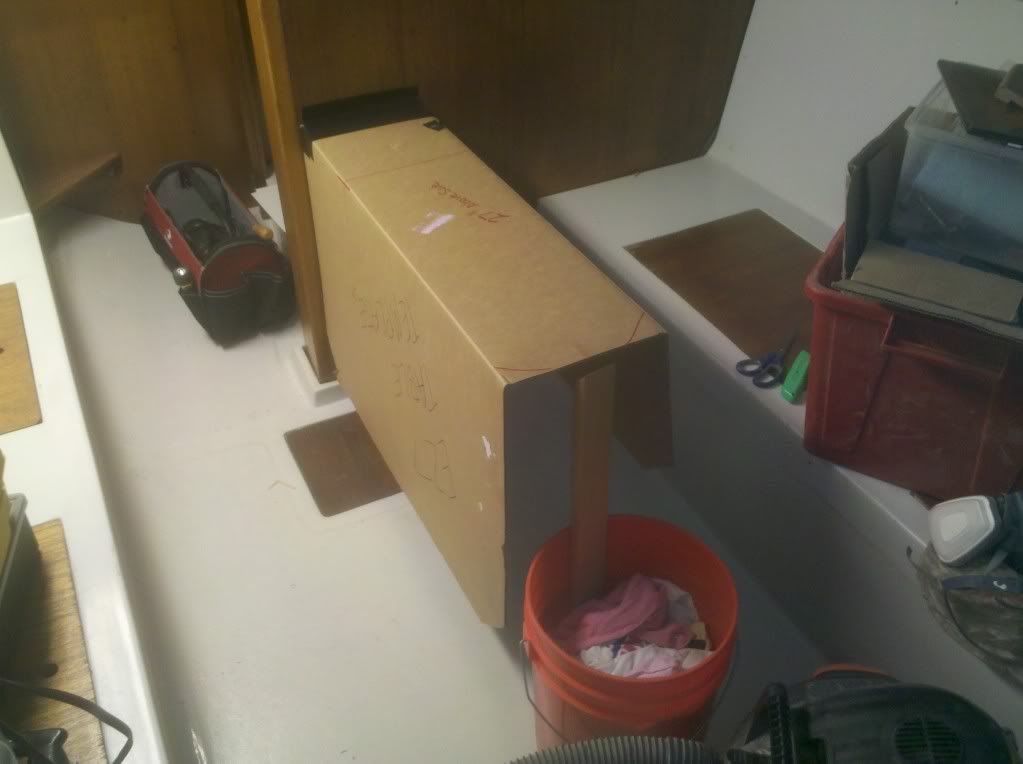
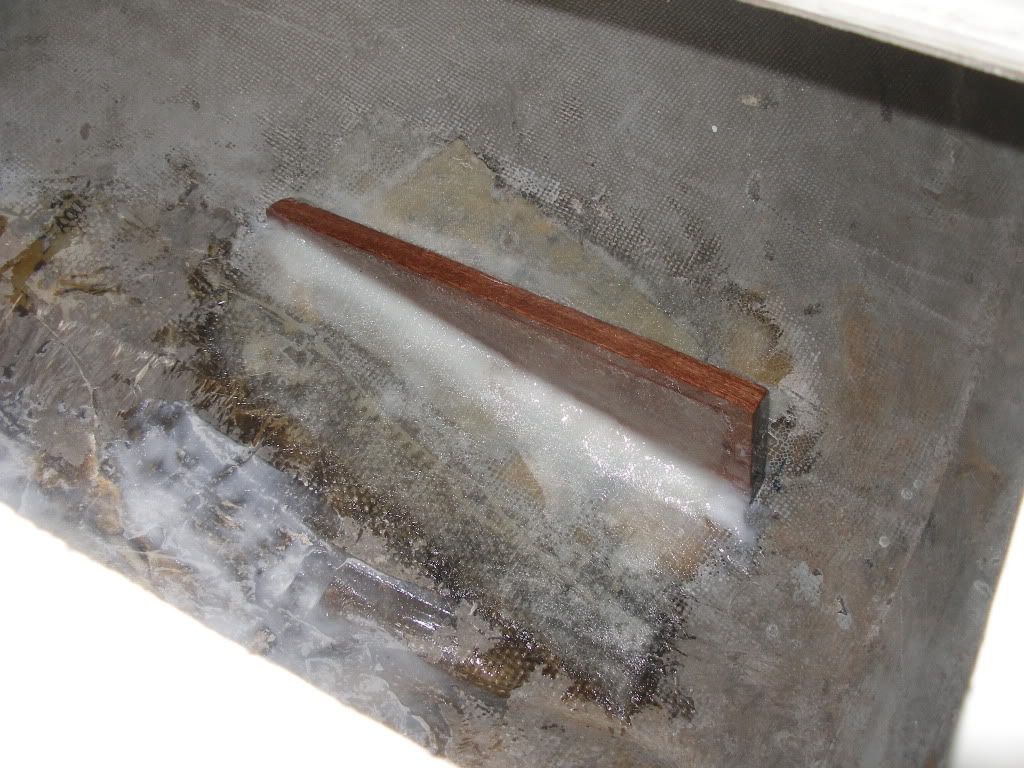
I also glassed in a couple of braces made from scrap mahogany for a platform to hold a fuel tank under the cockpit. I sealed them with epoxy before installing them.
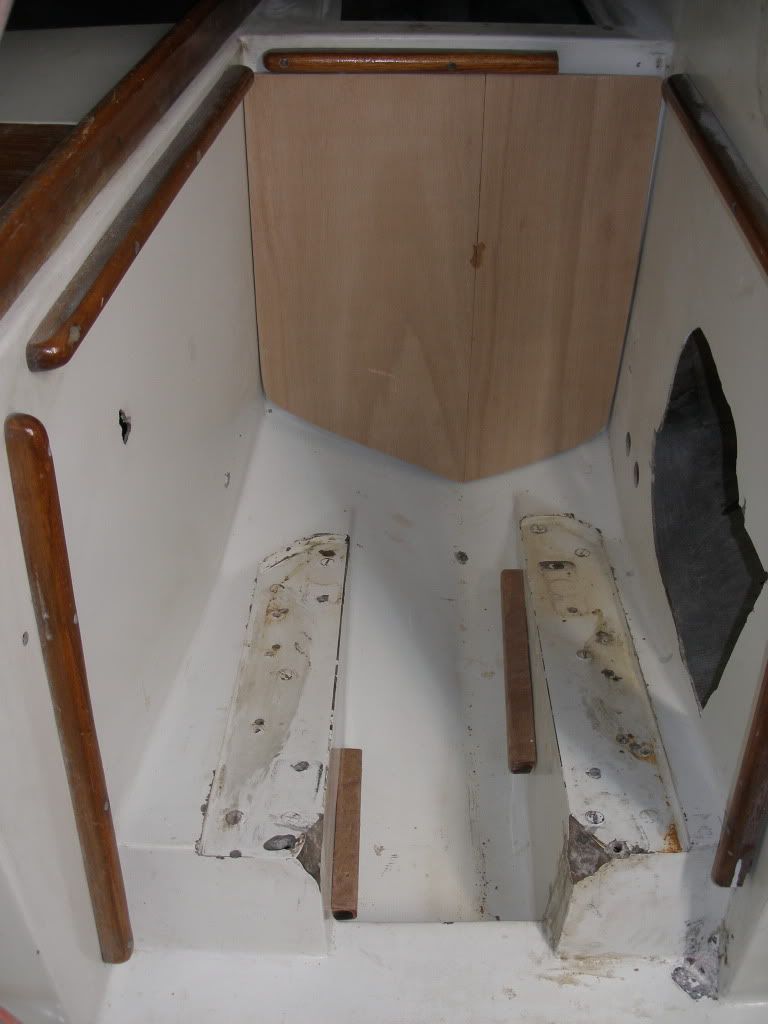
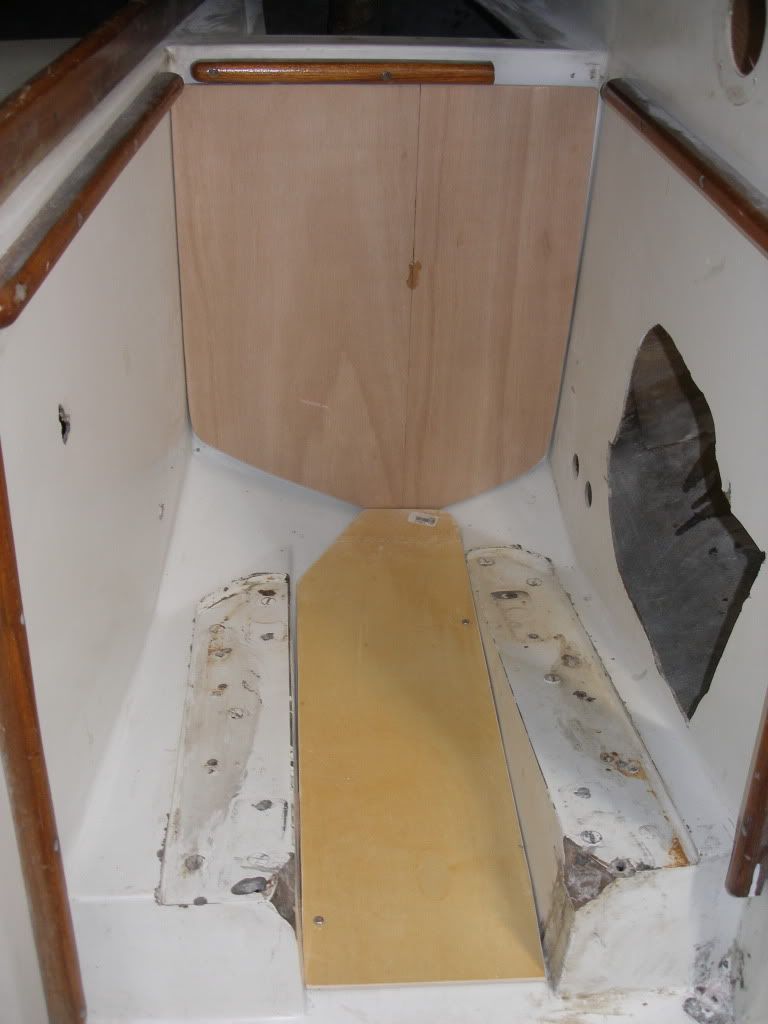
And finally I started working on repairing the old engine compartment and preparing a battery platform using a bunch of scrap materials I had lying around. The plan is to place two batteries along the centerline, each in a plastic battery box, and strap them to the old engine beds. The plywood panel (which I glassed on both sides some years ago as a test for some other project) will be removable to be able to clean underneath.
Next task- Cutting the glassed-in chainplates off- the prospect of which has caused more than a few sleepless nights and much hemming and hawing. However, once that is done, there will be no more major glass-work, a major milestone. Then I can think about painting again, just in time for warmer weather. But that's a month or more down the road... And in between now and then I need someone knowledgeable to inspect the mast which has some dimples/compression damage around the spreaders along with some extra holes and an oversized compression bolt hole.
More next weekend hopefully.
Re: Ericson 27 Project
Posted: Sun Apr 25, 2010 7:48 pm
by bigd14
Well, I cut off the chainplates this weekend. Took me a few minutes to get up the nerve, but I went for it. Of course, none of them looked like they were in bad shape after I pulled them out, so it was probably not really necessary, but I will feel better knowing I can see them and easily replace them in the future.
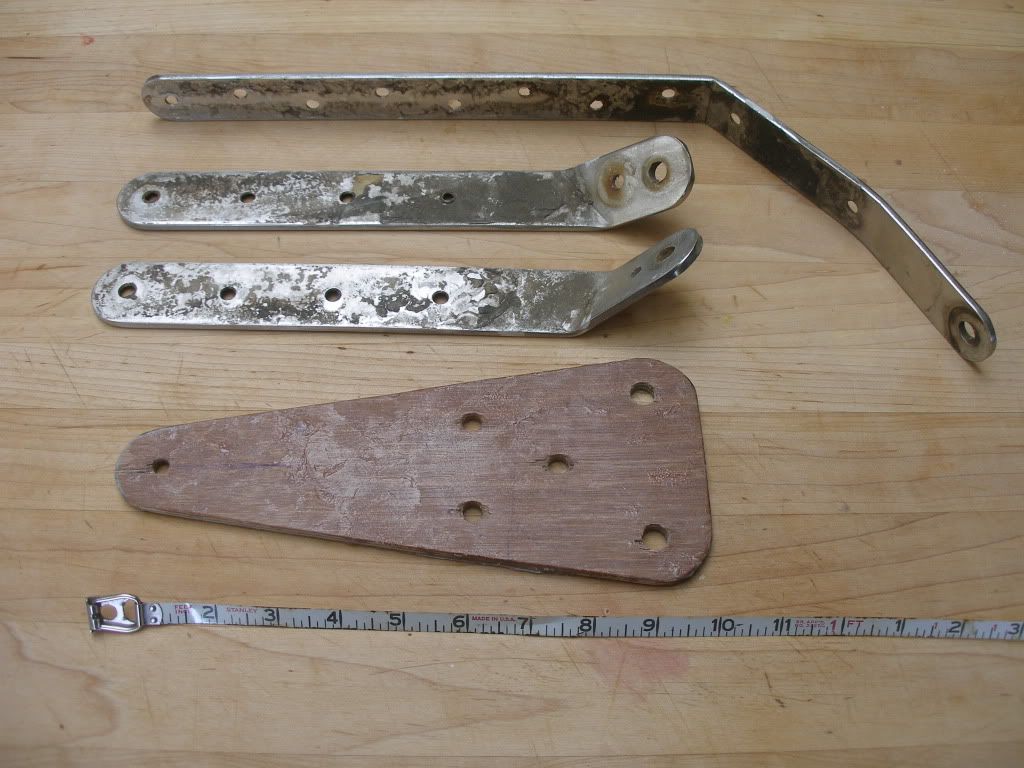
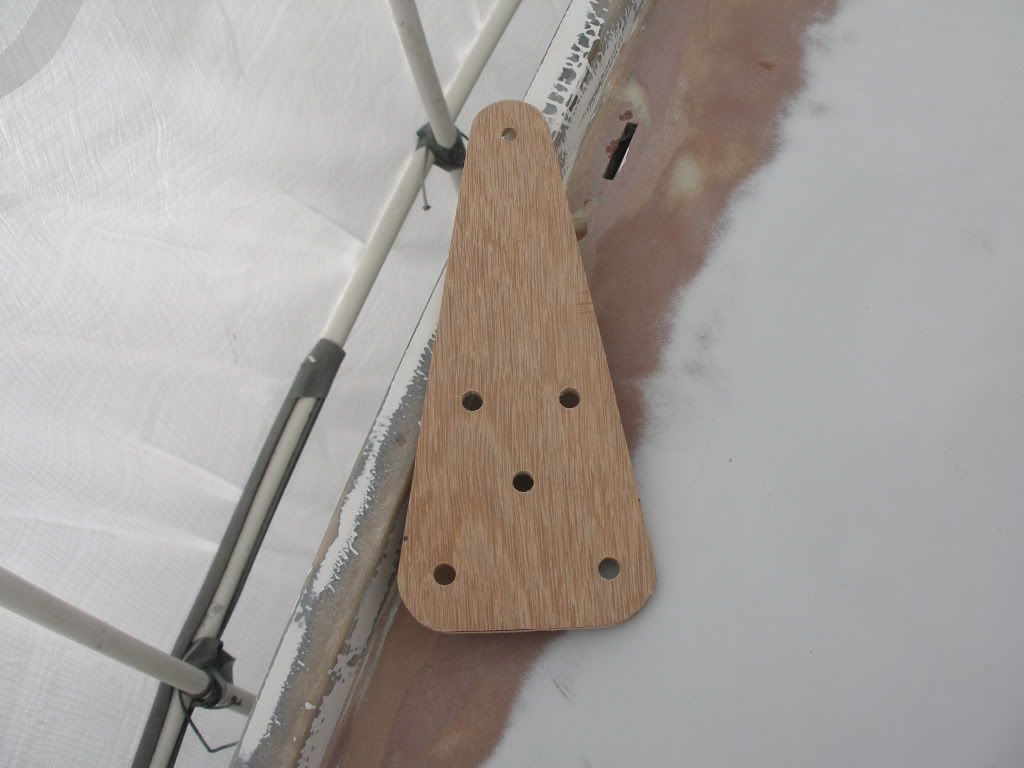
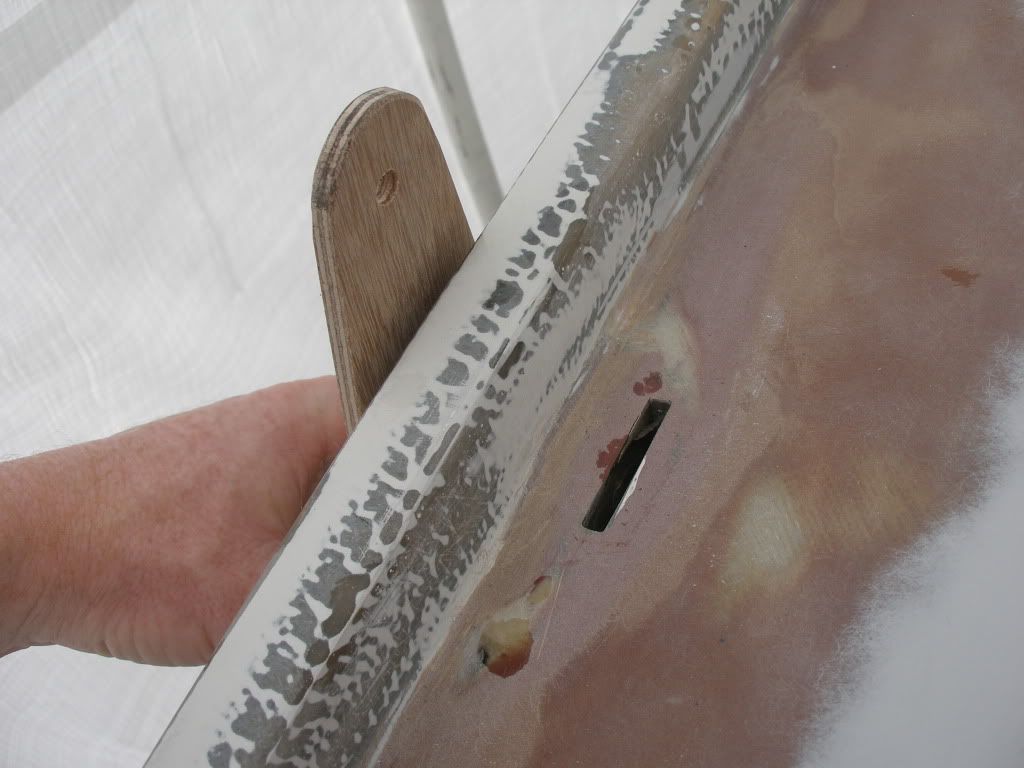
After removing all the chainplates, and experimenting with various new chainplate designs, I figured out that I will have to put them on the outside. The necessary width and length will make it extremely difficult to install from the inside given the limited space imposed by the liner. This will actually make the installation much easier, since I won't have to build up such a huge pad on the inside. I realize I will lose some sheeting angle, but I will just have to live with it. The chainplates are triangular because the bottom two bolts will bolt through the existing horizontal strap and will have to straddle the welded upright chainplate legs that I just cut off. This is not the final design, but probably close to it.
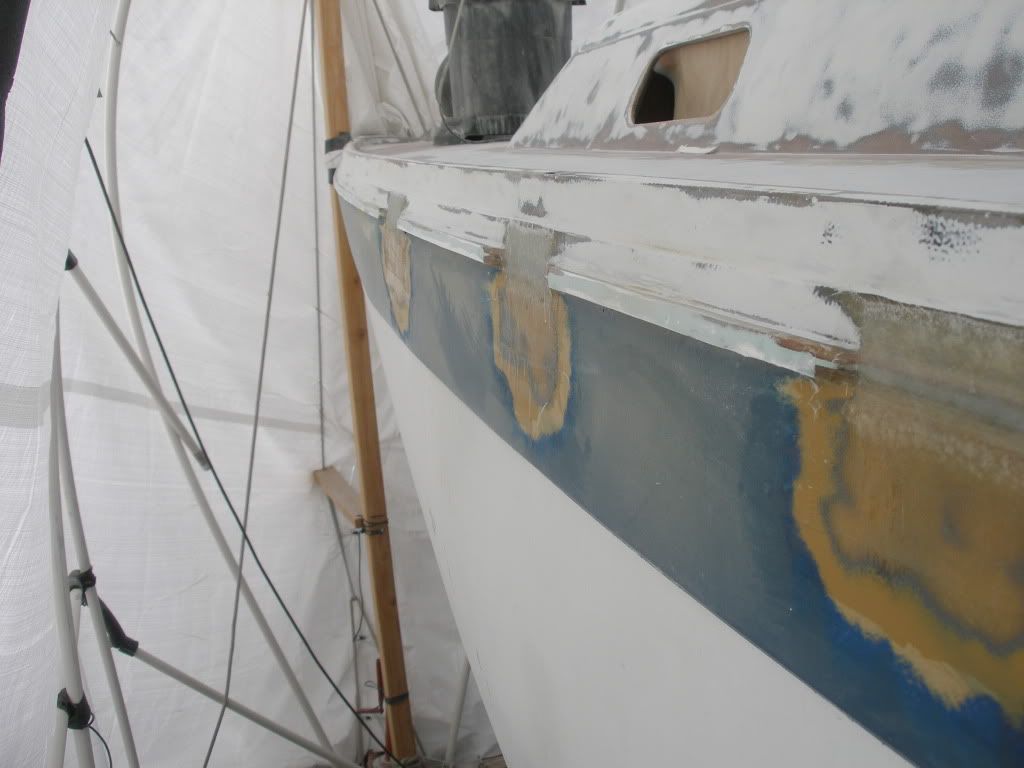
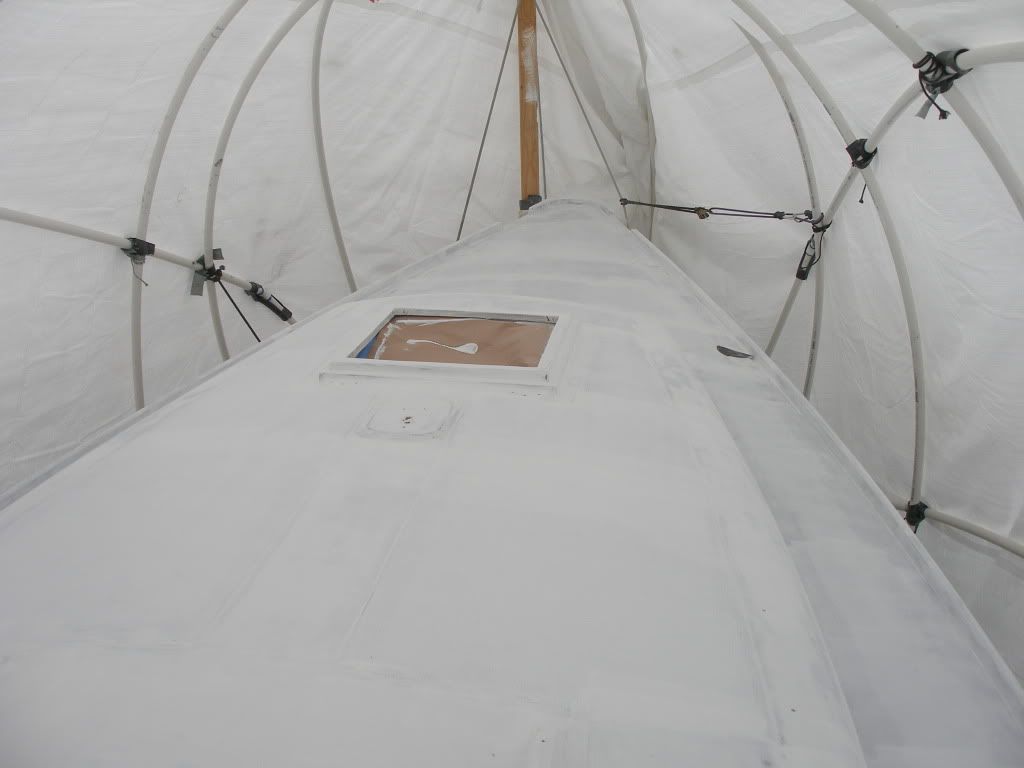
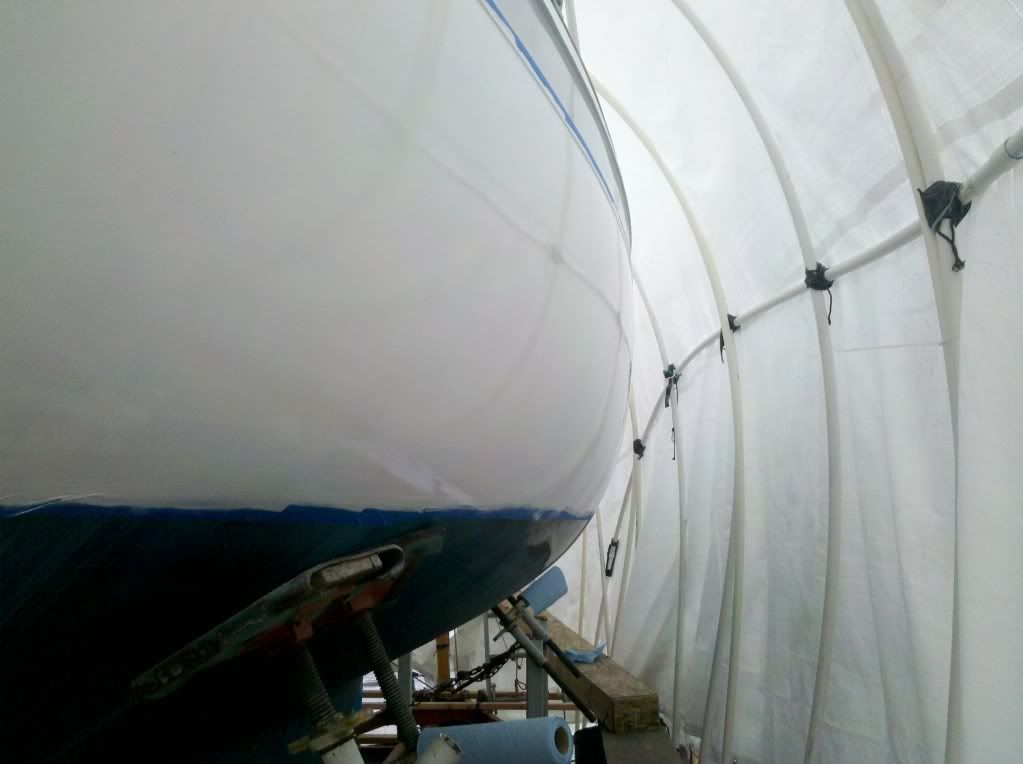
While my wife was sanding off the old blue stripe around the top of the hull, I ground off the hull/deck joint seam in three places, then we glassed it over and added a few layers of biax along the top to bring it somewhat vertical from the hull so I hopefully won't have to put a bend along the entire length of the chainplate.
At this point I am stuck until i can get our local metalworker to precisely drill the bottom chainplate holes through the metal strap. I don't want to try it because drilling stainless with a hand drill is a real pain and I want these holes to be aligned correctly so my chainplates aren't all cattywampus. Once I have those holes as a reference, i will build up the backing pads/plates inside the hull, then drill back through them from the outside. With the bottom two holes in place, I can then finalize the chainplate design and have them manufactured. But that is a few weeks out I think.
Re: Ericson 27 Project
Posted: Wed May 05, 2010 12:52 am
by bigd14
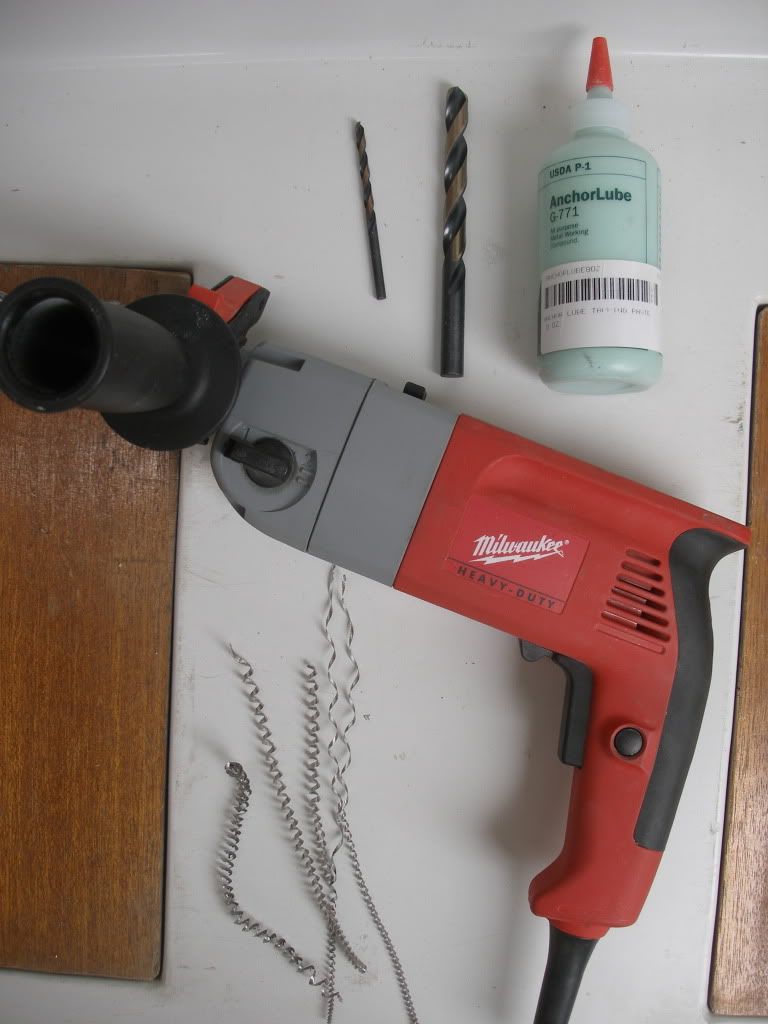
This weekend I had our local boatyard metalworker help me drill the holes through the stainless strap. It worked pretty slick. The key was cutting fluid, lots of pressure (I drilled while he applied extra pressure using a long stick of wood as a lever for accessible holes and hand pressure for others), and a slow drill speed (150rpm). Went through a couple of pilot bits and two full sized bits for 12 holes, but otherwise no trouble. Except for the fact that we could not get the holes lined up perfectly using a hand drill so the hole spacings will be slightly different for each chainplate. Oh well.
Here are the materials used for drilling. The nice curls result from a slow speed and lots of pressure on the drill.
Here is a shot of the cutoff chainplates with all the holes drilled on the port side.

Next step is to glass a bunch of G10 backing plates into the inside, reinforce with bunch more glass over the top to bond it all together, then get new chainplates made. All in all I think it will be pretty bomb-proof.
I'm relieved to have this behind me, it was holding up progress. Now I can finally finish fiberglassing and start thinking about paint again.
Re: Ericson 27 Project
Posted: Sat May 15, 2010 12:58 am
by bigd14
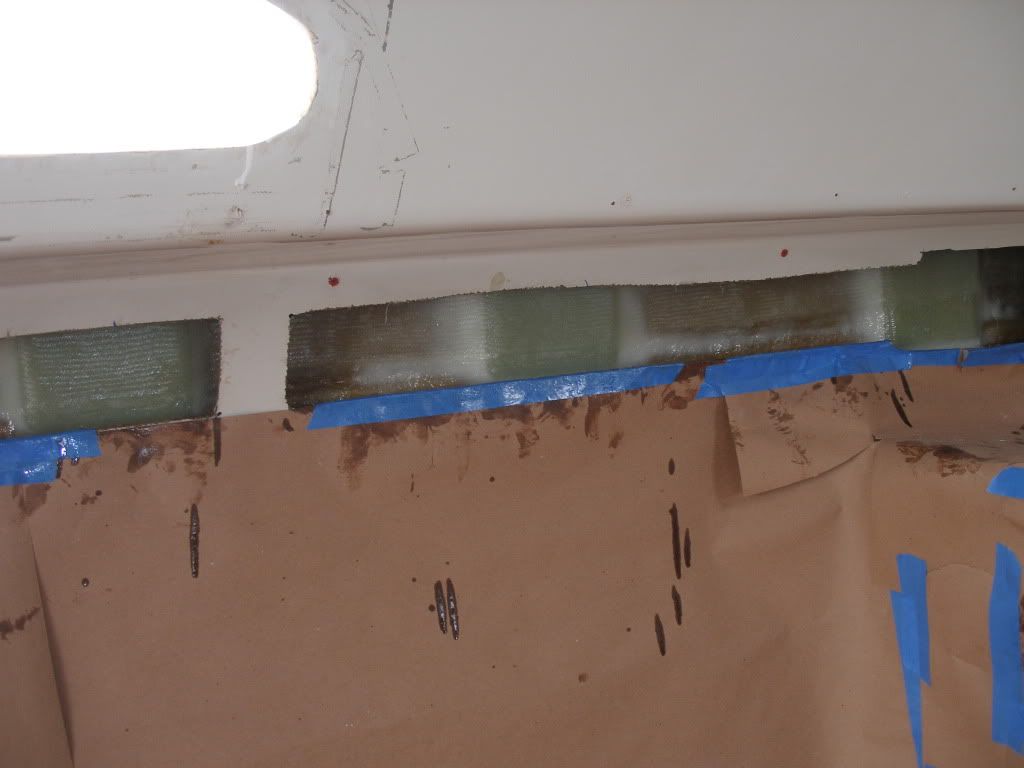
Here is a shot of the glassed in backing plates. Used plenty of thickened epoxy to bed them against the hull, then two layers of biax tape. The first layer extended to the deck, the second layer tied the deck and the hull together. I extended the biax about 18 inches on either side of the fore and aft chainplates. It should all act as one unit.
I also discovered that the cabin-top mounted traveller had no backing plates, and the washers had been pulled about halfway through the cabin top. Yikes! I cut away the liner and will install a couple big backing plates.
Just a little more fairing of the chainplate patches and we can start prepping for paint. Again!
Re: Ericson 27 Project
Posted: Mon May 31, 2010 7:22 pm
by bigd14
1st coat of primer on!
Had a little scare (again!) when a bit of the primer flaked off. It was cool and damp overnight and I think it hadn't fully set up yet. Also there may have been some contamination in this area, since its right where I grab each time when coming aboard. Sanded back away from the area, then solvent washed. I'll scuff with 120 and re-prime during the second coat. Everywhere else was solid.
Re: Ericson 27 Project
Posted: Mon Jun 21, 2010 12:37 am
by bigd14
Re: Ericson 27 Project
Posted: Mon Jun 21, 2010 12:42 am
by jeffwagnpete
looken good!
Re: Ericson 27 Project
Posted: Mon Jun 21, 2010 11:39 am
by Rachel
I hope you tied a rope to find your way back to the house - that is a lot of white! Reminds me of the morning after a blizzard :D
Seriously: Excellent! Crankin' right along :)
Rachel
Re: Ericson 27 Project
Posted: Mon Jun 21, 2010 11:54 am
by Chris Campbell
What did you think of the KiwiGrip? Another friend just did his decks with it in preference to Intergrip and liked it - any thoughts you'd like to share?
Boat looks great - congrats on your continued progress.
Re: Ericson 27 Project
Posted: Mon Jun 21, 2010 11:17 pm
by bigd14
Thanks, its been a long road to get to this point!
The Kiwigrip was really easy to apply. Obviously I can't speak to its durability or grip when wet, but it looks really good. Its amazing how the boat suddenly comes together when you pull the tape off. I did learn a couple things:
1. When you mask cut the tape into strips about two feet long and overlap them in the direction you will be working. You will want to remove them as you go so you don't get painted into a corner and can't get to them. You need to remove the tape pretty quickly to get a nice clean edge. The short sections of tape make it easy to remove and jettison over the side. Work carefully, the tape line is super crisp. If you don't take the tape up as you go, bring your yoga practice to the task! You know Oceans 12 where the French guy was moving through the laser beams? Its kind of like that!
2. Layer it on with a small drywall knife (we used a 4 inch wide plastic one). Lay it on pretty thick (about 1/8 inch), but evenly. There were some areas that we need to go back over a little since we didn't put quite enough on.
3. Work only one or two feet at a time. The stuff dries quickly.
4. Roll sideways then up and down towards the area you just covered. If you push hard you get more texture but you also get vertical lines. I went back over it really lightly, often on a diagonal to dial back the texture.
Overall its been the easiest job so far.
Oh and I used about 3.5 quarts (I bought a gallon of it).
Doug
Re: Ericson 27 Project
Posted: Fri Jul 09, 2010 1:04 am
by bigd14
Re: Ericson 27 Project
Posted: Fri Jul 09, 2010 11:47 am
by Mark F
Looking good Doug. I haven't had a chance to get down to Ballenger's again (reference from the Ericsonyachts site). Have you heard anything from them?
Mark
Re: Ericson 27 Project
Posted: Sat Jul 10, 2010 4:55 pm
by Tony
Your boat looks great, Doug. I hadn't realized you're here in Portland. Is that the yard behind Sexton's Chandlery?
Regards,
Tony Orchard
S/V Bonnie Blue
1974 C-22 #4823
St. Helens, OR
Re: Ericson 27 Project
Posted: Sat Jul 10, 2010 9:53 pm
by bigd14
Thanks, guys. Mark- No I haven't heard from Ballenger yet. I'm going to call next week. I'll be ready to work on the mast in a few weeks. Hey Tony, yes its the yard behind Sextons. One of the few DIY yards around! Did you work on your boat there?
Still cranking away this weekend. I'll post some photos tomorrow. .
Re: Ericson 27 Project
Posted: Sun Jul 11, 2010 12:42 am
by Tony
Hey Doug,
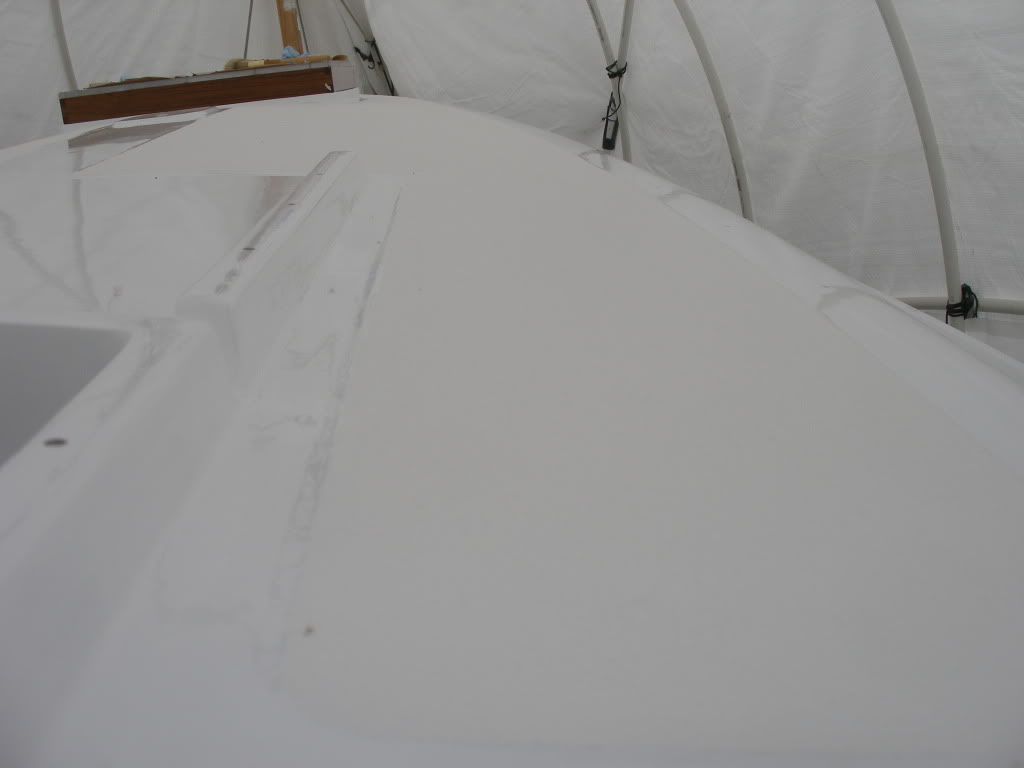
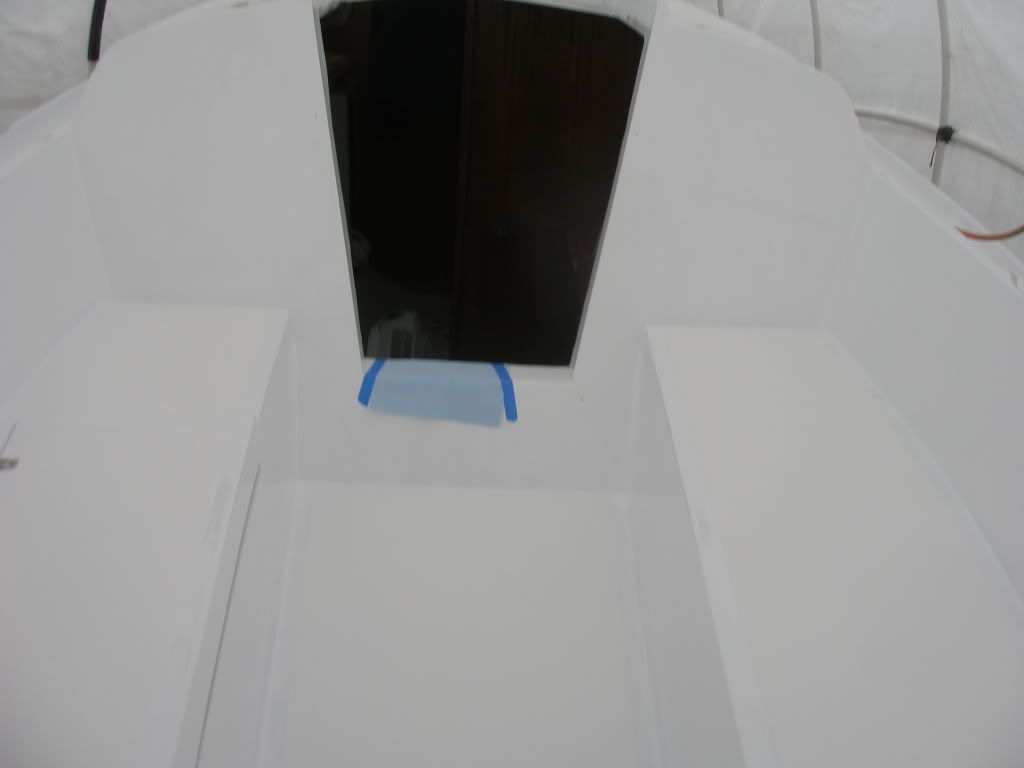
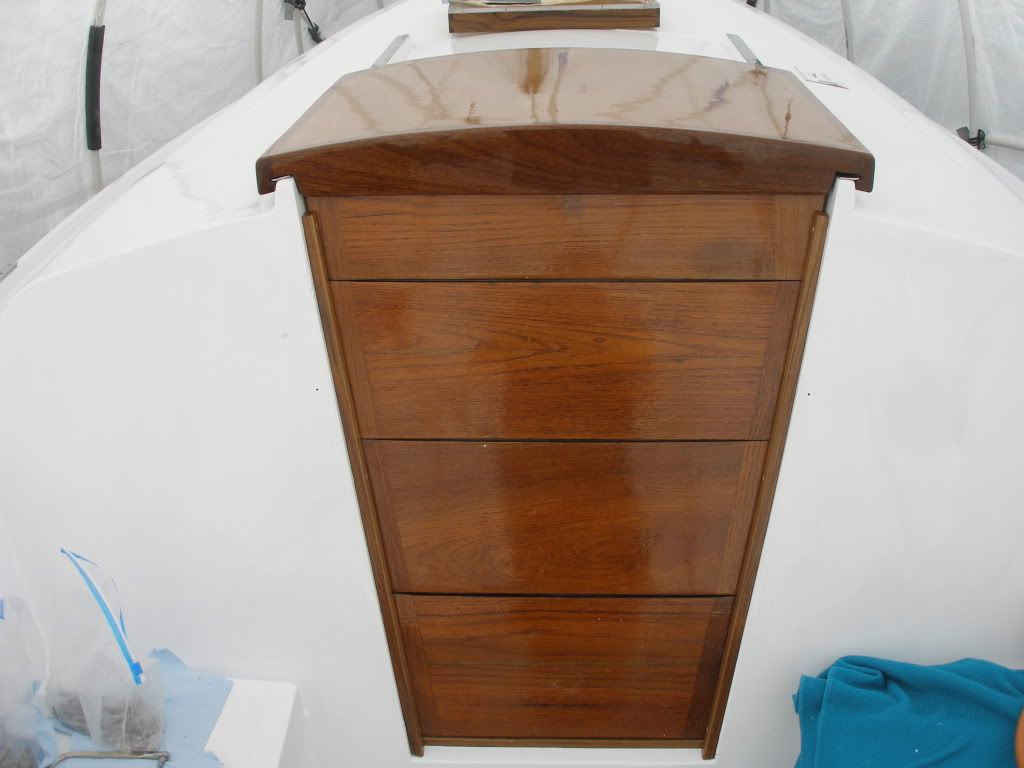
No, my boat is in St. Helens, but I drive by there once or twice a month and my wife and I lived aboard at McCuddy's several years ago across the street. I used to walk my dog in that big field next to the yard (before PYC fenced it in). I thought I recognized your boat. I remember looking at it one day and thinking Wow, someones doing a LOT of work... :-) I drop by Sexton's semi-regularly, I'll drop by if I see you working. Nice work on the hatch. The little triangles really look intentional.
Re: Ericson 27 Project
Posted: Sat Jul 17, 2010 2:21 am
by bhacurly
Looks Great Doug!
That new hatch is beutiful! Nice to see it all coming together for you, and inspires me to keep plugging away!
Billy
Re: Ericson 27 Project
Posted: Sat Jul 31, 2010 11:49 pm
by bigd14
Chainplates have arrived! We've been whittling away at re-intsalling all the hardware over the past month. Slow work but progress is being made, despite taking last week off to sail in the San Juans.
Here is a shot of the new chainplates. Hah, I think they will be the last thing left of this boat in 200 years...

Re: Ericson 27 Project
Posted: Sun Aug 01, 2010 12:40 pm
by moonie5961
I just re-read through your whole thread, you've come a long way! It must feel good to be at this stage after all of your work; thanks for sharing your progress!
Re: Ericson 27 Project
Posted: Sun Aug 01, 2010 9:39 pm
by Triton106
Doug, those chain plates are beautiful and they look like made for Cape Horn.
Re: Ericson 27 Project
Posted: Fri Aug 20, 2010 1:57 am
by bigd14
moonie5961 wrote:... It must feel good to be at this stage after all of your work; thanks for sharing your progress!
Well, yes and no. "Yes", compared to when I bought the boat almost exactly 2 years ago. "No" becasue I have recently determined that there is no way I can make an end of September launch which is what I have been shooting for since early spring. I just sat down and made an updated list of all the things that I still need to do. The exterior portion of the boat list took up 5 pages...
Realizing that i will be on the hard for another winter, I have decided to change directions and paint the topsides before the weather gets cold this fall. They were in decent enough condition, but a new coat of paint will address several issues and bring that area up to par with the rest of the boat. So the 'ol sander will see some more action!
Hopefully I will actually be able to get to work on the boat this weekend, but its looking less and less likely at this point. Aargh!
Doug
Re: Ericson 27 Project
Posted: Sun Aug 22, 2010 10:51 pm
by bigd14
New traveler going in.
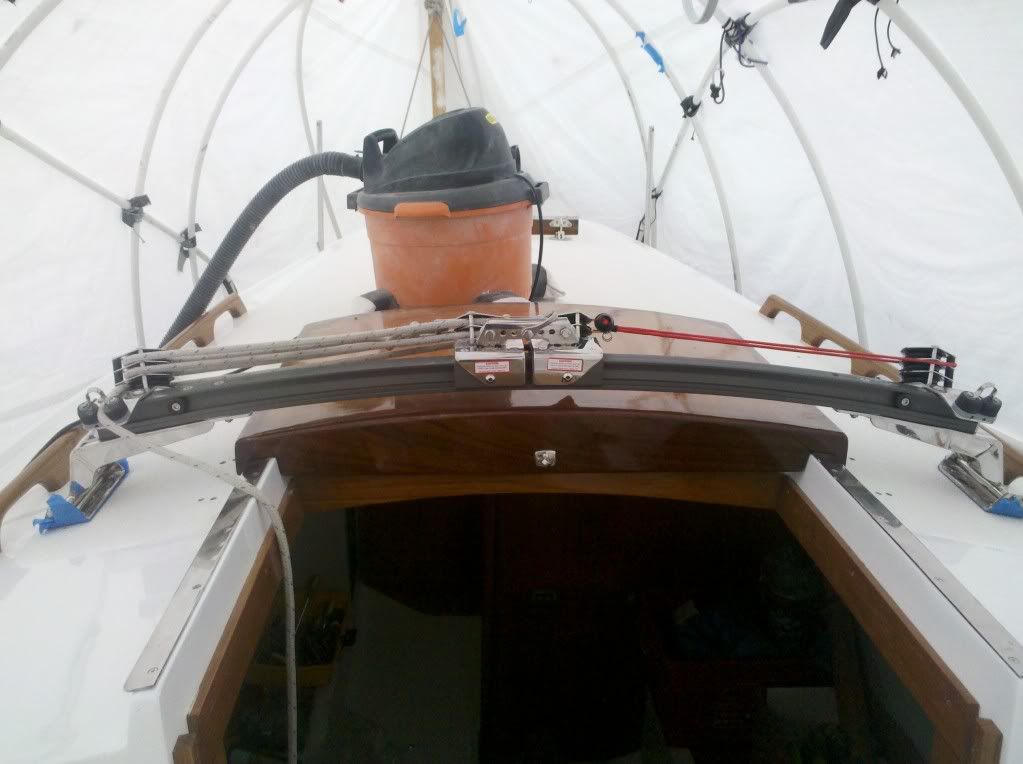
Spent today cleaning and sanding the topsides for paint. Cleaned all the wax off then I had to sand off a bunch of bottom paint that was put on too high. Then sanded one side to 150. My arms were too sore to lift the camera to take any photos!
Things are rolling again!
Re: Ericson 27 Project
Posted: Mon Aug 23, 2010 5:53 am
by LazyGuy
Compared to what you have been doing, the topsides will be a breeze.
Re: Ericson 27 Project
Posted: Wed Sep 01, 2010 1:20 am
by bigd14
Got some more goodies today. Here is a photo of the new spreaders, spreader bar, and repair plates.
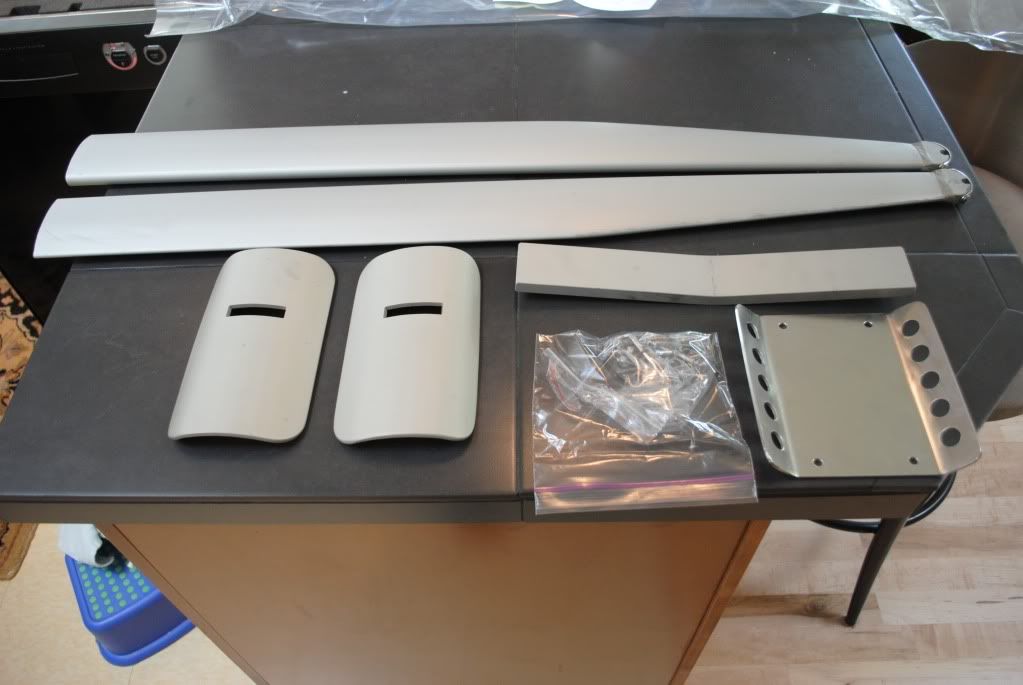
Spent last weekend sanding the rest of the hull and filling a few dings. Still trying to decide what to do about the weird cracks in the hull. I'll probably do some digging and then decide what to do.

Re: Ericson 27 Project
Posted: Sat Sep 04, 2010 12:03 am
by bigd14
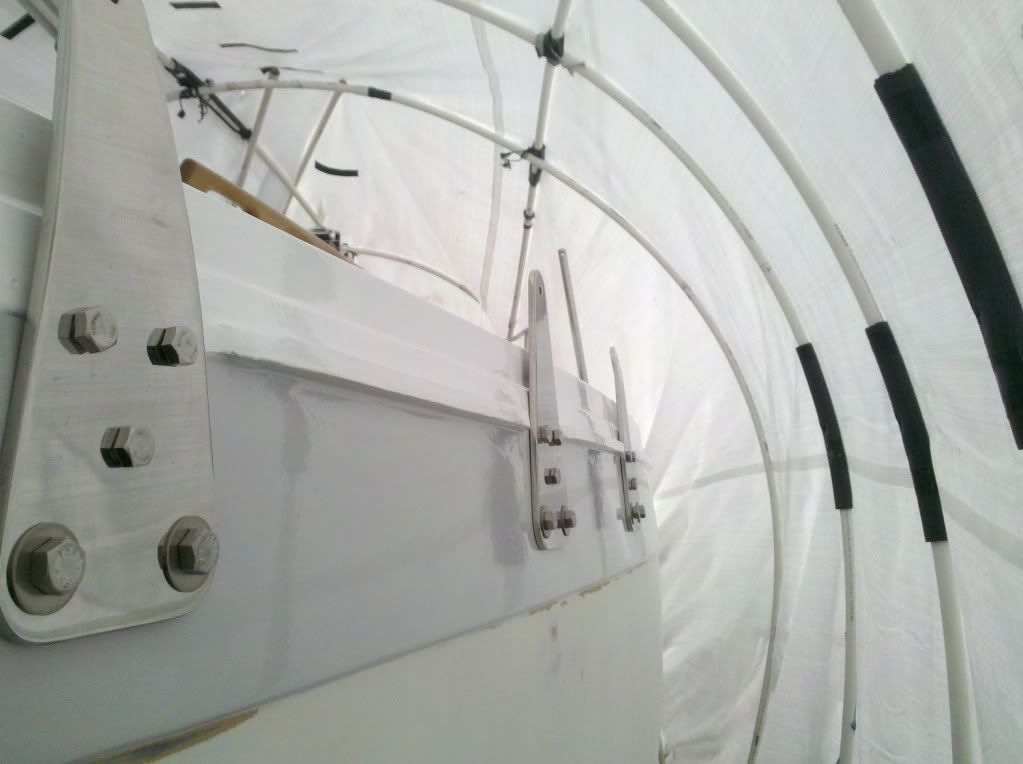
My epoxy was too green to sand this morning so I spent a few hours dry fitting the chainplates. The two bottom holes were already drilled from the inside, but since they didn't align quite properly with the chainplate holes I had to drill them out a bit. Once they were drilled out I tightened the lower bolts in place then drilled the three upper holes. Since the two bottom holes didn't line up on some of the chainplates, the bolt heads don't fit flush to the chainplate (Thats why the washers are there for now). I have yet to figure out what to do about this, if anything. Given the overbuilt nature of this whole endeavour I'm leaning towards leaving it alone and just replacing the lower bolts every couple years. But I have thought about having some angled washers/shims made up by our local metalworker. If anyone has any other ideas I'm all ears!
After that I bailed out to cool down and enjoy the sunny weather with my kids before it starts raining over the Labor Day weekend, which is the normal weather pattern for all major holidays around here.


Re: Ericson 27 Project
Posted: Sat Sep 04, 2010 8:28 am
by Chris Campbell
What a lovely photograph that waterfall one is!
And your chainplates of course look lovely also. Is there anything stopping you (other than having already done too much on the boat) from filling in the lower holes in the hull and redrilling, now that you have the three upper holes to hold the chainplate in place so you can get perfect lower holes also?
Re: Ericson 27 Project
Posted: Sat Sep 18, 2010 8:11 pm
by bigd14
Two coats of Perfection on topsides. I may put another on before launching in the spring, since I I got a very faint orange peel and I can still kinds of see the darker areas like the bootstripe. I imagine these dark areas will show up even clearer under direct sun. And I am going to repaint the sheer stripe. I used low quality rollers and have some foam bits and runs and drips in it.
But, she's really looking like a boat now! I just have a few more bits of deck hardware, then I will spent the winter working on the interior and the mast. But the outside of the boat is 90 percent finished. I still have some nasty sanding work to prep for bottom paint, but it doesn't have to look perfect, so I think the hardest part is over.
Doug
Re: Ericson 27 Project
Posted: Sun Sep 19, 2010 7:00 pm
by Chris Campbell
Congratulations! She's gorgeous!
Re: Ericson 27 Project
Posted: Tue Sep 28, 2010 10:44 pm
by bigd14
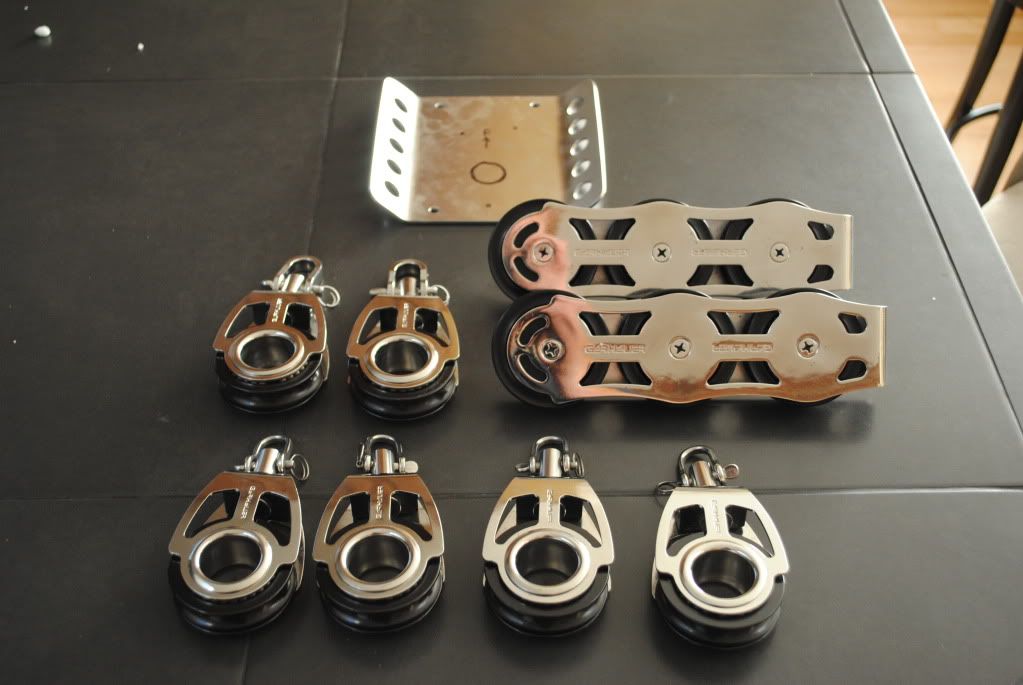
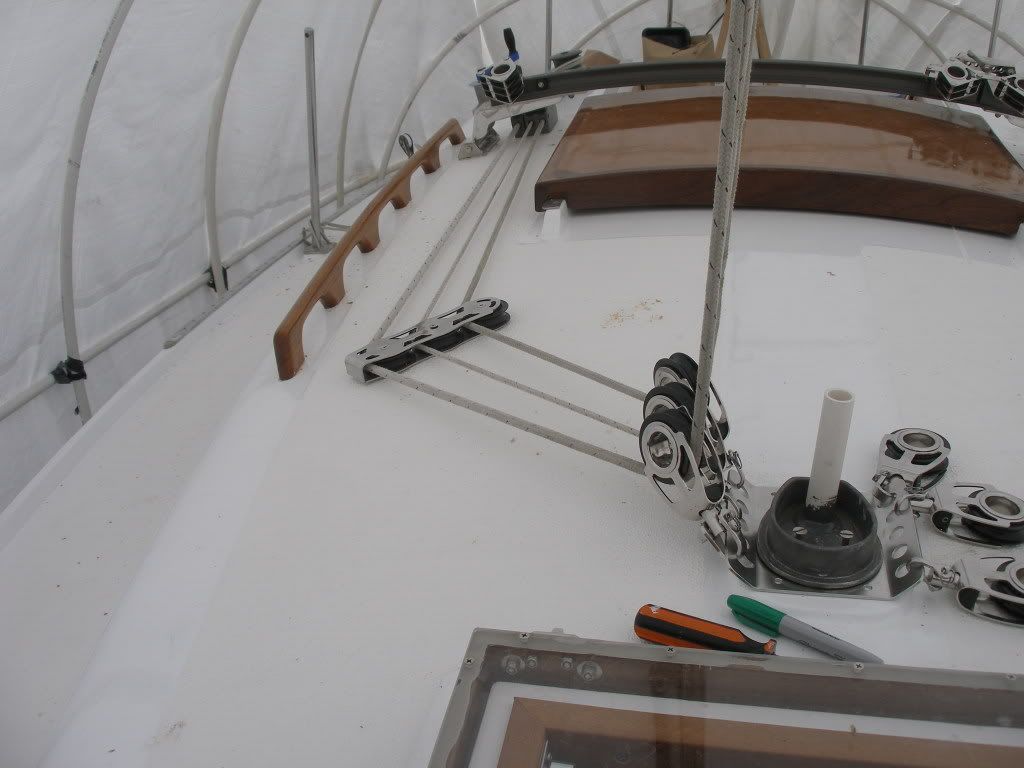
Some goodies from Garhauer (not the mast plate). Man these things are beefy! But I like stuff that's over built. I will have to have someone modify the mast plate because the halyard block shackles won't fit through (the only difference in the blocks is a beefier shackle on the higher rated halyard blocks). Rope clutches are due Thursday, and Friday I will start placing the organizers, clutches and winches, and potting holes.
Re: Ericson 27 Project
Posted: Fri Oct 01, 2010 8:06 pm
by bigd14
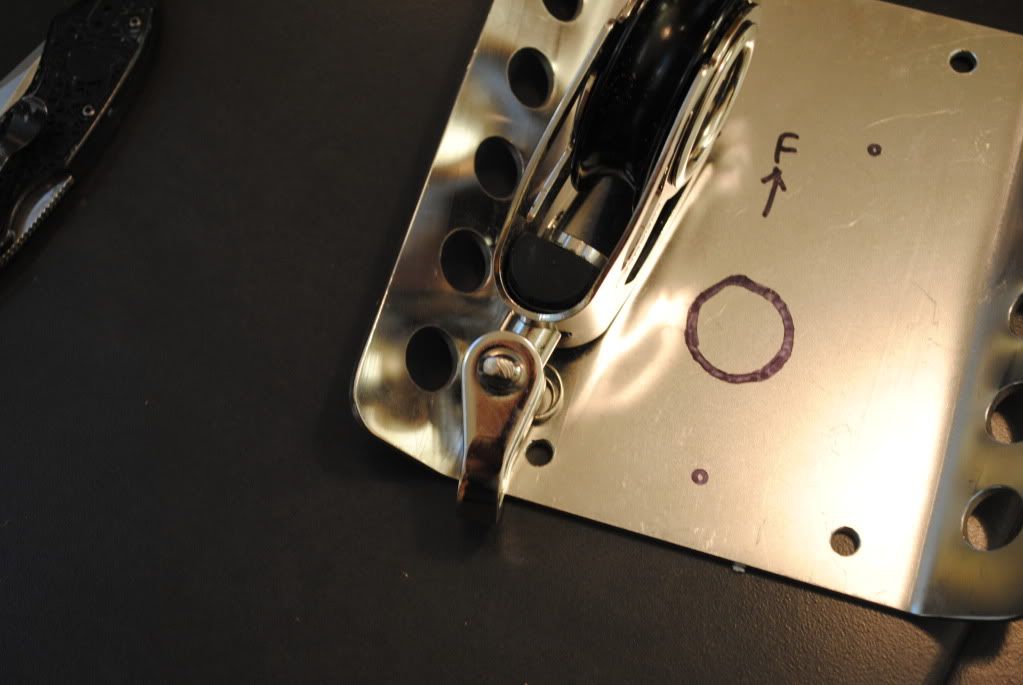
Over the past few evenings I drilled out the mast plate and filed down the holes to fit the larger shackles. I also cleaned up the bronze winches that came with the boat. They seem in ok condition.
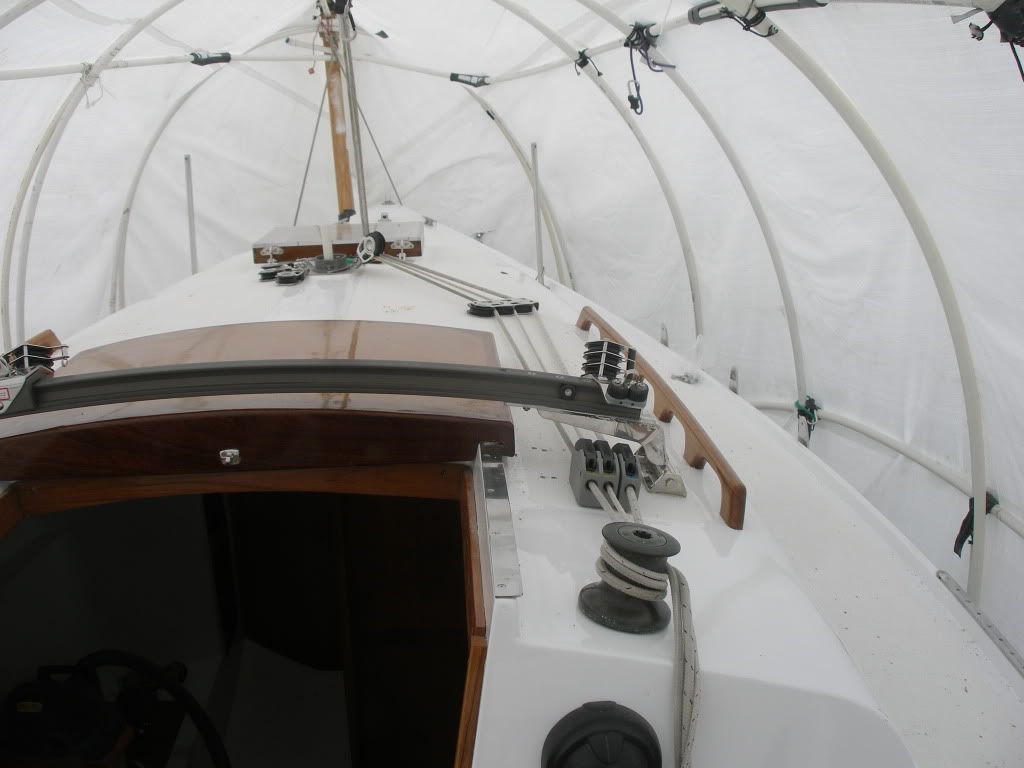
I spent today dry fitting the lines led aft gear. The deck organizers go through balsa cored deck, but the rope clutches and winches go through plywood core. I cut out sections of the headliner for backing plates. I will have to make some large covers for all the damaged headliner areas. I reamed out the holes and I had hoped to pot them today, but when I cut the headliner out for the deck organizers I encountered some of the lovely Ericson "mash" that had been squooshed in between the deck and headliner.
So I had to chip that out. I have heard it contains asbestos, but I was already in too deep before I could figure a way to try to contain it, so now the entire cabin is contaminated. I'm not going to worry too much about it, just try and clean it up as best I can and wear a respirator while I do.
The whole lines lead aft setup is going to be pretty nice!
Re: Ericson 27 Project
Posted: Sat Oct 02, 2010 12:17 am
by Rachel
Things are looking tidy :)
On the asbestos-containing mish-mash: I have read that some builders used that, and have wondered how to recognize it. Is there any way? Was it only used when there are big "globs" sticking things together, or in regular old thickened resin, or? I would like to know something more definitive than what I have read.
Rachel
Re: Ericson 27 Project
Posted: Sat Oct 02, 2010 11:40 pm
by bigd14
Thanks, Rachel, its so much fun to see things come together like this.
Geez, I hope the asbestos is only in this nasty stuff! I've encountered lots of other thickened materials and it didn't occur to me to think about it then.
Whatever else is in it, this stuff is rock hard. Seems harder than the colloidal silica-thickened epoxy I have been using. I recently started using a bit of finely milled fiberglass to add some strength. This after I started hearing ominous cracking noises coming from the foredeck where I used a lot of epoxy thickened only with colloidal silica. I still hear them frequently when walking around up there. I hope the entire area doesn't shatter into a million bits when I hit the first wave! I had trouble controlling temperatures up there when i was epoxying so maybe it turned brittle from curing too quickly . I can't worry about that now I guess!
Re: Ericson 27 Project
Posted: Mon Oct 25, 2010 2:07 am
by bigd14
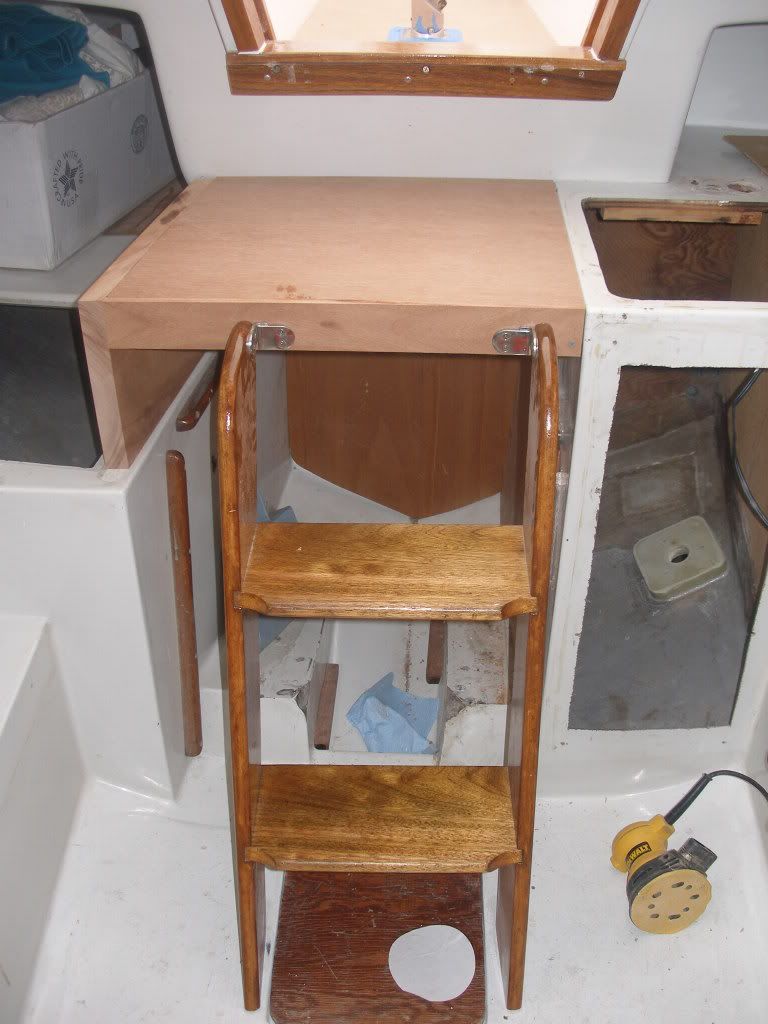
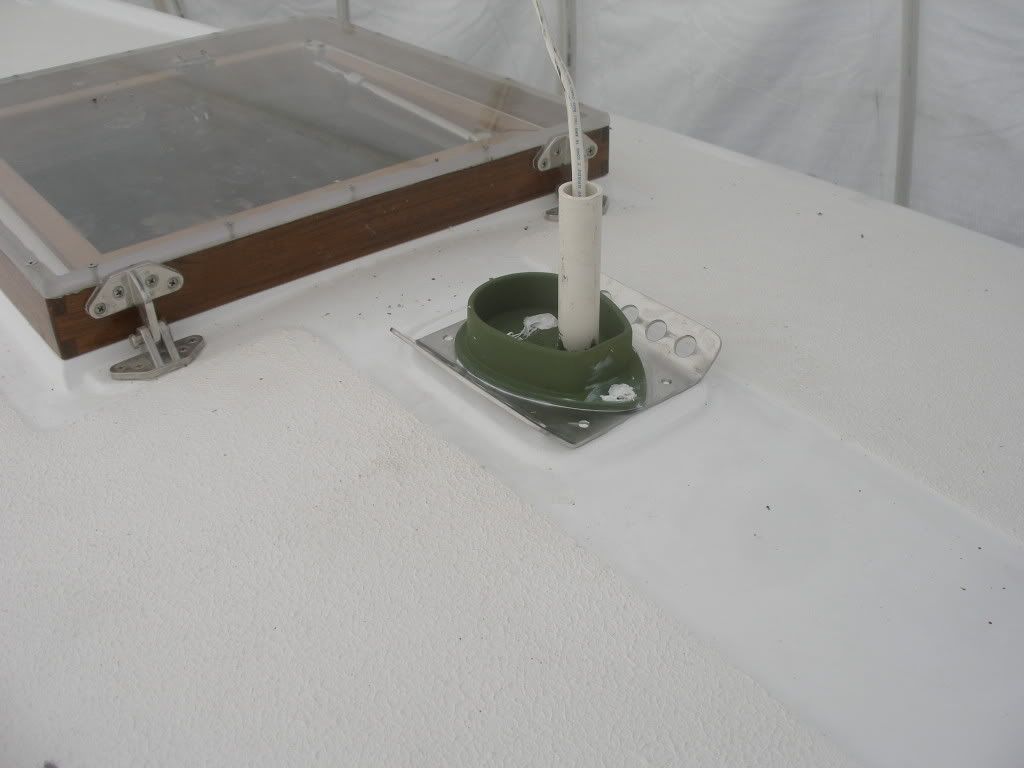
Things have slowed down a bit as I am in research and learning mode to figure out electrical and plumbing systems. I've been working on some miscellaneous projects. I've extended the galley underneath the companionway, cut down the ladder to fit, added a step into the v-berth and finally attached the mast step.
I'm finishing the extension in the shop and I'll add a new countertop over the entire area when I locate some suitable (e.g. cheap) material.
I just realized that there is going to be a silly green ring around the base of the mast. Oops!
Re: Ericson 27 Project
Posted: Thu Oct 28, 2010 11:53 am
by Mark F
Hey Doug,
Do you have any photos of the V-berth step?
Thanks, Mark F
Re: Ericson 27 Project
Posted: Thu Oct 28, 2010 10:41 pm
by bigd14
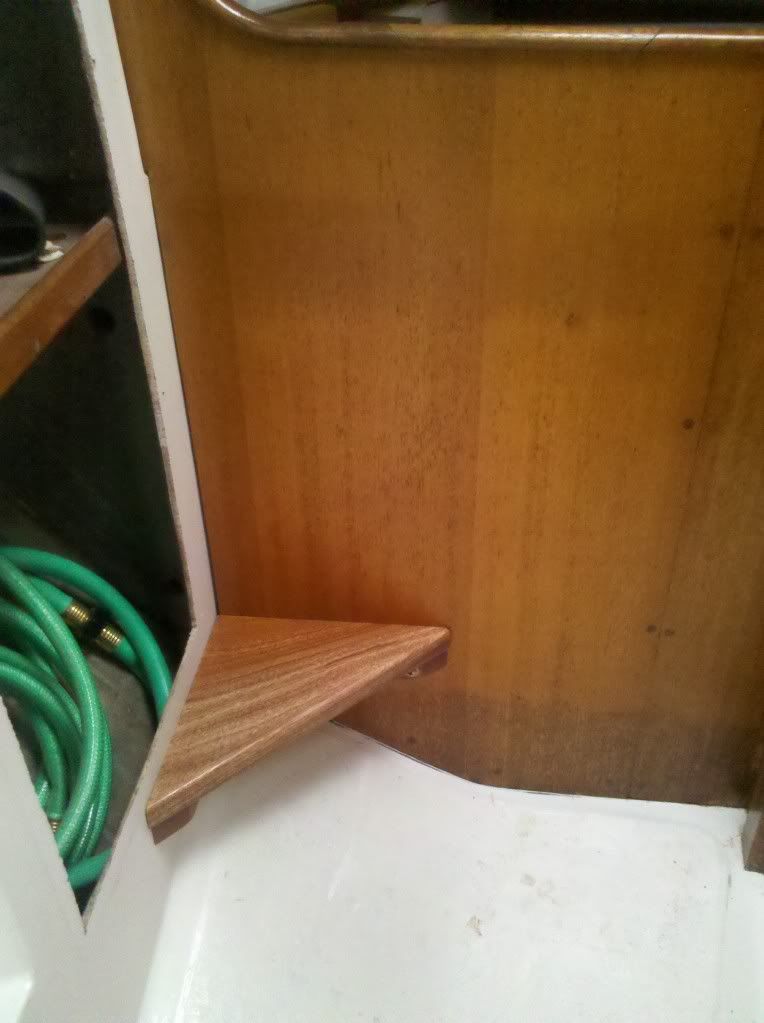
Here is a shot of the step into the vberth. Doesn't get much simpler than this!
Re: Ericson 27 Project
Posted: Sat Dec 04, 2010 12:53 am
by bigd14
Guess I better update the Projects section since no one else has for a few weeks!
Things have slowed considerably over the past couple months and there have been plenty of other things distracting me away from the boat. And ski season is here!
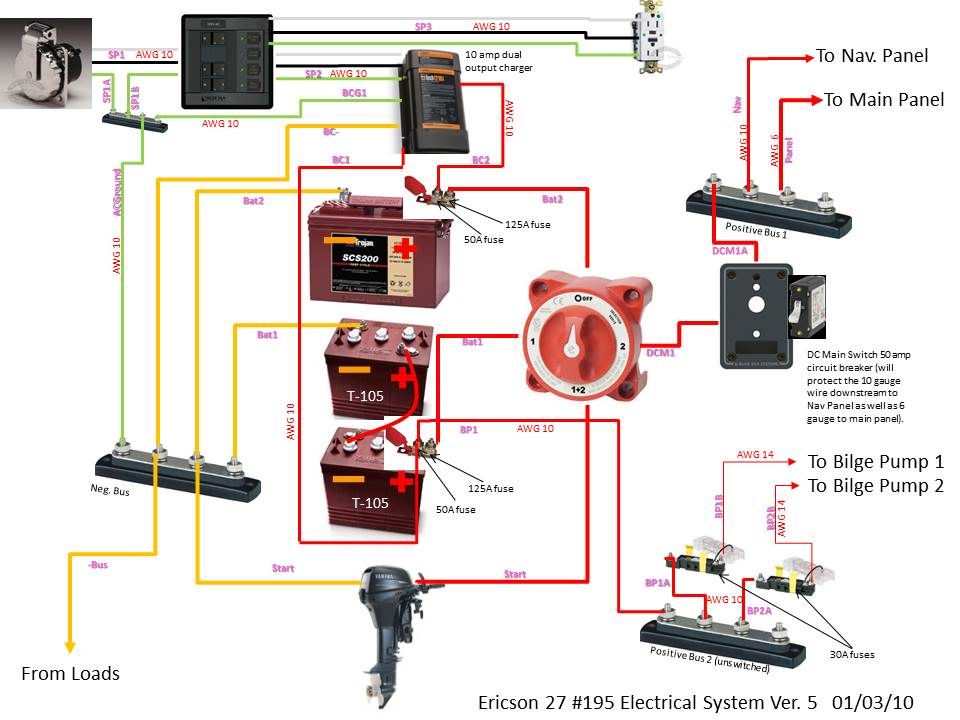
I still have to figure out final layout and details of the electrical system (wire sizing and fusing requirements) but I have been ordering some bits and pieces. Here is a shot of the electrical panel (still need to add an AC on/off switch)
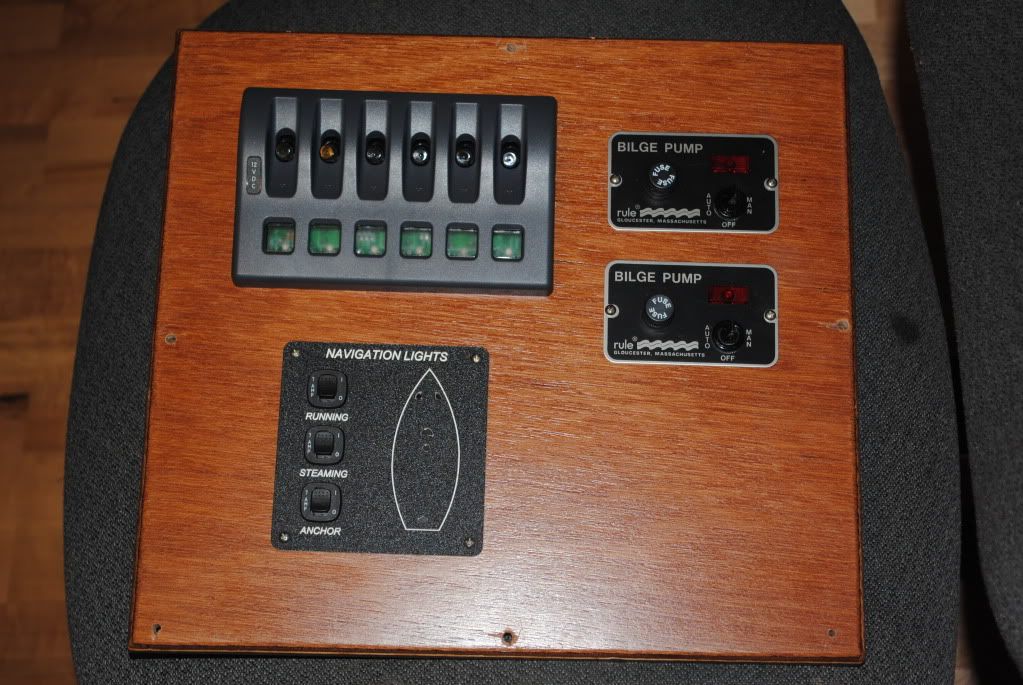
I'll try to post my electrical plan soon.
Re: Ericson 27 Project
Posted: Sat Dec 11, 2010 2:47 am
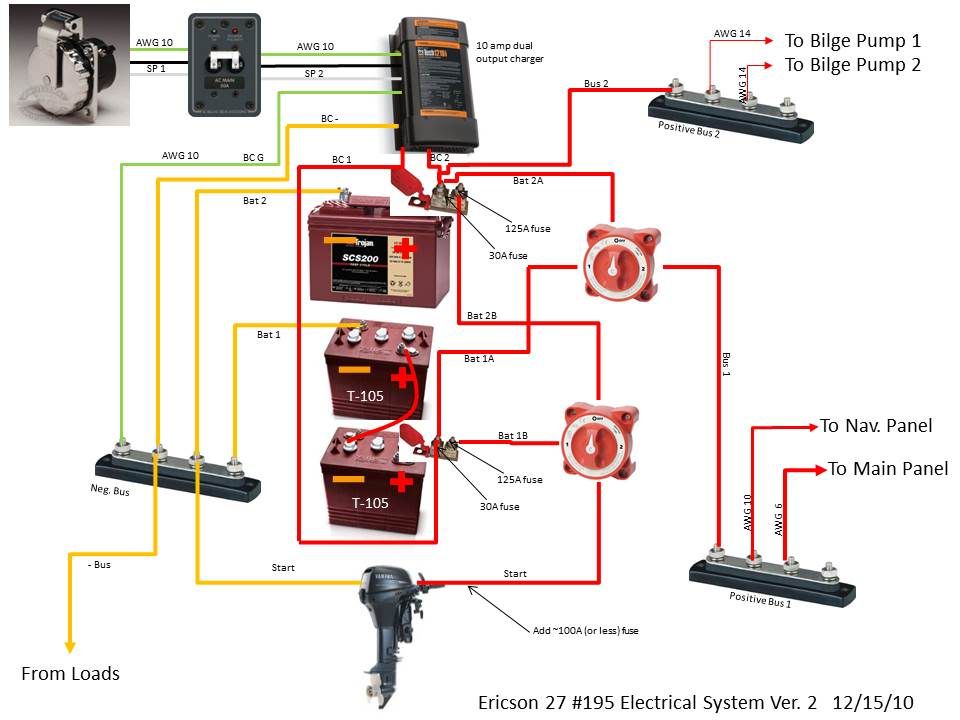
by bigd14
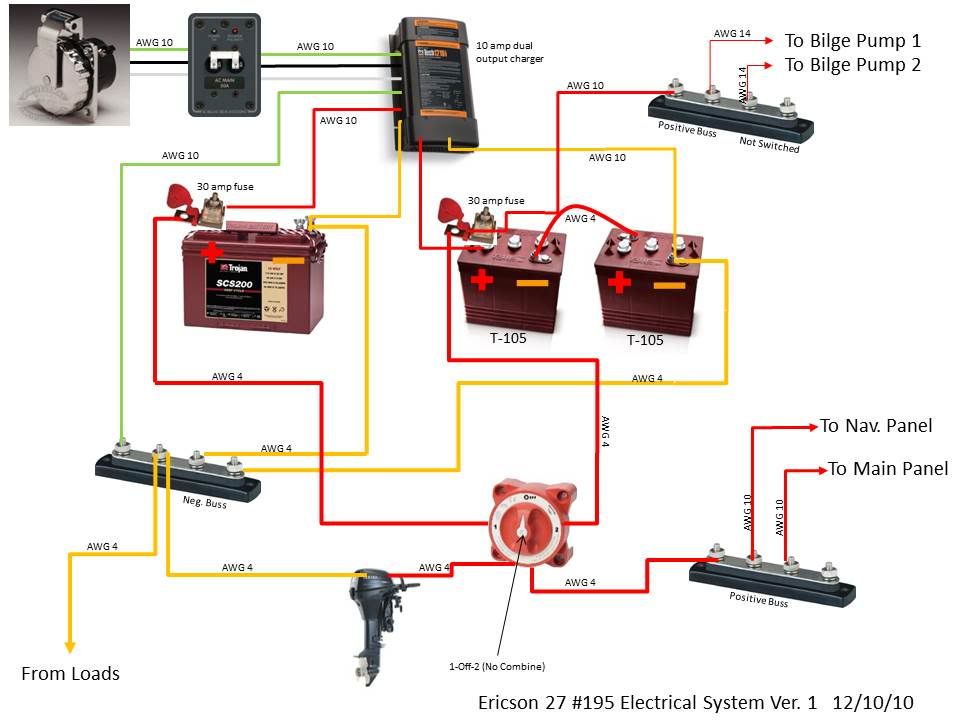
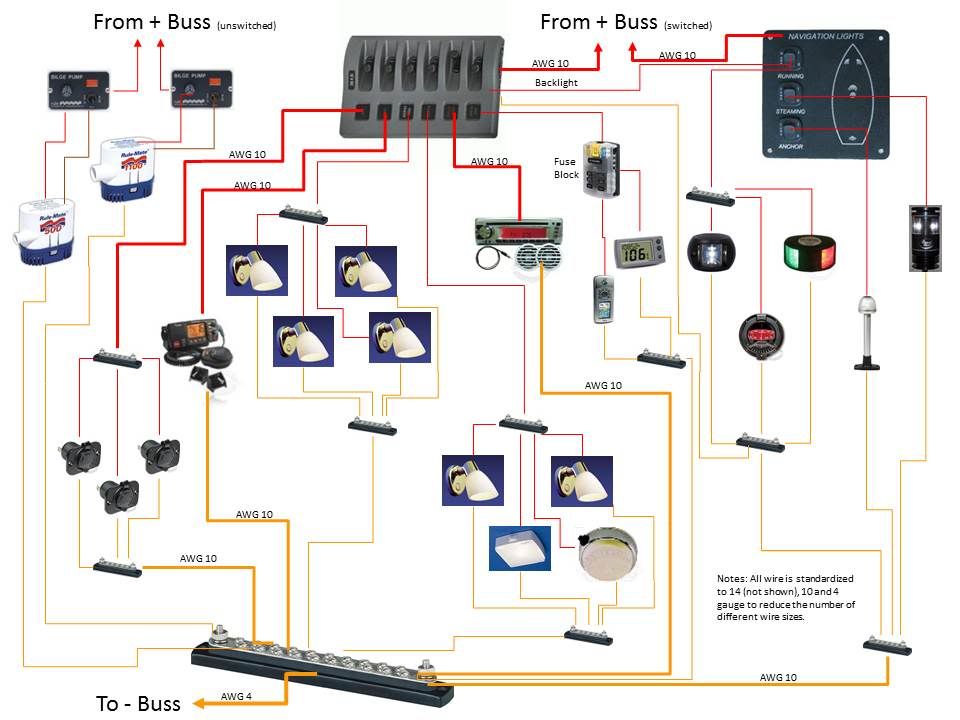
Here are a couple electrical system diagrams. Comments welcome!
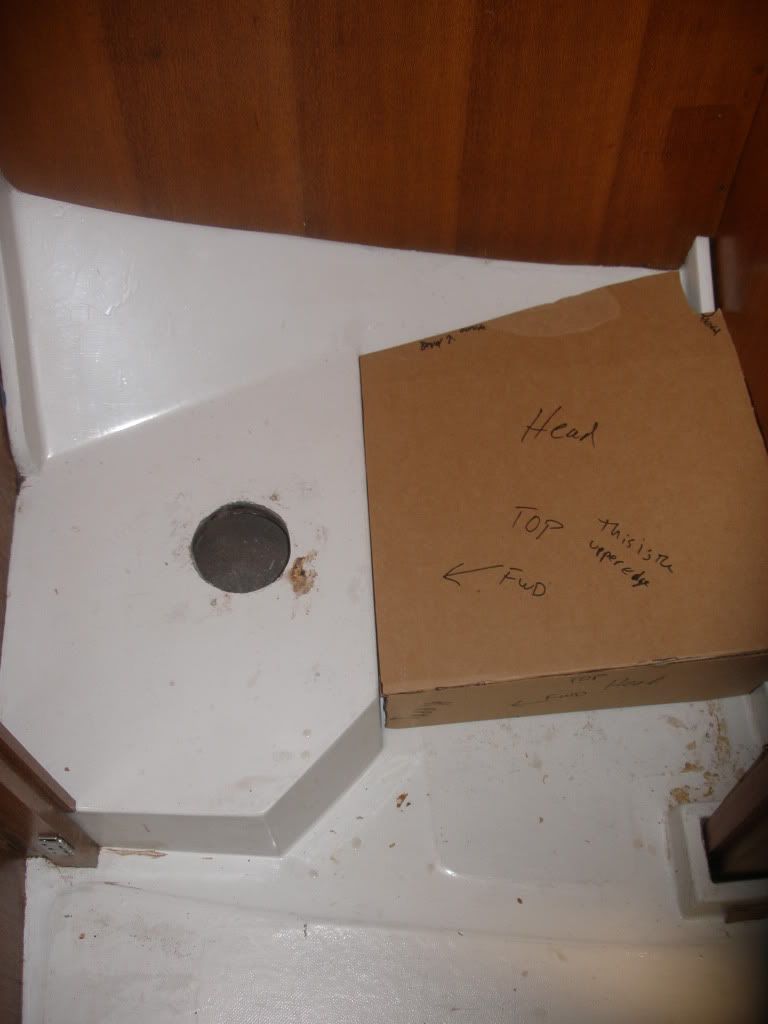
I have been making templates and mock ups of the countertops, battery storage and extending a platform in the head.
Head countertop template
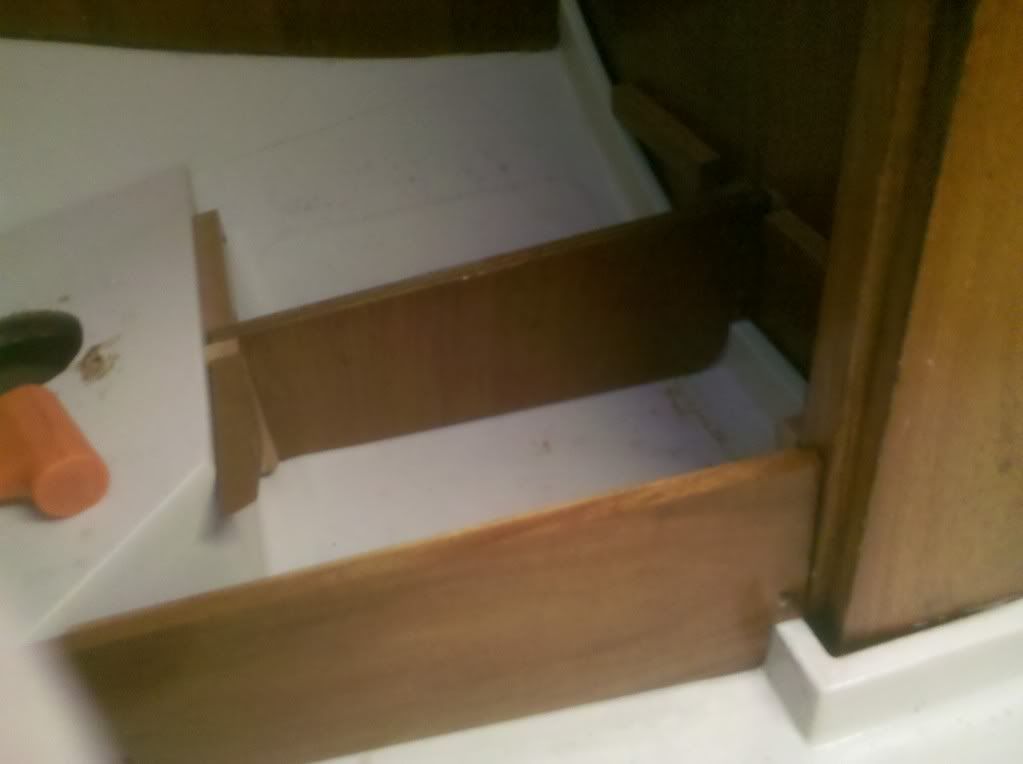
Head floor extension (I think I will extend it towards the door so its flush with the existing platform
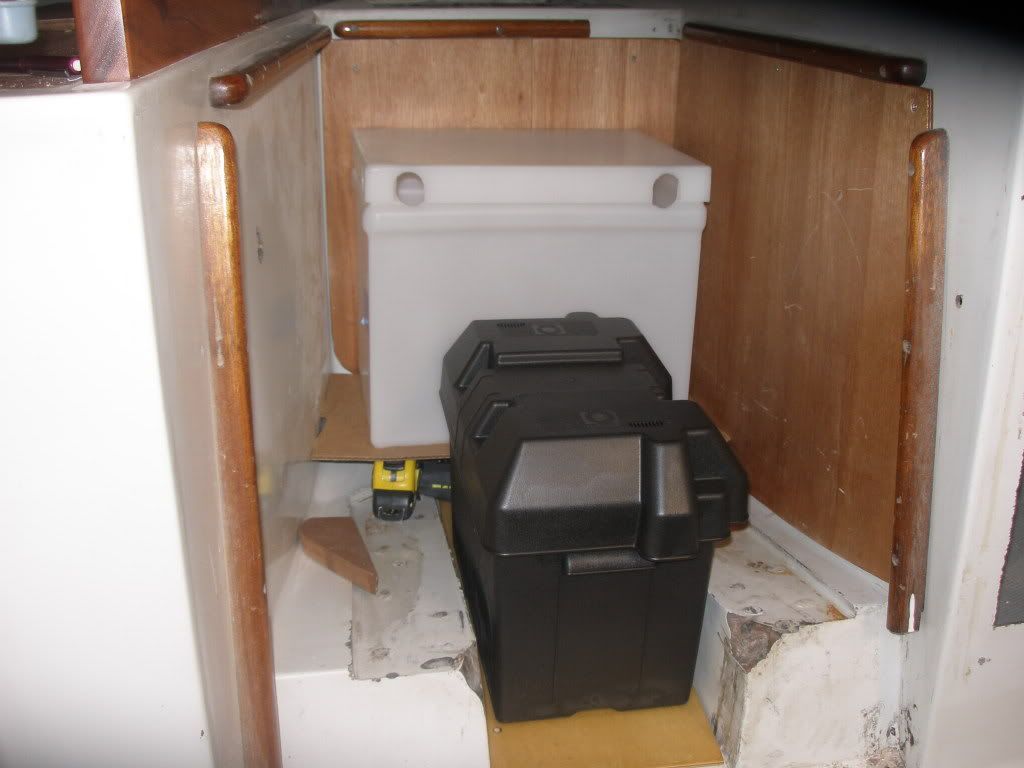
And the battery boxes. The large one in the back needs a platform built to support it.
Re: Ericson 27 Project
Posted: Sat Dec 11, 2010 10:28 am
by Paulus
Nice job on the electric schematic! I assume the three 12V "lighter plug" outlets will be sitting on at least 14 wire and have a separate fuse on each, right at the plug?
Re: Ericson 27 Project
Posted: Wed Dec 15, 2010 1:55 am
by bigd14
Good thinking on the fuses for the outlets. I'm still figuring all my fusing out.
Question that came up as I cogitated on the battery and fuse setup. I probably need to up my 30 amp fuse at the battery terminal considerably to handle starter loads for the outboard. I haven't been able to figure out how much current the little outboard starter draws. The rest of the system only draws 23 amps with everything on (not a likely scenario) so I want to keep the fusing somewhat reasonable. Any thoughts how high I should go (max 150 for 4 gauge wire).
Thanks
Doug
Re: Ericson 27 Project
Posted: Wed Dec 15, 2010 11:37 am
by Bikermouse
Not sure what the starter draw on your outboard would be, but assuming it's similar to a motorcycle would put it at around 100ADC at most, unless something is wrong. If you have a service manual or can talk to your local shop, they can probably tell you how big a draw you have. You can get automotive fusible link blocks (and spare links) at any auto parts store in sizes from 30A to 300A. Considering the way in which starters engage, I'd suggest a fusible link around twice the starter draw, mounted as close to the battery as possible.
Disclaimer, this is how a motorcycle mechanic would arrange it, but I don't know if it'd be up to ABYC snuff.
Re: Ericson 27 Project
Posted: Wed Dec 15, 2010 8:40 pm
by Paulus
You may want to keep the amps low (I hate DC - will tell y'all why one day) and consider a slow (delayed) fuse rather than amping for the maximum flow, which should be temporary.
That said, the line going to the starter is likely separate from the "system" and you could put a designated high amp fuse on it that would allow repeated, or longer term, starting, and leave the rest the way you have it with a 30A at the supply off the batteries
Re: Ericson 27 Project
Posted: Thu Dec 16, 2010 2:15 am
by bigd14
Thanks guys. I'll have to some further research on the starter motor draw. And Paulus, the way I have the line to the starter now is that it runs through the same battery switch as the "system" does. I wonder if I should use two battery switches, and a double fuse holder at the battery terminal (one @30A for the "system" and the other @125A, or maybe a bit lower since the loads will be temporary for the start circuit)? Also had some advice from another forum to put another smaller fuse right in front of the starter.
Here is another revised version of the diagram. I feel like this is too complicated and I am missing something obvious. What do you think?
One possible advantage of this configuration is that I can use the reserve battery for starting while using the house battery for other loads. Or vise versa.
Doug
Re: Ericson 27 Project
Posted: Thu Dec 16, 2010 2:44 am
by Bikermouse
Here's a basic idea of how I'd wire your circuit. Again, I'm ignorant of ABYC standards, but the layout is pretty basic.
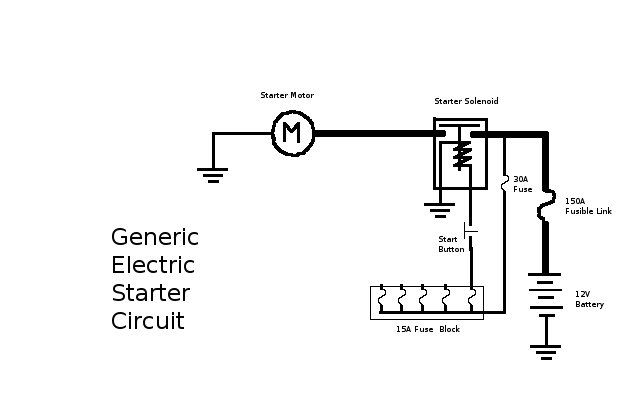
This arrangement works well if you want to mount the fuse block for all your systems close to the engine with a minimum of wire runs. The biggest downside to this arrangement is that if the solenoid sticks closed, you'll eventually (in 10-30 seconds) blow the fusible link and lose power to all your electrical systems. You can avoid that by mounting the fuse block close to the battery and connecting the 30A main fuse directly to the battery instead of at the solenoid lead.
Another important rule is to remember that you fuse for the wiring, not the load. If you need a bigger fuse for a bigger load, then you need heavier wiring.
Re: Ericson 27 Project
Posted: Thu Dec 16, 2010 9:22 am
by Paulus
That's how my current system is set up, bikerrmouse, and the narrative indeed identifies my concern with tapping from the starter solenoid - I am going to rewire so that the panel sits on it's own, designated, separately fused line from the selector switch at 30A.
At this moment, there is no fuse between the battery bank and the starter solenoid... I have to do some thinking about that... As you can see in "Projects", the starter motor for my 40hp Perkins Diesel (4-107) is substantial and the starting amps are huge.
bigd14, to keep things simpler, you could run the designated, 30A fused line, and the designated, higher fused line, both from the same "load" side of one selector switch (they are quite robust and can easily handle the load, as long as the connections are tight and clean). If you have a concern about the line(s) from the batteries to the selector switch, you could individually in-line fuse those at a pretty high amperage, without exposing the loads downstream the selector switch.
Hope this makes sense somehow.
Re: Ericson 27 Project
Posted: Sun Jan 09, 2011 12:54 am
by bigd14
So here is my almost final electrical scheme (battery side). I think I am going to eliminat the 30 amp fuses between the positive bus 2 and bilge switches and reduce the battery post fuses (on both batteries) to 30Amps
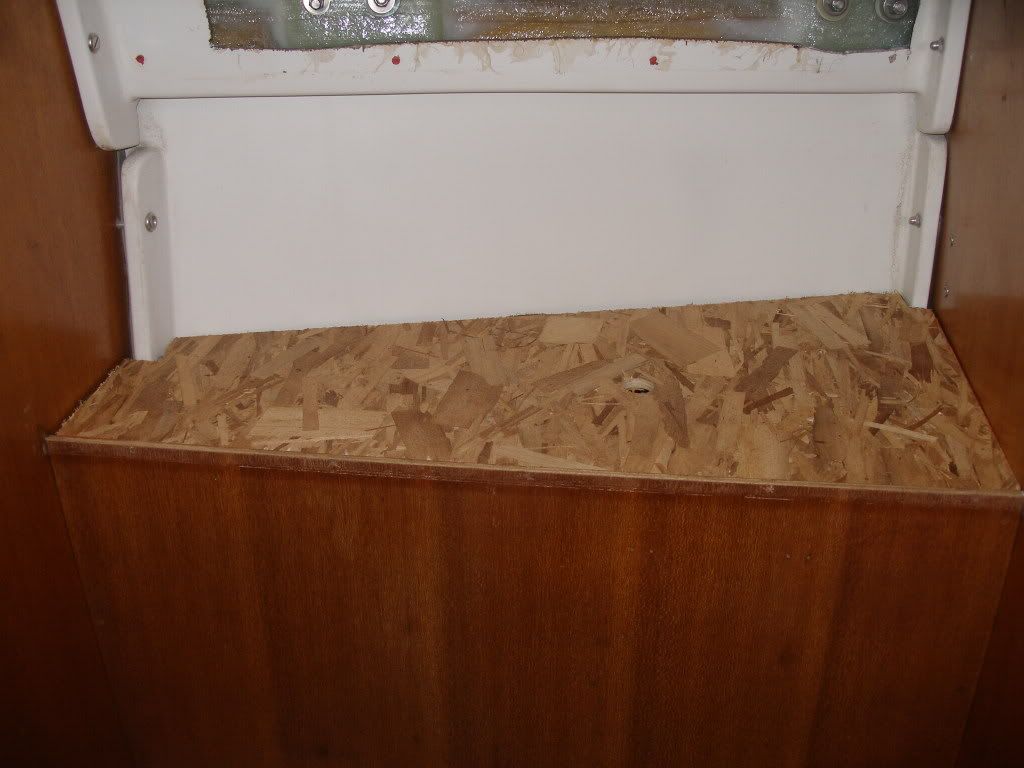
I finished up the battery area using scrap wood I had lying around the shop:
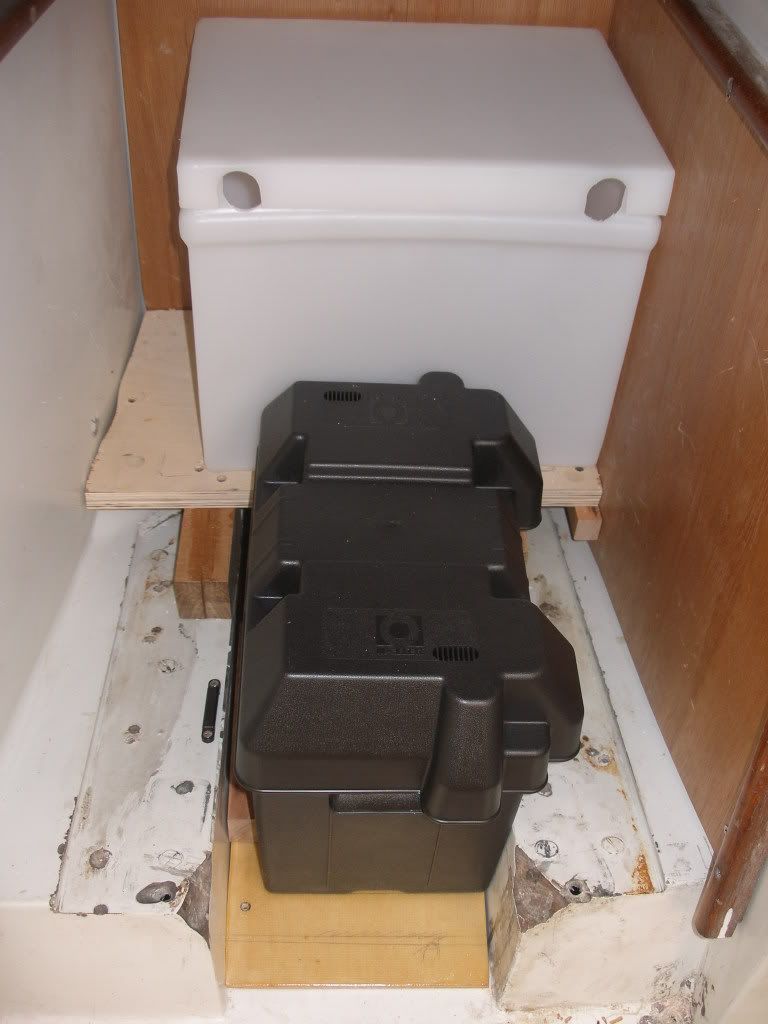
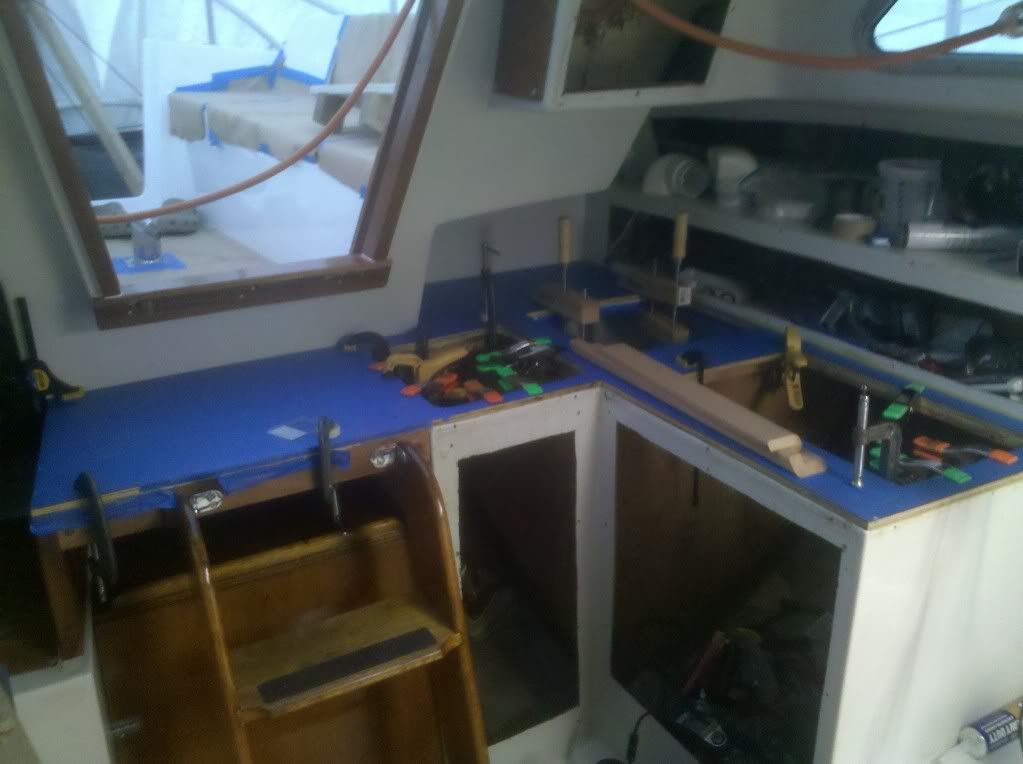
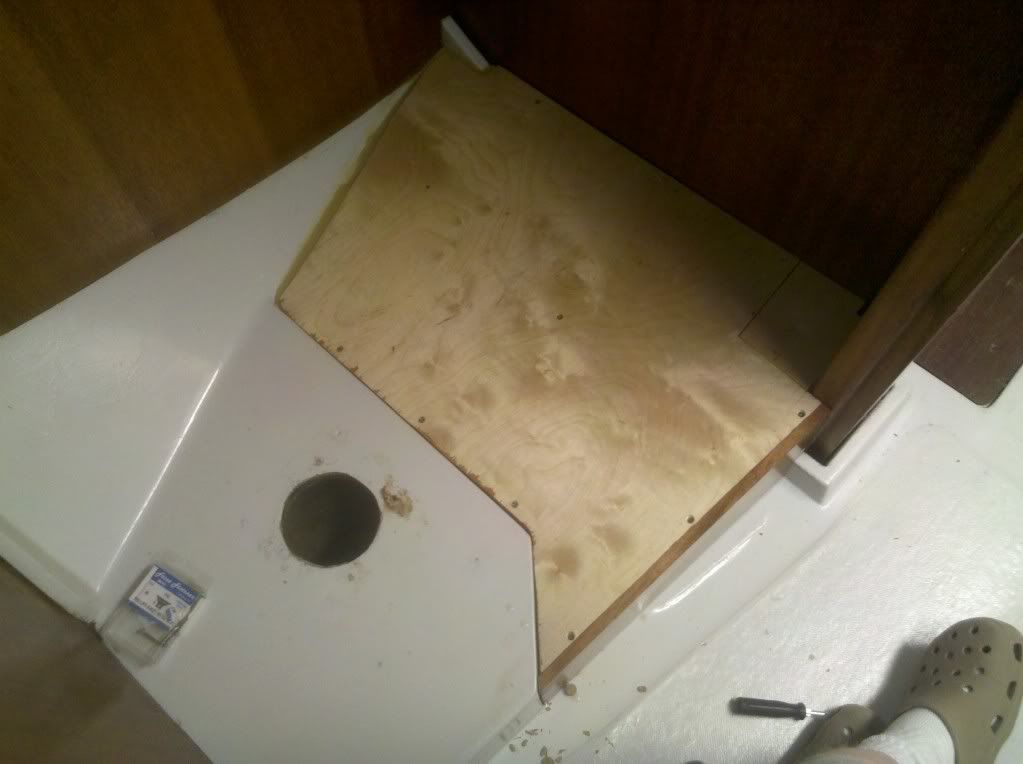
We are going to install a composting toilet, which will be taller than the standard marine head, so I had to build up the platform so ones legs would not be dangling into space. I used a bunch of scrap materials to make the support structures and the top. I will be laying a sheet of marine plywood over the entire area. The panel on the right corner will be removable to allow for cleaning under the structure, and to access a wire run down from the mast.
Re: Ericson 27 Project
Posted: Sun Jan 09, 2011 1:04 am
by bigd14
Re: Ericson 27 Project
Posted: Thu Jan 13, 2011 4:31 pm
by Rich P
I think the progress you've made is amazing, its puts my efforts completely in the shade!
Fantastic work!
Re: Ericson 27 Project
Posted: Fri Jan 14, 2011 1:02 am
by mitiempo
Doug
You're doing a great job.
A few comments on the electrical.
The battery fusing is not for overload but for short circuit protection. Because of this fuse size isn't critical and can be anywhere from wire capacity to 150% of capacity. Or less. The fuse will not blow at its amperage limit immediately. For example a Blue Seas ANL fuse rated at 100 amps blows with a load of 175 amps after 500 seconds. So engine starting, even on boats with small, under 50 hp or so diesels can be fused without a problem.
There is no reason to put a second fuse near the starter. The risk in the circuit is the battery, not the starter, and fusing should be closest to the battery. ABYC states 7" but the terminal fuse blocks you show in your diagrams are even better.
Here's a good link on fusing from Blue Seas. For short circuit fusing scroll down past the chart.
http://bluesea.com/viewresource/95
Hope this helps.
Re: Ericson 27 Project
Posted: Mon Jan 17, 2011 4:39 am
by bigd14
Thanks for clarifying that mitiempo. I'm slowly learning this electrical stuff. The nice thing about this project is that the next time around I will know how to do all this stuff. But I will hopefully be smart enough to know better!
Had a setback yesterday. When I extended and re-covered the countertop, I raised it half an inch. So now the sink will not fit back into its cutout. The sink flange hits the aft end of the cabin liner. I spent 45 minutes wrassling with it to no avail. However, I did succeed in damaging the recently installed trim... So my only option is to cut half an inch off the back of the flange and hope that it works. Very annoying! Hopefully our local metalworker can make it look halfway decent. I was too distraught to take any photos.
All my wire and fittings are on order and I should start wiring next week.
Things left to do before splashing:
Electrical system
Mast repair and spreader installation
New Sheaves in masthead, light, antenna, windex
New rigging
Install bilge pumps and plumbing
Install the @&%@ sink and plumb to thru-hull
Repair old speed log holeand install new speed log (waiting for wamer weather to epoxy)
Bottom paint
Motor tune up
Install bow pulpit and lifelines
Lots more to do after this, but I will do it in the water
Re: Ericson 27 Project
Posted: Mon Jan 17, 2011 4:51 am
by bigd14
Rich P wrote:I think the progress you've made is amazing, its puts my efforts completely in the shade!
Fantastic work!
Hah, I don't think so. You put in a herculean effort too, but had the backbone to walk away from it. Some days I feel like I am a slave to this whole deal, especially with the more expensive aspects of the project that I am going through now, and with the amount of shop time I have had to spend. I am ready to be done with it and start sailing again. Unfortunately there is so much more to do... I think once I get this woodwork done and can move on to the electrical that things will start to flow again.
Re: Ericson 27 Project
Posted: Mon Jan 31, 2011 12:58 am
by bigd14
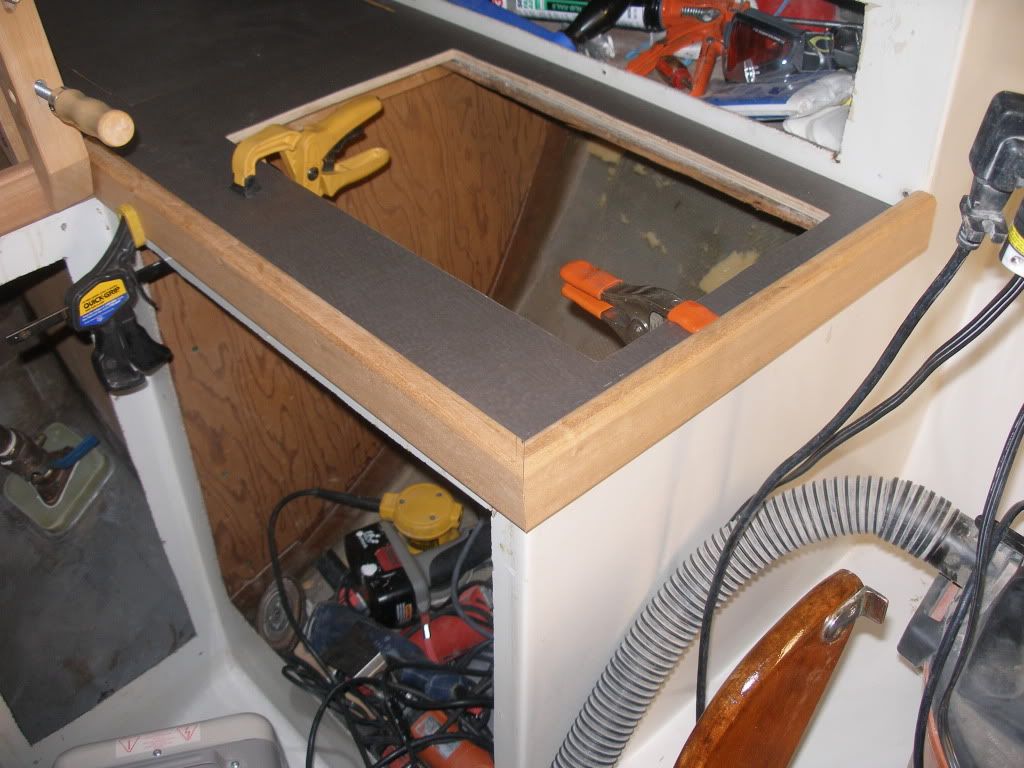
Here are some shots of the new countertop. The sink finally fits after having about half and inch cut off of the flange.
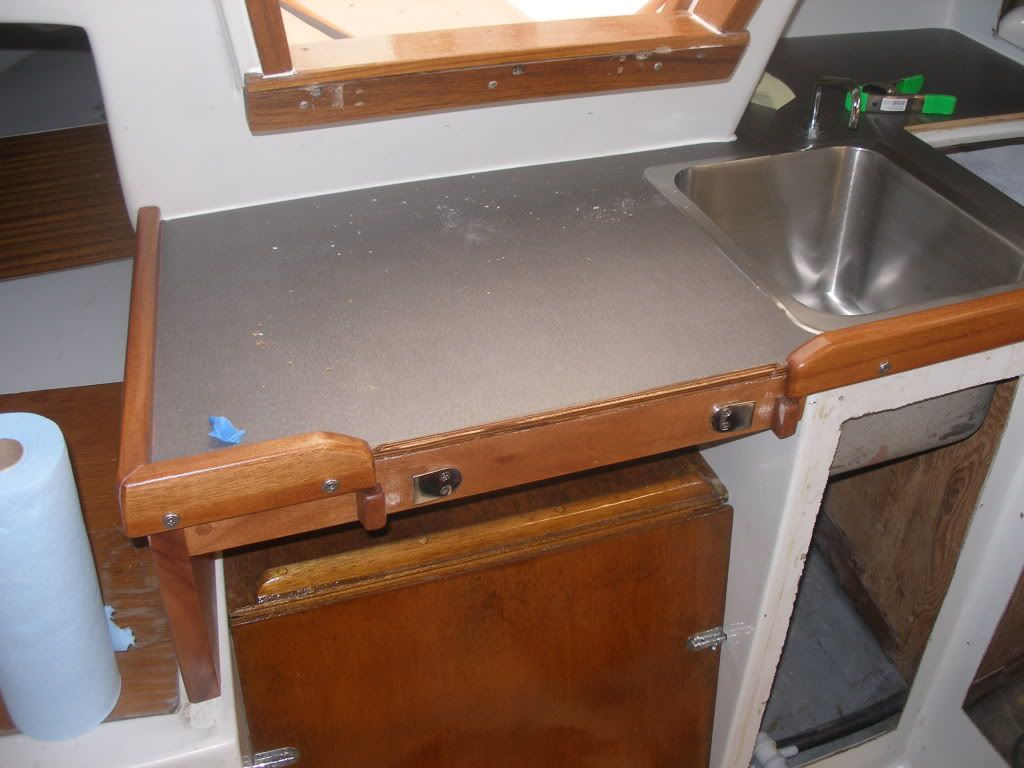
I had to sand the fiddles in place so I have some more refinishing to do.

Here is the new cooler top. I simply glued the new top to the old one.
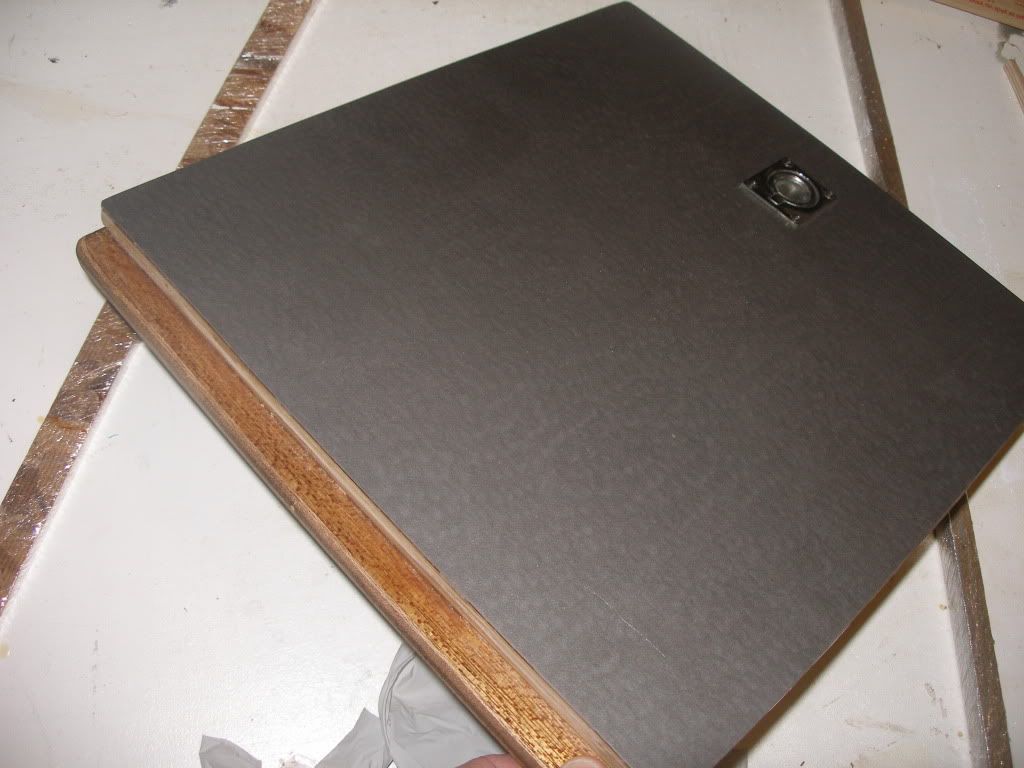
New cooler top. A little more shaping and it should fit flush.
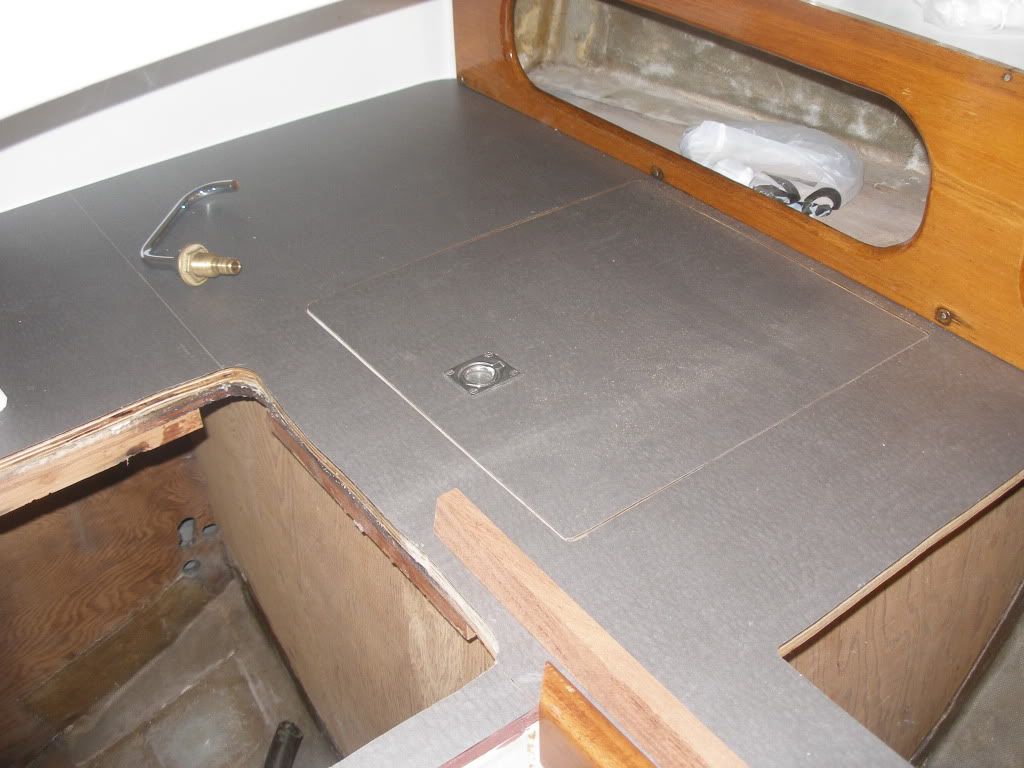
Installed the footpump and the drain hose. For some reason i am ridiculously pleased with finally connecting the sink drain. I guess it represents a culmination of several other projects. I am beginning to feel that there may be an end in site somehwere!