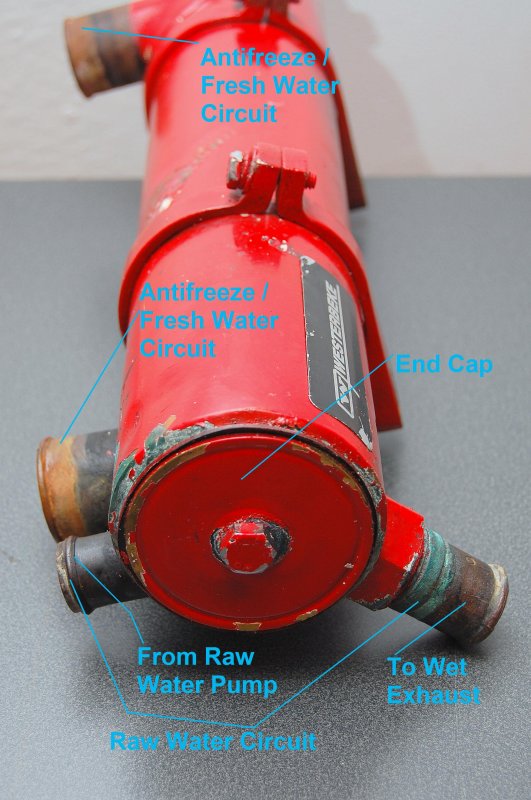
HX's are one of those things that many boaters find mysterious but they are in fact quite simple and easy to work on, especially the cylindrical type as used on Universal and Westerbeke engines. A marine HX is very much like a cars radiator. Rather than cooling the engine antifreeze with air passing across aluminum fins, the marine HX uses raw ocean or lake water run through copper tubes. This raw water is doing, and serving, the same purpose as the air does on an auto radiator.
This is the basic anatomy of a HX. There are two sealed water loops or circuits in this tube, a fresh water side (engine antifreeze), and a raw water side (lake or ocean water):
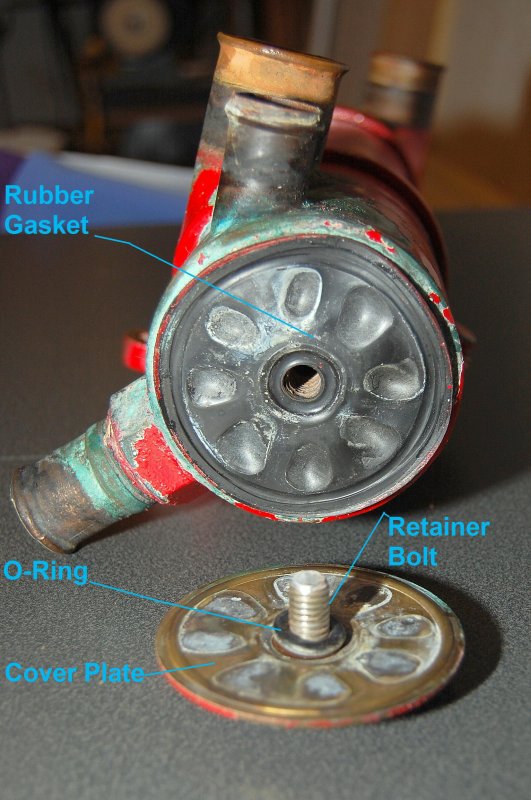
To see inside simply remove this bolt and pull the cover plate off (this can usually be done on board if you have access and a closed seacock):
What's behind the cover plate? On this type of HX all that's there is an o-ring and rubber gasket. Be sure to have new replacements on hand before removal:
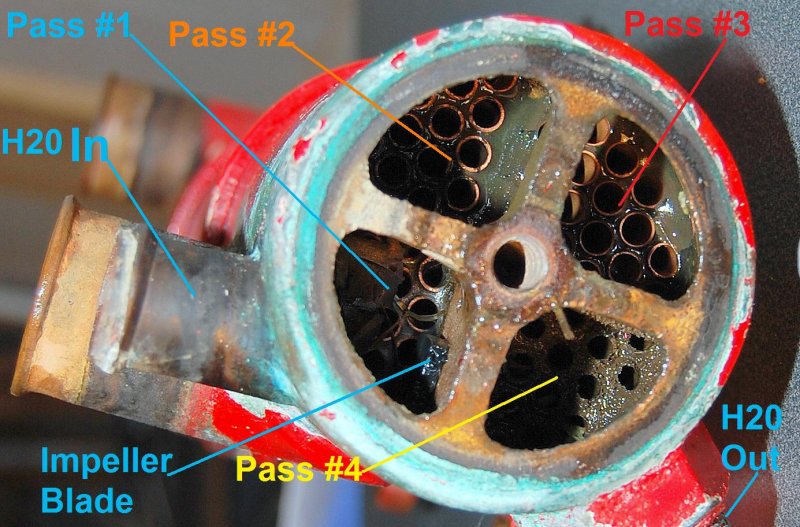
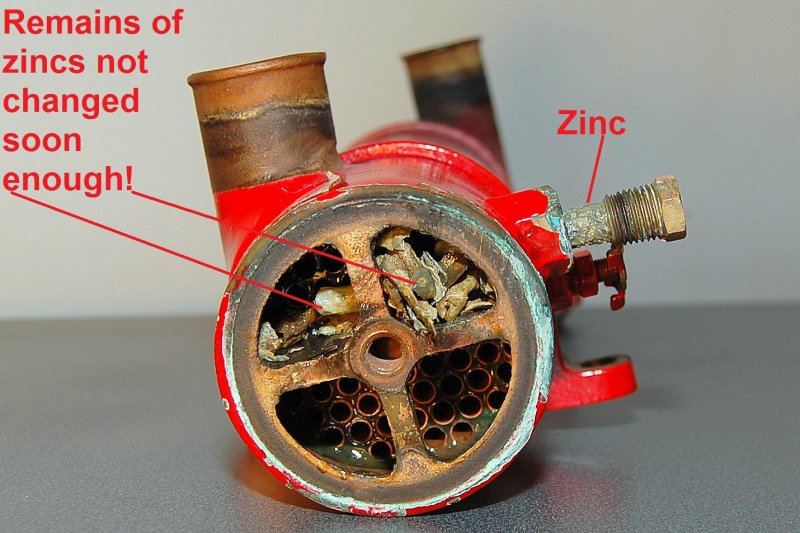
This is the most confusing part trust me! The in-coming raw water passes into quadrant #1 and makes pass #1. When it hits the end of the tube it makes a 180 degree turn and comes back for pass #2. It then hits the end of the tube again and is forced back though the HX for pass #3 where this process happens again and the raw water is finally sent out of the HX and into the wet exhaust system. In essence the raw water passes through four quadrants or quarters of the HX before leaving the HX. If you look closely you can see some eel grass and an old impeller vane. This first pass only consists of a few small diameter copper tubes so it's important to monitor temp and on an abnormal rise, use a good trouble shooting methodology to make sure it's not a blocked HX.:
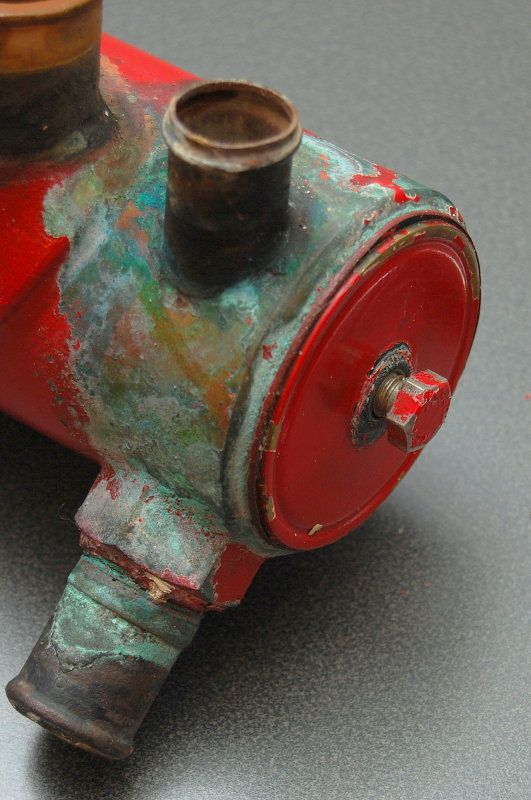
This is the end I call the trouble end. With Universal/Westerbeke HX's the zinc is almost he same width as the threads for the head. Zincs do funny things when they sacrifice themselves one of them being that they begin to flake and appear to get bigger in diameter. If the zincs are not changed often enough a few things can happen as did here.
#1 the zinc gets thin and the water pressure snaps it off the head.
#2 The zinc crumbles and flakes off inside the HX which can lead to plugged tubes.
#3 The zinc gets too fat and when you un-thread it the whole thing snaps off the head. People often assume the zinc was totally eaten but more often than not it just broke off because it went too long.
The zinc in the photo, which came out in one piece, was about eight weeks old. I change them about once every 8 weeks. The PO spent time cruising and was probably in different areas with different water so getting to know his zinc schedule was probably tough, hence the crud. I should have pulled the cap a long time ago but my temps were running spot on... If you don't get a full zinc out it's a good idea to pull the cap and retrieve the pieces.:
Tomorrow I drop it off at the radiator shop for a cleaning then clean it up and paint it. I learned a long time ago that paying the $20.00-$30.00 for an HX cleaning is soooooo worth it. Hell I can't even buy the Rydlyme, to DIY, for what my local radiator shop charges.
