NavPod Installation Tips

Post photos and descriptions of your ongoing projects here. No project is too big or too small.
Post Reply
Maine Sail
Skilled Systems Installer
Posts: 243
Joined: Fri Feb 24, 2006 10:47 am
Location: Casco Bay
Contact:

NavPod Installation Tips

Post by Maine Sail »

Hi All,

It occurred to me, after seeing a guy at the boat yard destroy a $200.00 + NavPod, that some may benefit from my gained knowledge of how to handle drilling and mounting instruments to them.

Rule #1 - If they offer a pre-cut NavPod for your instrument BUY IT!!!!! DO NOT cheap out on this and try to cut it your self if it can be avoided!!


NavPods are made of a plastic and plastic is inherently finicky to drill and cut into especially when tolerances for instrument bezels need to be very precise. Here are some tips that will help..

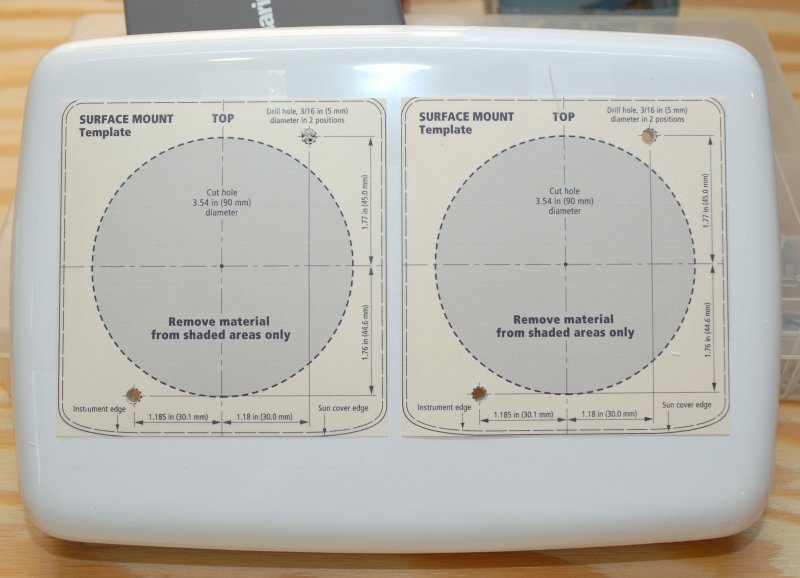
#1 Print your template from the companies web site being sure to have your printer NOT using the "scale to fit paper setting"! If your template is too big bring it to Staples or Kinko's and have it photo copied onto heavy weight card stock. Always be sure measure the hole centers after you print out a template to double check the proper scaling and to ensure the proper template size.


#2 Use a heavy weight card stock for the template! I can not stress this enough it is very important that you use a heavy weight paper as it will not get twisted up in the drill, hole saw or jig saw.

Heavy Weight Card Stock Templates:
Image


#3 Center, align and securely tape your template, after trimming to size, to the face of the NavPod.

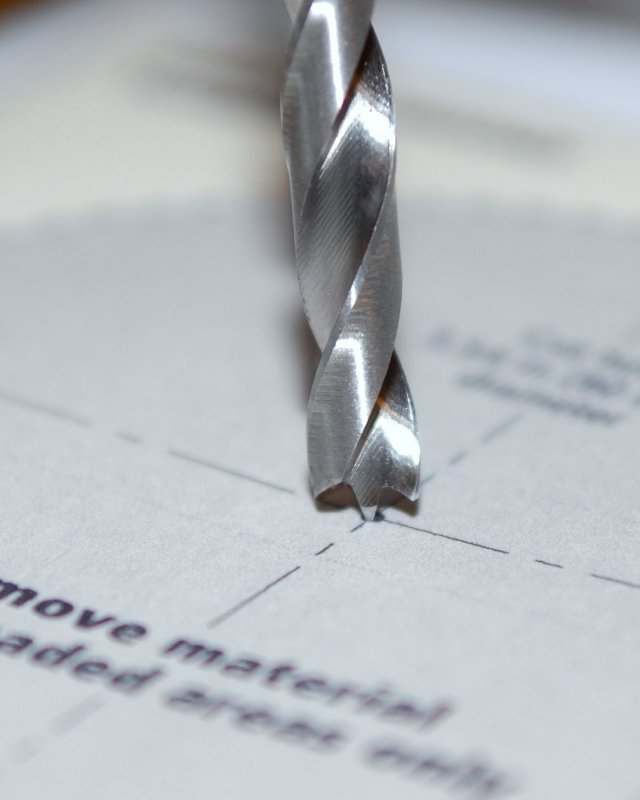
#4 Use only BRAD POINT DRILLS!!! If you don't have them buy them! Many instruments such as some of the Garmin plotters require VERY, VERY precise holes. A drill that wanders even a 1/32nd or 1/64th of an inch can make a real mess and potentially ruin a $300.00 pod.

Brad Point Drill:
Image

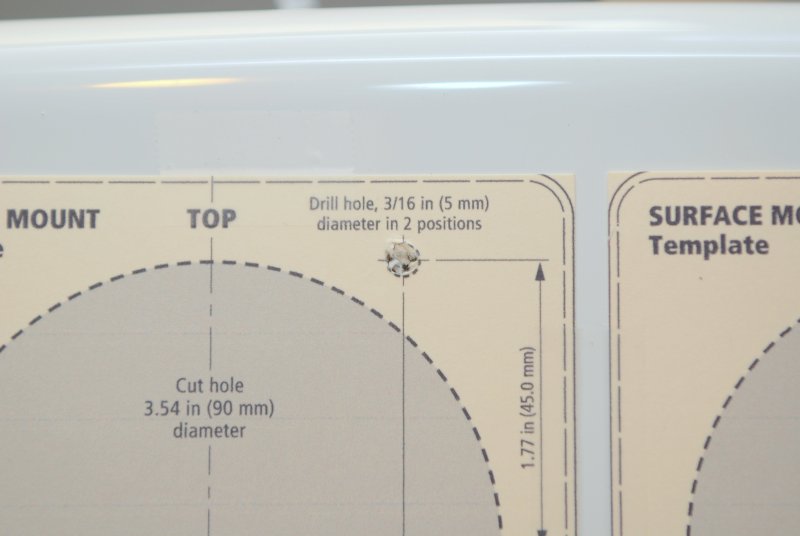
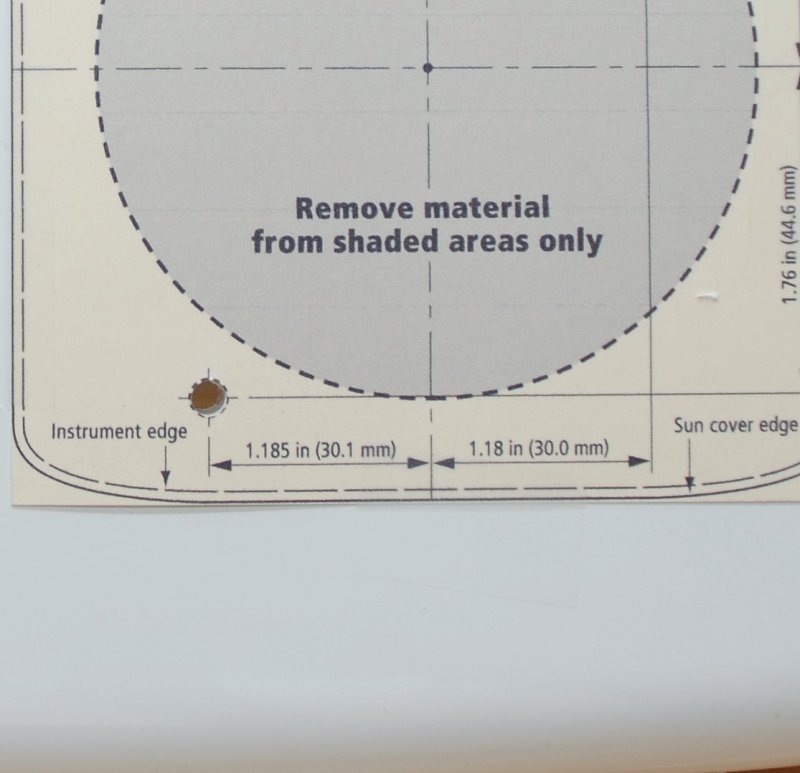
#5 Start the drill and the hole saw in REVERSE then switch to forward once through the surface skin and template.

Brad Point Drill Started in Forward:
Image


Brad Point Drill Started in REVERSE (note the clean hole):
Image


#6 When using a hole saw pre-drill the arbor hole using a 1/4" brad point drill first. This will ensure your hole is perfectly centered over the X on the template and that the instrument hole will line up with the mounting screw holes.Most all hole saw arbors use a 1/4" bit whether it's a Starrett or a Lennox but do confirm your hole saws arbor bit size first.


#7 When using a hole saw, like when mounting Raymarine ST-60 series instruments, start in reverse then switch to forward. This will give a nice clean entry with no chipping of the plastic.

#8 Use the absolute SLOWEST speed your tools will go and if the plastic begins to melt stop, let it cool and then start again. I used my air compressor to blow the chips away as I cut and to keep it cool. It took about 5 minutes to rig the set up so that it would automatically blow where I was cutting. If you have an air compressor this may be worth while. A simple 4" hole may take as long as 15 minutes to cut while trying to prevent melting of the plastic. Patience is a virtue!!

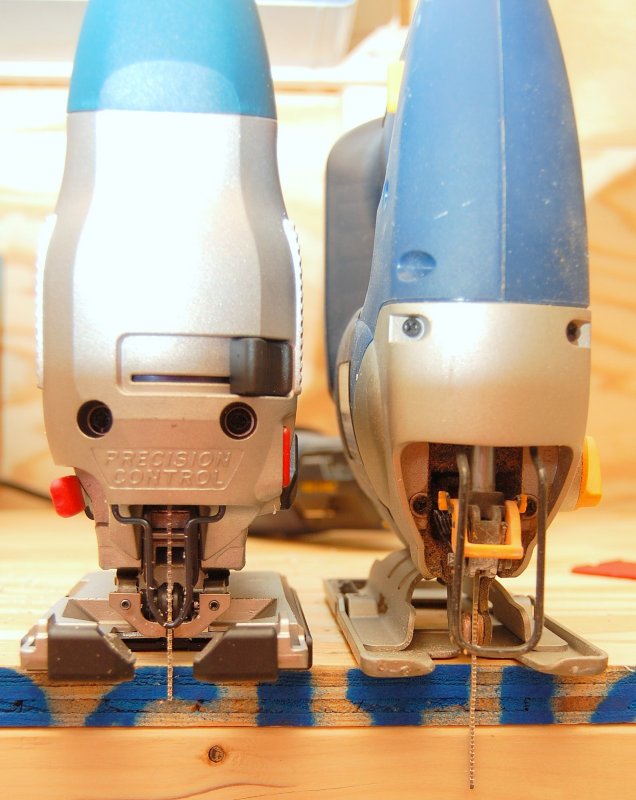
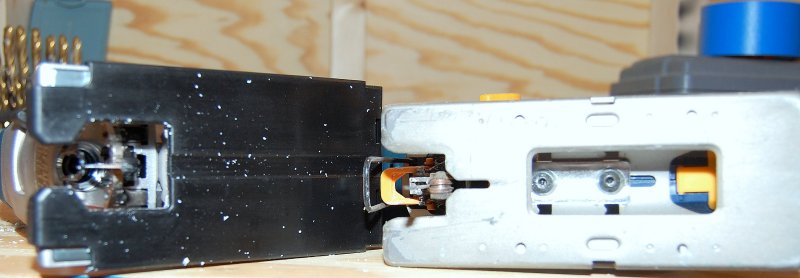
#9 When using a jig saw tape the entire face of the NavPod with blue tape to prevent marring of the surface. Also use a HIGH quality jig saw such as a Bosch. While I'm as big a fan of cheap tools as anyone this is NO PLACE for a cheap jig saw. I would NEVER even consider using my Ryobi (pictured on right) to perform this task as it is FAR from accurate!!

Bosch on Left Cheap Ryobi on Right:
Image

Bosch non-mar plastic base on left Ryobi metal base on right:
Image

#10 Use the right blades for your jig saw! I use these and they make beautiful clean cuts and don't even rip the paper template. If they can cut paper clean....
Image

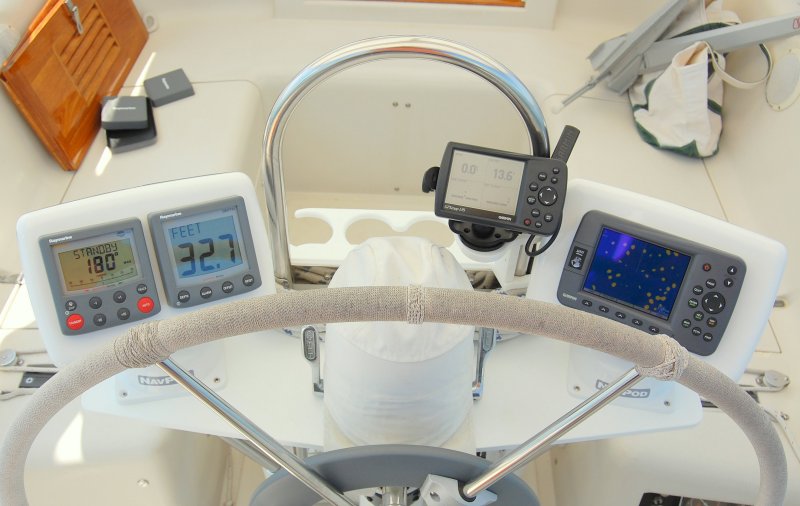
By using the right tool for the right job your finished result will work and perform as intended.. Both of these pods required custom cutting and mounting..
Image
Last edited by Maine Sail on Tue Jul 22, 2008 6:21 pm, edited 1 time in total.
-Maine Sail

Canadian Sailcraft 36T
Casco Bay, ME
http://www.marinehowto.com
Figment
Damned Because It's All Connected
Posts: 2846
Joined: Tue Apr 08, 2003 9:32 am
Boat Name: Triton
Boat Type: Grand Banks 42
Location: L.I. Sound

Post by Figment »

...!!!

... ;)

!!!@#&

???
Ronin120
Rough Carpentry Apprentice
Posts: 53
Joined: Thu May 31, 2007 1:19 pm
Location: Northern Neck, Virginia
Contact:

Post by Ronin120 »

Oh yeah. As someone with a "uniquely drilled" 3-hole NavPod for my ST-60's I would second those recommendations.

And I would pay the extra $'s and get the pre-cut version. They weren't available when I "modified" mine. When I move my instruments from the binnacle to over top of the companionway hatch I'm going to use that as an excuse to get a new, pre-cut, NavPod...

Last year I purchased 4' x 8' panels of plastic of the same type as the NavPods in order to build the missing overhead panels in my boat. This time around I overdid it. I made the cuts (Bosch jig-saw, only way to go) using really good blades, a slow speed AND I used a spray bottle with water to constantly cool the plastic and the blade as I was running down the cut-line.

I don't think anyone needs to go to that extreme with the spray bottle. It's kinda like patting your head and rubbing your tummy at the same. If you keep the blade speed down it will be fine.

Plus it's just messy.

Cheers
Dave
1982 C&C 37 - under reconstruction
1988 Mako 26 CC - don't laugh, it needs work too.
1970's vintage Snipe
1970 Islander 37 - sold
1968 Cal 25 - sold but still racing...

Wave Man
User avatar
Rachel
Master of the Arcane
Posts: 3044
Joined: Tue Dec 07, 2004 7:59 pm

Post by Rachel »

Yeah, Acoustic, save some exclamation points for the rest of us, hey?

<grin>

R.
Quetzalsailor
Master of the Arcane
Posts: 1100
Joined: Fri Aug 26, 2005 9:53 am
Boat Name: Quetzal
Boat Type: LeComte North East 38
Location: Philadelphia, PA

Post by Quetzalsailor »

Excellent, thank you.

What kind of plastic is it?

I'll bet that most of us are not tuned in to the necessity of using the correct drills (ground to the correct angles) and blades for different materials.

A chemistry lab plastic wash bottle is nice, since the stream of soapy water can be closely directed, neater than your wife's gardening spray bottle.

I will often use a router and a 1/4" carbide 'end mill' for plastic and aluminum; it takes really small shavings at the speed a router turns. Adequate guiding and jigging are between extremely useful and absolutely necessary.
Maine Sail
Skilled Systems Installer
Posts: 243
Joined: Fri Feb 24, 2006 10:47 am
Location: Casco Bay
Contact:

Post by Maine Sail »

Rachel wrote:Yeah, Acoustic, save some exclamation points for the rest of us, hey?

<grin>

R.
Sorry, I took them out of the subject so we don't run out.. (wink)
-Maine Sail

Canadian Sailcraft 36T
Casco Bay, ME
http://www.marinehowto.com
User avatar
Rachel
Master of the Arcane
Posts: 3044
Joined: Tue Dec 07, 2004 7:59 pm

Post by Rachel »

Quetzalsailor wrote:A chemistry lab plastic wash bottle is nice, since the stream of soapy water can be closely directed, neater than your wife's gardening spray bottle.
Of course one's wife's chemistry lab plastic wash bottle would also work ;)
Post Reply