Re: Engine Vibrating Excessively
Posted: Sun Mar 28, 2010 1:29 am
After dropping off my two older kids off at Berkeley Youth Orchestra (where they both play the violins) bright and early this morning I was once again back on the alignment project. Unlike the previous several weeks I could see light at the end of the tunnel now.
While waiting for my friend Rob to show up and help I adjusted the valve clearance (.012 for exhaust and .010 for intake). The last time I adjusted them was about five years ago. The clearance were not off by that much. I also cleaned up the cooling water chamber. Since I have not upgraded to fresh water cooling the water chamber was pretty disgusting. For some reason this time the water chamber was dirtier than the last time I cleaned it (also about five years ago). The cover plate was corroded pretty badly with couple of thin spots. I cleaned it up with wire wheel and coated it with Kleen Strip Rust Converter.
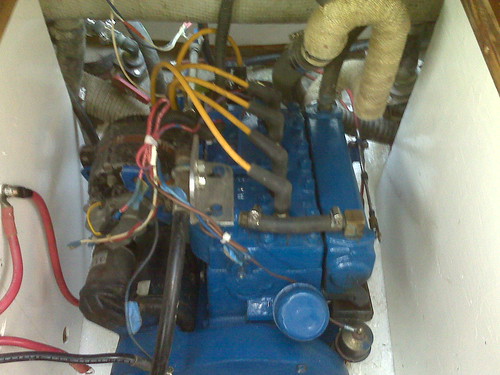
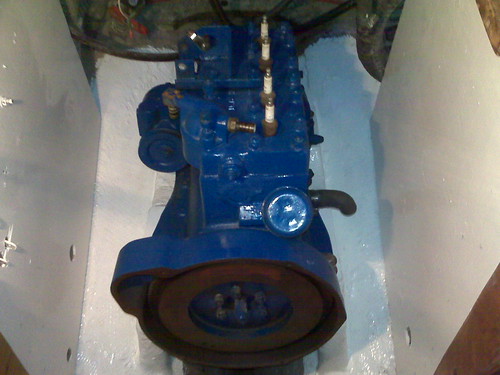
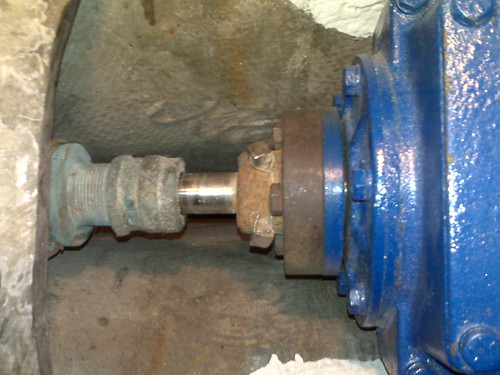
Rob showed up around noon and we immediately went to load the engine on the stringers (see picture below). With two people loading the engine is really pretty easy process. Once the engine was on the mount we pried up each corner of the flanger up and slided the home made fender washer sandwich (one rubber washer sandwiched between two stainless steel washers) under each corner. We also put washer sandwich on top of the flange to further cushion the engine vibration (see picture below). We then inserted the bolts but did not tighten them. We then adjusted the position of the engine to align the coupling. After a few tries we were pleased find that we were able to get the alignment within .003" tolerance as specified by Universal Motors (see picture below). I plan to put the alternator, starter, water pump, manifold, fuel pump, carboratuor all back tomorrow and hook up water, fuel, and electrical connections. Maybe I will be able to start the engine tomorrow! That's exciting.

While waiting for my friend Rob to show up and help I adjusted the valve clearance (.012 for exhaust and .010 for intake). The last time I adjusted them was about five years ago. The clearance were not off by that much. I also cleaned up the cooling water chamber. Since I have not upgraded to fresh water cooling the water chamber was pretty disgusting. For some reason this time the water chamber was dirtier than the last time I cleaned it (also about five years ago). The cover plate was corroded pretty badly with couple of thin spots. I cleaned it up with wire wheel and coated it with Kleen Strip Rust Converter.
Rob showed up around noon and we immediately went to load the engine on the stringers (see picture below). With two people loading the engine is really pretty easy process. Once the engine was on the mount we pried up each corner of the flanger up and slided the home made fender washer sandwich (one rubber washer sandwiched between two stainless steel washers) under each corner. We also put washer sandwich on top of the flange to further cushion the engine vibration (see picture below). We then inserted the bolts but did not tighten them. We then adjusted the position of the engine to align the coupling. After a few tries we were pleased find that we were able to get the alignment within .003" tolerance as specified by Universal Motors (see picture below). I plan to put the alternator, starter, water pump, manifold, fuel pump, carboratuor all back tomorrow and hook up water, fuel, and electrical connections. Maybe I will be able to start the engine tomorrow! That's exciting.