Hi Guys,
I have done a comparison of the Harbor Freight Crimper to the Ancor and there IS a difference...
Over the years I have purchased a number of tools from Harbor Freight and it is more MISS than HIT.. The Ryobi stuff is a great value and surprisingly reliable. Here is an example of just ONE tool from Harbor Freight where there is certainly a difference.
I ordered the Harbor Freight Tools double ratcheting crimper and compared it's construction, specifically the crimp dies, which are the important part, to the Ancor Double Crimp Ratchet Crimper.
It was stated by some on other forums that the HFT crimper was identical to the Ancor model. I wanted to see for myself but I'll let you decide..
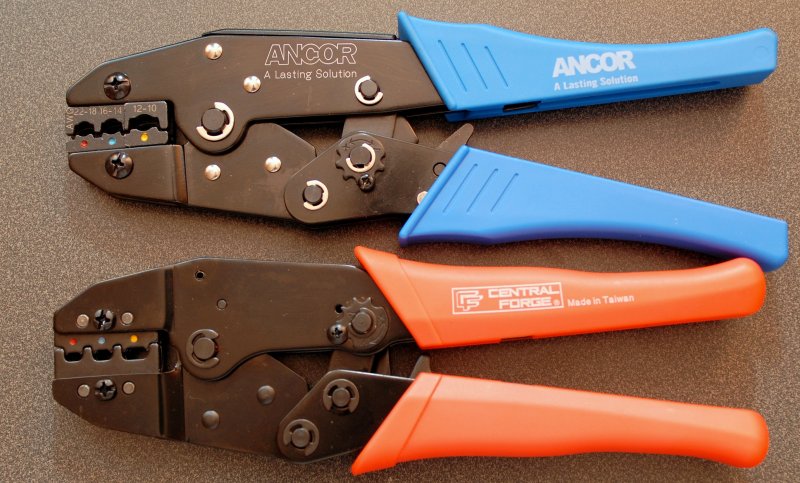
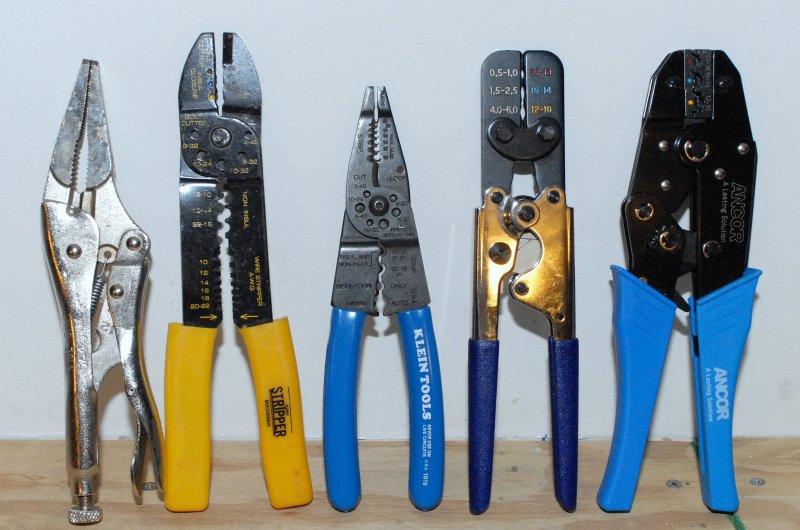
Ancor and HFT Crimpers: Note the non-removable dies on the HFT crimper. You'd literally have to pound out those drift pins to replace those dies.
All Photos ©1998-2008 Hale Kai Inc.
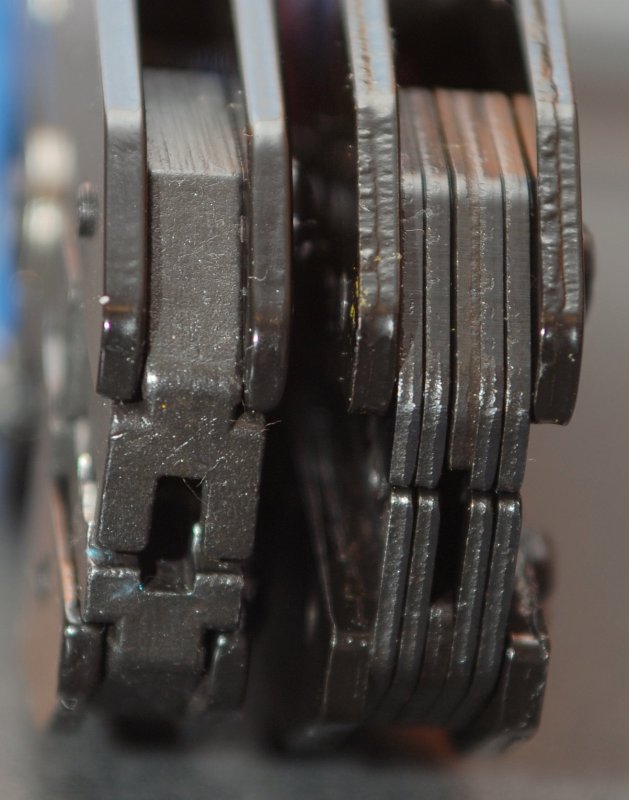
Crimp Dies: The Ancor crimper on the left has the proper spacing to execute a double crimp and nicely machined heads from a solid ingot. The HFT crimper has incorrect spacing to properly execute a double crimp and uses cheap plates of steel to make up the crimp dies.
 Crimp Jaw Surface:
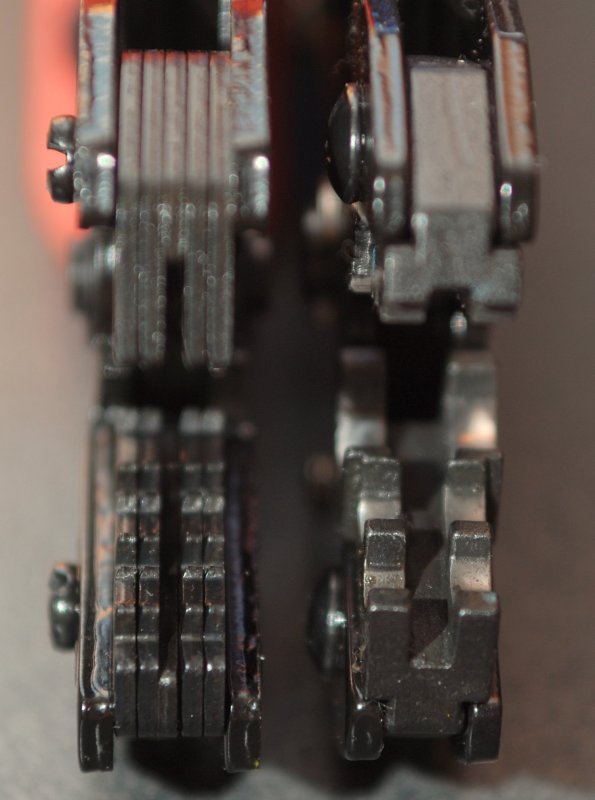
 Note the sharp edges and the improper spacing on the HFT crimper vs. the well machined and properly spaced jaws of the Ancor crimper.
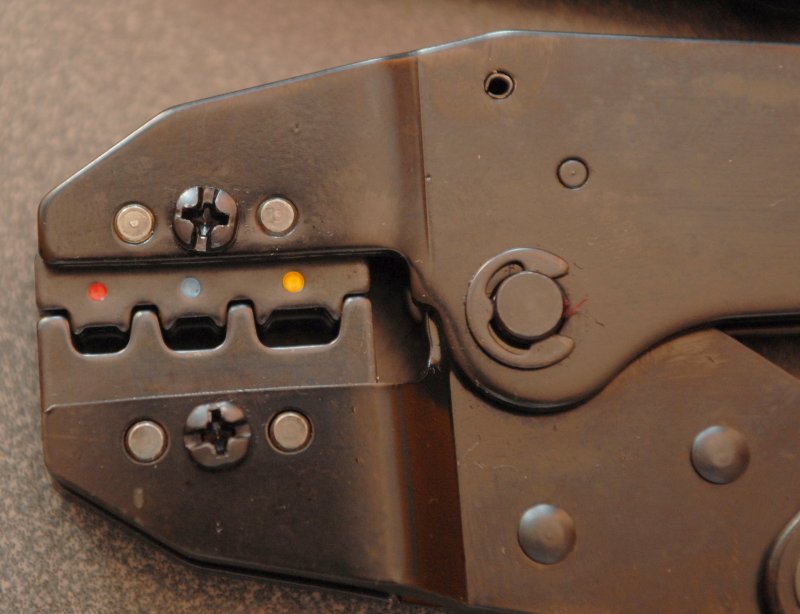
 Ancor Crimp Head:
 the fit and finish is very good and the crimp jaws are in the correct location top and bottom.
 HFT Crimp Head:
 These dies do not even have the proper profile and are located incorrectly. The jaw on the bottom should be on the top!
 Proper Die/Jaw Orientation:
 This is the proper jaw orientation for a double crimp ratchet tool. The spit in the barrel of the connector always faces the top. On the HFT tool your would need to crimp backwards!
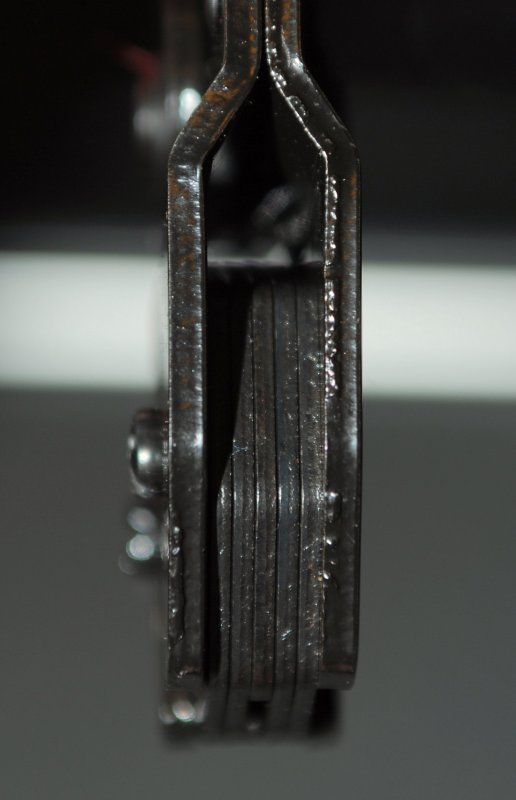
Close Up Of Sloppy Machining: This crimper JUST came out of the shipping envelope an hour ago and already it's showing signs of RUST!! Also look at the rough surface where the steel was cut. See picture number two for a side by side look at the sloppy machining.
I paid $14.99 plus 6.99 S&H (which took 20 DAYS!) for the HFT crimper and $55.00 for the Ancor crimpers. The Ancor crimpers came with detailed instructions and the HFT crimpers came with NOTHING. The crimp dies on the HFT tool makes and improperly spaced crimp and the heads are not replaceable. The Ancor crimper makes beautiful and repeatable crimps every time and the dies can be replaced if they wear out!
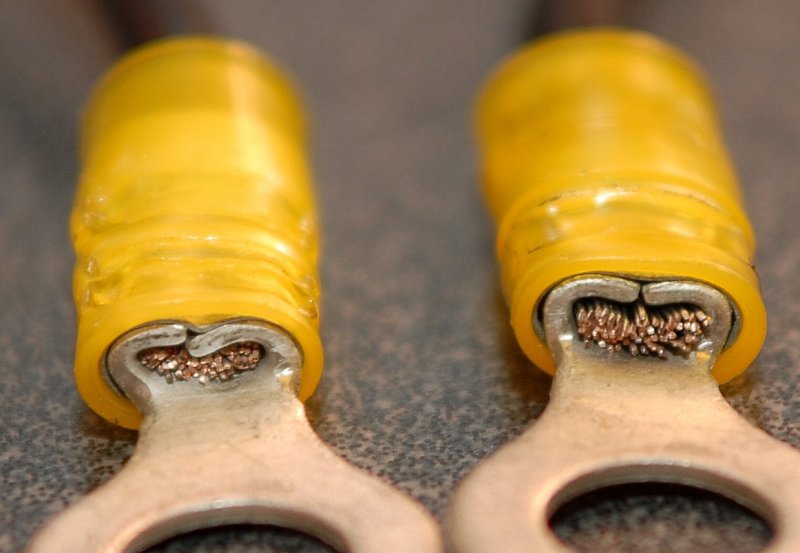
Here are two identical crimps, same terminals, same wire just different crimpers.
Front Close Up: HFT on left Ancor on Right
All Photos ©1998-2008 Hale Kai Inc.
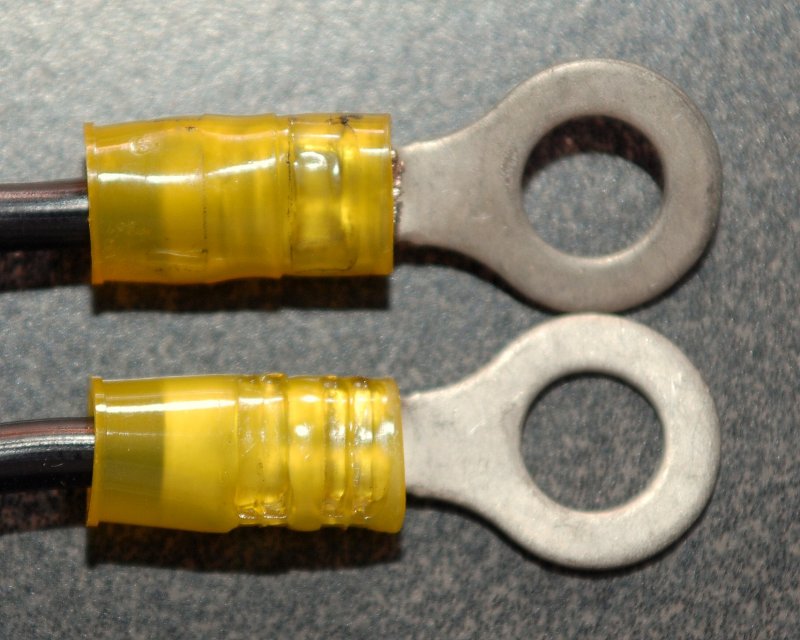
 Crimp Locations:
 This is IMPORTANT a double crimper is supposed to crimp the strain relief. The HFT crimper (bottom crimp) crimps the slot between the strain relief barrel and the crimp barrel. Look closely through the nylon and you'll see that the crimp barrel was not even touched and it's still round! Look at the Ancor crimp (top) and you can see a very slight black line depicting the crimp jaw outline. Also notice the almost invisible crimp in the nylon. The proper spacing of the Ancor dies makes a properly spaced crimp and actually achieves the "double crimp"!
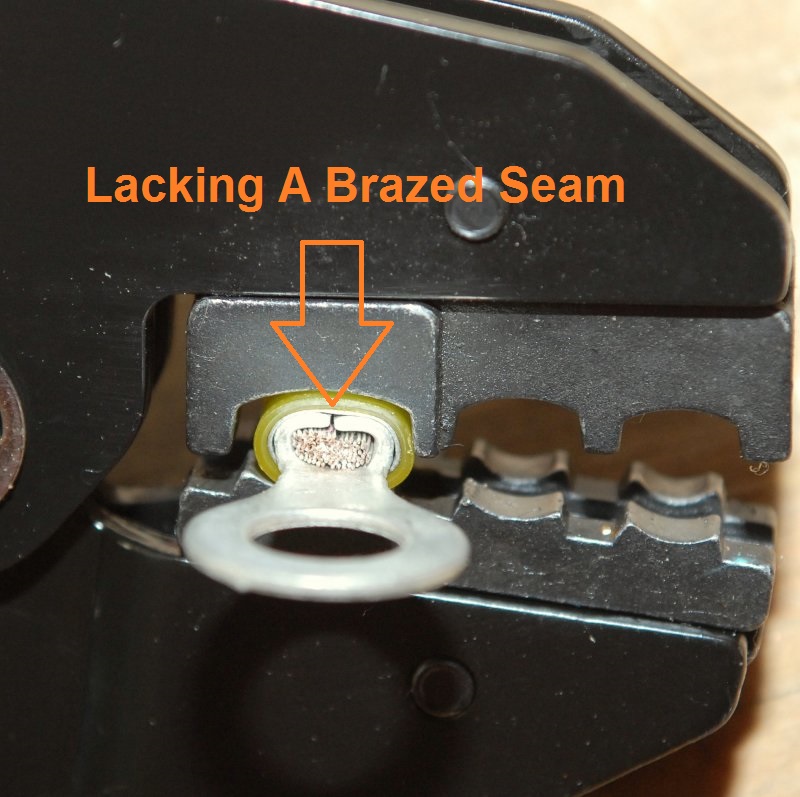
 Anatomy of a crimp connector:
 I took apart an insulated terminal to show why the crimper is referred to as double crimper. The spade gets one crimp (left side of photo) and the strain relief barrel (middle of the photo) gets a second crimp where I have scuffed the metal. The "colored dot" side of the jaws, of the Ancor "double" crimper, are the appropriate size for crimping this strain relief barrel and the non dot side is sized for the crimp barrel. On the Ancor crimper these dies are sized for both the strain relief and the crimp barrel specifically and on the HFT crimper both sides of the jaw are identical as in there is no specific side for a strain relief crimp or a wire crimp! Truly a one size fits all approach! Using the appropriate crimper such as the Ancor will create both crimps in one single motion properly.
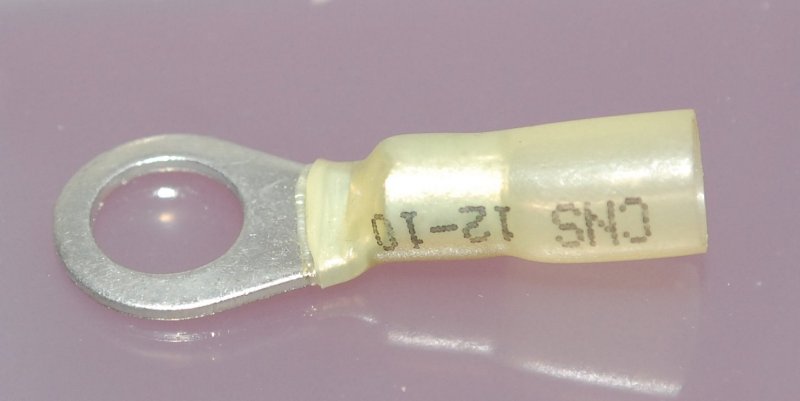
If I were to disassemble a heat shrink connector all you'd see is the heat shrink and the terminal. You'd only have two pieces, not three, hence the term "single crimp" as it only crimps the crimp barrel because there is no strain relief barrel on a heat shrink terminal. This photo shows the valley that the HFT tool crimped in the strain relief barrel!

To me the extra $33.02 for the Ancor crimpers was and is well worth the expense considering it actually makes a proper crimp. Fit and finish aside and just looking at execution the HFT tool makes the crimps in the WRONG location on the connector....
Again this tool may be just the ticket for some just not me...


